2021 DODGE CHALLENGER wheel
[x] Cancel search: wheelPage 205 of 328

SAFETY203
The steering wheel hub trim cover and the upper
passenger side of the instrument panel separate
and fold out of the way as the air bags inflate to
their full size. The front air bags fully inflate in less
time than it takes to blink your eyes. The front air
bags then quickly deflate while helping to restrain
the driver and front passenger.
Knee Impact Bolsters
The Knee Impact Bolsters help protect the knees
of the driver and front passenger, and position the
front occupants for improved interaction with the
front air bags.
Supplemental Side Air Bags
Supplemental Seat-Mounted Side Air Bags (SABs)
This vehicle is equipped with Supplemental
Seat-Mounted Side Air Bags (SABs).
Supplemental Seat-Mounted Side Air Bags (SABs)
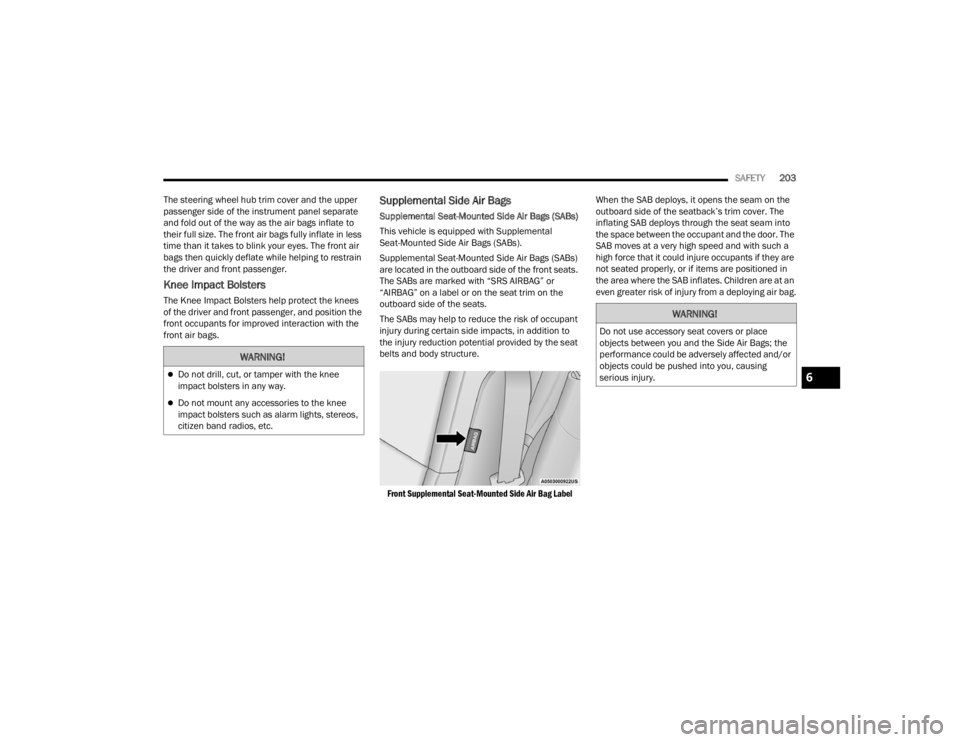
are located in the outboard side of the front seats.
The SABs are marked with “SRS AIRBAG” or
“AIRBAG” on a label or on the seat trim on the
outboard side of the seats.
The SABs may help to reduce the risk of occupant
injury during certain side impacts, in addition to
the injury reduction potential provided by the seat
belts and body structure.
Front Supplemental Seat-Mounted Side Air Bag Label
When the SAB deploys, it opens the seam on the
outboard side of the seatback’s trim cover. The
inflating SAB deploys through the seat seam into
the space between the occupant and the door. The
SAB moves at a very high speed and with such a
high force that it could injure occupants if they are
not seated properly, or if items are positioned in
the area where the SAB inflates. Children are at an
even greater risk of injury from a deploying air bag.
WARNING!
Do not drill, cut, or tamper with the knee
impact bolsters in any way.
Do not mount any accessories to the knee
impact bolsters such as alarm lights, stereos,
citizen band radios, etc.
WARNING!
Do not use accessory seat covers or place
objects between you and the Side Air Bags; the
performance could be adversely affected and/or
objects could be pushed into you, causing
serious injury.
6
21_LA_OM_EN_USC_t.book Page 203
Page 207 of 328

SAFETY205
(Continued)
NOTE:Air bag covers may not be obvious in the interior
trim, but they will open during air bag deployment.
Rollover Events
Side Air Bags and seat belt pretensioners are
designed to activate in certain rollover events. The
Occupant Restraint Controller (ORC) determines
whether deployment in a particular rollover event
is appropriate, based on the severity and type of
collision. Vehicle damage by itself is not a good
indicator of whether or not Side Air Bags and seat
belt pretensioners should have deployed.
The Side Air Bags and seat belt pretensioners will
not deploy in all rollover events. The rollover
sensing system determines if a rollover event may
be in progress and whether deployment is
appropriate. In the event the vehicle experiences a
rollover or near rollover event, and deployment is
appropriate, the rollover sensing system will deploy
the side air bags and seat belt pretensioners on
both sides of the vehicle.
The SABICs may help reduce the risk of partial or
complete ejection of vehicle occupants through side
windows in certain rollover or side impact events.
Air Bag System Components
NOTE:The Occupant Restraint Controller (ORC) monitors
the internal circuits and interconnecting wiring
associated with electrical Air Bag System Compo
-
nents listed below:
Occupant Restraint Controller (ORC)
Air Bag Warning Light
Steering Wheel and Column
Instrument Panel
Knee Impact Bolsters
Driver and Front Passenger Air Bags
Seat Belt Buckle Switch
Supplemental Side Air Bags
Front and Side Impact Sensors
Seat Belt Pretensioners
Seat Track Position Sensors
NOTE:Vehicles with front passenger seat deleted will not
be equipped with the Seat Belt Buckle Switch, Seat
Belt Pretensioner, Supplemental Seat Mounted
Side Airbag, and Seat Track Position Sensors for
the front passenger.
WARNING!
Occupants, including children, who are up
against or very close to Side Air Bags can be
seriously injured or killed. Occupants,
including children, should never lean on or
sleep against the door, side windows, or area
where the side air bags inflate, even if they are
in an infant or child restraint.
Seat belts (and child restraints where appropriate)
are necessary for your protection in all collisions.
They also help keep you in position, away from an
inflating Side Air Bag. To get the best protection
from the Side Air Bags, occupants must wear their
seat belts properly and sit upright with their backs
against the seats. Children must be properly
restrained in a child restraint or booster seat that
is appropriate for the size of the child.
WARNING!
Side Air Bags need room to inflate. Do not lean
against the door or window. Sit upright in the
center of the seat.
Being too close to the Side Air Bags during
deployment could cause you to be severely
injured or killed.
Relying on the Side Air Bags alone could lead
to more severe injuries in a collision. The Side
Air Bags work with your seat belt to restrain
you properly. In some collisions, Side Air Bags
won’t deploy at all. Always wear your seat belt
even though you have Side Air Bags.
WARNING!
6
21_LA_OM_EN_USC_t.book Page 205
Page 209 of 328

SAFETY207
NOTE:After an accident, remember to cycle the ignition to
the STOP (OFF/LOCK) position and remove the key
from the ignition switch to avoid draining the
battery. Carefully check the vehicle for fuel leaks in
the engine compartment and on the ground near
the engine compartment and fuel tank before
resetting the system and starting the engine. If
there are no fuel leaks or damage to the vehicle
electrical devices (e.g. headlights) after an
accident, reset the system by following the
procedure described below. If you have any doubt,
contact an authorized dealer.
Enhanced Accident Response System
Reset Procedure
In order to reset the Enhanced Accident Response
System functions after an event, the ignition switch
must be changed from ignition START or ON/RUN
to ignition OFF. Carefully check the vehicle for fuel
leaks in the engine compartment and on the
ground near the engine compartment and fuel
tank before resetting the system and starting the
engine.
After an accident, if the vehicle will not start after
performing the reset procedure, the vehicle must
be towed to an authorized dealer to be inspected
and to have the Enhanced Accident Response
System reset.
Maintaining Your Air Bag System Event Data Recorder (EDR)
This vehicle is equipped with an event data
recorder (EDR). The main purpose of an EDR is to
record, in certain crash or near crash-like
situations, such as an air bag deployment or hitting
a road obstacle, data that will assist in
understanding how a vehicle’s systems performed.
The EDR is designed to record data related to
vehicle dynamics and safety systems for a short
period of time, typically 30 seconds or less. The
EDR in this vehicle is designed to record such data
as:
How various systems in your vehicle were oper -
ating;
Whether or not the driver and passenger safety
belts were buckled/fastened;
How far (if at all) the driver was depressing the
accelerator and/or brake pedal; and,
How fast the vehicle was traveling.
These data can help provide a better
understanding of the circumstances in which
crashes and injuries occur.
WARNING!
Modifications to any part of the air bag system
could cause it to fail when you need it. You
could be injured if the air bag system is not
there to protect you. Do not modify the compo -
nents or wiring, including adding any kind of
badges or stickers to the steering wheel hub
trim cover or the upper passenger side of the
instrument panel. Do not modify the front
fascia/bumper, vehicle body structure, or add
aftermarket side steps or running boards.
It is dangerous to try to repair any part of the air
bag system yourself. Be sure to tell anyone who
works on your vehicle that it has an air bag system.
Do not attempt to modify any part of your air
bag system. The air bag may inflate accidentally
or may not function properly if modifications are
made. Take your vehicle to an authorized dealer
for any air bag system service. If your seat,
including your trim cover and cushion, needs to
be serviced in any way (including removal or
loosening/tightening of seat attachment bolts),
take the vehicle to an authorized dealer. Only
manufacturer approved seat accessories may
be used. If it is necessary to modify the air bag
system for persons with disabilities, contact an
authorized dealer.
6
21_LA_OM_EN_USC_t.book Page 207
Page 228 of 328

226
IN CASE OF EMERGENCY
HAZARD WARNING FLASHERS
The Hazard Warning Flashers button is located on
the instrument panel, below the radio.
Hazard Warning Flashers Button
Push the button to turn on the Hazard Warning
Flashers. When the button is activated, all
directional turn signals will flash on and off to warn
oncoming traffic of an emergency. Push the switch
a second time to turn off the Hazard Warning
Flashers. This is an emergency warning system and it should
not be used when the vehicle is in motion. Use it
when your vehicle is disabled and it is creating a
safety hazard for other motorists.
When you must leave the vehicle to seek
assistance, the Hazard Warning Flashers will
continue to operate even though the ignition is
placed in the OFF position.
NOTE:With extended use, the Hazard Warning Flashers
may wear down your battery.
ASSIST AND SOS MIRROR — IF EQUIPPED
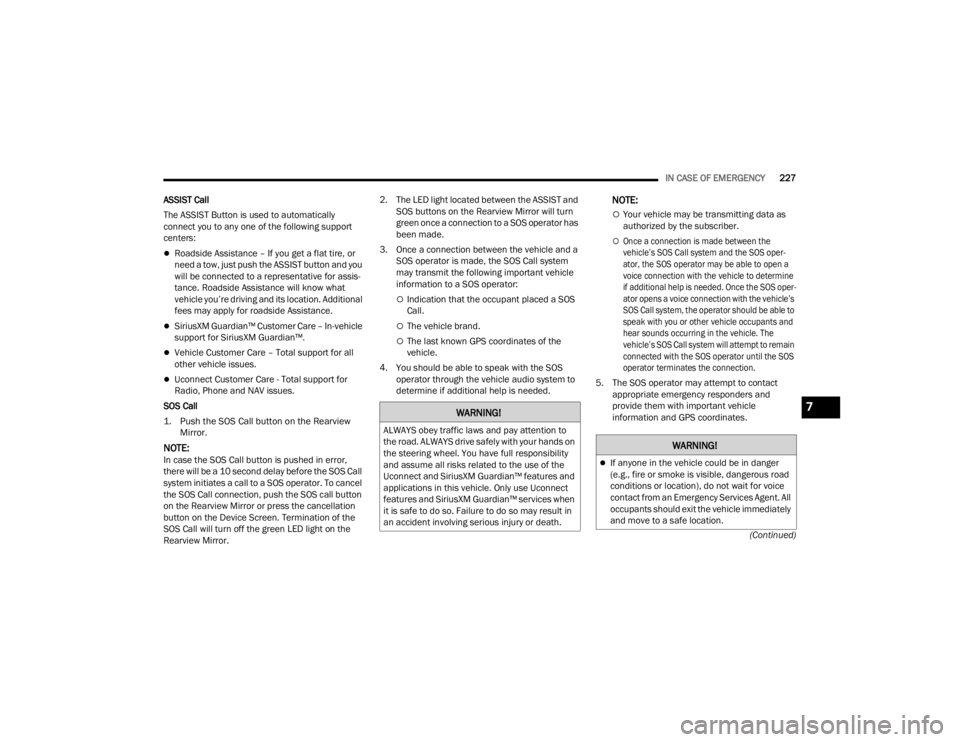
Assist And SOS Mirror
If equipped, the rearview mirror contains an
ASSIST and a SOS button.
NOTE:
Your vehicle may be transmitting data as autho
-
rized by the subscriber Ú page 311.
The SOS and ASSIST buttons will only function if
you are connected to an operable LTE (voice/
data) or 4G (data) network. Other Uconnect
services will only be operable if your SiriusXM
Guardian™ service is active and you are
connected to an operable LTE (voice/data) or
4G (data) network.
WARNING!
ALWAYS obey traffic laws and pay attention to
the road. ALWAYS drive safely with your hands on
the steering wheel. You have full responsibility
and assume all risks related to the use of the
Uconnect and SiriusXM Guardian™ features and
applications in this vehicle. Only use Uconnect
features and SiriusXM Guardian™ services when
it is safe to do so. Failure to do so may result in
an accident involving serious injury or death.
21_LA_OM_EN_USC_t.book Page 226
Page 229 of 328

IN CASE OF EMERGENCY227
(Continued)
ASSIST Call
The ASSIST Button is used to automatically
connect you to any one of the following support
centers:
Roadside Assistance – If you get a flat tire, or
need a tow, just push the ASSIST button and you
will be connected to a representative for assis-
tance. Roadside Assistance will know what
vehicle you’re driving and its location. Additional
fees may apply for roadside Assistance.
SiriusXM Guardian™ Customer Care – In-vehicle
support for SiriusXM Guardian™.
Vehicle Customer Care – Total support for all
other vehicle issues.
Uconnect Customer Care - Total support for
Radio, Phone and NAV issues.
SOS Call
1. Push the SOS Call button on the Rearview Mirror.
NOTE:In case the SOS Call button is pushed in error,
there will be a 10 second delay before the SOS Call
system initiates a call to a SOS operator. To cancel
the SOS Call connection, push the SOS call button
on the Rearview Mirror or press the cancellation
button on the Device Screen. Termination of the
SOS Call will turn off the green LED light on the
Rearview Mirror. 2. The LED light located between the ASSIST and
SOS buttons on the Rearview Mirror will turn
green once a connection to a SOS operator has
been made.
3. Once a connection between the vehicle and a SOS operator is made, the SOS Call system
may transmit the following important vehicle
information to a SOS operator:
Indication that the occupant placed a SOS
Call.
The vehicle brand.
The last known GPS coordinates of the
vehicle.
4. You should be able to speak with the SOS operator through the vehicle audio system to
determine if additional help is needed.
NOTE:
Your vehicle may be transmitting data as
authorized by the subscriber.
Once a connection is made between the
vehicle’s SOS Call system and the SOS oper -
ator, the SOS operator may be able to open a
voice connection with the vehicle to determine
if additional help is needed. Once the SOS oper -
ator opens a voice connection with the vehicle’s
SOS Call system, the operator should be able to
speak with you or other vehicle occupants and
hear sounds occurring in the vehicle. The
vehicle’s SOS Call system will attempt to remain
connected with the SOS operator until the SOS
operator terminates the connection.
5. The SOS operator may attempt to contact appropriate emergency responders and
provide them with important vehicle
information and GPS coordinates.
WARNING!
ALWAYS obey traffic laws and pay attention to
the road. ALWAYS drive safely with your hands on
the steering wheel. You have full responsibility
and assume all risks related to the use of the
Uconnect and SiriusXM Guardian™ features and
applications in this vehicle. Only use Uconnect
features and SiriusXM Guardian™ services when
it is safe to do so. Failure to do so may result in
an accident involving serious injury or death.
WARNING!
If anyone in the vehicle could be in danger
(e.g., fire or smoke is visible, dangerous road
conditions or location), do not wait for voice
contact from an Emergency Services Agent. All
occupants should exit the vehicle immediately
and move to a safe location.
7
21_LA_OM_EN_USC_t.book Page 227
Page 231 of 328

IN CASE OF EMERGENCY229
Equipment malfunction at the SOS operator
facility.
Operator error by the SOS operator.
LTE (voice/data) or 4G (data) network congestion.
Weather.
Buildings, structures, geographic terrain, or
tunnels.
NOTE:
Your vehicle may be transmitting data as autho -
rized by the subscriber.
Never place anything on or near the vehicle’s
LTE (voice/data) or 4G (data) and GPS
antennas. You could prevent LTE (voice/data) or
4G (data) and GPS signal reception, which can
prevent your vehicle from placing an emergency
call. An operable LTE (voice/data) or 4G (data)
network connection and a GPS signal is
required for the SOS Call system to function
properly.
NOTE:Changes or modifications not expressly approved
by the party responsible for compliance could void
the user's authority to operate the equipment.
Automatic SOS — If Equipped
Automatic SOS is a hands-free safety service that
can immediately connect you with help in the event
that your vehicle’s airbags deploy. Please refer to
your provided radio supplement for complete
information.
JACKING AND TIRE CHANGING
WARNING!
ALWAYS obey traffic laws and pay attention to
the road. ALWAYS drive safely with your hands on
the steering wheel. You have full responsibility
and assume all risks related to the use of the
Uconnect and SiriusXM Guardian™ features and
applications in this vehicle. Only use Uconnect
features and SiriusXM Guardian™ services when
it is safe to do so. Failure to do so may result in
an accident involving serious injury or death.
CAUTION!
To avoid damage to the mirror during cleaning,
never spray any cleaning solution directly onto
the mirror. Apply the solution onto a clean cloth
and wipe the mirror clean.
WARNING!
Do not attempt to change a tire on the side of
the vehicle close to moving traffic. Pull far
enough off the road to avoid the danger of
being hit when operating the jack or changing
the wheel.
Being under a jacked-up vehicle is dangerous.
The vehicle could slip off the jack and fall on
you. You could be crushed. Never put any part
of your body under a vehicle that is on a jack.
If you need to get under a raised vehicle, take
it to a service center where it can be raised on
a lift.
Never start or run the engine while the vehicle
is on a jack.
The jack is designed to be used as a tool for
changing tires only. The jack should not be
used to lift the vehicle for service purposes.
The vehicle should be jacked on a firm level
surface only. Avoid ice or slippery areas.
7
21_LA_OM_EN_USC_t.book Page 229
Page 232 of 328

230IN CASE OF EMERGENCY
PREPARATIONS FOR JACKING
1. Park the vehicle on a firm, level surface as far
from the edge of the roadway as possible.
Avoid icy or slippery areas.
2. Turn on the Hazard Warning Flashers.
3. Apply the parking brake.
4. Place the gear selector into PARK (automatic transmission) or FIRST gear (manual
transmission).
5. Turn the ignition OFF.
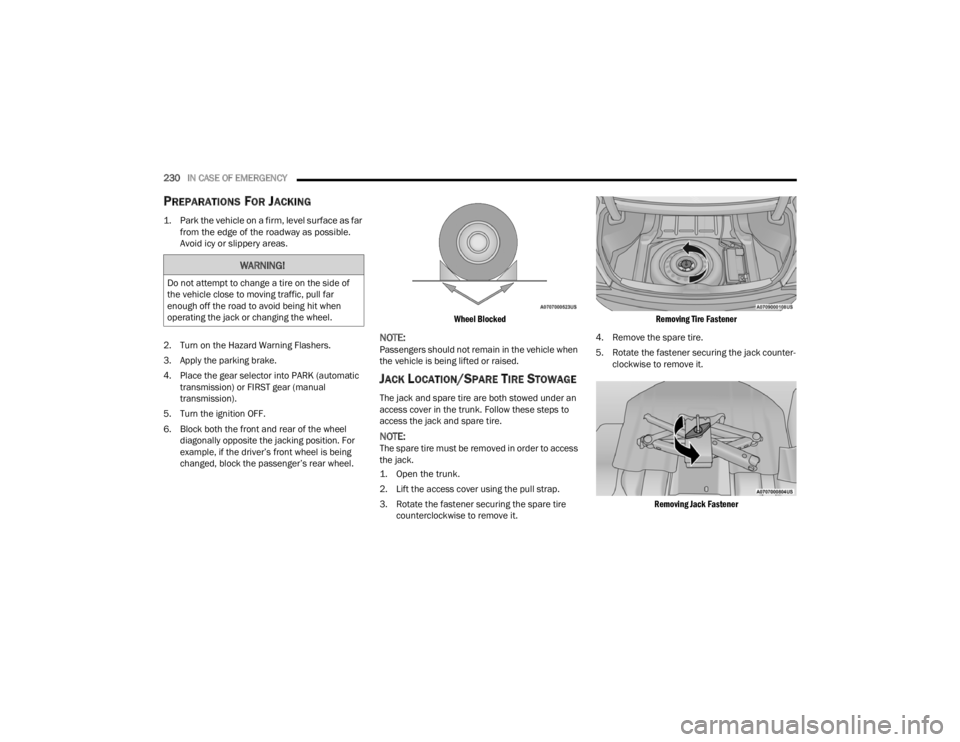
6. Block both the front and rear of the wheel diagonally opposite the jacking position. For
example, if the driver’s front wheel is being
changed, block the passenger’s rear wheel.
Wheel Blocked
NOTE:Passengers should not remain in the vehicle when
the vehicle is being lifted or raised.
JACK LOCATION/SPARE TIRE STOWAGE
The jack and spare tire are both stowed under an
access cover in the trunk. Follow these steps to
access the jack and spare tire.
NOTE:The spare tire must be removed in order to access
the jack.
1. Open the trunk.
2. Lift the access cover using the pull strap.
3. Rotate the fastener securing the spare tire
counterclockwise to remove it.
Removing Tire Fastener
4. Remove the spare tire.
5. Rotate the fastener securing the jack counter -
clockwise to remove it.
Removing Jack Fastener
WARNING!
Do not attempt to change a tire on the side of
the vehicle close to moving traffic, pull far
enough off the road to avoid being hit when
operating the jack or changing the wheel.
21_LA_OM_EN_USC_t.book Page 230
Page 233 of 328

IN CASE OF EMERGENCY231
(Continued)
6. Remove the jack and lug wrench assembly
from under the spare tire. Turn the jack screw
to the left to loosen the lug wrench, and
remove the wrench from the jack assembly.
JACKING AND CHANGING A TIRE
Jack Warning Label
Placement for the front and rear jacking locations
are critical. See the following images for proper
jacking locations.
Jack Engagement Locations
WARNING!
A loose tire or jack thrown forward in a collision or
hard stop could endanger the occupants of the
vehicle. Always stow the jack parts and the spare
tire in the places provided. Have the deflated (flat)
tire repaired or replaced immediately.
WARNING!
Carefully follow these tire changing warnings to
help prevent personal injury or damage to your
vehicle:
Always park on a firm, level surface as far from
the edge of the roadway as possible before
raising the vehicle.
Turn on the Hazard Warning Flashers.
Apply the parking brake firmly and place an
automatic transmission in PARK; a manual
transmission in REVERSE or FIRST gear.
Block the wheel diagonally opposite the wheel
to be raised.
Never start or run the engine with the vehicle
on a jack.
Do not let anyone sit in the vehicle when it is
on a jack.
Do not get under the vehicle when it is on a
jack. If you need to get under a raised vehicle,
take it to a service center where it can be
raised on a lift.
Only use the jack in the positions indicated
and for lifting this vehicle during a tire change.
If working on or near a roadway, be extremely
careful of motor traffic.
WARNING!
CAUTION!
Do not attempt to raise the vehicle by jacking on
locations other than those indicated in the
Jacking Instructions for this vehicle.7
21_LA_OM_EN_USC_t.book Page 231