2021 DODGE CHALLENGER change time
[x] Cancel search: change timePage 252 of 328

250SERVICING AND MAINTENANCE
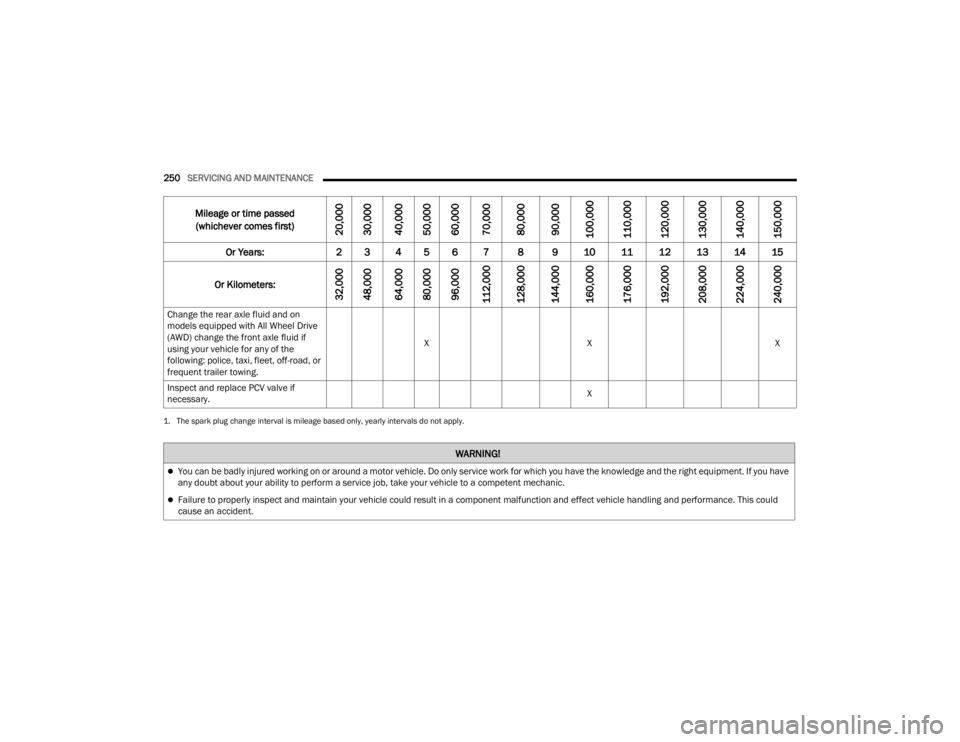
Change the rear axle fluid and on
models equipped with All Wheel Drive
(AWD) change the front axle fluid if
using your vehicle for any of the
following: police, taxi, fleet, off-road, or
frequent trailer towing. X
X X
Inspect and replace PCV valve if
necessary. X
1. The spark plug change interval is mileage based only, yearly intervals do not apply.
Mileage or time passed
(whichever comes first)
20,000
30,000
40,000
50,000
60,000
70,000
80,000
90,000
100,000
110,000
120,000
130,000
140,000
150,000
Or Years: 2 3 4 5 6 7 8 9 10 11 12 13 14 15
Or Kilometers:
32,000
48,000
64,000
80,000
96,000
112,000
128,000
144,000
160,000
176,000
192,000
208,000
224,000
240,000
WARNING!
You can be badly injured working on or around a motor vehicle. Do only service work for which you have the knowledge and the right equipment. If you have
any doubt about your ability to perform a service job, take your vehicle to a competent mechanic.
Failure to properly inspect and maintain your vehicle could result in a component malfunction and effect vehicle handling and performance. This could
cause an accident.
21_LA_OM_EN_USC_t.book Page 250
Page 257 of 328

SERVICING AND MAINTENANCE255
NOTE:Intentional tampering with emissions control
systems may void your warranty and could result in
civil penalties being assessed against you.
ENGINE OIL
Engine Oil Selection — 3.6L And 5.7L
Engine
For best performance and maximum protection
under all types of operating conditions, the
manufacturer only recommends engine oils that
are API Certified and meet the requirements of the
manufacturer Material Standard MS-6395.
NOTE:Hemi engines (5.7L) at times can tick right after
startup and then quiet down after approximately
30 seconds. This is normal and will not harm the
engine. This characteristic can be caused by short
drive cycles: for example, if the vehicle is started
then shut off after driving a short distance. Upon
restarting, you may experience a ticking sound. Other causes could be if the vehicle is unused for
an extended period of time, incorrect oil, extended
oil changes or extended idling. If the engine
continues to tick or if the Malfunction Indicator
Light (MIL) comes on, see the nearest authorized
dealer.
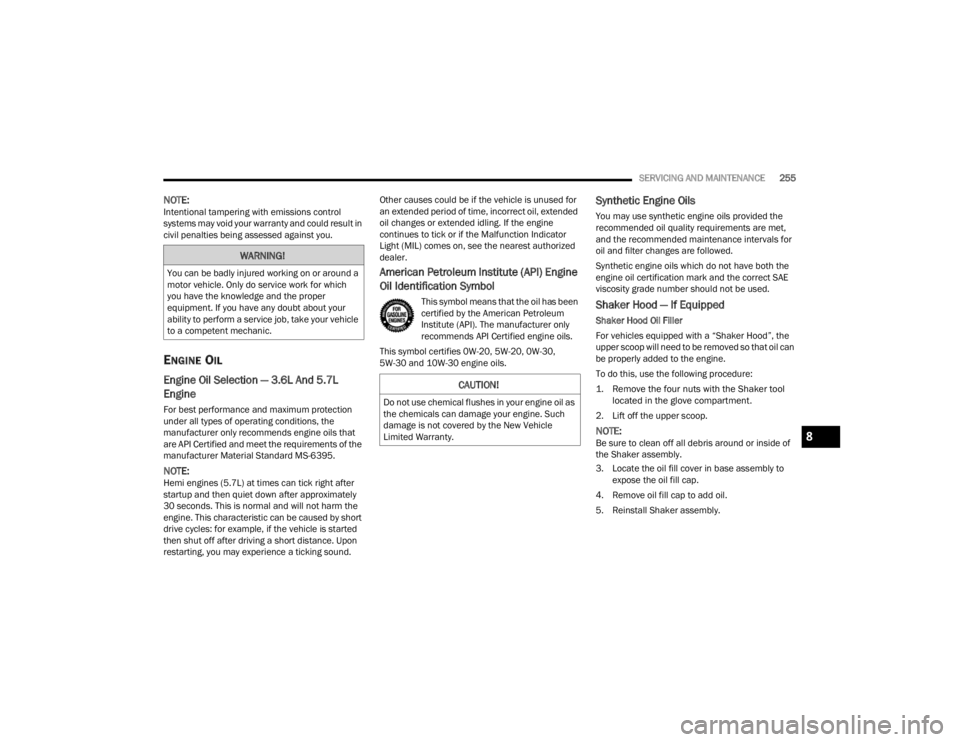
American Petroleum Institute (API) Engine
Oil Identification Symbol
This symbol means that the oil has been
certified by the American Petroleum
Institute (API). The manufacturer only
recommends API Certified engine oils.
This symbol certifies 0W-20, 5W-20, 0W-30,
5W-30 and 10W-30 engine oils.
Synthetic Engine Oils
You may use synthetic engine oils provided the
recommended oil quality requirements are met,
and the recommended maintenance intervals for
oil and filter changes are followed.
Synthetic engine oils which do not have both the
engine oil certification mark and the correct SAE
viscosity grade number should not be used.
Shaker Hood — If Equipped
Shaker Hood Oil Filler
For vehicles equipped with a “Shaker Hood”, the
upper scoop will need to be removed so that oil can
be properly added to the engine.
To do this, use the following procedure:
1. Remove the four nuts with the Shaker tool located in the glove compartment.
2. Lift off the upper scoop.
NOTE:Be sure to clean off all debris around or inside of
the Shaker assembly.
3. Locate the oil fill cover in base assembly to expose the oil fill cap.
4. Remove oil fill cap to add oil.
5. Reinstall Shaker assembly.
WARNING!
You can be badly injured working on or around a
motor vehicle. Only do service work for which
you have the knowledge and the proper
equipment. If you have any doubt about your
ability to perform a service job, take your vehicle
to a competent mechanic.
CAUTION!
Do not use chemical flushes in your engine oil as
the chemicals can damage your engine. Such
damage is not covered by the New Vehicle
Limited Warranty.
8
21_LA_OM_EN_USC_t.book Page 255
Page 263 of 328

SERVICING AND MAINTENANCE261
(Continued)
3. With the wiper blade disengaged, remove the
wiper blade from the wiper arm.
Wiper Blade Removed From Wiper Arm
4. Gently lower the wiper arm onto the glass.
Installing The Front Wipers
1. Lift the wiper arm off of the glass, until the wiper arm is in the full up position.
2. Position the wiper blade near the hook on the tip of the wiper arm.
3. Insert the hook on the tip of the arm through the opening in the wiper blade. 4. Slide the wiper blade up into the hook on the
wiper arm, latch engagement will be
accompanied by an audible click.
5. Gently lower the wiper blade onto the glass.
EXHAUST SYSTEM
The best protection against carbon monoxide entry
into the vehicle body is a properly maintained
engine exhaust system.
If you notice a change in the sound of the exhaust
system; or if the exhaust fumes can be detected
inside the vehicle; or when the underside or rear of
the vehicle is damaged; have an authorized
technician inspect the complete exhaust system
and adjacent body areas for broken, damaged,
deteriorated, or mispositioned parts. Open seams
or loose connections could permit exhaust fumes
to seep into the passenger compartment. In
addition, have the exhaust system inspected each
time the vehicle is raised for lubrication or oil
change. Replace as required.
1 — Wiper Blade
2 — Wiper Arm
3 — Release Tab
WARNING!
Exhaust gases can injure or kill. They contain
carbon monoxide (CO), which is colorless and
odorless. Breathing it can make you uncon
-
scious and can eventually poison you. To
avoid breathing CO, Ú page 223.
A hot exhaust system can start a fire if you
park over materials that can burn. Such
materials might be grass or leaves coming
into contact with your exhaust system. Do not
park or operate your vehicle in areas where
your exhaust system can contact anything
that can burn.
CAUTION!
The catalytic converter requires the use of
unleaded fuel only. Leaded gasoline will
destroy the effectiveness of the catalyst as an
emissions control device and may seriously
reduce engine performance and cause
serious damage to the engine.
Damage to the catalytic converter can result if
your vehicle is not kept in proper operating
condition. In the event of engine malfunction,
particularly involving engine misfire or other
apparent loss of performance, have your
vehicle serviced promptly. Continued opera -
tion of your vehicle with a severe malfunction
could cause the converter to overheat,
resulting in possible damage to the converter
and vehicle.
WARNING!
8
21_LA_OM_EN_USC_t.book Page 261
Page 267 of 328

SERVICING AND MAINTENANCE265
(Continued)
Make sure that the coolant expansion bottle
overflow hoses are not kinked or obstructed.
Keep the front of the radiator clean. If your
vehicle is equipped with air conditioning, keep
the front of the condenser clean.
Do not change the thermostat for Summer or
Winter operation. If replacement is ever neces -
sary, install ONLY the correct type thermostat.
Other designs may result in unsatisfactory
engine cooling performance, poor gas mileage,
and increased emissions.
BRAKE SYSTEM
In order to ensure brake system performance, all
brake system components should be inspected
periodically Ú page 247.
Fluid Level Check — Brake Master Cylinder
Check the fluid level in the master cylinder
immediately if the Brake System Warning Light
indicates system failure.
Check the fluid level in the master cylinder when
performing underhood services.
Clean the top of the master cylinder area before
removing the cap. Add fluid to bring the level up to
the top of the “FULL” mark on the side of the
master cylinder reservoir.
Overfilling of fluid is not recommended because it
may cause leaking in the system.
Add enough fluid to bring the level up to the
requirements described on the brake fluid
reservoir. With disc brakes, fluid level can be
expected to fall as the brake pads wear. However,
low fluid level may be caused by a leak and a
checkup may be needed.
Use only brake fluid that has been recommended
by the manufacturer, and has been kept in a tightly
closed container to avoid contamination from
foreign matter or moisture Ú page 306.
WARNING!
Riding the brakes can lead to brake failure and
possibly a collision. Driving with your foot resting
or riding on the brake pedal can result in
abnormally high brake temperatures, excessive
lining wear, and possible brake damage. You
would not have your full braking capacity in an
emergency.
WARNING!
Use only manufacturer's recommended brake
fluid Úpage 306. Using the wrong type of
brake fluid can severely damage your brake
system and/or impair its performance. The
proper type of brake fluid for your vehicle is
also identified on the original factory installed
hydraulic master cylinder reservoir.
To avoid contamination from foreign matter or
moisture, use only new brake fluid or fluid that
has been in a tightly closed container. Keep
the master cylinder reservoir cap secured at
all times. Brake fluid in a open container
absorbs moisture from the air resulting in a
lower boiling point. This may cause it to boil
unexpectedly during hard or prolonged
braking, resulting in sudden brake failure. This
could result in a collision.
Overfilling the brake fluid reservoir can result
in spilling brake fluid on hot engine parts,
causing the brake fluid to catch fire. Brake
fluid can also damage painted and vinyl
surfaces, care should be taken to avoid its
contact with these surfaces.8
21_LA_OM_EN_USC_t.book Page 265
Page 318 of 328

316 I
Ignition
............................................................ 16Switch......................................................... 16Information Center, Vehicle............................. 63Inside Rearview Mirror............................ 36, 226Instrument Cluster Descriptions......................................... 61, 75Display................................................. 62, 64Instrument Cluster DisplayAudio........................................................... 67Driver Assist................................................ 66Fuel Economy.............................................. 67Speedometer.............................................. 65Vehicle Info................................................. 65Instrument Panel Lens Cleaning.................... 300Interior Appearance Care............................... 299Interior Lights.................................................. 44Intermittent Wipers (Delay Wipers).................. 46iPod/USB/MP3 Control................................... 54Bluetooth Streaming Audio......................... 54
J
Jack Location................................................. 230Jack Operation............................................... 231Jacking Instructions....................................... 231Jump Starting............................. 238, 239, 240
K
Key FobArm The System
.......................................... 20Programming Additional Key Fobs............... 15Unlatch The Trunk....................................... 14Key Fob Battery Service
(Remote Keyless Entry).................................... 14
Key Fob Programming (Remote Keyless Entry).. 15
Keyless Enter 'n Go™....................................... 22Enter The Trunk........................................... 14Keys................................................................. 13Replacement............................................... 15
L
Lane Change And Turn Signals........................ 44Lane Change Assist......................................... 44Lap/Shoulder Belts....................................... 195Latches......................................................... 225Hood............................................................ 58Lead Free Gasoline....................................... 302Leaks, Fluid.................................................. 225Life Of Tires................................................... 290Light Bulbs........................................... 225, 276
Lights............................................................ 225Air Bag...................................... 69, 200, 223Automatic Headlights..................................43Brake Assist Warning................................ 182Brake Warning................................... 70, 301Bulb Replacement.................................... 276Courtesy/Reading........................................45Cruise...................................................75, 76Daytime Running.........................................42Dimmer Switch, Headlight...........................42
Electronic Stability Program(ESP) Indicator....71
Exterior.............................................. 41, 225Fog...............................................................44Headlight Switch..........................................41Headlights............................................ 41, 43Headlights On With Wipers..........................43High Beam...................................................42High Beam/Low Beam Select......................42Instrument Cluster.......................................41Intensity Control..........................................45Interior.........................................................44License..................................................... 279Lights On Reminder.....................................43Malfunction Indicator (Check Engine)..........73
21_LA_OM_EN_USC_t.book Page 316