2021 DODGE CHALLENGER lights
[x] Cancel search: lightsPage 23 of 328

GETTING TO KNOW YOUR VEHICLE21
If you remain in the vehicle and open a door, the
alarm will sound. If this occurs, disarm the Vehicle
Security system.
If the Vehicle Security system is armed and the
battery becomes disconnected, the Vehicle
Security system will remain armed when the
battery is reconnected; the exterior lights will flash,
and the horn will sound. If this occurs, disarm the
Vehicle Security system.
REARMING THE SYSTEM
If something triggers the alarm and no action is
taken to disarm it, the Vehicle Security system will
turn the horn off after a 29 second cycle (with five
seconds between cycles and up to eight cycles if
the trigger remains active) and then rearm itself.
SECURITY SYSTEM MANUAL OVERRIDE
The Vehicle Security system will not arm if you lock
the doors using the manual door lock.
TAMPER ALERT
If something has triggered the Vehicle Security
system in your absence, the horn will sound three
times and the exterior lights will blink three times
when you disarm the Vehicle Security system.
DOORS
MANUAL DOOR LOCKS
The power door locks can be manually locked from
inside the vehicle by using the door lock knob. To
lock each door, push the door lock knob on each
door trim panel downward. To unlock each door,
pull the door lock knob on each door trim panel
upward.
Door Lock Knob
If the door lock knob is down when you shut the
door, the door will lock. Therefore, make sure the
key fob is not inside the vehicle before closing the
door.
NOTE:Manually locking the vehicle will not arm the
Vehicle Security system.
WARNING!
For personal security and safety in the event of a
collision, lock the vehicle doors before you drive
as well as when you park and leave the vehicle.
Before exiting a vehicle, always shift the auto -
matic transmission into PARK or the manual
transmission into FIRST gear or REVERSE, apply
the parking brake, place the ignition in the OFF
position, remove the key fobs from the vehicle
and lock all doors, and lock your vehicle.
When leaving the vehicle, always remove the
key from the ignition and lock your vehicle.
Unsupervised use of vehicle equipment may
cause severe personal injuries and death.
Never leave children alone in a vehicle, or with
access to an unlocked vehicle. Allowing chil -
dren to be in a vehicle unattended is
dangerous for a number of reasons. A child or
others could be seriously or fatally injured.
Children should be warned not to touch the
parking brake, brake pedal or gear selector.
Do not leave the key fob in or near the vehicle,
or in a location accessible to children, and do
not leave the ignition of a vehicle equipped
with Keyless Enter ‘n Go™ in the ACC or ON/
RUN position. A child could operate power
windows, other controls, or move the vehicle.
2
21_LA_OM_EN_USC_t.book Page 21
Page 43 of 328

GETTING TO KNOW YOUR VEHICLE41
NOTE:
If the indicator light stays on constantly,
programming is complete and the garage
door/device should activate when the
HomeLink® button is pressed.
To program the two remaining HomeLink®
buttons, repeat each step for each
remaining button. DO NOT erase the chan -
nels.
If you unplugged the garage door opener/device
for programming, plug it back in at this time.
Reprogramming A Single HomeLink® Button
(Canadian/Gate Operator)
To reprogram a channel that has been previously
trained, follow these steps:
1. Place the ignition in the ON/RUN position.
2. Press and hold the desired HomeLink® button until the indicator light begins to flash after 20
seconds. Do not release the button.
3. Without releasing the button, proceed with “Canadian/Gate Operator Programming” step
2 and follow all remaining steps.
EXTERIOR LIGHTS
HEADLIGHT SWITCH
The headlight switch is located on the left side of
the instrument panel. This switch controls the
operation of the headlights, parking lights,
instrument panel lights, instrument panel light
dimming, interior lights and fog lights (if equipped).
Headlight Switch Headlight Switch (Vehicles Sold In Canada Only)
NOTE:Vehicles sold in Canada are equipped with a head
-
light switch with an AUTO and ON detent but
without an OFF detent. Headlights will be deacti -
vated when the headlight switch is placed in the
parking lights position. However, the Daytime
Running Lights (DRLs) will be activated along with
the front and rear marker lights. The DRLs may be
deactivated when the parking brake is engaged.
1 — Rotate Headlight Control
2 — Push Fog Light Control
3 — Instrument Panel Dimmer Control
4 — Ambient Light Dimmer Control
1 — Rotate Headlight Control
2 — Push Fog Light Control
3 — Instrument Panel Dimmer Control
4 — Ambient Light Dimmer Control
2
21_LA_OM_EN_USC_t.book Page 41
Page 44 of 328

42GETTING TO KNOW YOUR VEHICLE
To turn on the headlights, rotate the headlight
switch clockwise. When the headlight switch is on,
the parking lights, taillights, license plate light and
instrument panel lights are also turned on. To turn
off the headlights, rotate the headlight switch back
to the O (off) position.
NOTE:For vehicles sold in Canada, rotate the headlight
switch clockwise from the parking lights and
instrument panel lights position to the first detent
to turn the headlight switch to the AUTO position.
Rotate to the second detent to turn on headlights,
parking lights, and instrument panel lights oper -
ation.
MULTIFUNCTION LEVER
The multifunction lever is located on the left side of
the steering column.
Multifunction Lever
DAYTIME RUNNING LIGHTS (DRLS) —
I
F EQUIPPED
The Daytime Running Lights will turn on when the
engine is started and will remain on unless the
headlamps are turned to the on position, the
parking brake is applied, or the ignition is placed in
the OFF position.
NOTE:
For vehicles sold in Canada, the Daytime
Running Lights will automatically deactivate
when the front fog lights are turned on.
If allowed by law in the country in which the
vehicle was purchased, the Daytime Running
Lights can be turned on and off using the
Uconnect system Ú page 120.
On some vehicles, the Daytime Running Lights
may deactivate, or reduce intensity, on one side
of the vehicle (when a turn signal is activated on
that side), or on both sides of the vehicle (when
the hazard warning lights are activated).
HIGH/LOW BEAM SWITCH
Push the multifunction lever toward the instrument
panel to switch the headlights to high beams.
Pulling the multifunction lever back will turn the
low beams on.
AUTOMATIC HIGH BEAM HEADLAMP
C
ONTROL — IF EQUIPPED
The Automatic High Beam Headlamp Control
system provides increased forward lighting at night
by automating high beam control through the use
of a camera mounted on the windshield. This
camera detects vehicle specific light and
automatically switches from high beams to low
beams until the approaching vehicle is out of view.
NOTE:
The Automatic High Beam Headlamp Control
can be turned on or off using the Uconnect
system Ú page 120.
Broken, muddy, or obstructed headlights and
taillights of vehicles in the field of view will
cause headlights to remain on longer (closer to
the vehicle). Also, dirt, film, and other obstruc -
tions on the windshield or camera lens will
cause the system to function improperly.
To opt out of the Advanced Auto High-Beam
Sensitivity Control and enter Reduced
High-Beam Sensitivity Control (not recom -
mended), toggle the high beam lever six full on/
off cycles within 10 seconds of placing the igni -
tion in the ON position. The system will return to
the default setting upon placing the ignition in
the OFF position.
21_LA_OM_EN_USC_t.book Page 42
Page 45 of 328

GETTING TO KNOW YOUR VEHICLE43
If the windshield or Automatic High Beam Head -
lamp Control mirror is replaced, the mirror must
be re-aimed to ensure proper performance. See
a local authorized dealer.
FLASH-TO-PASS
You can signal another vehicle with your headlights
by lightly pulling the multifunction lever toward you.
This will cause the high beam headlights to turn on,
and remain on, until the lever is released.
NOTE:If the multifunction lever is held in the flash-to pass
position for more than 20 seconds, the high beams
will shut off.
AUTOMATIC HEADLIGHTS
This system automatically turns the headlights on
or off according to ambient light levels. To turn the
system on, rotate the headlight switch
counterclockwise to the AUTO position. When the
system is on, the headlight time delay feature is
also on.
When the system is on, the Headlight Delay feature
is also on. This means the headlights will stay on
for up to 90 seconds after you place the ignition
into the OFF position. To turn the automatic
headlights off, turn the headlight switch out of the
AUTO position.
NOTE:The engine must be running before the headlights
will come on in the automatic mode.
PARKING LIGHTS
To turn on the parking lights and instrument panel
lights, rotate the headlight switch clockwise. To
turn off the parking lights, rotate the headlight
switch back to the O (off) position.
NOTE:Vehicles sold in Canada are equipped with a head -
light switch with an AUTO and ON detent but
without an OFF detent. Headlights will be deacti -
vated when the headlight switch is placed in the
parking lights position. However, the Daytime
Running Lights (DRLs) will be activated along with
the front and rear marker lights. The DRLs may be
deactivated when the parking brake is engaged.
AUTOMATIC HEADLIGHTS WITH WIPERS
If your vehicle is equipped with Automatic
Headlights, it also has this
customer-programmable feature. When your
headlights are in the automatic mode and the
engine is running, they will automatically turn on
when the wiper system is on. This feature is
programmable through the Uconnect system
Ú page 120. In addition, the headlights will turn off when the
wipers are turned off if they were turned on by this
feature.
HEADLIGHT TIME DELAY
To assist when exiting the vehicle, the headlight
delay feature will leave the headlights on for up to
90 seconds. This delay is initiated when the
ignition is placed in the OFF position while the
headlight switch is on, and then the headlight
switch is cycled off within 45 seconds. Headlight
delay can be canceled by either turning the
headlight switch on then off, or by placing the
ignition in the ON position.
NOTE:
This feature can be programmed through the
Uconnect system Ú
page 120.
If you turn the headlights off before the ignition,
they will turn off in the normal manner.
LIGHTS-ON REMINDER
If the headlights or parking lights are on after the
ignition is placed in the OFF position, the vehicle
will chime when the driver's door is opened.
2
21_LA_OM_EN_USC_t.book Page 43
Page 46 of 328

44GETTING TO KNOW YOUR VEHICLE
FOG LIGHTS — IF EQUIPPED
To activate the front fog lights, turn on the parking
lights or the low beam headlights, and push the fog
light button on the headlight switch.
Fog Light Switch
Fog Light Switch (Vehicles Sold In Canada Only)
The fog lights will operate only when the parking
lights are on or when the vehicle headlights are on
low beam. An indicator light located in the
instrument cluster will illuminate when the fog
lights are on. The fog lights will turn off when the
switch is pushed a second time, when the
headlight switch is rotated to the off position, or
the high beam is selected.
TURN SIGNALS
Move the multifunction lever up or down to
activate the turn signals. The arrows on each side
of the instrument cluster flash to show proper
operation.
NOTE:
If either light remains on and does not flash, or
there is a very fast flash rate, check for a defec
-
tive outside light bulb.
A “Turn Signal On” message will appear in the
instrument cluster display and a continuous
chime will sound if the vehicle is driven more
than 1 mile (1.6 km) with either turn signal on.
LANE CHANGE ASSIST — IF EQUIPPED
Lightly push the multifunction lever up or down,
without moving beyond the detent, and the turn
signal will flash three times then automatically
turn off.
INTERIOR LIGHTS
The interior lights come on when a door is opened.
To protect the battery, the interior lights will turn off
automatically 10 minutes after the ignition is
placed in the OFF position. This will occur if the
interior lights were switched on manually or are on
because a door is open. The Battery Protection
also includes the glove compartment light and the
trunk light. To restore interior light operation after
automatic battery protection is enabled (lights off),
either place the ignition in the ON/RUN position or
cycle the light switch.
21_LA_OM_EN_USC_t.book Page 44
Page 47 of 328

GETTING TO KNOW YOUR VEHICLE45
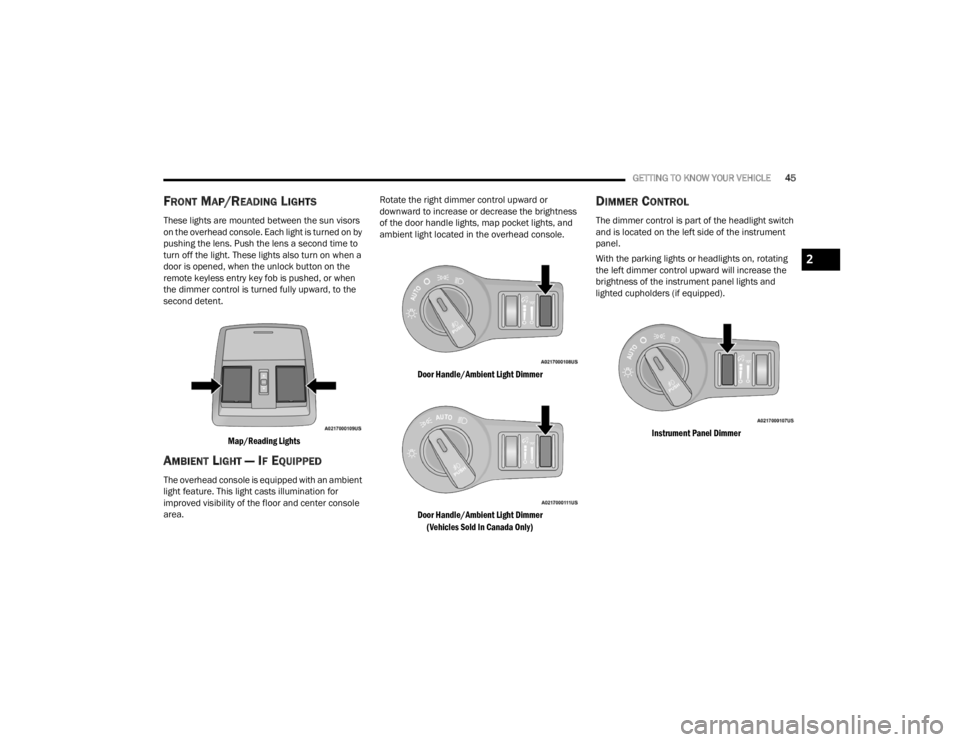
FRONT MAP/READING LIGHTS
These lights are mounted between the sun visors
on the overhead console. Each light is turned on by
pushing the lens. Push the lens a second time to
turn off the light. These lights also turn on when a
door is opened, when the unlock button on the
remote keyless entry key fob is pushed, or when
the dimmer control is turned fully upward, to the
second detent.
Map/Reading Lights
AMBIENT LIGHT — IF EQUIPPED
The overhead console is equipped with an ambient
light feature. This light casts illumination for
improved visibility of the floor and center console
area. Rotate the right dimmer control upward or
downward to increase or decrease the brightness
of the door handle lights, map pocket lights, and
ambient light located in the overhead console.
Door Handle/Ambient Light Dimmer
Door Handle/Ambient Light Dimmer (Vehicles Sold In Canada Only)
DIMMER CONTROL
The dimmer control is part of the headlight switch
and is located on the left side of the instrument
panel.
With the parking lights or headlights on, rotating
the left dimmer control upward will increase the
brightness of the instrument panel lights and
lighted cupholders (if equipped).
Instrument Panel Dimmer
2
21_LA_OM_EN_USC_t.book Page 45
Page 48 of 328

46GETTING TO KNOW YOUR VEHICLE
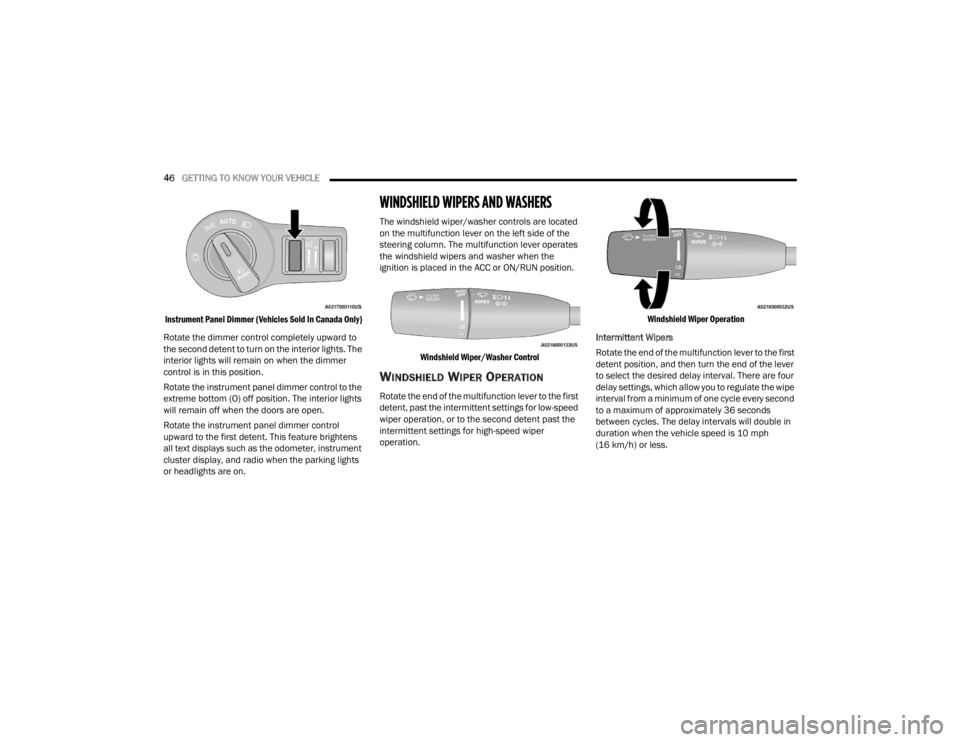
Instrument Panel Dimmer (Vehicles Sold In Canada Only)
Rotate the dimmer control completely upward to
the second detent to turn on the interior lights. The
interior lights will remain on when the dimmer
control is in this position.
Rotate the instrument panel dimmer control to the
extreme bottom (O) off position. The interior lights
will remain off when the doors are open.
Rotate the instrument panel dimmer control
upward to the first detent. This feature brightens
all text displays such as the odometer, instrument
cluster display, and radio when the parking lights
or headlights are on.
WINDSHIELD WIPERS AND WASHERS
The windshield wiper/washer controls are located
on the multifunction lever on the left side of the
steering column. The multifunction lever operates
the windshield wipers and washer when the
ignition is placed in the ACC or ON/RUN position.
Windshield Wiper/Washer Control
WINDSHIELD WIPER OPERATION
Rotate the end of the multifunction lever to the first
detent, past the intermittent settings for low-speed
wiper operation, or to the second detent past the
intermittent settings for high-speed wiper
operation.
Windshield Wiper Operation
Intermittent Wipers
Rotate the end of the multifunction lever to the first
detent position, and then turn the end of the lever
to select the desired delay interval. There are four
delay settings, which allow you to regulate the wipe
interval from a minimum of one cycle every second
to a maximum of approximately 36 seconds
between cycles. The delay intervals will double in
duration when the vehicle speed is 10 mph
(16 km/h) or less.
21_LA_OM_EN_USC_t.book Page 46
Page 57 of 328

GETTING TO KNOW YOUR VEHICLE55
(Continued)
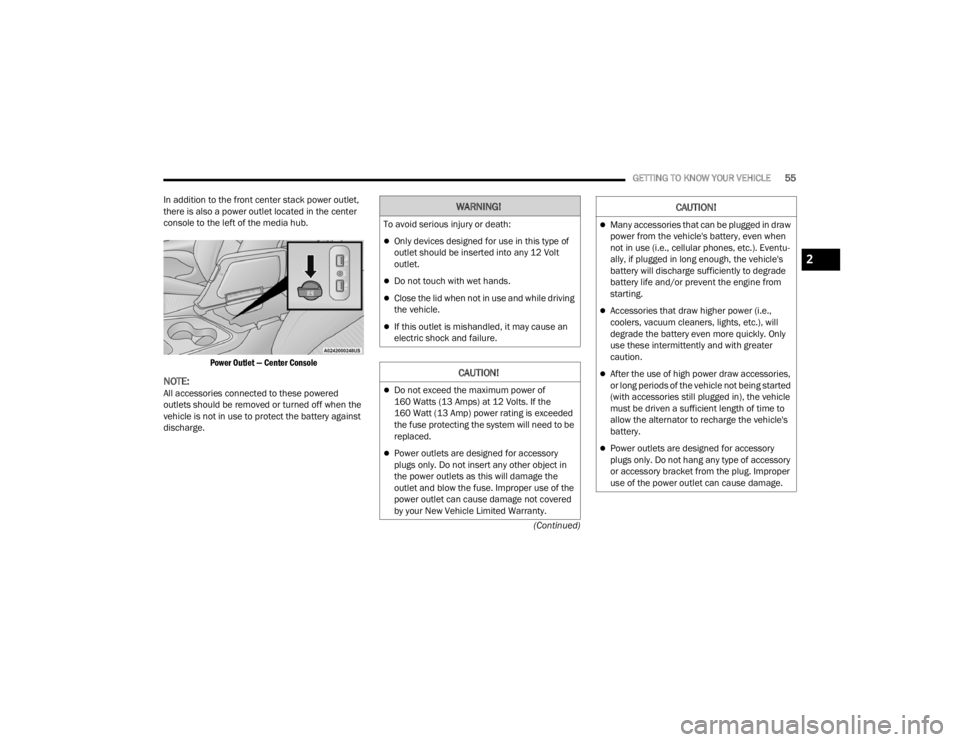
In addition to the front center stack power outlet,
there is also a power outlet located in the center
console to the left of the media hub.
Power Outlet — Center Console
NOTE:All accessories connected to these powered
outlets should be removed or turned off when the
vehicle is not in use to protect the battery against
discharge.
WARNING!
To avoid serious injury or death:
Only devices designed for use in this type of
outlet should be inserted into any 12 Volt
outlet.
Do not touch with wet hands.
Close the lid when not in use and while driving
the vehicle.
If this outlet is mishandled, it may cause an
electric shock and failure.
CAUTION!
Do not exceed the maximum power of
160 Watts (13 Amps) at 12 Volts. If the
160 Watt (13 Amp) power rating is exceeded
the fuse protecting the system will need to be
replaced.
Power outlets are designed for accessory
plugs only. Do not insert any other object in
the power outlets as this will damage the
outlet and blow the fuse. Improper use of the
power outlet can cause damage not covered
by your New Vehicle Limited Warranty.
Many accessories that can be plugged in draw
power from the vehicle's battery, even when
not in use (i.e., cellular phones, etc.). Eventu -
ally, if plugged in long enough, the vehicle's
battery will discharge sufficiently to degrade
battery life and/or prevent the engine from
starting.
Accessories that draw higher power (i.e.,
coolers, vacuum cleaners, lights, etc.), will
degrade the battery even more quickly. Only
use these intermittently and with greater
caution.
After the use of high power draw accessories,
or long periods of the vehicle not being started
(with accessories still plugged in), the vehicle
must be driven a sufficient length of time to
allow the alternator to recharge the vehicle's
battery.
Power outlets are designed for accessory
plugs only. Do not hang any type of accessory
or accessory bracket from the plug. Improper
use of the power outlet can cause damage.
CAUTION!
2
21_LA_OM_EN_USC_t.book Page 55