2021 CITROEN C4 AIRCROSS DAG mirror
[x] Cancel search: mirrorPage 119 of 244

11 7
Driving
6Rear vision
To activate the camera, located on the tailgate,
engage reverse and keep the speed of the
vehicle below 6 mph (10 km/h).The system is deactivated:– Automatically, at speeds above approximately 6 mph (10 km/h),– Automatically, if the tailgate is opened.– Upon changing out of reverse gear (the image remains displayed for 7 seconds).– By pressing the white arrow in the upper-left corner of the touch screen.
AUTO mode
This mode is activated by default.
Using sensors in the rear bumper, the automatic
view changes from the rear view (standard) to
the view from above (zoom) as an obstacle is
approached at the level of the red line (less than
30 cm) during a manoeuvre.
Standard view
The area behind the vehicle is displayed on the
screen. The blue lines
1 represent the width of your
vehicle, with the mirrors unfolded; their direction
changes depending on the position of the
steering wheel.
The red line 2 represents a distance of 30 cm
from the rear bumper; the two blue lines 3 and 4
represent 1 m and 2 m, respectively.
This view is available with AUTO mode or in the
view selection menu.
Zoom view
The camera records the vehicle's surroundings
during the manoeuvre in order to create a
view from above the rear of the vehicle in its
near surroundings, allowing the vehicle to be
manoeuvred around obstacles nearby.
This view is available with AUTO mode or in the
view selection menu.
Page 120 of 244

11 8
Driving
Obstacles may appear further away than
they actually are in reality.
It is important to check the sides of the
vehicle during the manoeuvre, using the
mirrors.
The rear parking sensors also provide
information on the vehicle's surroundings.
180° view
The 180° view facilitates reversing out of a
parking bay, making it possible to see the
approach of vehicles, pedestrians and cyclists.
This view is not recommended for carrying out a
complete manoeuvre.
It consists of 3 areas: left A, centre B and right
C. This view is available only from the view
selection menu.
Quick start mode
This mode displays, as quickly as possible, the
contextual view (left-hand part) and the overhead
view of the vehicle.
A message is displayed advising you to check
your vehicle's surroundings before starting the
manoeuvre.
Park Assist
Refer to the General recommendations on the
use of driving and manoeuvring aids .
This system provides active parking assistance:
it detects a parking space and then steers in the
appropriate direction to park in the space while
the driver controls the driving direction, gear
changes, acceleration and braking. To help the driver monitor the manoeuvre, the
system automatically triggers the display of T
op Rear Vision and activates the parking sensors.
The system measures the available parking
spaces and calculates the distances to obstacles
using ultrasonic sensors built into the front and
rear bumpers of the vehicle.
The system assists with the following
manoeuvres:
A.Entering a "parallel" parking space
B. Leaving a "parallel" parking space
C. Entering a "bay" parking space
Operation
► When approaching a parking area, reduce the speed of your vehicle to 19 mph (30 km/h) or less.
Activating the function
The function is activated in the Vehicle /
Driving touch screen menu.
Select "Park Assist ".
Activating the function deactivates the Blind Spot Monitoring System.
You can deactivate the function at any
time until the parking space entry or exit
manoeuvre begins, by pressing the arrow
located in the top left-hand corner of the
display page.
Selecting the type of manoeuvre
A manoeuvre selection page is displayed on the
touch screen: by default, the "Entry" page if the
vehicle has been running since the ignition was
switched on, otherwise, the "Exit" page.
► Select the type and side of the manoeuvre to activate the parking space search.
The selected manoeuvre can be changed at
any time, even while searching for an available
space.
Page 153 of 244

151
In the event of a breakdown
8Fuses in the dashboard
Access to the fuses
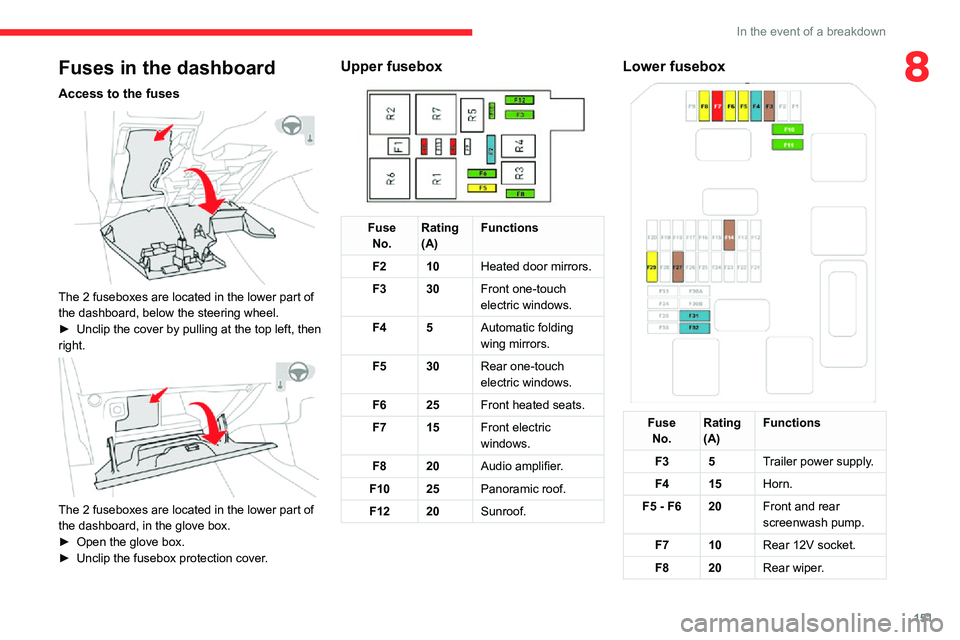
The 2 fuseboxes are located in the lower part of
the dashboard, below the steering wheel.
► Unclip the cover by pulling at the top left, then right.
The 2 fuseboxes are located in the lower part of
the dashboard, in the glove box.
► Open the glove box.► Unclip the fusebox protection cover.
Upper fusebox
Fuse
No. Rating
(A) Functions
F2 10 Heated door mirrors.
F3 30 Front one-touch
electric windows.
F4 5 Automatic folding
wing mirrors.
F5 30 Rear one-touch
electric windows.
F6 25 Front heated seats.
F7 15 Front electric
windows.
F8 20 Audio amplifier.
F10 25Panoramic roof.
F12 20Sunroof.
Lower fusebox
Fuse
No. Rating
(A) Functions
F3 5 Trailer power supply.
F4 15 Horn.
F5 - F6 20Front and rear
screenwash pump.
F7 10 Rear 12V socket.
F8 20 Rear wiper.
Page 164 of 244

162
Technical data
– Gross vehicle weight (GVW).– Gross train weight (GTW).– Maximum weight on the front axle.– Maximum weight on the rear axle.D. Tyres label.
Fixed at the driver-side door.
Bears the following information about the tyres:
– tyre pressures, unladen and laden.– tyre specification, made up of the dimensions and type as well as the load and speed indices.– spare tyre inflation pressure.
The vehicle may be originally equipped
with tyres with higher load and speed
indices than those indicated on the label,
without affecting tyre pressure (on cold tyres).
Dimensions (in mm)
These dimensions have been measured on an
unladen vehicle.
* Mirrors folded in.
** Version with longitudinal bars.
Identification markingsVarious visible markings for the identification and
research of your vehicle.
A. Vehicle Identification Number (VIN), on the
right-hand front seat floor.
Stamped on the chassis.
B. Vehicle identification number (VIN), on the
dashboard.
On a label, visible through the windscreen.
C. Manufacturer's label.
Fixed at the driver-side door.
Bears the following information:
– Manufacturer ’s name.– European whole vehicle type approval number.
– Vehicle identification number (VIN).
Page 178 of 244

176
CITROËN Connect Radio
CITROËN Connect Radio
Multimedia audio system -
Applications - Bluetooth
®
telephone
The functions and settings described
vary according to the vehicle version and
configuration.
For safety reasons and because they
require sustained attention by the driver,
the following operations must be carried out
with the vehicle stationary and the ignition
on:
– Pairing the smartphone with the system in Bluetooth mode.– Using the smartphone.– Connection to the CarPlay®, MirrorLinkTM
or Android Auto applications (certain
applications interrupt their display while the
vehicle is moving).
– Changing the system settings and configuration.
The system is protected in such a way that it will only operate in the vehicle.
The Energy Economy Mode message is
displayed when the system is about to enter
the corresponding mode.
The system’s Open Source Software (OSS) source codes are available at the
following addresses:
https://www.groupe-psa.com/fr/oss/
https://www.groupe-psa.com/en/oss/
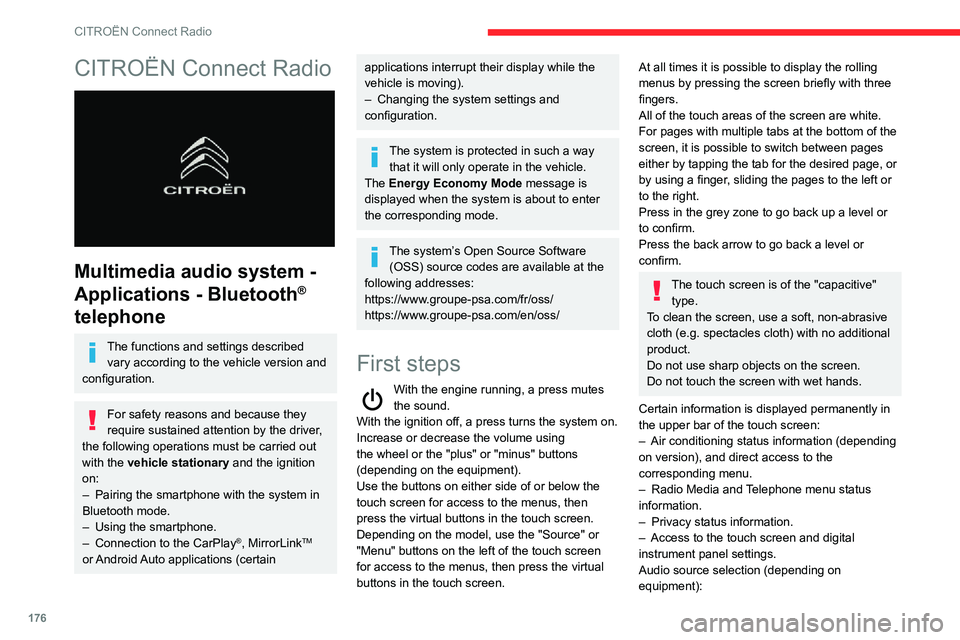
First steps
With the engine running, a press mutes the sound.
With the ignition off, a press turns the system on.
Increase or decrease the volume using
the wheel or the "plus" or "minus" buttons
(depending on the equipment).
Use the buttons on either side of or below the
touch screen for access to the menus, then
press the virtual buttons in the touch screen.
Depending on the model, use the "Source" or
"Menu" buttons on the left of the touch screen
for access to the menus, then press the virtual
buttons in the touch screen.
At all times it is possible to display the rolling
menus by pressing the screen briefly with three
fingers.
All of the touch areas of the screen are white.
For pages with multiple tabs at the bottom of the
screen, it is possible to switch between pages
either by tapping the tab for the desired page, or
by using a finger, sliding the pages to the left or
to the right.
Press in the grey zone to go back up a level or
to confirm.
Press the back arrow to go back a level or
confirm.
The touch screen is of the "capacitive" type.
To clean the screen, use a soft, non-abrasive
cloth (e.g. spectacles cloth) with no additional
product.
Do not use sharp objects on the screen.
Do not touch the screen with wet hands.
Certain information is displayed permanently in
the upper bar of the touch screen:
– Air conditioning status information (depending on version), and direct access to the
corresponding menu.
– Radio Media and Telephone menu status information.– Privacy status information.– Access to the touch screen and digital instrument panel settings.
Audio source selection (depending on
equipment):
Page 180 of 244

178
CITROËN Connect Radio
Short press: confirm a selection; if nothing
selected, access to presets.
Radio: display the list of stations.
Media: display the list of tracks.
Radio (press and hold): update the list of
stations received.
Menus
Applications
Access configurable equipment.
Radio Media
Select an audio source or radio station.
Telephone
Connect a mobile phone via Bluetooth®.
Run certain applications on a smartphone
connected via MirrorLink
TM, CarPlay® or Android
Auto.
Settings
Configure a personal profile and/or configure the sound (balance, ambience,
etc.) and the display (language, units, date, time,
etc.).
Driving
Activate, deactivate or configure certain vehicle functions.
Navigation
Configure the navigation and select your destination via MirrorLinkTM, CarPlay® or
Android Auto.
Air conditioning
21,518,5
Manage various temperature and air flow settings.
Page 181 of 244

179
CITROËN Connect Radio
11Navigation
Configure the navigation and select your destination via MirrorLinkTM, CarPlay® or
Android Auto.
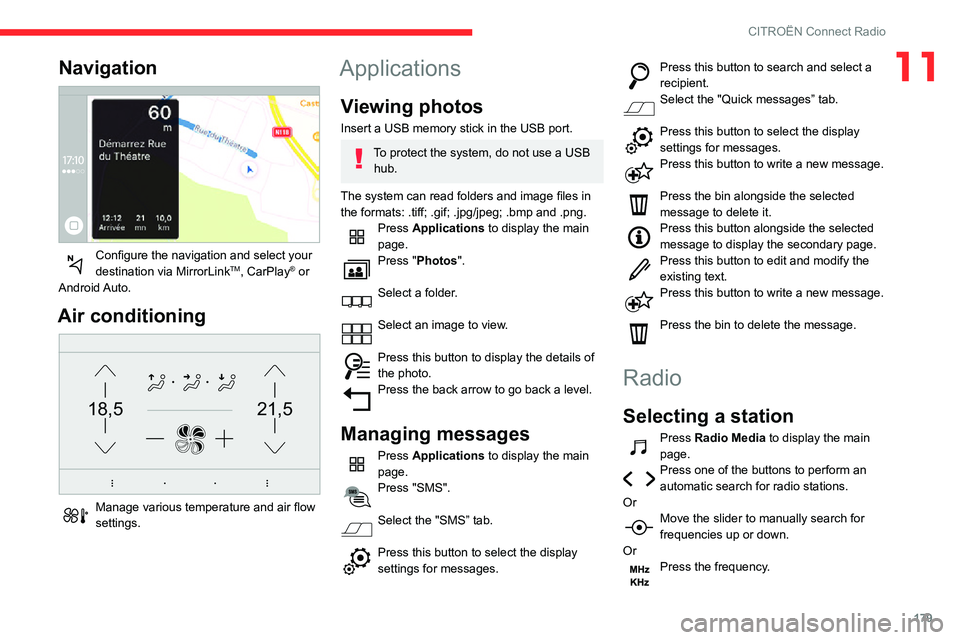
Air conditioning
21,518,5
Manage various temperature and air flow settings.
Applications
Viewing photos
Insert a USB memory stick in the USB port.
To protect the system, do not use a USB hub.
The system can read folders and image files in
the formats: .tiff; .gif; .jpg/jpeg; .bmp and .png.
Press Applications to display the main
page.
Press "Photos".
Select a folder.
Select an image to view.
Press this button to display the details of the photo.Press the back arrow to go back a level.
Managing messages
Press Applications to display the main
page.
Press "SMS".
Select the "SMS” tab.
Press this button to select the display settings for messages.
Press this button to search and select a recipient.Select the "Quick messages” tab.
Press this button to select the display settings for messages.Press this button to write a new message.
Press the bin alongside the selected
message to delete it.
Press this button alongside the selected message to display the secondary page.Press this button to edit and modify the existing text.Press this button to write a new message.
Press the bin to delete the message.
Radio
Selecting a station
Press Radio Media to display the main
page.
Press one of the buttons to perform an automatic search for radio stations.
Or
Move the slider to manually search for frequencies up or down.
Or
Press the frequency.
Page 184 of 244

182
CITROËN Connect Radio
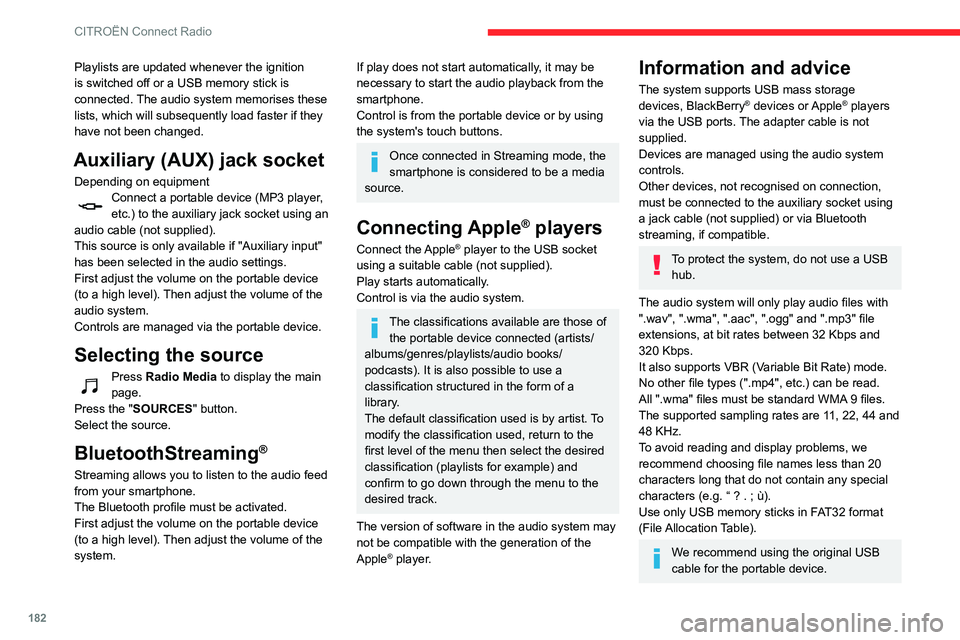
Playlists are updated whenever the ignition
is switched off or a USB memory stick is
connected. The audio system memorises these
lists, which will subsequently load faster if they
have not been changed.
Auxiliary (AUX) jack socket
Depending on equipmentConnect a portable device (MP3 player, etc.) to the auxiliary jack socket using an
audio cable (not supplied).
This source is only available if "Auxiliary input"
has been selected in the audio settings.
First adjust the volume on the portable device
(to a high level). Then adjust the volume of the
audio system.
Controls are managed via the portable device.
Selecting the source
Press Radio Media to display the main
page.
Press the "SOURCES" button.
Select the source.
BluetoothStreaming®
Streaming allows you to listen to the audio feed
from your smartphone.
The Bluetooth profile must be activated.
First adjust the volume on the portable device
(to a high level). Then adjust the volume of the
system.
If play does not start automatically, it may be
necessary to start the audio playback from the
smartphone.
Control is from the portable device or by using
the system's touch buttons.
Once connected in Streaming mode, the
smartphone is considered to be a media
source.
Connecting Apple® players
Connect the Apple® player to the USB socket
using a suitable cable (not supplied).
Play starts automatically.
Control is via the audio system.
The classifications available are those of the portable device connected (artists/
albums/genres/playlists/audio books/
podcasts). It is also possible to use a
classification structured in the form of a
library.
The default classification used is by artist. To
modify the classification used, return to the
first level of the menu then select the desired
classification (playlists for example) and
confirm to go down through the menu to the
desired track.
The version of software in the audio system may
not be compatible with the generation of the
Apple
® player.
Information and advice
The system supports USB mass storage
devices, BlackBerry® devices or Apple® players
via the USB ports. The adapter cable is not
supplied.
Devices are managed using the audio system
controls.
Other devices, not recognised on connection,
must be connected to the auxiliary socket using
a jack cable (not supplied) or via Bluetooth
streaming, if compatible.
To protect the system, do not use a USB hub.
The audio system will only play audio files with
".wav", ".wma", ".aac", ".ogg" and ".mp3" file
extensions, at bit rates between 32 Kbps and
320 Kbps.
It also supports VBR (Variable Bit Rate) mode.
No other file types (".mp4", etc.) can be read.
All ".wma" files must be standard WMA 9 files.
The supported sampling rates are 11, 22, 44 and
48 KHz.
To avoid reading and display problems, we
recommend choosing file names less than 20
characters long that do not contain any special
characters (e.g. “ ? . ; ù).Use only USB memory sticks in FAT32 format
(File Allocation Table).
We recommend using the original USB
cable for the portable device.
Telephone
USB sockets
Depending on equipment, for more information
on the USB sockets compatible with the
CarPlay
®, MirrorLinkTM or Android Auto
applications, refer to the "Ease of use and
comfort" section.
The synchronisation of a smartphone allows users to display applications
adapted to the CarPlay
®, MirrorLinkTM or Android Auto technology of the smartphone on the vehicle screen. For the CarPlay®
technology, the CarPlay® function must be
activated on the smartphone beforehand.
For the communication process between
the smartphone and the system to work, it is
essential in all cases that the smartphone is
unlocked.
As the principles and standards are
constantly changing, it is recommended
that you keep the smartphone's operating
system up-to-date, as well as the date and
time of the smartphone and of the system .
For the list of eligible smartphones, go to the
Brand's national website.