2021 CITROEN C4 AIRCROSS DAG radio
[x] Cancel search: radioPage 5 of 244

3
Contents
bit.ly/helpPSA
Blind Spot Monitoring System 11 3
Parking sensors 11 4
Top Rear Vision 11 6
Park Assist 11 8
7Practical information
Compatibility of fuels 123
Refuelling 123
Misfuel prevention (Diesel) 124
Snow chains 124
Towbar with quickly detachable towball 125
Towing device 128
Energy economy mode 128
Roof bars 129
Bonnet 130
Engine compartment 131
Checking levels 131
Checks 133
AdBlue® (BlueHDi) 135
Advice on care and maintenance 137
8In the event of a breakdown
Running out of fuel (Diesel) 139
Tool kit 139
Temporary puncture repair kit 140
Spare wheel 143
Changing a bulb 146
Changing a fuse 150
12 V battery 152
Towing 156
9Technical data
Engine technical data and towed loads 158
Petrol engines 159
Diesel engines 161
Dimensions 162
Identification markings 162
10Bluetooth® audio system
First steps 164
Steering mounted controls 164
Menus 165
Radio 166
DAB (Digital Audio Broadcasting) radio 167
Media 168
Telephone 170
Frequently asked questions 173
11CITROËN Connect Radio
First steps 176
Steering mounted controls 177
Menus 178
Applications 179
Radio 179
DAB (Digital Audio Broadcasting) radio 181
Media 181
Telephone 183
Settings 186
Frequently asked questions 188
12CITROËN Connect Nav
First steps 190
Steering mounted controls 191
Menus 192
Voice commands 193
Navigation 195
Connected navigation 197
Applications 199
Radio 202
DAB (Digital Audio Broadcasting) radio 203
Media 204
Telephone 205
Settings 208
Frequently asked questions 210
■
Alphabetical index
Access to additional videos
Page 6 of 244

4
Overview
Instruments and controls
1Bonnet release
2 Dashboard fuses 3
Courtesy lamp
Warning lamps display for seat belts and front
passenger airbag
Panoramic opening sunroof controls
Interior rear view mirror
Emergency and assistance call buttons
4 Monochrome screen with audio system
Touch screen with CITROËN Connect Radio
or CITROËN Connect Nav
5 Ventilation
Heating
Manual air conditioning
Automatic air conditioning
Front demisting / defrosting
Rear screen demisting / defrosting
6 START/STOP button
Gearbox controls
7 Parking brake
8 USB socket
12 V socket
9Horn
10 Instrument panel
Steering mounted controls
1External lighting controls / Direction indicators
2 Wiper controls / Screenwash / Trip computer
3 Audio system setting controls
4 Cruise control / speed limiter controls
Side control bar
Reinitialisation of the tyre under-inflation
detectionDeactivation of the Stop & Start
Activation of the heated windscreen
OFF Lane departure warning system
Electric child lock
Page 19 of 244

17
Instruments
1Monochrome screen C
Displays in the screen
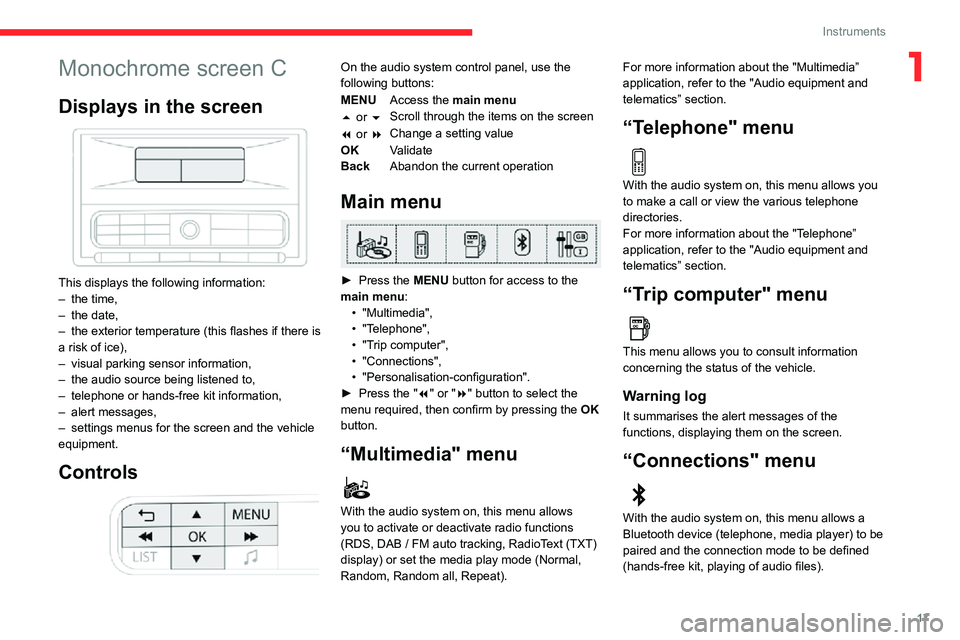
This displays the following information:– the time,– the date,– the exterior temperature (this flashes if there is a risk of ice),– visual parking sensor information,– the audio source being listened to,– telephone or hands-free kit information,– alert messages,– settings menus for the screen and the vehicle equipment.
Controls
On the audio system control panel, use the
following buttons:
MENUAccess the main menu
5 or 6 Scroll through the items on the screen
7 or 8 Change a setting value
OK Validate
Back Abandon the current operation
Main menu
► Press the MENU button for access to the
main menu:
• "Multimedia",• "Telephone",• "Trip computer",• "Connections",• "Personalisation-configuration".► Press the "7" or "8" button to select the
menu required, then confirm by pressing the OK
button.
“Multimedia" menu
With the audio system on, this menu allows
you to activate or deactivate radio functions
(RDS, DAB / FM auto tracking, RadioText (TXT) display) or set the media play mode (Normal,
Random, Random all, Repeat). For more information about the "Multimedia”
application, refer to the "Audio equipment and
telematics” section.
“Telephone" menu
With the audio system on, this menu allows you
to make a call or view the various telephone
directories.
For more information about the "Telephone”
application, refer to the "Audio equipment and
telematics” section.
“Trip computer" menu
This menu allows you to consult information
concerning the status of the vehicle.
Warning log
It summarises the alert messages of the
functions, displaying them on the screen.
“Connections" menu
With the audio system on, this menu allows a
Bluetooth device (telephone, media player) to be
paired and the connection mode to be defined
(hands-free kit, playing of audio files).
Page 20 of 244

18
Instruments
Menus
Radio Media.
See “Audio equipment and telematics”
section..
Mirror Screen or Connected navigation
(depending on equipment) .
See “Audio equipment and telematics” section..
Air conditioning.Allows adjustment of the various settings
for temperature, air flow, etc.
For more information on Heating, Manual air
conditioning and Automatic air conditioning ,
please refer to the corresponding sections.
Telephone.See “Audio equipment and telematics”
section..
Applications.
Allows the display of the connected
services available.
See “Audio equipment and telematics” section.
Vehicle or Driving (depending on
equipment) .
Allows the activation, deactivation and
adjustment of settings for certain functions.
For more information about the "Connections” application, refer to the "Audio equipment and
telematics” section.
“Personalisation-
configuration" menu
This menu gives access to the following
functions:
– “Define the vehicle parameters".– “Display configuration".
Define the vehicle parameters
This menu allows the following equipment to be
activated / deactivated, depending on the version
and/or country of sale:
"Lighting "
– "Directional headlamps",– "Follow-me-home headlamps",– "Welcome lighting"."Comfort"– "Rear wipe in reverse gear".
"Driving assistance"– Auto. emergency braking,– Fatigue Detection System,– Speed recommendation.For more information on the different equipment,
refer to the corresponding sections.
Display configuration
This menu allows you to change the language
used by the display from a defined list.
This menu gives access to the following settings:– “Choice of units".– “Date and time adjustment".– “Display personalisation".– “Choice of language".
As a safety measure, the driver must only
carry out operations that require
sustained attention when stationary.
Touch screen
The touch screen gives access to:– the heating / air conditioning controls,– menus for adjusting settings for vehicle functions and systems,– audio system and telephone controls and the display of associated information,
and, depending on equipment, allows:
– the display of alert messages and the visual parking sensors information,– the permanent display of the time and the exterior temperature (a blue warning lamp
appears when there is a risk of ice),
– access to the internet services and navigation system controls and the display of associated
information.
As a safety measure, the driver must
only carry out operations that require
sustained attention with the vehicle
stationary.
Some functions are not accessible when
driving.
Recommendations
This screen is of the capacitive type.
Use is possible in all temperatures.
Do not use pointed objects on the touch screen.
Do not touch the touch screen with wet hands.
Use a soft clean cloth to clean the touch screen.
Workflow
Use the buttons on each side of the touch screen
to access the menus, then use the buttons that
appear on the touch screen.
Certain functions may be displayed over 1 or 2
pages.
To deactivate / activate a function, press OFF/
ON.
To modify a setting (lighting duration, etc.) or
access additional information, press the symbol
for the function.
After a few moments with no action on the secondary page, the primary page is
displayed automatically.
Use this button to confirm.
Use this button to return to the previous page.
Page 21 of 244

19
Instruments
1Menus
Radio Media.
See “Audio equipment and telematics”
section..
Mirror Screen or Connected navigation
(depending on equipment) .
See “Audio equipment and telematics” section..
Air conditioning.Allows adjustment of the various settings
for temperature, air flow, etc.
For more information on Heating, Manual air
conditioning and Automatic air conditioning ,
please refer to the corresponding sections.
Telephone.See “Audio equipment and telematics”
section..
Applications.
Allows the display of the connected
services available.
See “Audio equipment and telematics” section.
Vehicle or Driving (depending on
equipment) .
Allows the activation, deactivation and
adjustment of settings for certain functions.
The functions accessible from this menu are
arranged under two tabs: " Vehicle settings" and
"Driving functions ".
Volume control / mute.See “Audio equipment and telematics”
section.
Press with three fingers on the touch
screen to access the menu carousel.
Upper bar
Certain information is displayed permanently in
the upper bar of the touch screen:
– Reminder of the air conditioning information, and access to a simplified menu (temperature
and air flow adjustment only).
– Reminder of information from the RadioMedia and Telephone menus and
navigation instructions (depending on
equipment).
– Notification zone (SMS and E-mail) (depending on equipment).– Access to the Settings.
Trip computer
Information displayed about the current journey
(range, fuel consumption, average speed, etc.).
Information display
Details are displayed successively.– The current information tab with:
• trip mileage.• range.• current fuel consumption.• the Stop & Start time counter .• information on the speed limit recognition system (depending on version).– Trip 1 with:• average speed.• average fuel consumption.• distance travelled for the first trip.Depending on your vehicle's equipment, a 2nd trip
is available.
– Trip 2 with:• average speed.• average fuel consumption.• distance travelled. for the second trip.Trips 1 and 2 are independent and are used
identically.
For example, trip 1 can be used for daily figures
and trip 2 for monthly figures.
► Press the button located on the end of the
wiper control stalk.
Page 50 of 244

48
Ease of use and comfort
Glove box
► To open the glove box, pull the handle
towards you.
It contains the front passenger airbag
deactivation switch.
12 V accessory sockets
► Always use the correct adapter to connect a
12 V accessory (max. power: 120 W).
Observe the maximum power rating to
avoid damaging your accessory.
The connection of an electrical device not approved by CITROËN, such as a
USB charger, may adversely affect the
operation of vehicle electrical systems,
causing faults such as poor radio reception or
interference with displays in the screens.
Wireless smartphone
charger
It allows wireless charging of a portable device
such as a smartphone, using the magnetic
induction principle, in accordance with the Qi 1.1
standard.
The portable device to be charged must be
compatible with the Qi standard, either by design
or by using a compatible holder or shell.
The charging area is identified by the Qi symbol.
The charger works with the engine running and
with the Stop & Start system in STOP mode.
Charging is managed by the smartphone.
With Keyless Entry and Starting, the charger’s
operation may be briefly disrupted when a door
is opened or the ignition is switched off.
Charging
► With the charging area clear , place a device in its centre.
When the portable device is detected, the
charger’s indicator lamp lights up green. It
remains lit for the whole time that the battery is
being charged.
The system is not designed to charge
multiple devices simultaneously.
Do not leave any metal objects (coins,
keys, vehicle remote control, etc.) in the
charging area while a device is being
charged, due to the risk of overheating or
interrupting the charging process.
Operating check
The state of the indicator lamp allows the
operation of the charger to be monitored.
Page 66 of 244

64
Safety
General safety
recommendations
Do not remove the labels attached in
different places on your vehicle. They
include safety warnings as well as
identification information for the vehicle.
For all work on your vehicle, use a
qualified workshop that has the technical
information, skills and equipment required, all
of which a CITROËN dealer is able to
provide.
Depending on country regulations,
certain safety equipment may be
mandatory: high visibility safety vests,
warning triangles, breathalysers, spare bulbs,
spare fuses, fire extinguisher, first aid kit, mud
flaps at the rear of the vehicle, etc.
Installing electrical accessories:
– The fitting of electrical equipment or accessories not approved by CITROËN may
cause excessive current consumption and
faults and failures with the electrical system
of your vehicle. Contact a CITROËN dealer
for information on the range of approved
accessories.
– As a safety measure, access to the diagnostic socket, used for the vehicle's
electronic systems, is reserved strictly for
CITROËN dealers or qualified workshops,
equipped with the special tools required (risk
of malfunctions of the vehicle's electronic
systems that could cause breakdowns or
serious accidents). The Manufacturer cannot
be held responsible if this advice is not
followed.
– Any modification or adaptation not intended or authorised by CITROËN or carried out
without meeting the technical requirements
defined by the Manufacturer will result in the
suspension of the commercial warranty.
Installation of accessory radio
communication transmitters
Before installing a radio communication
transmitter with an external aerial, you must
without fail contact a CITROËN dealer for
the specification of transmitters which can
be fitted (frequency, maximum power, aerial
position, specific installation requirements),
in line with the Vehicle Electromagnetic
Compatibility Directive (2004/104/EC).
Declarations of conformity for radio
equipment
The relevant certificates are available on the
http://service.citroen.com/ACddb/ website.
Hazard warning lamps
► Pressing the red button causes all the direction indicators to flash.
They can operate with the ignition off.
Automatic operation of hazard warning lamps
When braking in an emergency, depending on
the rate of deceleration, the hazard warning
lamps come on automatically. They switch off
automatically when you next accelerate.
They can be turned off by pressing the button
again.
Horn
► Press the central part of the steering wheel.
Emergency or assistance
call
* In accordance with the general conditions of use of the service, available from dealers and subject to technological and technical limitations.
** In areas covered by ‘Localised Emergency Call’ and ‘Localised Assistance Call’. The list of countries covered and telematic services provided is available from dealers or on the website for your country .
Page 157 of 244

155
In the event of a breakdown
8At the battery, it is only necessary to disconnect
the (+) terminal.
Quick-release terminal clamp
Disconnecting the (+) terminal
► Raise the lever A fully to release the clamp
B.
► Remove the clamp B by lifting it off.
Reconnecting the (+) terminal
► Raise the lever A fully.► Refit the open clamp B on the (+) terminal.► Push the clamp B fully down.► Lower the lever A to lock the clamp B.
Do not force the lever as locking will not
be possible if the clamp is not positioned
correctly; start the procedure again.
Following reconnection of the battery
After reconnecting the battery, turn on the
ignition and wait 1 minute before starting the
engine, in order to enable the electronic systems
to initialise.
For right-hand drive vehicles, when the
total distance recorder has reached 37
miles (60 km), it is necessary to wait approx.
15 minutes before starting the engine.
However, if minor problems persist following
this operation, contact a CITROËN dealer or a
qualified workshop.
Referring to the corresponding section, you must
yourself reinitialise or reset certain systems,
such as:
– the key with remote control or electronic key (depending on version),– the sunroof and its electric blind,– the electric windows,– the date and time,– the preset radio stations.
The Stop & Start system may not be
operational during the trip following the
first engine start.
In this case, the system will only be
available again after a continuous period of
immobilisation of the vehicle, a period which
depends on the exterior temperature and the
state of charge of the battery (up to about 8
hours).