2021 CHRYSLER VOYAGER warning
[x] Cancel search: warningPage 56 of 348

54GETTING TO KNOW YOUR VEHICLE
DAYTIME RUNNING LIGHTS (DRLS) —
I
F EQUIPPED
The headlights or LED light bars on your vehicle will
illuminate when the engine is started. This
provides a constant lights on condition until the
ignition is placed in the OFF position. If the parking
brake is applied, the Daytime Running Lights
(DRLs) will turn off.
NOTE:
For vehicles sold in Canada, the Daytime
Running Lights will automatically deactivate
when the front fog lights are turned on.
If allowed by law in the country in which the
vehicle was purchased, the Daytime Running
Lights can be turned on and off using the
Uconnect system
Úpage 142.
On some vehicles, the Daytime Running Lights
may deactivate, or reduce intensity, on one side
of the vehicle (when a turn signal is activated on
that side), or on both sides of the vehicle (when
the hazard warning lights are activated).
HIGH/LOW BEAM SWITCH
Push the multifunction lever toward the instrument
panel to switch the headlights to high beams.
Pulling the multifunction lever back will turn the
low beams on.
FLASH-TO-PASS
You can signal another vehicle with your headlights
by lightly pulling the multifunction lever toward you.
This will cause the high beam headlights to turn on,
and remain on, until the lever is released.
AUTOMATIC HEADLIGHTS — IF EQUIPPED
This system automatically turns your headlights on
or off based on ambient light levels. To turn the
system on, turn the headlight switch to the extreme
clockwise position aligning the indicator with the
AUTO on the headlight switch. When the system is
on, the Headlight Time Delay feature is also on.
This means your headlights will stay on for up to
90 seconds after the ignition is placed in the OFF
position. To turn the Automatic System off, turn the
headlight switch counterclockwise to the O (off)
position.
NOTE:The engine must be running before the headlights
will come on in the Automatic mode.
HEADLIGHT TIME DELAY — IF EQUIPPED
This feature provides the safety of headlight
illumination for up to 90 seconds after exiting your
vehicle. To activate the delay feature, place the ignition in
the OFF position while the headlights are still on.
The 90 second delay interval begins when
headlight switch is turned off. If the headlights or
parking lights are turned back on or the ignition is
placed in the ON position, the delay will be
cancelled.
When exiting the vehicle the driver can choose
to have the headlights remain on for 30, 60, or
90 seconds or not remain on. You can change the
timer setting through the Uconnect system
Úpage 142.
If the headlights are turned off before the ignition,
they will turn off in the normal manner.
NOTE:The headlights must be turned off within
45 seconds of placing the ignition in the OFF
position to activate this feature.
LIGHTS-ON REMINDER
If the headlights or the parking lights are left on
after the ignition is placed in the OFF position, the
vehicle will chime when the driver's door is opened.
FRONT FOG LIGHTS — IF EQUIPPED
To activate the front fog lights, turn on the parking
lights or the low beam headlights and push the
headlight switch control knob. Pushing the
headlight switch control knob a second time will
turn the front fog lights off.
21_RUV_OM_EN_USC_t.book Page 54
Page 57 of 348

GETTING TO KNOW YOUR VEHICLE55
Fog Light Switch
TURN SIGNALS
Move the multifunction lever up or down to
activate the turn signals. The arrows on each side
of the instrument cluster flash to show proper
operation.
NOTE:If either light remains on and does not flash, or
there is a very fast flash rate, check for a defective
outside light bulb.
Turn Signal Warning
If the vehicle electronics sense that the vehicle has
traveled for about 1 mile (1.6 km) with the turn signals on, a chime will sound and a message will
display in the cluster to alert the driver.
LANE CHANGE ASSIST — IF EQUIPPED
Tap the multifunction lever up or down once,
without moving beyond the detent, and the turn
signal (right or left) will flash three times then
automatically turn off.
BATTERY PROTECTION
This feature provides battery protection to avoid
wearing down the battery if the headlights or
parking lights are left on for extended periods of
time when the ignition is in the OFF position. After
eight minutes of the ignition being in the OFF
position and the headlight switch in any position
other than OFF or AUTO, the lights will turn off
automatically until the next cycle of the ignition or
headlight switch.
The battery protection feature will be disabled if
the ignition is placed in any position other than OFF
during the eight minute delay.
INTERIOR LIGHTS
INTERIOR COURTESY LIGHTS
The courtesy light switches are used to turn the
courtesy lights on/off.
Courtesy Light Switches
To operate the courtesy lights, push either the
driver or passenger light switch.
NOTE:
Before exiting the vehicle, make sure that the
interior lights are turned off. This will prevent the
battery from discharging once the doors are
closed.
If a light is left on, it will automatically be turned
off approximately 10 minutes after the ignition
is in the OFF position.
2
21_RUV_OM_EN_USC_t.book Page 55
Page 59 of 348

GETTING TO KNOW YOUR VEHICLE57
Washer And Wiper Controls
WINDSHIELD WIPER OPERATION
The wipers and washers are operated by a switch
within the wiper lever. Rotate the switch at the end
of the lever upward, to the first detent past the
intermittent settings for low-speed wiper
operation. Rotate the switch at the end of the lever
upward to the second detent past the intermittent
settings for high-speed wiper operation. To turn the
windshield wipers off, rotate the switch within the
lever all the way down to OFF.
Washer And Wiper Controls
NOTE:Always remove any buildup of snow that prevents
the windshield wiper blades from returning to the
off position. If the windshield wiper switch is turned
off and the blades cannot return to the off position,
damage to the wiper motor may occur.Intermittent Wipers
Use the intermittent wiper when weather
conditions make a single wiping cycle with a
variable pause between cycles desirable. Rotate
the switch at the end of the wiper lever to the first
detent position, and then turn the switch at the end
of the lever to select the desired delay interval.
There are four delay settings, which allow you to
regulate the wipe interval from a minimum of one
cycle every second to a maximum of approximately
36 seconds between cycles. The delay intervals
will double in duration when the vehicle speed is
10 mph (16 km/h) or less.
Windshield Washers
To use the washer, pull the lever rearward toward
you and hold. If the lever is pulled while on the
intermittent setting, the wipers will turn on and
operate for several wipe cycles after the lever is
released, and then resume the intermittent
interval previously selected. If the lever is pulled
while the wipers are in the off position, the wipers
will operate several cycles, then turn off.
WARNING!
Sudden loss of visibility through the windshield
could lead to a collision. You might not see other
vehicles or other obstacles. To avoid sudden
icing of the windshield during freezing weather,
warm the windshield with the defroster before
and during windshield washer use.
2
21_RUV_OM_EN_USC_t.book Page 57
Page 73 of 348

GETTING TO KNOW YOUR VEHICLE71
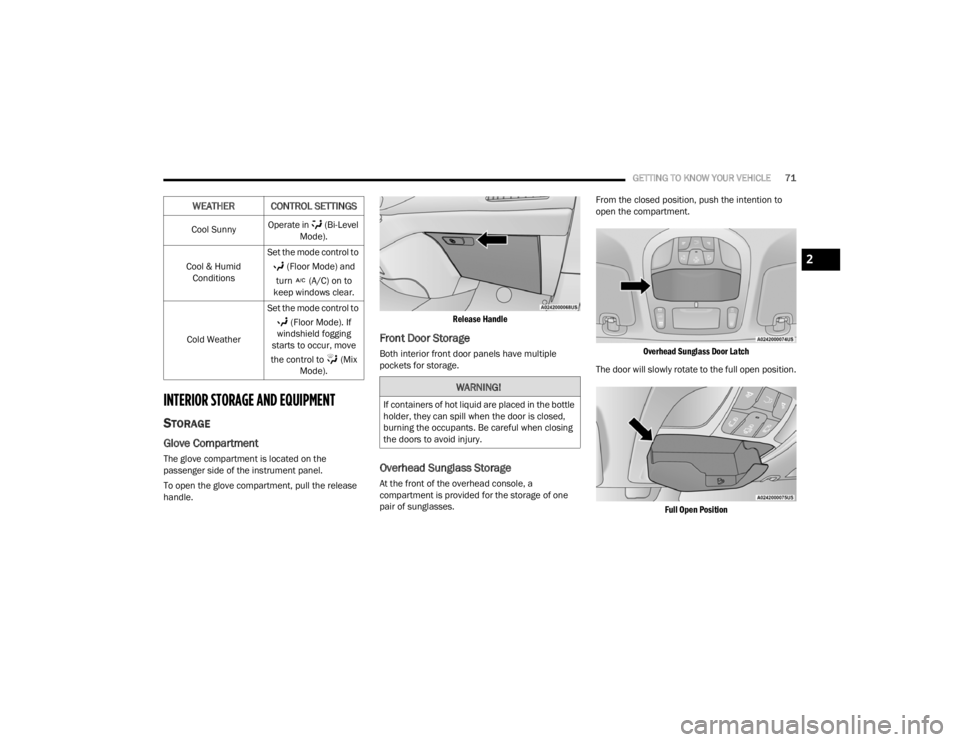
INTERIOR STORAGE AND EQUIPMENT
STORAGE
Glove Compartment
The glove compartment is located on the
passenger side of the instrument panel.
To open the glove compartment, pull the release
handle.
Release Handle
Front Door Storage
Both interior front door panels have multiple
pockets for storage.
Overhead Sunglass Storage
At the front of the overhead console, a
compartment is provided for the storage of one
pair of sunglasses.From the closed position, push the intention to
open the compartment.
Overhead Sunglass Door Latch
The door will slowly rotate to the full open position.
Full Open Position
Cool Sunny
Operate in (Bi-Level
Mode).
Cool & Humid Conditions Set the mode control to
(Floor Mode) and
turn (A/C) on to
keep windows clear.
Cold Weather Set the mode control to
(Floor Mode). If
windshield fogging
starts to occur, move
the control to (Mix Mode).
WEATHER CONTROL SETTINGS
WARNING!
If containers of hot liquid are placed in the bottle
holder, they can spill when the door is closed,
burning the occupants. Be careful when closing
the doors to avoid injury.
2
21_RUV_OM_EN_USC_t.book Page 71
Page 75 of 348

GETTING TO KNOW YOUR VEHICLE73
(Continued)
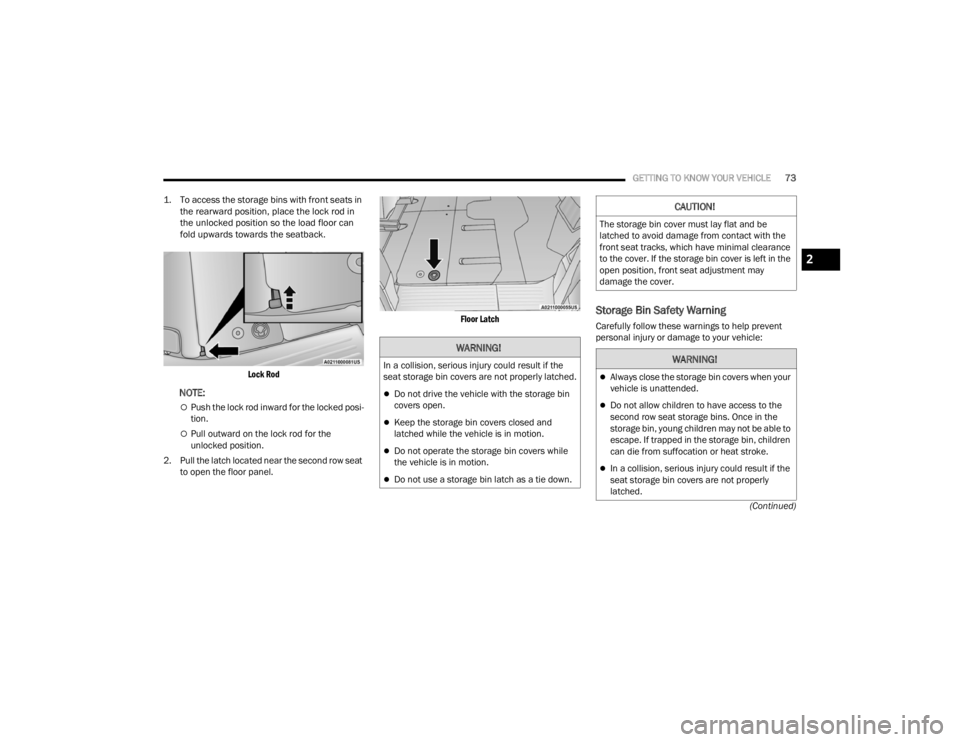
1. To access the storage bins with front seats in
the rearward position, place the lock rod in
the unlocked position so the load floor can
fold upwards towards the seatback.
Lock Rod
NOTE:
Push the lock rod inward for the locked posi -
tion.
Pull outward on the lock rod for the
unlocked position.
2. Pull the latch located near the second row seat to open the floor panel.
Floor Latch
Storage Bin Safety Warning
Carefully follow these warnings to help prevent
personal injury or damage to your vehicle:
WARNING!
In a collision, serious injury could result if the
seat storage bin covers are not properly latched.
Do not drive the vehicle with the storage bin
covers open.
Keep the storage bin covers closed and
latched while the vehicle is in motion.
Do not operate the storage bin covers while
the vehicle is in motion.
Do not use a storage bin latch as a tie down.
CAUTION!
The storage bin cover must lay flat and be
latched to avoid damage from contact with the
front seat tracks, which have minimal clearance
to the cover. If the storage bin cover is left in the
open position, front seat adjustment may
damage the cover.
WARNING!
Always close the storage bin covers when your
vehicle is unattended.
Do not allow children to have access to the
second row seat storage bins. Once in the
storage bin, young children may not be able to
escape. If trapped in the storage bin, children
can die from suffocation or heat stroke.
In a collision, serious injury could result if the
seat storage bin covers are not properly
latched.
2
21_RUV_OM_EN_USC_t.book Page 73
Page 76 of 348

74GETTING TO KNOW YOUR VEHICLE
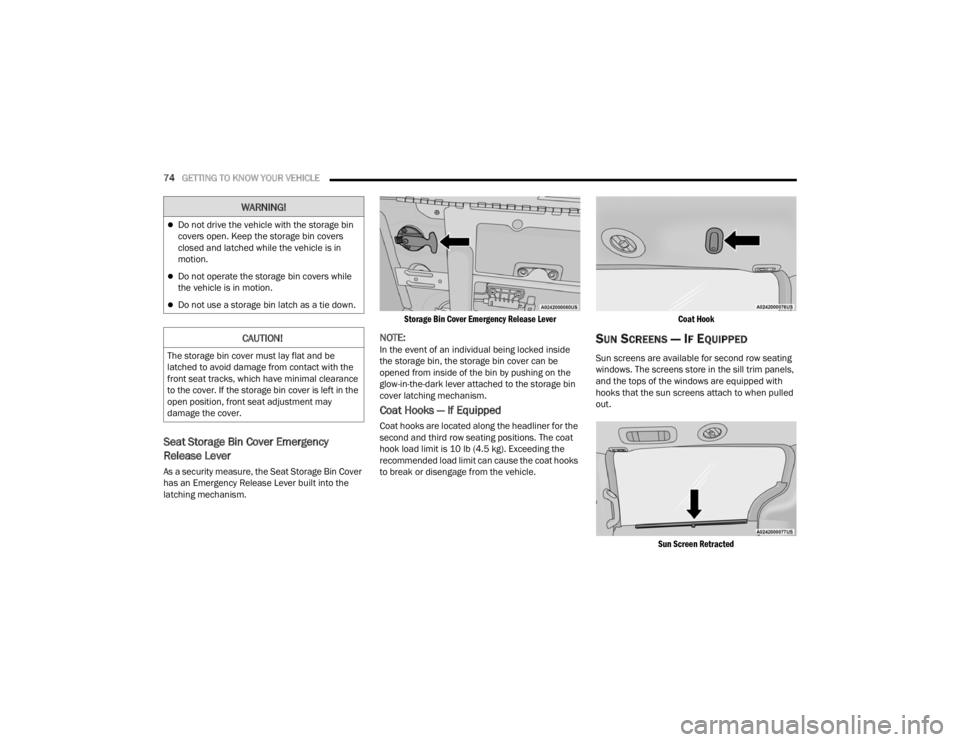
Seat Storage Bin Cover Emergency
Release Lever
As a security measure, the Seat Storage Bin Cover
has an Emergency Release Lever built into the
latching mechanism.
Storage Bin Cover Emergency Release Lever
NOTE:In the event of an individual being locked inside
the storage bin, the storage bin cover can be
opened from inside of the bin by pushing on the
glow-in-the-dark lever attached to the storage bin
cover latching mechanism.
Coat Hooks — If Equipped
Coat hooks are located along the headliner for the
second and third row seating positions. The coat
hook load limit is 10 lb (4.5 kg). Exceeding the
recommended load limit can cause the coat hooks
to break or disengage from the vehicle.
Coat Hook
SUN SCREENS — IF EQUIPPED
Sun screens are available for second row seating
windows. The screens store in the sill trim panels,
and the tops of the windows are equipped with
hooks that the sun screens attach to when pulled
out.
Sun Screen Retracted
Do not drive the vehicle with the storage bin
covers open. Keep the storage bin covers
closed and latched while the vehicle is in
motion.
Do not operate the storage bin covers while
the vehicle is in motion.
Do not use a storage bin latch as a tie down.
CAUTION!
The storage bin cover must lay flat and be
latched to avoid damage from contact with the
front seat tracks, which have minimal clearance
to the cover. If the storage bin cover is left in the
open position, front seat adjustment may
damage the cover.
WARNING!
21_RUV_OM_EN_USC_t.book Page 74
Page 79 of 348

GETTING TO KNOW YOUR VEHICLE77
The front power outlet is located at the bottom of
the instrument panel.
12 Volt Front Power Outlet
In addition to the front power outlets, there is also
a power outlet located in the rear cargo area.
The rear power outlet is located in the right rear
cargo area.
Rear Power Outlet Power Outlet Fuse Locations
1 — F95A (Ignition)/F95B (Battery) I/P Power
Outlet 10A (If Equipped)
2 — F85 Cigar Lighter 20A
3 — F60 RR Cargo Power Outlet 20A
WARNING!
To avoid serious injury or death:
Only devices designed for use in this type of
outlet should be inserted into any 12 Volt
outlet.
Do not touch with wet hands.
Close the lid when not in use and while driving
the vehicle.
If this outlet is mishandled, it may cause an
electric shock and failure.
CAUTION!
Many accessories that can be plugged in draw
power from the vehicle's battery, even when
not in use (i.e., cellular phones, etc.). Eventu
-
ally, if plugged in long enough, the vehicle's
battery will discharge sufficiently to degrade
battery life and/or prevent the engine from
starting.
Accessories that draw higher power (i.e.,
coolers, vacuum cleaners, lights, etc.) will
degrade the battery even more quickly. Only
use these intermittently and with greater
caution.
After the use of high power draw accessories,
or long periods of the vehicle not being started
(with accessories still plugged in), the vehicle
must be driven a sufficient length of time to
allow the generator to recharge the vehicle's
battery.
2
21_RUV_OM_EN_USC_t.book Page 77
Page 80 of 348

78GETTING TO KNOW YOUR VEHICLE
CIGAR LIGHTER — IF EQUIPPED
NOTE:Cigar lighters can be purchased at an authorized
dealer through Mopar® parts.
The cigar lighter is located at the bottom of the
instrument panel. Push lighter inward to heat.
After a few seconds, the lighter automatically
returns to its initial position and is ready to be
used.
SMOKER'S PACKAGE KIT — IF EQUIPPED
With the optional authorized dealer-installed
Smoker's Package Kit, a removable ash receiver is
inserted into one of the two cupholders in the
center floor console. To install the ash receiver,
align the receiver so the thumb grip on the lid is
facing rearward. Push the ash receiver into either
of the cup wells to secure. Pull upward on the ash
receiver to remove for cleaning and/or storage.
The left rear trim panel cupholder is designed to
accommodate a second ash receiver, if desired.
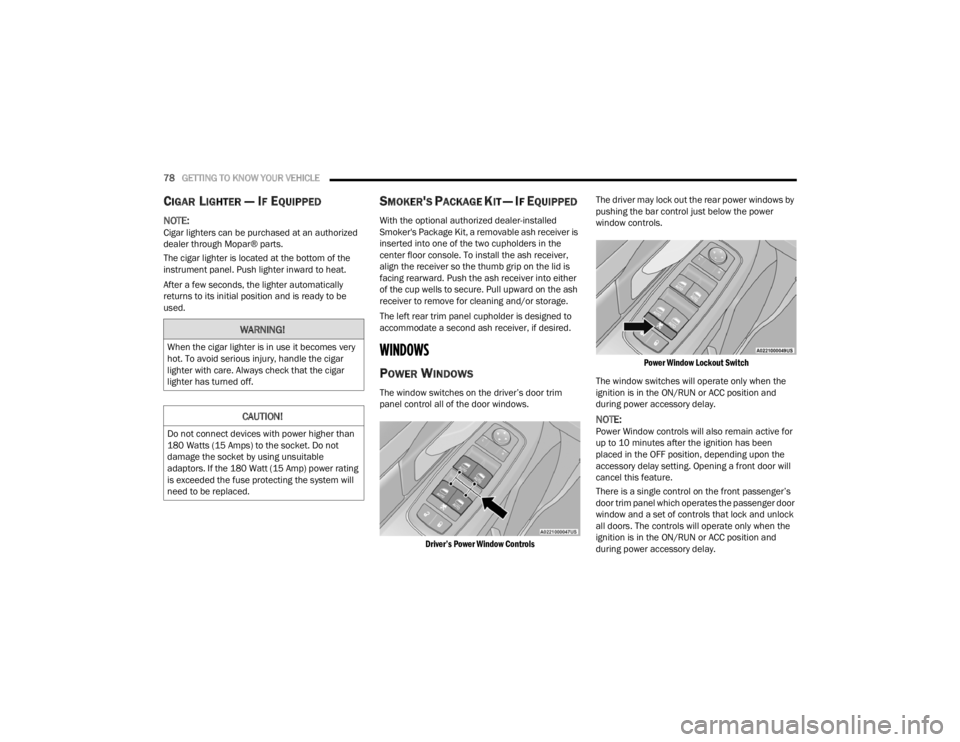
WINDOWS
POWER WINDOWS
The window switches on the driver’s door trim
panel control all of the door windows.
Driver’s Power Window Controls
The driver may lock out the rear power windows by
pushing the bar control just below the power
window controls.
Power Window Lockout Switch
The window switches will operate only when the
ignition is in the ON/RUN or ACC position and
during power accessory delay.
NOTE:Power Window controls will also remain active for
up to 10 minutes after the ignition has been
placed in the OFF position, depending upon the
accessory delay setting. Opening a front door will
cancel this feature.
There is a single control on the front passenger’s
door trim panel which operates the passenger door
window and a set of controls that lock and unlock
all doors. The controls will operate only when the
ignition is in the ON/RUN or ACC position and
during power accessory delay.
WARNING!
When the cigar lighter is in use it becomes very
hot. To avoid serious injury, handle the cigar
lighter with care. Always check that the cigar
lighter has turned off.
CAUTION!
Do not connect devices with power higher than
180 Watts (15 Amps) to the socket. Do not
damage the socket by using unsuitable
adaptors. If the 180 Watt (15 Amp) power rating
is exceeded the fuse protecting the system will
need to be replaced.
21_RUV_OM_EN_USC_t.book Page 78