2021 CHRYSLER VOYAGER service
[x] Cancel search: servicePage 122 of 348

120STARTING AND OPERATING
TO START THE ENGINE WHILE IN AUTO
S
TOP/START
While in a forward gear, the engine will start when
the brake pedal is released or the throttle pedal is
pressed. The transmission will automatically
re-engage upon engine restart.
Conditions That Will Cause The Engine To Start
Automatically While In Auto Stop/Start:
The transmission selector is moved out of
DRIVE.
To maintain cabin temperature comfort.
HVAC is set to full defrost mode.
HVAC system temperature or fan speed is
manually adjusted.
Battery voltage drops too low. During this time a
message will display "Stop/Start Not Ready
Battery Charging".
Stop/Start OFF switch is pushed.
A Stop/Start system error occurs.
TO MANUALLY TURN OFF THE
S
TOP/START SYSTEM
Stop/Start OFF Switch
Push the Stop/Start OFF switch (located on the
switch bank). The light on the switch will illuminate.
The “STOP/START OFF” message will appear in the
instrument cluster display and the autostop mode
will be disabled
Úpage 97.
NOTE:The Stop/Start system will reset itself back to the
ON mode every time the ignition is turned OFF and
back ON.
TO MANUALLY TURN ON THE
S
TOP/START SYSTEM
After turning off the Stop/Start system, push the
Stop/Start OFF switch again (located on the switch
bank). The light on the switch will turn off.
SYSTEM MALFUNCTION
If there is a malfunction in the Stop/Start system,
the system will not shut down the engine. A
“SERVICE STOP/START SYSTEM” message will
appear in the instrument cluster display and the
Stop/Start telltale will remain yellow
Úpage 89.
If the “SERVICE STOP/START SYSTEM” message
appears in the instrument cluster display, have the
system checked by an authorized dealer.
CRUISE CONTROL SYSTEMS — IF EQUIPPED
Your vehicle may be equipped with the Cruise
Control system for cruising at a constant preset
speed.
CRUISE CONTROL
When engaged, the Cruise Control takes over
accelerator operations at speeds greater than
25 mph (40 km/h).
The Cruise Control buttons are located on the right
side of the steering wheel.
21_RUV_OM_EN_USC_t.book Page 120
Page 128 of 348

126STARTING AND OPERATING
ENABLING AND DISABLING PARKSENSE
ParkSense can be enabled and disabled
with the ParkSense switch, located on
the switch panel below the Uconnect
display.
When the ParkSense switch is pushed to disable
the system, the instrument cluster will display the
“PARKSENSE OFF” message for approximately five
seconds. When the gear selector is moved to
REVERSE and the system is disabled, the
instrument cluster display will show the
“PARKSENSE OFF” message for as long as the
vehicle is in REVERSE.
The ParkSense switch LED will be on when
ParkSense is disabled or requires service. The
ParkSense switch LED will be off when the system
is enabled. If the ParkSense switch is pushed, and
requires service, the ParkSense switch LED will
blink momentarily, and then the LED will be on.
NOTE:When KeySense feature is present, the ParkSense
system will reject customer input to turn the
system off via the hard switch. The instrument
cluster display will show a "KeySense in Use
Selected Feature Cannot be Disabled" message.
SERVICE THE PARKSENSE REAR PARK
A
SSIST SYSTEM
During vehicle start up, when the ParkSense Rear
Park Assist system has detected a faulted
condition, the instrument cluster will actuate a
single chime, once per ignition cycle, and it will
display the “PARKSENSE UNAVAILABLE WIPE
REAR SENSORS” or the “PARKSENSE
UNAVAILABLE SERVICE REQUIRED”. When the
gear selector is moved to REVERSE and the system
has detected a faulted condition, the instrument
cluster display
Úpage 89 will show the
"PARKSENSE UNAVAILABLE WIPE REAR SENSORS"
or "PARKSENSE UNAVAILABLE SERVICE
REQUIRED" message for five seconds while the
vehicle is in REVERSE. The vehicle graphic will
remain displayed for as long as the vehicle is in
REVERSE.
If “PARKSENSE UNAVAILABLE WIPE REAR
SENSORS” appears in the instrument cluster
display, make sure the outer surface and the
underside of the rear fascia/bumper is clean and
clear of snow, ice, mud, dirt, or other obstruction
and then cycle the ignition. If the message
continues to appear, see an authorized dealer.
If “PARKSENSE UNAVAILABLE SERVICE
REQUIRED” appears in the instrument cluster
display, see an authorized dealer.
CLEANING THE PARKSENSE SYSTEM
Clean the ParkSense sensors with water, car wash
soap, and a soft cloth. Do not use rough or hard
cloths. Do not scratch or poke the sensors.
PARKSENSE SYSTEM USAGE
P
RECAUTIONS
NOTE:
Ensure that the rear bumper is free of snow, ice,
mud, dirt, and debris to keep the ParkSense
system operating properly.
Jackhammers, large trucks, and other vibra -
tions could affect the performance of Park -
Sense.
When you turn ParkSense off, the instrument
cluster will display “PARKSENSE OFF”. Further -
more, once you turn ParkSense off, it remains
off until you turn it on again, even if you cycle the
ignition.
When you move the gear selector to the
REVERSE position and ParkSense is turned off,
the instrument cluster display will show “PARK -
SENSE OFF” for as long as the vehicle is in
REVERSE.
21_RUV_OM_EN_USC_t.book Page 126
Page 140 of 348

138STARTING AND OPERATING
RECREATIONAL TOWING (BEHIND MOTORHOME)
TOWING THIS VEHICLE BEHIND ANOTHER VEHICLE
NOTE:
To avoid inadvertent Electric Park Brake (EPB) engagement, you must ensure that the Auto Park Brake feature is disabled before towing this vehicle
(if rear wheels are on the ground). The Auto Park Brake feature is enabled or disabled via the customer programmable features Úpage 142.
When towing your vehicle, always follow applicable state and provincial laws. Contact state and provincial Highway Safety offices for additional details.
If your vehicle is disabled and in need of commercial towing service, for further information Úpage 268.
DO NOT flat tow this vehicle. Damage to the drivetrain will result.
Towing Condition Wheel OFF The Ground FWD Models
Flat TowNONENOT ALLOWED
Dolly Tow Front
OK
Rear NOT ALLOWED
On Trailer ALLOK
CAUTION!
DO NOT flat tow this vehicle. Damage to the drivetrain will result. If this vehicle requires towing, make sure the drive wheels are OFF the ground.
Ensure that the EPB is released, and remains released, while being towed.
Towing this vehicle in violation of the above requirements can cause severe transmission damage. Damage from improper towing is not covered under the
New Vehicle Limited Warranty.
21_RUV_OM_EN_USC_t.book Page 138
Page 151 of 348

MULTIMEDIA149
Brakes
Rear ParkSense Volume This setting adjusts the volume of the Rear ParkSense system. The available settings are
“Low”, “Medium”, and “High”.
Rear ParkSense Braking Assist This setting will turn the Rear ParkSense Braking Assist on or off.
Sliding Door Alert This setting will turn the Sliding Door Alert on and off.
Blind Spot Alert — If Equipped This setting will change the type of alert provided when an object is detected in a vehicle’s blind spot. The
“Off” setting will turn off Blind Spot Alert. The “Lights” setting will activate the Blind Spot Alert lights on
the outside mirrors. The “Lights & Chime” setting will activate both the lights on the outside mirrors and
an audible chime.
Hill Start Assist This setting will turn the Hill Start Assist system on or off.
Setting Name Description
When the Brakes button is pressed on the touchscreen, the system will display settings related to the vehicle’s brake system.
Setting Name Description
Auto Park BrakeThis setting will turn the Auto Park Brake on or off.
Brake Service This setting will allow you to retract the brakes for servicing.
5
21_RUV_OM_EN_USC_t.book Page 149
Page 153 of 348

MULTIMEDIA151
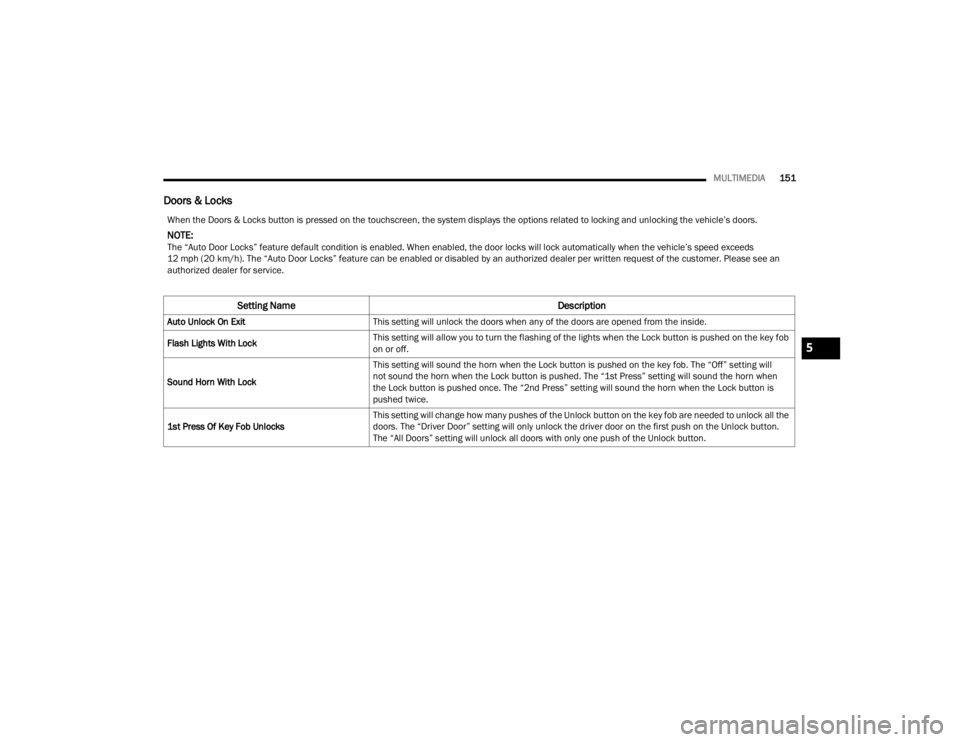
Doors & Locks
When the Doors & Locks button is pressed on the touchscreen, the system displays the options related to locking and unlocking the vehicle’s doors.
NOTE:The “Auto Door Locks” feature default condition is enabled. When enabled, the door locks will lock automatically when the vehicle’s speed exceeds
12 mph (20 km/h). The “Auto Door Locks” feature can be enabled or disabled by an authorized dealer per written request of the customer. Please see an
authorized dealer for service.
Setting Name Description
Auto Unlock On ExitThis setting will unlock the doors when any of the doors are opened from the inside.
Flash Lights With Lock This setting will allow you to turn the flashing of the lights when the Lock button is pushed on the key fob
on or off.
Sound Horn With Lock This setting will sound the horn when the Lock button is pushed on the key fob. The “Off” setting will
not sound the horn when the Lock button is pushed. The “1st Press” setting will sound the horn when
the Lock button is pushed once. The “2nd Press” setting will sound the horn when the Lock button is
pushed twice.
1st Press Of Key Fob Unlocks This setting will change how many pushes of the Unlock button on the key fob are needed to unlock all the
doors. The “Driver Door” setting will only unlock the driver door on the first push on the Unlock button.
The “All Doors” setting will unlock all doors with only one push of the Unlock button.
5
21_RUV_OM_EN_USC_t.book Page 151
Page 160 of 348

158MULTIMEDIA
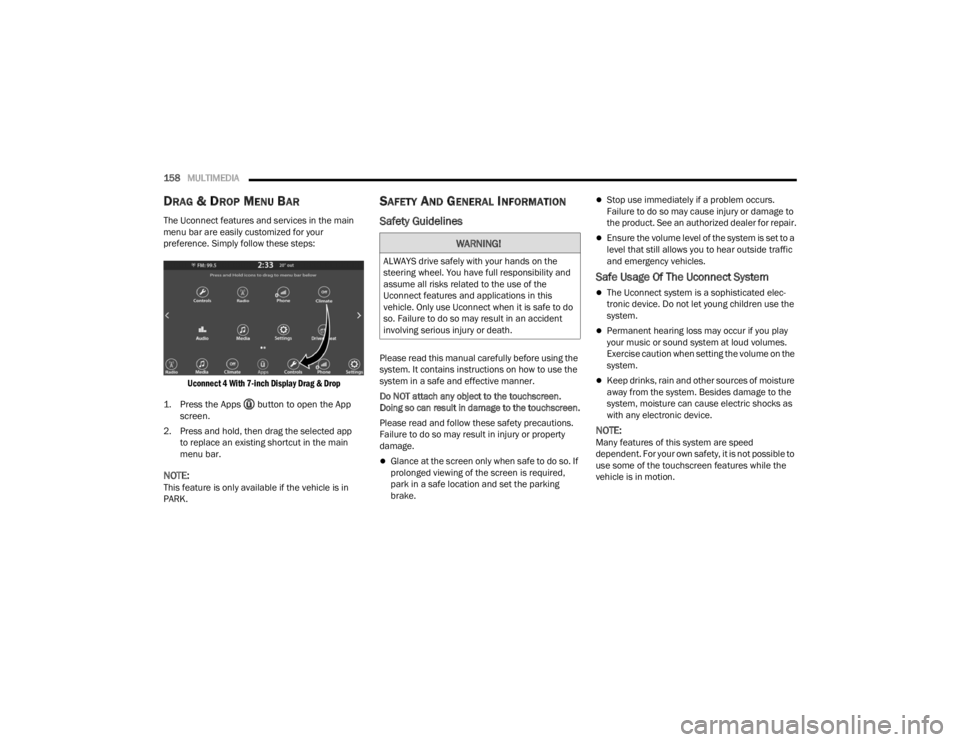
DRAG & DROP MENU BAR
The Uconnect features and services in the main
menu bar are easily customized for your
preference. Simply follow these steps:
Uconnect 4 With 7-inch Display Drag & Drop
1. Press the Apps button to open the App screen.
2. Press and hold, then drag the selected app to replace an existing shortcut in the main
menu bar.
NOTE:This feature is only available if the vehicle is in
PARK.
SAFETY AND GENERAL INFORMATION
Safety Guidelines
Please read this manual carefully before using the
system. It contains instructions on how to use the
system in a safe and effective manner.
Do NOT attach any object to the touchscreen.
Doing so can result in damage to the touchscreen.
Please read and follow these safety precautions.
Failure to do so may result in injury or property
damage.
Glance at the screen only when safe to do so. If
prolonged viewing of the screen is required,
park in a safe location and set the parking
brake.
Stop use immediately if a problem occurs.
Failure to do so may cause injury or damage to
the product. See an authorized dealer for repair.
Ensure the volume level of the system is set to a
level that still allows you to hear outside traffic
and emergency vehicles.
Safe Usage Of The Uconnect System
The Uconnect system is a sophisticated elec -
tronic device. Do not let young children use the
system.
Permanent hearing loss may occur if you play
your music or sound system at loud volumes.
Exercise caution when setting the volume on the
system.
Keep drinks, rain and other sources of moisture
away from the system. Besides damage to the
system, moisture can cause electric shocks as
with any electronic device.
NOTE:Many features of this system are speed
dependent. For your own safety, it is not possible to
use some of the touchscreen features while the
vehicle is in motion.
WARNING!
ALWAYS drive safely with your hands on the
steering wheel. You have full responsibility and
assume all risks related to the use of the
Uconnect features and applications in this
vehicle. Only use Uconnect when it is safe to do
so. Failure to do so may result in an accident
involving serious injury or death.
21_RUV_OM_EN_USC_t.book Page 158
Page 163 of 348

MULTIMEDIA161
Direct Tune
Press the Tune button located at the bottom of the
radio screen to directly tune to a desired radio
station or channel.
Press the available number button on the
touchscreen to begin selecting a desired station.
Once a number has been entered, any numbers
that are no longer possible (stations that cannot be
reached) will become deactivated/grayed out.
Undo
You can backspace an entry by pressing the
Back button on the touchscreen.
GO
Once the last digit of a station has been entered,
press “Ok”. The Direct Tune screen will close, and
the system will automatically tune to that station.
RADIO VOICE COMMANDS
Use your voice to quickly get to the AM, FM, or
SiriusXM® Satellite Radio stations you would like
to hear. (Subscription or included SiriusXM®
Satellite Radio trial required.)
Push the VR button on the steering wheel and
wait for the beep to say a command. See an
example below:
“ Tune to ninety-five-point-five FM”
“Tune to Satellite Channel Hits 1” Did You Know:
At any time, if you are not sure of
what to say or want to learn a Voice Command,
push the VR button and say “ Help”. The system
provides you with a list of commands.
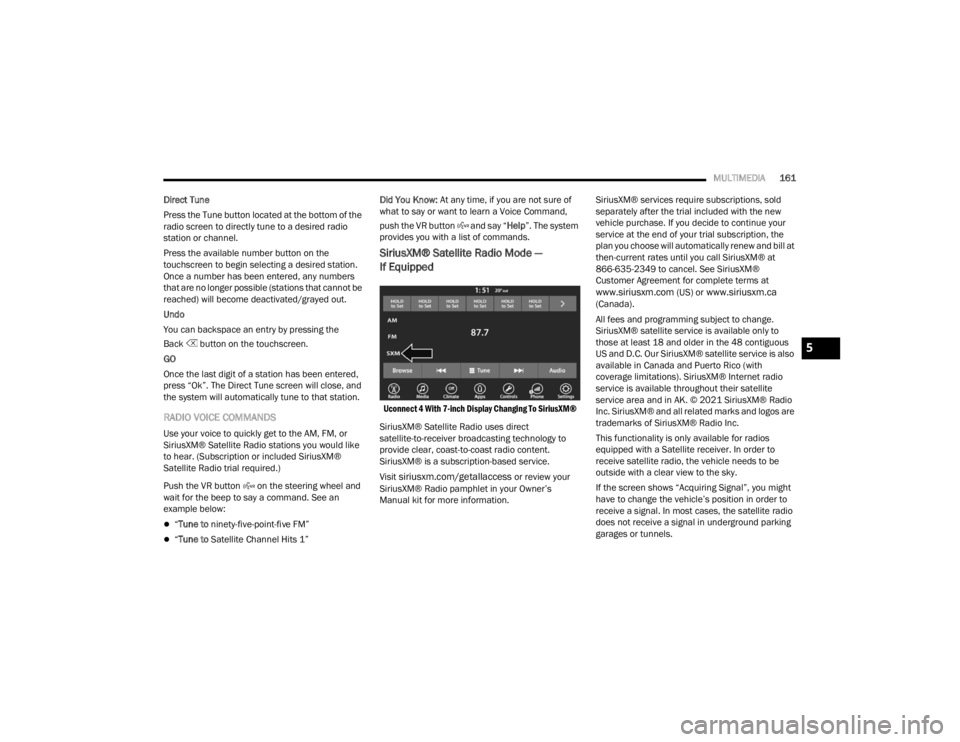
SiriusXM® Satellite Radio Mode —
If Equipped
Uconnect 4 With 7-inch Display Changing To SiriusXM®
SiriusXM® Satellite Radio uses direct
satellite-to-receiver broadcasting technology to
provide clear, coast-to-coast radio content.
SiriusXM® is a subscription-based service.
Visit
siriusxm.com/getallaccess or review your
SiriusXM® Radio pamphlet in your Owner’s
Manual kit for more information. SiriusXM® services require subscriptions, sold
separately after the trial included with the new
vehicle purchase. If you decide to continue your
service at the end of your trial subscription, the
plan you choose will automatically renew and bill at
then-current rates until you call SiriusXM® at
866-635-2349 to cancel. See SiriusXM®
Customer Agreement for complete terms at
www.siriusxm.com (US) or www.siriusxm.ca
(Canada).
All fees and programming subject to change.
SiriusXM® satellite service is available only to
those at least 18 and older in the 48 contiguous
US and D.C. Our SiriusXM® satellite service is also
available in Canada and Puerto Rico (with
coverage limitations). SiriusXM® Internet radio
service is available throughout their satellite
service area and in AK. © 2021 SiriusXM® Radio
Inc. SiriusXM® and all related marks and logos are
trademarks of SiriusXM® Radio Inc.
This functionality is only available for radios
equipped with a Satellite receiver. In order to
receive satellite radio, the vehicle needs to be
outside with a clear view to the sky.
If the screen shows “Acquiring Signal”, you might
have to change the vehicle’s position in order to
receive a signal. In most cases, the satellite radio
does not receive a signal in underground parking
garages or tunnels.
5
21_RUV_OM_EN_USC_t.book Page 161
Page 164 of 348

162MULTIMEDIA
No Subscription
Radios equipped with a Satellite receiver require a
subscription to the SiriusXM® Service. When the
radio does not have the necessary subscription,
the radio is able to receive the Preview channel
only.
Acquiring SiriusXM® Subscription
To activate the SiriusXM® Satellite Radio
subscription, US residents visit
siriusxm.com/
getallaccess or call: 1-800-643-2112
Canadian residents visit
https://
www.siriusxm.ca/ or call: 1-888-539-7474.
NOTE:You will need to provide the SiriusXM® ID (RID)
located at the bottom of the Channel 0 screen.
The Satellite Mode is activated by a press of the
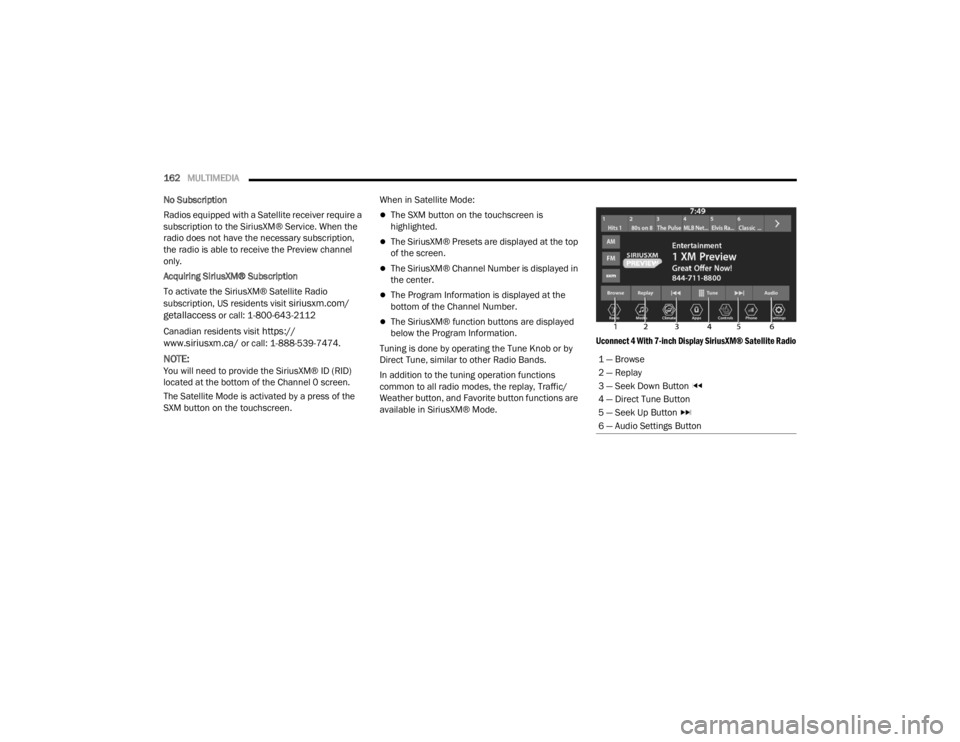
SXM button on the touchscreen. When in Satellite Mode:
The SXM button on the touchscreen is
highlighted.
The SiriusXM® Presets are displayed at the top
of the screen.
The SiriusXM® Channel Number is displayed in
the center.
The Program Information is displayed at the
bottom of the Channel Number.
The SiriusXM® function buttons are displayed
below the Program Information.
Tuning is done by operating the Tune Knob or by
Direct Tune, similar to other Radio Bands.
In addition to the tuning operation functions
common to all radio modes, the replay, Traffic/
Weather button, and Favorite button functions are
available in SiriusXM® Mode.
Uconnect 4 With 7-inch Display SiriusXM® Satellite Radio
1 — Browse
2 — Replay
3 — Seek Down Button
4 — Direct Tune Button
5 — Seek Up Button
6 — Audio Settings Button
21_RUV_OM_EN_USC_t.book Page 162