2021 CHRYSLER 300 power steering
[x] Cancel search: power steeringPage 4 of 268

2
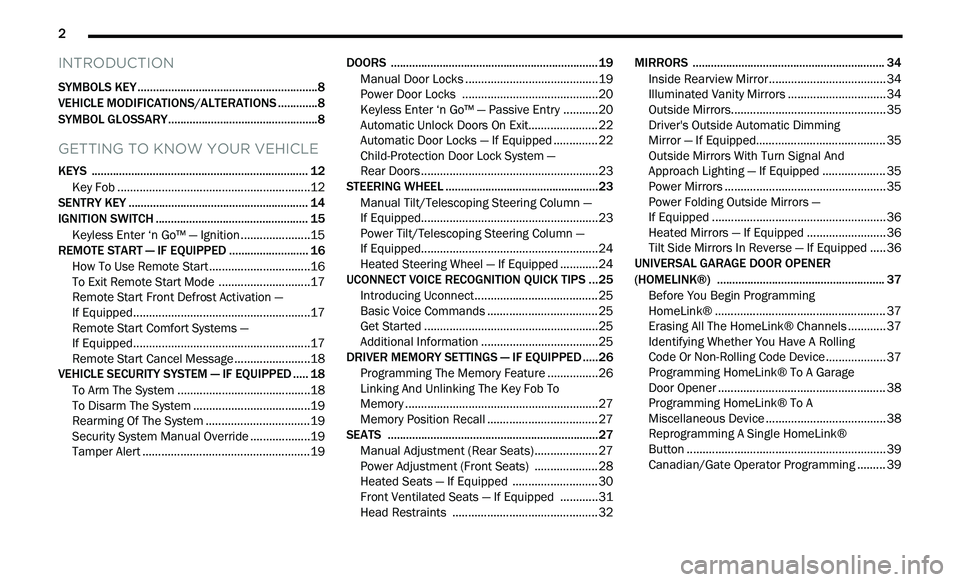
INTRODUCTION
SYMBOLS KEY ...........................................................8
VEHICLE MODIFICATIONS/ALTERATIONS .. ...........8
SYMBOL GLOSSARY.. ...............................................8
GETTING TO KNOW YOUR VEHICLE
KEYS ....................................................................... 12
Key Fob .............................................................12
S
ENTRY KEY . . ......................................................... 14
IGNITION SWITCH .. ................................................ 15
Keyless Enter ‘n Go™ — Ignition.. ....................15
REMOTE START — IF EQUIPPED . . ........................ 16
How To Use Remote Start .. ..............................16
To Exit Remote Start Mode . . ...........................17
Remote Start Front Defrost Activation —
If Equipped. .
......................................................17
Remote Start Comfort Systems —
If Equipped. .
......................................................17
Remote Start Cancel Message . . ......................18
VEHICLE SECURITY SYSTEM — IF EQUIPPED . . ... 18
To Arm The System .. ........................................18
To Disarm The System . . ...................................19
Rearming Of The System . . ...............................19
Security System Manual Override . . .................19
Tamper Alert . . ...................................................19 DOORS .
...................................................................19
M
anual Door Locks .. ........................................19
Power Door Locks . . .........................................20
Keyless Enter ‘n Go™ — Passive Entry . . .........20
Automatic Unlock Doors On Exit. . ....................22
Automatic Door Locks — If Equipped . . ............22
Child-Protection Door Lock System —
Rear Doors . .
......................................................23
STEERING WHEEL . . ................................................23
Manual Tilt/Telescoping Steering Column —
If Equipped. .
......................................................23
Power Tilt/Telescoping Steering Column —
If Equipped. .
......................................................24
Heated Steering Wheel — If Equipped . . ..........24
UCONNECT VOICE RECOGNITION QUICK TIPS . . .25
Introducing Uconnect .. .....................................25
Basic Voice Commands . . .................................25
Get Started . . .....................................................25
Additional Information . . ...................................25
DRIVER MEMORY SETTINGS — IF EQUIPPED . . ...26
Programming The Memory Feature .. ..............26
Linking And Unlinking The Key Fob To
Memory . ............................................................27
M
emory Position Recall . . .................................27
SEATS . ....................................................................27
M anual Adjustment (Rear Seats) .. ..................27
Power Adjustment (Front Seats) . . ..................28
Heated Seats — If Equipped . . .........................30
Front Ventilated Seats — If Equipped . . ..........31
Head Restraints . . ............................................32 MIRRORS .
.............................................................. 34
I
nside Rearview Mirror.. ................................... 34
Illuminated Vanity Mirrors . . ............................. 34
Outside Mirrors.................................................3 5
D river's Outside Automatic Dimming
Mirror — If Equipped. .
....................................... 35
Outside Mirrors With Turn Signal And
Approach Lighting — If Equipped . .
.................. 35
Power Mirrors . . ................................................. 35
Power Folding Outside Mirrors —
If Equipped . .
.....................................................36
Heated Mirrors — If Equipped . . ....................... 36
Tilt Side Mirrors In Reverse — If Equipped . . ... 36
UNIVERSAL GARAGE DOOR OPENER
(HOMELINK®) . .
..................................................... 37
Before You Begin Programming
HomeLink® . .
.................................................... 37
Erasing All The HomeLink® Channels . . .......... 37
Identifying Whether You Have A Rolling
Code Or Non-Rolling Code Device . .
................. 37
Programming HomeLink® To A Garage
Door Opener . .
................................................... 38
Programming HomeLink® To A
Miscellaneous Device . .
.................................... 38
Reprogramming A Single HomeLink®
Button . .............................................................. 39
C
anadian/Gate Operator Programming . . ....... 39
Page 6 of 268

4
STARTING AND OPERATING
STARTING THE ENGINE ......................................... 81
Automatic Transmission .. ...............................81
Keyless Enter ‘n Go™ — Ignition. . ....................81
Normal Starting . . ..............................................81
AutoPark . ..........................................................82
C old Weather Operation (Below –22°F Or
−30°C) . ............................................................83
I
f Engine Fails To Start . . ...................................83
After Starting. . ...................................................84
ENGINE BLOCK HEATER — IF EQUIPPED . . ......... 84
ENGINE BREAK-IN RECOMMENDATIONS .. ......... 84
PARKING BRAKE .. ................................................. 84
AUTOMATIC TRANSMISSION.. .............................. 85
Ignition Park Interlock .. ....................................86
Brake Transmission Shift Interlock (BTSI)
System . .............................................................87
8
-Speed Automatic Transmission . . .................87
SPORT MODE — IF EQUIPPED . . ............................ 91
FUEL SAVER TECHNOLOGY 5.7L ONLY —
IF EQUIPPED ..
......................................................... 92
POWER STEERING .. ............................................... 92
CRUISE CONTROL SYSTEMS — IF EQUIPPED .. . 92
Cruise Control .. ................................................92
Adaptive Cruise Control (ACC) . . .......................94PARKSENSE FRONT AND REAR PARK
ASSIST — IF EQUIPPED. .
..................................... 103
ParkSense Sensors .. ..................................... 103
ParkSense Display . . ...................................... 103
ParkSense Warning Display . . ....................... 106
Enabling And Disabling ParkSense . . ............ 106
Service The ParkSense Park Assist
System . .......................................................... 106
C
leaning The ParkSense System . . ............... 107
ParkSense System Usage Precautions. . ...... 107
LANESENSE — IF EQUIPPED . . ........................... 108
LaneSense Operation .. ................................. 108
Turning LaneSense On Or Off . . ..................... 108
LaneSense Warning Message . . .................... 108
Changing LaneSense Status . . ...................... 110
PARKVIEW REAR BACK UP CAMERA. . ............. 110
REFUELING THE VEHICLE .. ................................. 111
Emergency Fuel Filler Door Release .. .......... 112
VEHICLE LOADING . . ............................................ 113
Vehicle Certification Label .. .......................... 113
Gross Vehicle Weight Rating (GVWR) . . ........ 113
Gross Axle Weight Rating (GAWR) . . ............. 113
Overloading. . .................................................. 113
Loading . ......................................................... 113 T RAILER TOWING .
.
.............................................. 114
Common Towing Definitions.. ....................... 114
Trailer Hitch Classification. . .......................... 115
Trailer Towing Weights (Maximum Trailer
Weight Ratings) . .
........................................... 116
Trailer And Tongue Weight . . ........................ 116
Towing Requirements . . ................................. 116
Towing Tips . . ................................................. 118
RECREATIONAL TOWING (BEHIND
MOTORHOME) . .
.................................................... 119
DRIVING TIPS .. ..................................................... 119
Driving On Slippery Surfaces .. ...................... 119
Driving Through Water . . ............................... 120
MULTIMEDIA
UCONNECT SYSTEMS ......................................... 121
CYBERSECURITY ................................................. 121
UCONNECT SETTINGS .. ...................................... 122
Customer Programmable Features —
Uconnect 4C/4C NAV Settings . .
.................. 122
RADIO OPERATION AND MOBILE PHONES. . .... 136
Regulatory And Safety Information .. ............ 136
Page 11 of 268

9
Door Open Warning Light
Ú page 73
Electric Power Steering Fault Warning Light
Ú page 73
Electronic Throttle Control (ETC) Warning Light
Ú page 73
Engine Coolant Temperature Warning Light
Ú page 73
Oil Pressure Warning Light
Ú page 74
Oil Temperature Warning Light
Ú page 74
Seat Belt Reminder Warning Light
Ú page 73
Transmission Temperature Warning Light
Ú page 74
Red Warning Lights
Trunk Open Warning Light
Ú page 74
Vehicle Security Warning Light
Ú page 74
Yellow Warning Lights
Engine Check/Malfunction Indicator Warning Light (MIL)
Ú page 75
Electronic Stability Control (ESC) Active Warning Light
Ú page 75
Electronic Stability Control (ESC) OFF Warning Light
Ú page 75
Low Washer Fluid Warning Light
Ú page 75
Tire Pressure Monitoring System (TPMS) Warning Light
Ú page 76
Red Warning Lights
1
Page 19 of 268

GETTING TO KNOW YOUR VEHICLE 17
For security, power window operation is
disabled when the vehicle is in the Remote Start
mode.
Remote Start can only be used twice. The igni -
tion must be placed in the ON/RUN position
b e
fore the Remote Start sequence can be
repeated for a third cycle.
All of the following conditions must be met before
t h
e engine will remote start:
Gear selector in PARK
Doors closed
Hood closed
Trunk closed
Hazard switch off
Brake switch inactive (brake pedal not pressed)
Battery at an acceptable charge level
PANIC button not pushed
System not disabled from previous Remote
Start event
Vehicle Security Light is flashing
Ignition in OFF position
Fuel level meets minimum requirement
Vehicle Security system is not signaling an intru -
sion
Malfunction Indicator Light is not illuminated
TO EXIT REMOTE START MODE
To drive the vehicle after starting the Remote Start
system, either push and release the unlock button
on the key fob to unlock the doors, or unlock the
vehicle using Keyless Enter ‘n Go™ — Passive Entry
via the door handles, and disarm the Vehicle
Security system (if equipped). Then, prior to the
end of the 15 minute cycle, push and release the
S T
ART/STOP ignition button.
The Remote Start system will turn the engine off
wi
th another push and release of the Remote Start
button on the key fob, or if the engine is allowed to
run for the entire 15 minute cycle. Once the
i g
nition is placed in the ON/RUN position, the
climate controls will resume the previously set
operations (temperature, blower control, etc.).
NOTE:
To avoid unintentional shutdowns, the system
will disable for two seconds after receiving a
valid Remote Start request.
For vehicles equipped with the Keyless Enter ‘n
Go™ — Passive Entry feature, the message
“Remote Start Active — Push Start Button” will
display in the instrument cluster display until
you push the START/STOP ignition button.
REMOTE START FRONT DEFROST
A
CTIVATION — IF EQUIPPED
When Remote Start is active, and the outside
ambient temperature is 40°F (4.5°C) or below, the
system will automatically activate front defrost for
15 minutes or less. The time is dependent on the
a m
bient temperature. Once the timer expires, the
system will automatically adjust the settings
depending on ambient conditions. See “Remote
Start Comfort Systems — If Equipped” in the next
section for detailed operation.
REMOTE START COMFORT SYSTEMS —
I
F EQUIPPED
When Remote Start is activated, the front and rear
defrost will automatically turn on in cold weather.
The heated steering wheel and driver heated seat
feature will turn on if selected in the comfort menu
screen within Uconnect Settings
Ú page 122.
WARNING!
Do not start or run an engine in a closed
garage or confined area. Exhaust gas contains
Carbon Monoxide (CO) which is odorless and
colorless. Carbon Monoxide is poisonous and
can cause serious injury or death when
inhaled.
Keep key fobs away from children. Operation
of the Remote Start system, windows, door
locks or other controls could cause serious
injury or death.
2
Page 26 of 268

24 GETTING TO KNOW YOUR VEHICLE
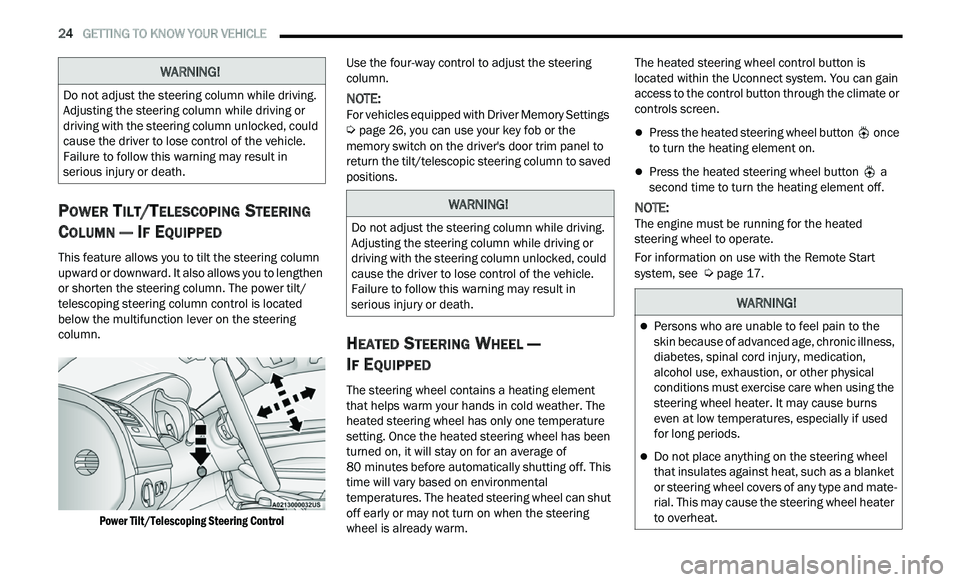
POWER TILT/TELESCOPING STEERING
C
OLUMN — IF EQUIPPED
This feature allows you to tilt the steering column
upward or downward. It also allows you to lengthen
or shorten the steering column. The power tilt/
telescoping steering column control is located
below the multifunction lever on the steering
column.
Power Tilt/Telescoping Steering Control
Use the four-way control to adjust the steering
c
ol
umn.
NOTE:
For vehicles equipped with Driver Memory Settings
Ú page 26, you can use your key fob or the
memory switch on the driver's door trim panel to
r e
turn the tilt/telescopic steering column to saved
positions.
HEATED STEERING WHEEL —
I
F EQUIPPED
The steering wheel contains a heating element
that helps warm your hands in cold weather. The
heated steering wheel has only one temperature
setting. Once the heated steering wheel has been
turned on, it will stay on for an average of
80 minutes before automatically shutting off. This
t i
me will vary based on environmental
temperatures. The heated steering wheel can shut
off early or may not turn on when the steering
wheel is already warm. The heated steering wheel control button is
l
oc
ated within the Uconnect system. You can gain
access to the control button through the climate or
controls screen.
Press the heated steering wheel button once
to turn the heating element on.
Press the heated steering wheel button a
second time to turn the heating element off.
NOTE:
The engine must be running for the heated
s t
eering wheel to operate.
For information on use with the Remote Start
sy
stem, see Ú page 17.
WARNING!
Do not adjust the steering column while driving.
Adjusting the steering column while driving or
driving with the steering column unlocked, could
cause the driver to lose control of the vehicle.
Failure to follow this warning may result in
serious injury or death.
WARNING!
Do not adjust the steering column while driving.
Adjusting the steering column while driving or
driving with the steering column unlocked, could
cause the driver to lose control of the vehicle.
Failure to follow this warning may result in
serious injury or death.
WARNING!
Persons who are unable to feel pain to the
skin because of advanced age, chronic illness,
diabetes, spinal cord injury, medication,
alcohol use, exhaustion, or other physical
conditions must exercise care when using the
steering wheel heater. It may cause burns
even at low temperatures, especially if used
for long periods.
Do not place anything on the steering wheel
that insulates against heat, such as a blanket
or steering wheel covers of any type and mate
-
rial. This may cause the steering wheel heater
t o
overheat.
Page 28 of 268

26 GETTING TO KNOW YOUR VEHICLE
Uconnect System Support:
US residents visit www.DriveUconnect.com or
call: 1-877-855-8400 (24 hours a day 7 days a
w e
ek)
Canadian residents visit www.DriveUconnect.ca
or call: 1-800-465-2001 (English) or
1 -
800-387-9983 (French)
SiriusXM Guardian™ services support:
US residents visit www.driveuconnect.com/
sirius-xm-guardian or call: 1-844-796-4827
Canadian residents visit https://www.driveuco-
nnect.ca/en/sirius-xm-guardian or call:
1-877-324-9091
DRIVER MEMORY SETTINGS — IF EQUIPPED
This feature allows the driver to save up to two
different memory profiles for easy recall through a
memory switch. Each memory profile saves
desired position settings for the following features:
Driver seat
Easy Entry/Exit seat operation (if equipped)
Side mirrors
Power tilt and telescopic steering column (if
equipped)
A set of desired radio station presets
NOTE:
Your vehicle is equipped with two key fobs, each
can be linked to either memory position 1 or 2.
Be sure to program the radio presets prior to
programming the memory settings.
The memory settings switch is located on the
dr
iver’s door trim panel. The switch consists of
three buttons:
The set (S) button, which is used to activate the
memory save function.
The (1) and (2) buttons which are used to recall
either of two saved memory profiles.
Memory Switch
PROGRAMMING THE MEMORY FEATURE
To create a new memory profile, perform the
following:
NOTE:
Saving a new memory profile will erase the
s e
lected profile from memory.
1. Place the vehicle’s ignition in the ON/RUN p
osition (do not start the engine).
2. Adjust all memory profile settings to desired p
references (i.e., seat, side mirror, power tilt
and telescopic steering column [if equipped],
and radio station presets).
3. Push and release the set (S) button on the m
emory switch, and then push the desired
memory button (1 or 2) within five seconds.
The instrument cluster display will display
which memory position has been set.
NOTE:
Memory profiles can be set without the vehicle in
P A
RK, but the vehicle must be in PARK to recall a
memory profile.
Page 62 of 268

60 GETTING TO KNOW YOUR VEHICLE
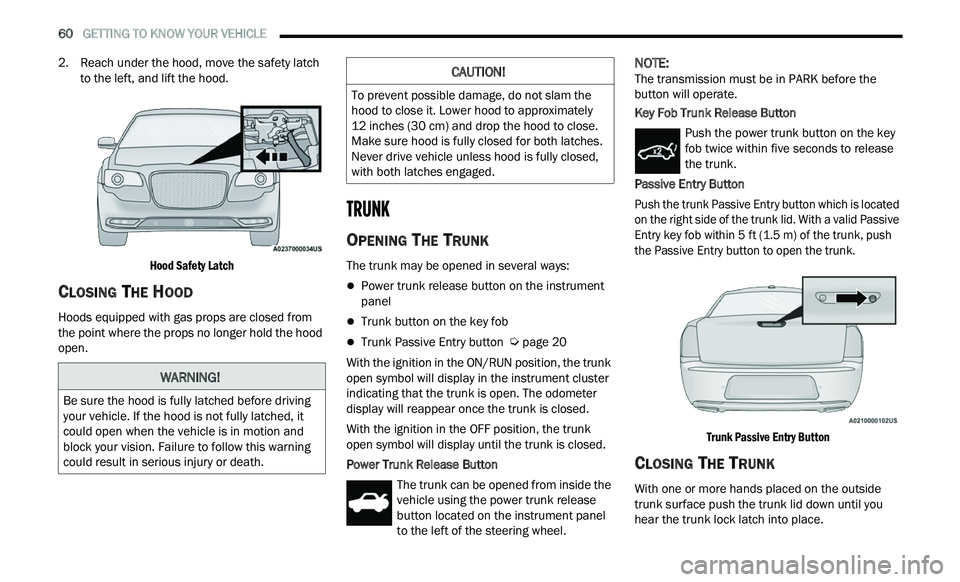
2. Reach under the hood, move the safety latch
to the left, and lift the hood.
Hood Safety Latch
CLOSING THE HOOD
Hoods equipped with gas props are closed from
the point where the props no longer hold the hood
open.
TRUNK
OPENING THE TRUNK
The trunk may be opened in several ways:
Power trunk release button on the instrument
panel
Trunk button on the key fob
Trunk Passive Entry button Ú page 20
With the ignition in the ON/RUN position, the trunk
op e
n symbol will display in the instrument cluster
indicating that the trunk is open. The odometer
display will reappear once the trunk is closed.
With the ignition in the OFF position, the trunk
ope
n symbol will display until the trunk is closed.
Power Trunk Release Button The trunk can be opened from inside the
vehicle using the power trunk release
bu
tton located on the instrument panel
to the left of the steering wheel.
NOTE:
The transmission must be in PARK before the
b u
tton will operate.
Key Fob Trunk Release Button
Push the power trunk button on the key
fob twice within five seconds to release
th
e trunk.
Passive Entry Button
Push the trunk Passive Entry button which is located
o n
the right side of the trunk lid. With a valid Passive
Entry key fob within 5 ft (1.5 m) of the trunk, push
th
e Passive Entry button to open the trunk.
Trunk Passive Entry Button
CLOSING THE TRUNK
With one or more hands placed on the outside
trunk surface push the trunk lid down until you
hear the trunk lock latch into place.
WARNING!
Be sure the hood is fully latched before driving
your vehicle. If the hood is not fully latched, it
could open when the vehicle is in motion and
block your vision. Failure to follow this warning
could result in serious injury or death.
CAUTION!
To prevent possible damage, do not slam the
hood to close it. Lower hood to approximately
12 inches (30 cm) and drop the hood to close.
Ma
ke sure hood is fully closed for both latches.
Never drive vehicle unless hood is fully closed,
with both latches engaged.
Page 75 of 268

GETTING TO KNOW YOUR INSTRUMENT PANEL 73
Seat Belt Reminder Warning Light
This warning light indicates when the
driver or passenger seat belt is
un
buckled. When the ignition is first
placed in the ON/RUN or ACC/ON/RUN
position and if the driver’s seat belt is unbuckled,
a chime will sound and the light will turn on. When
driving, if the driver or front passenger seat belt
remains unbuckled, the Seat Belt Reminder Light
will flash or remain on continuously and a chime
will sound
Ú page 151.
Battery Charge Warning Light
This warning light will illuminate when the
battery is not charging properly. If it stays
on
while the engine is running, there may
be a malfunction with the charging
system. Contact an authorized dealer as soon as
possible.
This indicates a possible problem with the
e l
ectrical system or a related component.
Door Open Warning Light
This indicator will illuminate when a door
is ajar/open and not fully closed.
NOTE:
If the vehicle is moving, there will also be a single
c h
ime.
Electric Power Steering Fault Warning
Light
This warning light will turn on when
there's a fault with the Electric Power
St
eering (EPS) system Ú page 92.
Electronic Throttle Control (ETC) Warning
Light
This warning light will illuminate to
indicate a problem with the ETC system.
I
f
a problem is detected while the vehicle
is running, the light will either stay on or
flash depending on the nature of the problem.
Cycle the ignition when the vehicle is safely and
completely stopped and the transmission is placed
in the PARK position. The light should turn off. If
the light remains on with the vehicle running, your
vehicle will usually be drivable; however, see an
authorized dealer for service as soon as possible.
NOTE:
This light may turn on if the accelerator and brake
p e
dals are pressed at the same time. If the light continues to flash when the vehicle is
r
u
nning, immediate service is required and you
may experience reduced performance, an
elevated/rough idle, or engine stall and your
vehicle may require towing. The light will come on
when the ignition is placed in the ON/RUN or ACC/
ON/RUN position and remain on briefly as a bulb
check. If the light does not come on during starting,
have the system checked by an authorized dealer.
Engine Coolant Temperature Warning
Light
This warning light warns of an
overheated engine condition. If the
e n
gine coolant temperature is too high,
this indicator will illuminate and a single
chime will sound. If the temperature reaches the
upper limit, a continuous chime will sound for four
minutes or until the engine is able to cool,
whichever comes first.
If the light turns on while driving, safely pull over
a n
d stop the vehicle. If the Air Conditioning (A/C)
system is on, turn it off. Also, shift the transmission
into NEUTRAL and idle the vehicle. If the
temperature reading does not return to normal,
turn the engine off immediately and call for service
Ú page 190.
WARNING!
Continued operation with reduced assist could
pose a safety risk to yourself and others. Service
should be obtained as soon as possible.3