2021 CHEVROLET SPARK change time
[x] Cancel search: change timePage 94 of 270

Chevrolet Spark Owner Manual (GMNA-Localizing-U.S./Canada-14622955) -
2021 - CRC - 8/17/20
Lighting 93
The3light comes on in the instrument
cluster while the high beams are on and the
ignition is on.
To return to low beams, push the lever
again or pull the lever toward you and
release.
Flash-to-Pass
This feature is used to signal to the vehicle
ahead that you want to pass.
Pull the turn signal lever toward you until
the high-beam headlamps come on, then
release the lever to turn them off.
Daytime Running Lamps (DRL)
DRL can make it easier for others to see the
front of your vehicle during the day. Fully
functional DRL are required on all vehicles
first sold in Canada.
The DRL system makes the headlamps come
on when the following conditions are met:
.The ignition is on.
.The exterior lamp control is in the AUTO.
.The vehicle is not parked.
.The light sensor determines it is daytime. When the DRL system is on, the taillamps,
sidemarker lamps, parking lamps, and
instrument panel lights do not come on
unless the exterior lamp control is turned to
the parking lamp or headlamp position.
The DRL system turns off when one of the
following conditions is met:
.The ignition is off.
.The vehicle is parked.
.The high-beam headlamps are on.
.The low-beam headlamps are on.
.The light sensor determines it is
nighttime.
For vehicles first sold in Canada, the DRL can
only be turned off when the vehicle is
parked.
The regular headlamp system should be
used when needed.
Automatic Headlamp System
When it is dark enough outside and the
exterior lamp control is in the automatic
position, the headlamps come on
automatically. See Exterior Lamp Controls
0 92.
The vehicle has a light sensor on top of the
instrument panel. Make sure it is not
covered, or the headlamps will be on when
they are not needed.
The system may also turn on the headlamps
when driving through a parking garage or
tunnel.
If the vehicle is started in a dark garage, the
automatic headlamp system comes on
immediately. If it is light outside when the
vehicle leaves the garage, there is a slight
delay before the automatic headlamp
system changes to the Daytime Running
Lamp (DRL). During that delay, the
instrument cluster may not be as bright as
usual. Make sure the instrument panel
Page 95 of 270

Chevrolet Spark Owner Manual (GMNA-Localizing-U.S./Canada-14622955) -
2021 - CRC - 8/17/20
94 Lighting
brightness control is in the full bright
position. SeeInstrument Panel Illumination
Control 095.
When it is bright enough outside, the
headlamps will turn off or may change
to DRL.
The automatic headlamp system turns off
when the exterior lamp control or the
ignition is off.
Lights On with Wipers
If the windshield wipers are activated in
daylight with the vehicle on, and the
exterior lamp control is in AUTO, the
headlamps, parking lamps, and other
exterior lamps come on. The transition time
for the lamps coming on varies based on
wiper speed. When the wipers are not
operating, these lamps turn off. Move the
exterior lamp control to
Por;to
disable this feature.
Hazard Warning Flashers
The hazard warning flasher button is on the
center stack.
|: Press to make the front and rear turn
signal lamps flash on and off. This warns
others that you are having trouble. Press
the button again to turn the flashers off.
When the hazard warning flashers are on,
the turn signals will not work.
Turn and Lane-Change Signals
Move the lever all the way up or down to
signal a turn.
An arrow on the instrument cluster flashes
in the direction of the turn or lane change.
Raise or lower the lever until the arrow
starts to flash to signal a lane change. Hold
it there until the lane change is completed.
If the lever is moved momentarily to the
lane change position, the arrow will flash
three times.
The lever returns to its starting position
whenever it is released.
If after signaling a turn or a lane change the
arrow flashes rapidly or does not come on, a
signal bulb may be burned out.
Page 97 of 270

Chevrolet Spark Owner Manual (GMNA-Localizing-U.S./Canada-14622955) -
2021 - CRC - 8/17/20
96 Lighting
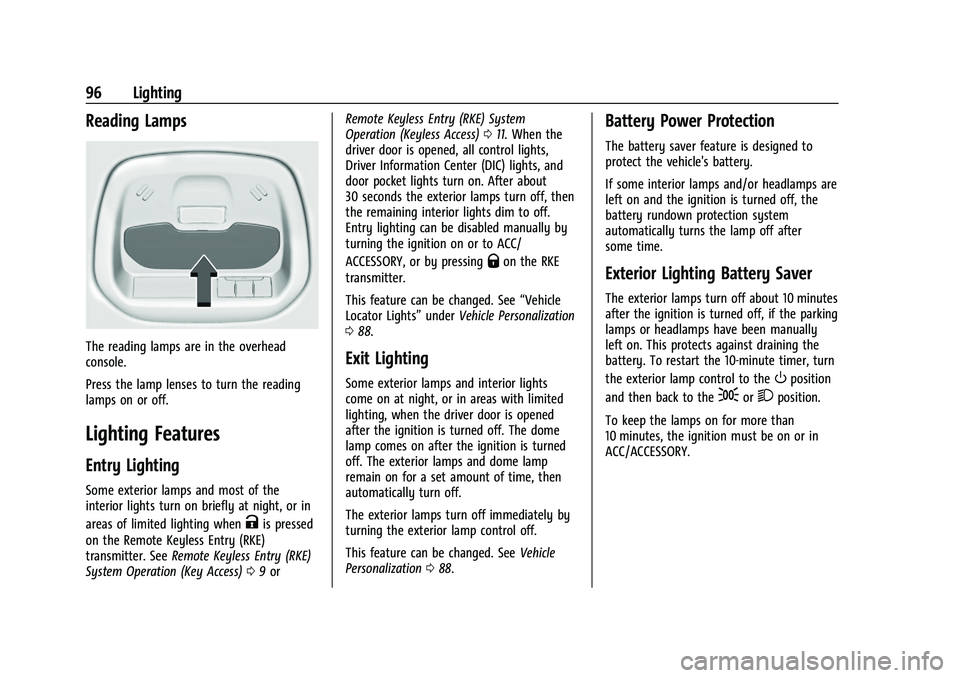
Reading Lamps
The reading lamps are in the overhead
console.
Press the lamp lenses to turn the reading
lamps on or off.
Lighting Features
Entry Lighting
Some exterior lamps and most of the
interior lights turn on briefly at night, or in
areas of limited lighting when
Kis pressed
on the Remote Keyless Entry (RKE)
transmitter. See Remote Keyless Entry (RKE)
System Operation (Key Access) 09or Remote Keyless Entry (RKE) System
Operation (Keyless Access)
011. When the
driver door is opened, all control lights,
Driver Information Center (DIC) lights, and
door pocket lights turn on. After about
30 seconds the exterior lamps turn off, then
the remaining interior lights dim to off.
Entry lighting can be disabled manually by
turning the ignition on or to ACC/
ACCESSORY, or by pressing
Qon the RKE
transmitter.
This feature can be changed. See “Vehicle
Locator Lights” underVehicle Personalization
0 88.
Exit Lighting
Some exterior lamps and interior lights
come on at night, or in areas with limited
lighting, when the driver door is opened
after the ignition is turned off. The dome
lamp comes on after the ignition is turned
off. The exterior lamps and dome lamp
remain on for a set amount of time, then
automatically turn off.
The exterior lamps turn off immediately by
turning the exterior lamp control off.
This feature can be changed. See Vehicle
Personalization 088.
Battery Power Protection
The battery saver feature is designed to
protect the vehicle's battery.
If some interior lamps and/or headlamps are
left on and the ignition is turned off, the
battery rundown protection system
automatically turns the lamp off after
some time.
Exterior Lighting Battery Saver
The exterior lamps turn off about 10 minutes
after the ignition is turned off, if the parking
lamps or headlamps have been manually
left on. This protects against draining the
battery. To restart the 10-minute timer, turn
the exterior lamp control to the
Oposition
and then back to the
;or2position.
To keep the lamps on for more than
10 minutes, the ignition must be on or in
ACC/ACCESSORY.
Page 110 of 270

Chevrolet Spark Owner Manual (GMNA-Localizing-U.S./Canada-14622955) -
2021 - CRC - 8/17/20
Infotainment System 109
Phone
Touch the Phone icon on the Home Page to
enter the phone main menu.
Audio System
When using the Bluetooth phone system,
sound comes through the vehicle's front
audio system speakers and overrides the
audio system. The volume level while on a
phone call can be adjusted by pressing the
steering wheel controls or by touching the
volume control on the center stack. The
adjusted volume level remains in memory
for later calls. The volume cannot be
lowered beyond a certain level.
Bluetooth (Pairing and Using a
Phone)
Pairing
A Bluetooth-enabled cell phone must be
paired to the Bluetooth system and then
connected to the vehicle before it can be
used. See the cell phone manufacturer's user
guide for Bluetooth functions before pairing
the cell phone.Pairing Information
.If no mobile device has been connected,
the Phone main page on the infotainment
display will show the Connect Phone
option. Touch this option to connect.
Another way to connect is to touch the
Phones tab at the top right of the display
and then touch Add Phone.
.A Bluetooth phone with music capability
can be paired to the vehicle as a phone
and a music player at the same time.
.Up to 10 devices can be paired to the
Bluetooth system.
.The pairing process is disabled when the
vehicle is moving.
.Pairing only needs to be completed once,
unless the pairing information on the cell
phone changes or the cell phone is
deleted from the system.
.If multiple paired cell phones are within
range of the system, the system connects
to the paired cell phone that is set to
First to Connect. If there is no phone set
to First to Connect, it will link to the
device which was used last. To link to a
different paired phone, see
“Linking to a
Different Phone” later in this section. Pairing a Phone
1. Make sure Bluetooth has been enabled on the cell phone before pairing is
started.
2. Touch the Phone icon on the Home Page or the phone shortcut on the
applications tray at the bottom of the
display.
3. Touch Phone at the top of the infotainment display. There is also an
Add option in the middle of the Phone
screen. Touching this Add Phone option
will shortcut to the Phone List menu.
4. Touch Add Phone.
5. Select the vehicle name shown on the infotainment display from your phone’s
Bluetooth Settings list.
6. Follow the instructions on the cell phone to confirm the six-digit code shown on
the infotainment display and touch Pair.
The code on the cell phone and
infotainment display will need to be
acknowledged for a successful pair.
7. Start the pairing process on the cell phone to be paired to the vehicle. See
the cell phone manufacturer's user guide
Page 114 of 270

Chevrolet Spark Owner Manual (GMNA-Localizing-U.S./Canada-14622955) -
2021 - CRC - 8/17/20
Infotainment System 113
To use Android Auto and/or Apple CarPlay:1. Download the Android Auto app to your smartphone from the Google Play store.
There is no app required for Apple
CarPlay.
2. Connect your Android smartphone or Apple iPhone by using the compatible
phone USB cable and plugging into a
USB data port. For best performance, use
the device’s factory-provided USB cable.
Aftermarket or third-party cables may
not work.
3. When the phone is first connected to activate Apple CarPlay or Android Auto,
the message “Device Projection Privacy
Consent” will appear.
.Touch Continue to launch Apple
CarPlay or Android Auto.
.Touch Disable to remove Apple
CarPlay and Android Auto capability
from the vehicle Settings menu.
Other functions may still work.
The Android Auto and Apple CarPlay icons
on the Home Page will illuminate depending
on the smartphone. Android Auto and/or
Apple CarPlay may automatically launch
upon USB connection. If not, touch the
Android Auto or Apple CarPlay icon on the
Home Page to launch. Press
{on the center stack to return to the
Home Page.
For further information on how to set up
Android Auto and Apple CarPlay in the
vehicle, see my.chevrolet.com or see
Customer Assistance Offices 0242.
Android Auto is provided by Google and is
subject to Google’s terms and privacy policy.
Apple CarPlay is provided by Apple and is
subject to Apple’s terms and privacy policy.
Data plan rates apply. For Android Auto
support see https://support.google.com/
androidauto. For Apple CarPlay support see
www.apple.com/ios/carplay/. Apple or
Google may change or suspend availability
at any time. Android Auto, Android, Google,
Google Play, and other marks are
trademarks of Google Inc.; Apple CarPlay is a
trademark of Apple Inc.
Press
{on the center stack to exit Android
Auto or Apple CarPlay. To enter back into
Android Auto or Apple CarPlay, press and
hold {on the center stack.
Apple CarPlay and Android Auto can be
disabled from the Infotainment system. To
do this, touch Home, Settings, and then touch the Apps tab along the top of the
display. Use the On/Off toggled to turn off
Apple CarPlay or Android Auto.
Settings
The Settings menu may be organized into
three categories. Select the desired category
by touching System, Apps, or Vehicle.
To access the menus:
1. Touch the Settings icon on the Home Page on the infotainment display.
2. Touch the desired category to display a list of available options.
3. Touch to select the desired feature setting.
4. Touch
9orRto turn off or on a feature.
5. Touch
zto go to the top level of the
Settings menu.
Page 115 of 270

Chevrolet Spark Owner Manual (GMNA-Localizing-U.S./Canada-14622955) -
2021 - CRC - 8/17/20
114 Infotainment System
The menu may contain the following:
System
The menu may contain the following:
Time / Date
Use the following features to set the clock:
.Automatic Time and Date: Touch On to
have the time and date automatically set.
When this feature is off, the time and
date can be manually set.
.Set Time: Touch to manually set the time
using the controls on the infotainment
display.
.Set Date: Touch to manually set the date
using the controls on the infotainment
display.
.Use 24-hour Format: Touch to specify the
clock format shown.
Touch Off or On.
Language
This will set the display language used on
the infotainment display. Touch Language
and select the appropriate language. Phones
Touch to connect to a different cell phone or
mobile device source, disconnect a cell
phone or media device, or delete a cell
phone or media device.
Wi-Fi Networks
This will show connected and available Wi-Fi
networks.
If a 4G LTE data package is not active on the
vehicle, the infotainment system can be
connected to an external protected Wi-Fi
network, such as a mobile device or home
hotspot, to utilize connected services.
Wi-Fi Hotspot
Touch and the following may display:.Wi-Fi Services: This allows devices to use
the vehicle hotspot.
Touch the controls on the infotainment
display to disable or enable.
.Wi-Fi Name: Touch to change the vehicle
Wi-Fi name.
.Wi-Fi Password: Touch to change the
vehicle Wi-Fi password.
.Connected Devices: Touch to show
connected devices.
.Share Hotspot Data: Touch Enable to
allow devices to use the vehicle hotspot
and its data, or touch Disable to allow
devices to only use the vehicle hotspot.
Privacy
Touch and the following may display:
.Location Services: The Off setting disables
sharing of the vehicle location. Emergency
services will not be affected when Off is
selected.
Display
Touch and the following may display:
.Calibrate Touchscreen: Touch to calibrate
the infotainment display and follow the
prompts.
.Turn Display Off: Touch to turn the
display off. Touch anywhere on the
infotainment display or press any
infotainment control on the center stack
again to turn the display on.
Sounds
Touch and the following may display:
.Maximum Startup Volume: This feature
adjusts the maximum volume of the
infotainment system when you start the
Page 118 of 270

Chevrolet Spark Owner Manual (GMNA-Localizing-U.S./Canada-14622955) -
2021 - CRC - 8/17/20
Infotainment System 117
.Re-sync Device Contacts:
This allows the device contacts to re-sync
if you are having difficulty accessing all of
the contacts on your cell phone.
.Delete All Vehicle Contacts: Touch to
delete all vehicle stored contacts.
.OnStar Phone TTY Mode: This enables
OnStar cell phone TTY mode.
Touch Disable or Enable.
Vehicle
This menu allows adjustment of different
vehicle features. SeeVehicle Personalization
0 88.
Trademarks and License
Agreements
FCC Information
See Radio Frequency Statement 0248.
Bluetooth
The Bluetooth word mark and logos are
owned by the Bluetooth
®SIG, Inc. and any
use of such marks by General Motors is
under license. Other trademarks and trade
names are those of their respective owners.
"Made for iPod," and "Made for iPhone,"
mean that an electronic accessory has been
designed to connect specifically to iPod or
iPhone, respectively, and has been certified
by the developer to meet Apple
performance standards. Apple is not
responsible for the operation of this device
or its compliance with safety and regulatory
standards. Please note that the use of this
accessory with iPod or iPhone may affect
wireless performance. iPhone, iPod, iPod
classic, iPod nano, iPod shuffle, and iPod
touch are trademarks of Apple Inc.,
registered in the U.S. and other countries.
Fees and Taxes: Subscription fee, taxes, one
time activation fee, and other fees may
apply. Subscription fee is consumer only. All
fees and programming subject to change.
Subscriptions subject to Customer
Agreement available at www.siriusxm.com
or www.siriusxm.ca. SiriusXM service only
available in the 48 contiguous United States
and Canada.
In Canada: Some deterioration of service
may occur in extreme northern latitudes.
This is beyond the control of SiriusXM
Satellite Radio.
Explicit Language Notice: Channels with
frequent explicit language are indicated with
an “XL” preceding the channel name.
Channel blocking is available for SiriusXM
Satellite Radio receivers by notifying
SiriusXM:
.USA Customers —See www.siriusxm.com
or call 1-888-601–6296.
.Canada Customers —See
www.siriusxm.ca or call 1-877-438-9677.
It is prohibited to copy, decompile,
disassemble, reverse engineer, hack,
manipulate, or otherwise make available any
technology or software incorporated in
receivers compatible with the SiriusXM
Satellite Radio System or that support the
Page 121 of 270

Chevrolet Spark Owner Manual (GMNA-Localizing-U.S./Canada-14622955) -
2021 - CRC - 8/17/20
120 Climate Controls
Air Delivery Mode Control :Turn clockwise
or counterclockwise to change the current
airflow mode.
Select from the following air delivery
modes:
Y: Air is directed to the instrument panel
outlets.
\: Air is divided between the instrument
panel and floor outlets.
[: Air is directed to the floor outlets.
W:This mode clears the windows of fog
or moisture. Air is directed to the floor,
windshield, and side window outlets.
1: This mode clears the windshield of fog
or frost more quickly. Air is directed to the
windshield and side window outlets.
Do not drive the vehicle until all windows
are clear.
In defrost or defog mode, excessive air
conditioning use can cause the windows to
fog. If this happens, change the air delivery
mode to
Yand reduce the fan speed.
A/C : If equipped with air conditioning,
follow these steps to use the system. Turn
Ato the desired speed. The air conditioning does not operate when the fan
control knob is in the off position. Press A/C
to turn the air conditioning on and off.
When A/C is pressed, an indicator light
comes on to show that the air conditioning
is on.
For quick cool down on hot days:
1. Open the windows to let hot air escape.
2. Press
M.
3. Press A/C.
4. Select the coolest temperature.
5. Select the highest
Aspeed.
Using these settings together for long
periods of time may cause the air inside the
vehicle to become too dry. To prevent this
from happening, after the air in the vehicle
has cooled, turn the recirculation mode off.
M: This mode recirculates and helps to
quickly cool the air inside the vehicle. It can
be used to reduce the entry of outside air
and odors.
Press
Mto turn the recirculation mode
on. An indicator light comes on to show
that the recirculation is on. Press
Magain
to return to outside air mode. Using the recirculation mode for extended
periods may cause the windows to fog.
If this happens, select the defrost mode.
If the air delivery mode is set to
Wor1,
A/C operation and outside air mode will be
fixed to defog or defrost as quickly as
possible regardless of indicator status.
Rear Window and Outside Mirror
Defogger
1: Press to turn the rear window and
outside mirror defogger on or off. An
indicator light comes on to show that the
feature is on.
The rear window defogger can be turned off
by pressing
1again or by turning the
ignition off or to ACC/ACCESSORY.
If equipped with heated outside mirrors,
they turn on with the rear window defogger
and help to clear fog or frost from the
surface of the mirror. See Heated Mirrors
0 21.
Caution
Using a razor blade or sharp object to
clear the inside rear window can damage
the rear window defogger. Repairs would
(Continued)