2021 CHEVROLET SILVERADO 1500 turn signal
[x] Cancel search: turn signalPage 34 of 463
Chevrolet Silverado 1500 Owner Manual (GMNA-Localizing-U.S./Canada/
Mexico/Paraguay-14632303) - 2021 - CRC - 11/9/20
Keys, Doors, and Windows 31
.Pressjagain to return to normal
operation.
Enable/Disable
To enable or disable the power assist steps,
press and hold
jfor four seconds. A DIC
message displays.
Cleaning
Clean the power assist steps regularly. For
an automatic car wash, extend the steps
while in N (Neutral) using the center stack
switch. The steps will stow when shifting
into D (Drive).
Vehicle Security
This vehicle has theft-deterrent features;
however, they do not make the vehicle
impossible to steal.
Vehicle Alarm System
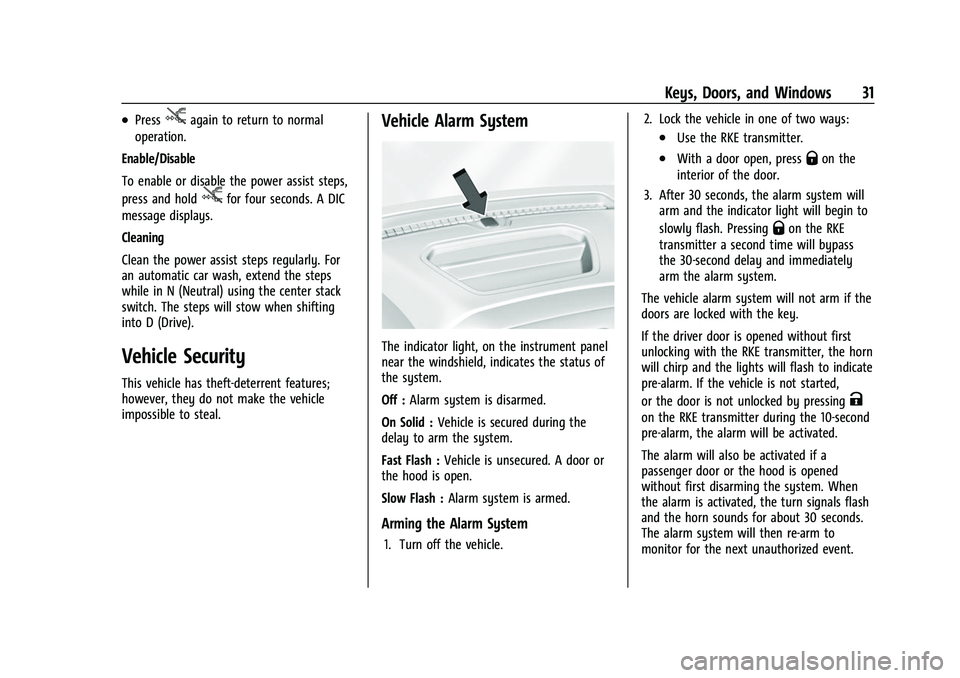
The indicator light, on the instrument panel
near the windshield, indicates the status of
the system.
Off : Alarm system is disarmed.
On Solid : Vehicle is secured during the
delay to arm the system.
Fast Flash : Vehicle is unsecured. A door or
the hood is open.
Slow Flash : Alarm system is armed.
Arming the Alarm System
1. Turn off the vehicle. 2. Lock the vehicle in one of two ways:
.Use the RKE transmitter.
.With a door open, pressQon the
interior of the door.
3. After 30 seconds, the alarm system will arm and the indicator light will begin to
slowly flash. Pressing
Qon the RKE
transmitter a second time will bypass
the 30-second delay and immediately
arm the alarm system.
The vehicle alarm system will not arm if the
doors are locked with the key.
If the driver door is opened without first
unlocking with the RKE transmitter, the horn
will chirp and the lights will flash to indicate
pre-alarm. If the vehicle is not started,
or the door is not unlocked by pressing
K
on the RKE transmitter during the 10-second
pre-alarm, the alarm will be activated.
The alarm will also be activated if a
passenger door or the hood is opened
without first disarming the system. When
the alarm is activated, the turn signals flash
and the horn sounds for about 30 seconds.
The alarm system will then re-arm to
monitor for the next unauthorized event.
Page 39 of 463

Chevrolet Silverado 1500 Owner Manual (GMNA-Localizing-U.S./Canada/
Mexico/Paraguay-14632303) - 2021 - CRC - 11/9/20
36 Keys, Doors, and Windows
Turn Signal Indicator
If equipped, the mirror has turn signal
indicator lights, which flash in the direction
of the turn or lane change.
Task Lighting
If equipped, task lighting projects light from
the outside mirrors to the sides of the
vehicle. SeeTask Lighting 0144.
Puddle Lamps
If equipped, puddle lamps project light from
the bottom of the mirror to the area of
ground below the driver and passenger
doors. See Entry Lighting 0146 and
Exit Lighting 0146.
Memory Mirrors
The vehicle may have memory mirrors. See
Memory Seats 049.
Lane Change Alert (LCA)
The vehicle may have LCA. See Lane Change
Alert (LCA) 0279.Folding Mirrors
Manual Folding Mirrors
If equipped, push the mirror toward the
vehicle to fold. Push the mirror outward to
return to its original position.
Manually fold the mirrors inward to prevent
damage when going through an automatic
car wash.
Power Folding Mirrors
If equipped, pressgto power fold the
mirrors. Press again to unfold. Resetting the Power Folding Mirrors
Reset the power folding mirrors if:
.The mirrors are accidentally obstructed
while folding.
.The mirrors are accidentally manually
folded/unfolded.
.The mirrors will not stay in the unfolded
position.
.The mirrors vibrate at normal driving
speeds.
Fold and unfold the mirrors one time using
the mirror controls to reset them to their
normal position. A noise may be heard
during the resetting of the power folding
mirrors. This sound is normal after a manual
folding operation.
Remote Mirror Folding
If equipped, press and holdQon the RKE
transmitter for approximately one second to
remotely fold the exterior mirrors. Press and
hold
Kon the RKE transmitter for
approximately one second to unfold. See
Remote Keyless Entry (RKE) System
Operation (Key Access) 010 or
Remote Keyless Entry (RKE) System
Operation (Keyless Access) 013.
Page 104 of 463
Chevrolet Silverado 1500 Owner Manual (GMNA-Localizing-U.S./Canada/
Mexico/Paraguay-14632303) - 2021 - CRC - 11/9/20
Instruments and Controls 101
seats when it is cold outside. The heated
steering wheel indicator light may not
come on.
SeeHeated and Ventilated Front Seats 052.
Horn
To sound the horn, pressaon the
steering wheel.
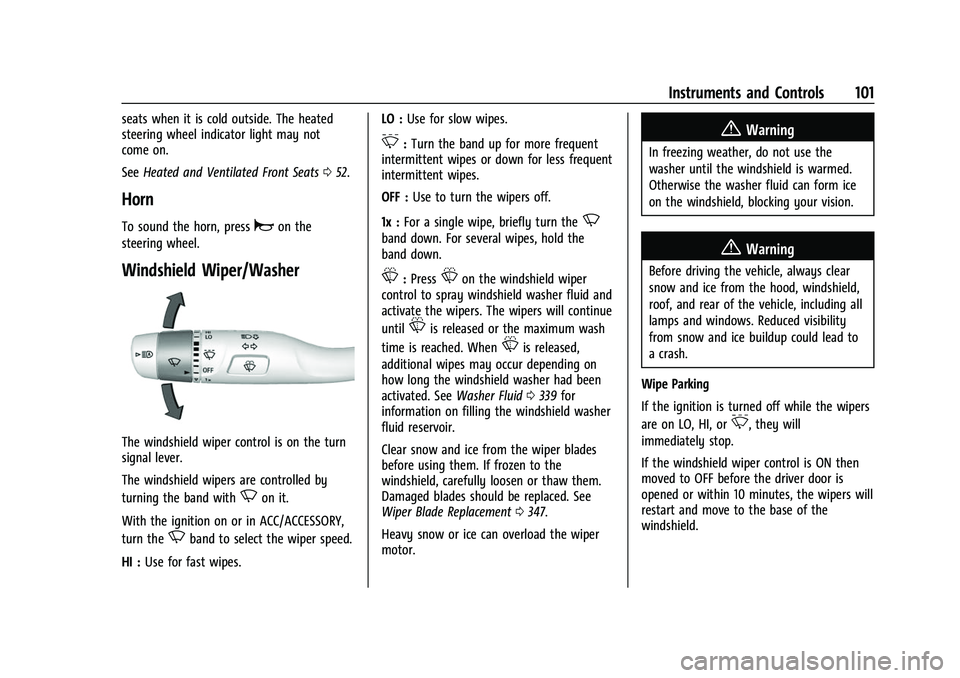
Windshield Wiper/Washer
The windshield wiper control is on the turn
signal lever.
The windshield wipers are controlled by
turning the band with
Non it.
With the ignition on or in ACC/ACCESSORY,
turn the
Nband to select the wiper speed.
HI : Use for fast wipes. LO :
Use for slow wipes.
3:Turn the band up for more frequent
intermittent wipes or down for less frequent
intermittent wipes.
OFF : Use to turn the wipers off.
1x : For a single wipe, briefly turn the
N
band down. For several wipes, hold the
band down.
L:PressLon the windshield wiper
control to spray windshield washer fluid and
activate the wipers. The wipers will continue
until
Lis released or the maximum wash
time is reached. When
Lis released,
additional wipes may occur depending on
how long the windshield washer had been
activated. See Washer Fluid0339 for
information on filling the windshield washer
fluid reservoir.
Clear snow and ice from the wiper blades
before using them. If frozen to the
windshield, carefully loosen or thaw them.
Damaged blades should be replaced. See
Wiper Blade Replacement 0347.
Heavy snow or ice can overload the wiper
motor.
{Warning
In freezing weather, do not use the
washer until the windshield is warmed.
Otherwise the washer fluid can form ice
on the windshield, blocking your vision.
{Warning
Before driving the vehicle, always clear
snow and ice from the hood, windshield,
roof, and rear of the vehicle, including all
lamps and windows. Reduced visibility
from snow and ice buildup could lead to
a crash.
Wipe Parking
If the ignition is turned off while the wipers
are on LO, HI, or
3, they will
immediately stop.
If the windshield wiper control is ON then
moved to OFF before the driver door is
opened or within 10 minutes, the wipers will
restart and move to the base of the
windshield.
Page 105 of 463

Chevrolet Silverado 1500 Owner Manual (GMNA-Localizing-U.S./Canada/
Mexico/Paraguay-14632303) - 2021 - CRC - 11/9/20
102 Instruments and Controls
If the ignition is turned off while the wipers
are performing wipes due to windshield
washing, the wipers continue to run until
they reach the base of the windshield.
Compass
The vehicle may have a compass display on
the Driver Information Center (DIC). The
compass receives its heading and other
information from the Global Positioning
System (GPS) antenna, Electronic Stability
Control (ESC), and vehicle speed information.
The compass system is designed to operate
for a certain number of miles or degrees of
turn before needing a signal from the GPS
satellites. When the compass display shows
CAL, drive the vehicle for a short distance in
an open area where it can receive a GPS
signal. The compass system will
automatically determine when a GPS signal
is restored and provide a heading again.
Clock
Set the time and date using the
infotainment system. See "Time / Date"
underSettings 0186.
Power Outlets
Accessory power outlets can be used to plug
in electrical equipment, such as a cell phone
or MP3 player.
Rear of Front Center Console
The vehicle has one accessory power outlet
under the climate control system and one
accessory power outlet on the rear of the
center console, if equipped, or on the rear of
the bench seat, if equipped.
Lift the cover to access and replace when
not in use.
{Warning
Power is always supplied to the outlets.
Do not leave electrical equipment
plugged in when the vehicle is not in use
because the vehicle could catch fire and
cause injury or death.
Caution
Leaving electrical equipment plugged in
for an extended period of time while the
vehicle is off will drain the battery.
Always unplug electrical equipment when
not in use and do not plug in equipment
that exceeds the maximum 15 amp
rating.
Certain power accessory plugs may not be
compatible with the accessory power outlet
and could overload vehicle or adapter fuses.
If a problem is experienced, see your dealer.
When adding electrical equipment, be sure
to follow the proper installation instructions
included with the equipment. See Add-On
Electrical Equipment 0317.
Page 122 of 463
Chevrolet Silverado 1500 Owner Manual (GMNA-Localizing-U.S./Canada/
Mexico/Paraguay-14632303) - 2021 - CRC - 11/9/20
Instruments and Controls 119
The light will flash when a shift is in
progress. Once the shift is complete the
light will be steady.
If the light turns amber, there may be a
malfunction with the four-wheel-drive
system. See your dealer.
SeeFour-Wheel Drive 0241.
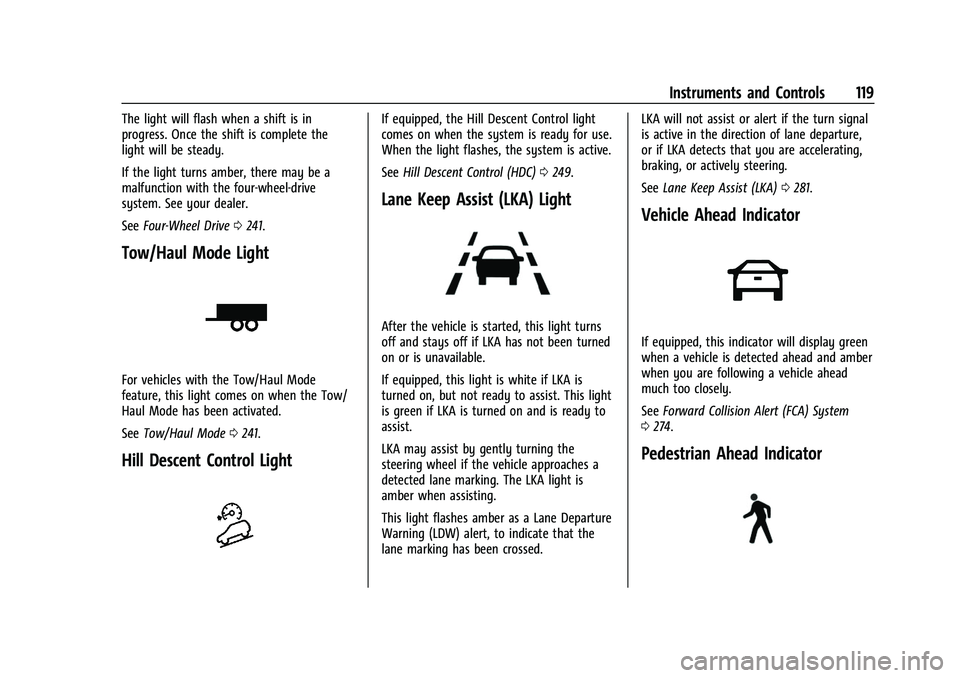
Tow/Haul Mode Light
For vehicles with the Tow/Haul Mode
feature, this light comes on when the Tow/
Haul Mode has been activated.
See Tow/Haul Mode 0241.
Hill Descent Control Light
If equipped, the Hill Descent Control light
comes on when the system is ready for use.
When the light flashes, the system is active.
See Hill Descent Control (HDC) 0249.
Lane Keep Assist (LKA) Light
After the vehicle is started, this light turns
off and stays off if LKA has not been turned
on or is unavailable.
If equipped, this light is white if LKA is
turned on, but not ready to assist. This light
is green if LKA is turned on and is ready to
assist.
LKA may assist by gently turning the
steering wheel if the vehicle approaches a
detected lane marking. The LKA light is
amber when assisting.
This light flashes amber as a Lane Departure
Warning (LDW) alert, to indicate that the
lane marking has been crossed. LKA will not assist or alert if the turn signal
is active in the direction of lane departure,
or if LKA detects that you are accelerating,
braking, or actively steering.
See
Lane Keep Assist (LKA) 0281.
Vehicle Ahead Indicator
If equipped, this indicator will display green
when a vehicle is detected ahead and amber
when you are following a vehicle ahead
much too closely.
See Forward Collision Alert (FCA) System
0 274.
Pedestrian Ahead Indicator
Page 138 of 463
Chevrolet Silverado 1500 Owner Manual (GMNA-Localizing-U.S./Canada/
Mexico/Paraguay-14632303) - 2021 - CRC - 11/9/20
Instruments and Controls 135
Ride Height
Touch and the following may display:
.Automatic Entry/Egress
Automatic Entry/Egress
This feature specifies if the vehicle will
automatically lower to make it easier to
enter or exit the vehicle.
Touch Off or On.
Running Boards
Touch and the following may display:
.Automatic Running Boards
.Deploy Running Boards
Automatic Running Boards
This feature specifies the position and use of
the running boards.
Touch Off or On.
Deploy Running Boards
This feature moves the running boards to a
deployed position so they can be used with
the doors closed.
Touch Off or Deploy.
Seating Position
Touch and the following may display:
.Seat Entry Memory
.Seat Exit Memory
Seat Entry Memory
This feature automatically recalls the
previously stored 1 or 2 button positions
when the ignition is changed from off to on
or ACC/ACCESSORY. See Memory Seats049.
Touch Off or On.
Seat Exit Memory
This feature automatically recalls the
previously stored exit button position when
the ignition is changed from on or ACC/
ACCESSORY to off and the driver door is
open. See Memory Seats 049.
Touch Off or On.
Suspension
Touch and the following may display:
.Service Mode
.Alignment Mode Service Mode
This feature disables the air suspension
system and is used to prevent unintended
raising or lowering of the suspension..
Touch Off or On.
Alignment Mode
This feature will optimize the vehicle height
to provide the most accurate wheel
alignment.
Touch Off or On.
Trailering
Touch and the following may display:
.Side Trailer Camera
.Bed View Camera Lighting
Side Trailer Camera
This feature specifies if using the turn signal
during a lane change will also display an
applicable side view of the trailer and
vehicle. See Assistance Systems for Parking
or Backing 0266.
Touch Off or On.
Page 139 of 463
Chevrolet Silverado 1500 Owner Manual (GMNA-Localizing-U.S./Canada/
Mexico/Paraguay-14632303) - 2021 - CRC - 11/9/20
136 Instruments and Controls
Bed View Camera Lighting
This feature specifies if the truck bed rail
lights are turned on when the Bed View
Camera is active. SeeAssistance Systems for
Parking or Backing 0266.
Touch Off or On.
Teen Driver
See “Teen Driver” underSettings 0186.
Valet Mode
This will lock the infotainment system and
steering wheel controls. It may also limit
access to vehicle storage locations,
if equipped.
To enable valet mode:
1. Enter a four-digit code on the keypad.
2. Select Enter to go to the confirmation screen.
3. Re-enter the four-digit code.
Touch Lock or Unlock to lock or unlock the
system. Touch Back to go back to the
previous menu.
Universal Remote System
See Radio Frequency Statement 0436.
Universal Remote System
Programming
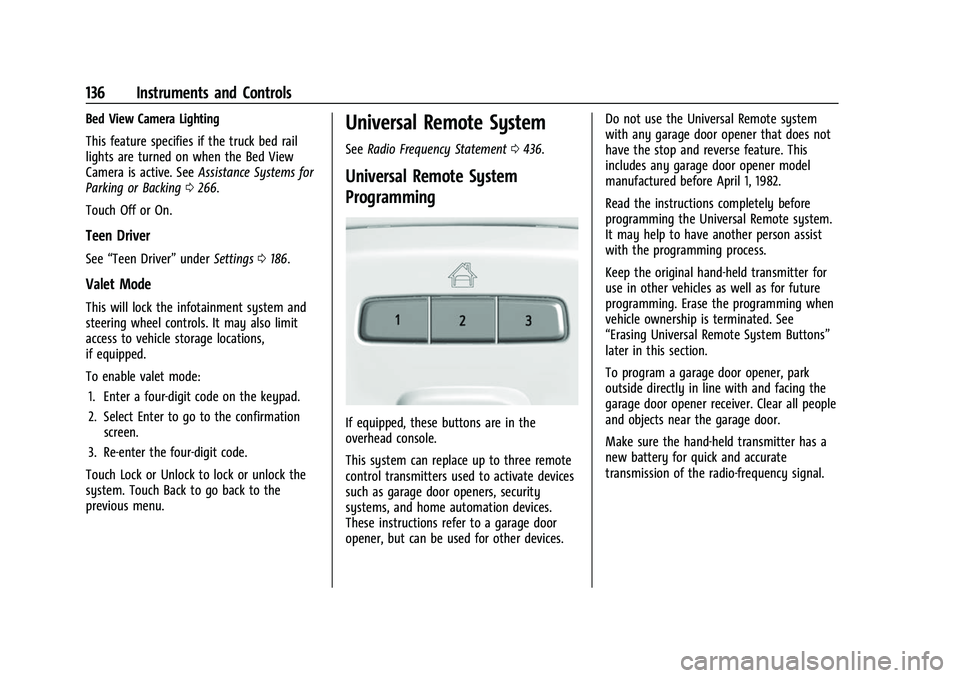
If equipped, these buttons are in the
overhead console.
This system can replace up to three remote
control transmitters used to activate devices
such as garage door openers, security
systems, and home automation devices.
These instructions refer to a garage door
opener, but can be used for other devices. Do not use the Universal Remote system
with any garage door opener that does not
have the stop and reverse feature. This
includes any garage door opener model
manufactured before April 1, 1982.
Read the instructions completely before
programming the Universal Remote system.
It may help to have another person assist
with the programming process.
Keep the original hand-held transmitter for
use in other vehicles as well as for future
programming. Erase the programming when
vehicle ownership is terminated. See
“Erasing Universal Remote System Buttons”
later in this section.
To program a garage door opener, park
outside directly in line with and facing the
garage door opener receiver. Clear all people
and objects near the garage door.
Make sure the hand-held transmitter has a
new battery for quick and accurate
transmission of the radio-frequency signal.
Page 140 of 463
Chevrolet Silverado 1500 Owner Manual (GMNA-Localizing-U.S./Canada/
Mexico/Paraguay-14632303) - 2021 - CRC - 11/9/20
Instruments and Controls 137
Programming the Universal Remote
System
For questions or programming help, see
www.homelink.com/gm or call
1-800-355-3515. For calls placed outside the
U.S., Canada, or Puerto Rico, international
rates will apply and may differ based on
landline or mobile phone.
Programming involves time-sensitive actions,
and may time out causing the procedure to
be repeated.
To program up to three devices:1. Hold the end of the hand-held transmitter about 3 to 8 cm (1 to 3 in)
away from the Universal Remote system
buttons with the indicator light in view.
The hand-held transmitter was supplied
by the manufacturer of the garage door
opener receiver.
2. Press and release one of the three Universal Remote system buttons to be
programmed. Press and hold the
hand-held transmitter button. Do not
release the hand-held transmitter button
until the indicator light changes from a
slow to a rapid flash or continuous light.
Then release the hand-held transmitter
button. Some garage door openers may require
substitution of Step 2 with the procedure
under
“Radio Signals for Some Gate
Operators” later in this section.
3. Press and hold the newly programmed Universal Remote system button for
five seconds while watching the indicator
light and garage door activation.
.If the indicator light stays on
continuously or the garage door
moves when the button is pressed,
then programming is complete. There
is no need to complete Steps 4–6.
.If the indicator light does not come
on or the garage door does not
move, a second button press may be
required. For a second time, press
and hold the newly programmed
button for five seconds. If the
indicator light is continuously lit,
or the garage door moves,
programming is complete.
.If the indicator light flashes rapidly
and the garage door does not move,
continue with programming
Steps 4–6.
Learn or Smart Button
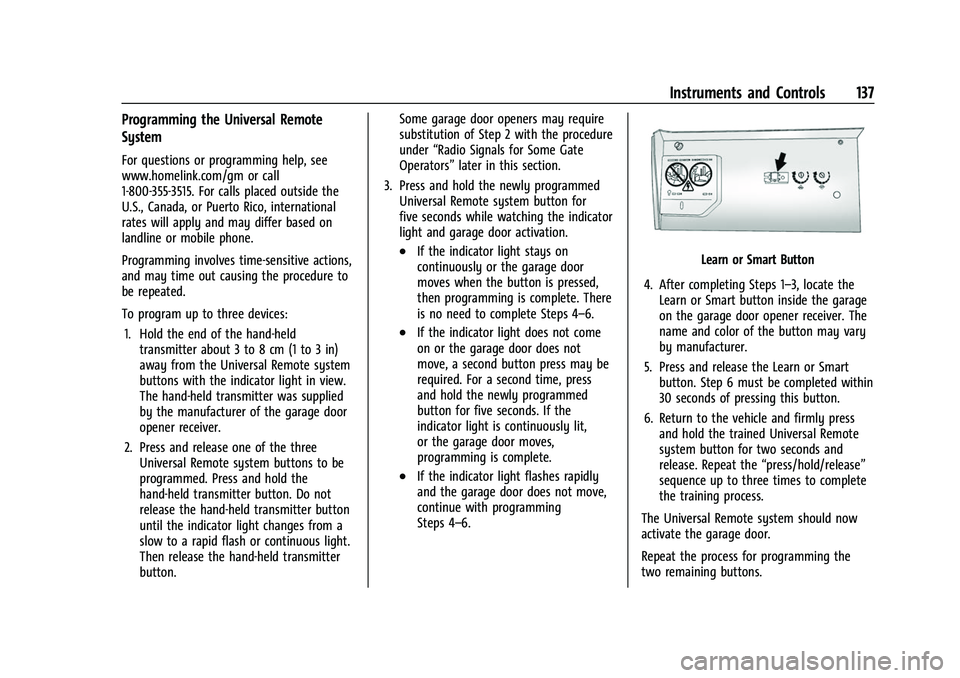
4. After completing Steps 1–3, locate the Learn or Smart button inside the garage
on the garage door opener receiver. The
name and color of the button may vary
by manufacturer.
5. Press and release the Learn or Smart button. Step 6 must be completed within
30 seconds of pressing this button.
6. Return to the vehicle and firmly press and hold the trained Universal Remote
system button for two seconds and
release. Repeat the “press/hold/release”
sequence up to three times to complete
the training process.
The Universal Remote system should now
activate the garage door.
Repeat the process for programming the
two remaining buttons.