2021 CHEVROLET MALIBU ECO
[x] Cancel search: ECOPage 278 of 351
Chevrolet Malibu Owner Manual (GMNA-Localizing-U.S./Canada-
14584249) - 2021 - CRC - 11/9/20
Vehicle Care 277
Your dealer will know the kind of wheel that
is needed.
Each new wheel should have the same
load-carrying capacity, diameter, width,
offset, and be mounted the same way as
the one it replaces.
Replace wheels, wheel bolts, wheel nuts,
or Tire Pressure Monitor System (TPMS)
sensors with new GM original equipment
parts.
{Warning
Using the wrong replacement wheels,
wheel bolts, or wheel nuts can be
dangerous. It could affect the braking and
handling of the vehicle. Tires can lose air,
and cause loss of control, causing a crash.
Always use the correct wheel, wheel
bolts, and wheel nuts for replacement.
Caution
The wrong wheel can also cause
problems with bearing life, brake cooling,
speedometer or odometer calibration,
headlamp aim, bumper height, vehicle
ground clearance, and tire or tire chain
clearance to the body and chassis.
Used Replacement Wheels
{Warning
Replacing a wheel with a used one is
dangerous. How it has been used or how
far it has been driven may be unknown.
It could fail suddenly and cause a crash.
When replacing wheels, use a new GM
original equipment wheel.
Tire Chains
{Warning
If the vehicle has 245/45R18 or 245/40R19
size tires, do not use tire chains. There is
not enough clearance. Tire chains used on
a vehicle without the proper amount of
clearance can cause damage to the
brakes, suspension, or other vehicle parts.
The area damaged by the tire chains
could cause loss of control and a crash.
Use another type of traction device only
if its manufacturer recommends it for the
vehicle's tire size combination and road
conditions. Follow that manufacturer's
instructions. To avoid vehicle damage,
drive slow and readjust or remove the(Continued)
Warning (Continued)
traction device if it contacts the vehicle.
Do not spin the wheels. If traction
devices are used, install them on the
front tires.
Caution
If the vehicle is equipped with a tire size
other than 245/45R18 or 245/40R19, use
tire chains only where legal and only
when necessary. Use low profile chains
that add no more than 12 mm thickness
to the tire tread and inner sidewall. Use
chains that are the proper size for the
tires. Install them on the tires of the
front axle. Do not use chains on the tires
of the rear axle. Tighten them as tightly
as possible with the ends securely
fastened. Drive slowly and follow the
chain manufacturer's instructions. If the
chains contact the vehicle, stop and
retighten them. If the contact continues,
slow down until it stops. Driving too fast
or spinning the wheels with chains on
will damage the vehicle.
Page 280 of 351
Chevrolet Malibu Owner Manual (GMNA-Localizing-U.S./Canada-
14584249) - 2021 - CRC - 11/9/20
Vehicle Care 279
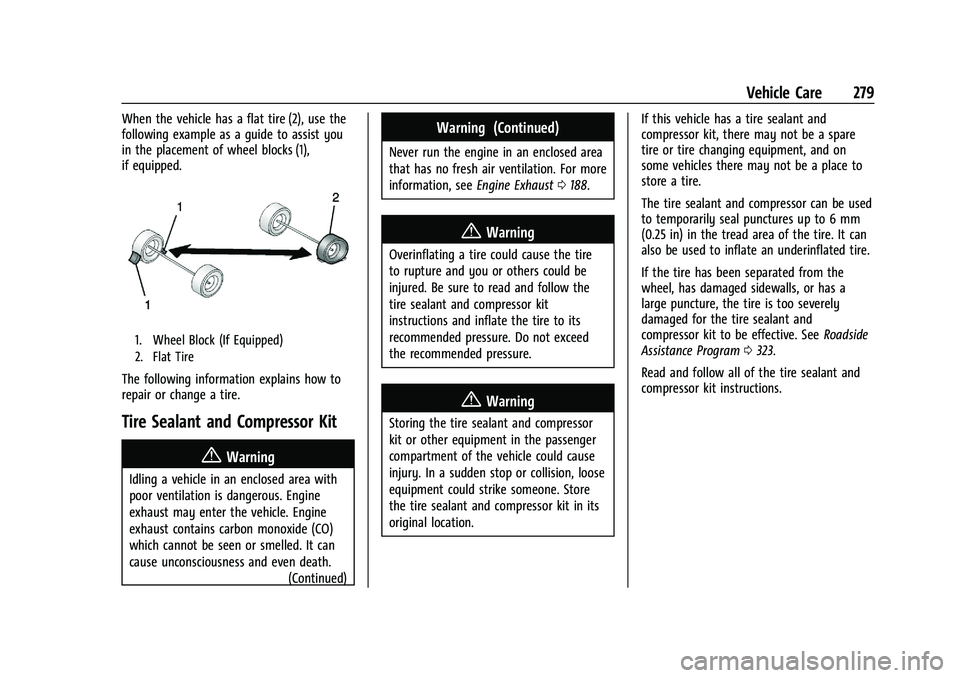
When the vehicle has a flat tire (2), use the
following example as a guide to assist you
in the placement of wheel blocks (1),
if equipped.
1. Wheel Block (If Equipped)
2. Flat Tire
The following information explains how to
repair or change a tire.
Tire Sealant and Compressor Kit
{Warning
Idling a vehicle in an enclosed area with
poor ventilation is dangerous. Engine
exhaust may enter the vehicle. Engine
exhaust contains carbon monoxide (CO)
which cannot be seen or smelled. It can
cause unconsciousness and even death.(Continued)
Warning (Continued)
Never run the engine in an enclosed area
that has no fresh air ventilation. For more
information, seeEngine Exhaust0188.
{Warning
Overinflating a tire could cause the tire
to rupture and you or others could be
injured. Be sure to read and follow the
tire sealant and compressor kit
instructions and inflate the tire to its
recommended pressure. Do not exceed
the recommended pressure.
{Warning
Storing the tire sealant and compressor
kit or other equipment in the passenger
compartment of the vehicle could cause
injury. In a sudden stop or collision, loose
equipment could strike someone. Store
the tire sealant and compressor kit in its
original location. If this vehicle has a tire sealant and
compressor kit, there may not be a spare
tire or tire changing equipment, and on
some vehicles there may not be a place to
store a tire.
The tire sealant and compressor can be used
to temporarily seal punctures up to 6 mm
(0.25 in) in the tread area of the tire. It can
also be used to inflate an underinflated tire.
If the tire has been separated from the
wheel, has damaged sidewalls, or has a
large puncture, the tire is too severely
damaged for the tire sealant and
compressor kit to be effective. See
Roadside
Assistance Program 0323.
Read and follow all of the tire sealant and
compressor kit instructions.
Page 282 of 351
Chevrolet Malibu Owner Manual (GMNA-Localizing-U.S./Canada-
14584249) - 2021 - CRC - 11/9/20
Vehicle Care 281
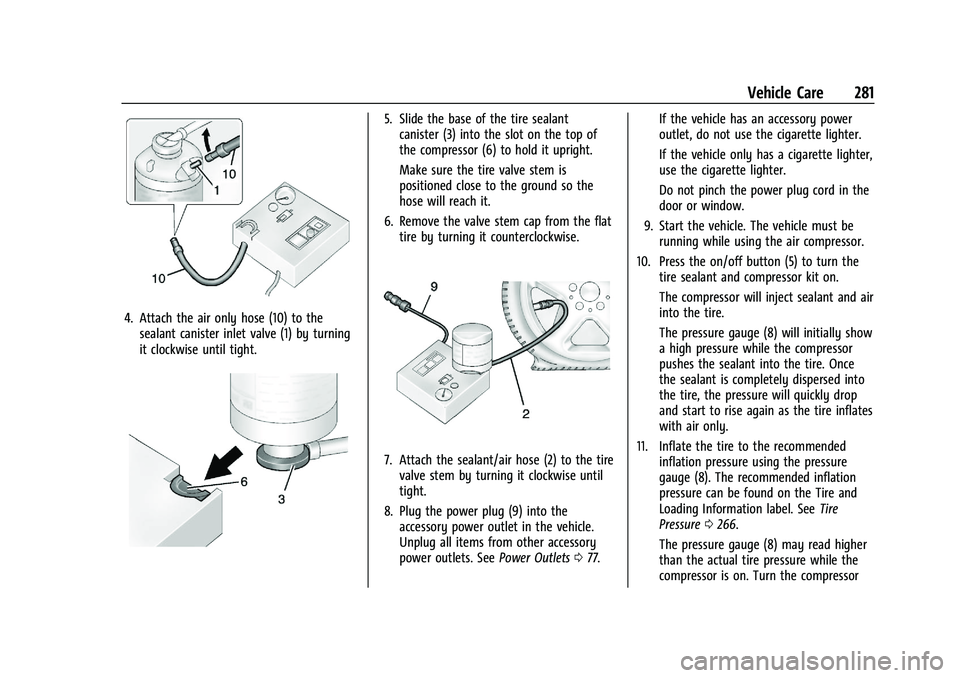
4. Attach the air only hose (10) to thesealant canister inlet valve (1) by turning
it clockwise until tight.
5. Slide the base of the tire sealantcanister (3) into the slot on the top of
the compressor (6) to hold it upright.
Make sure the tire valve stem is
positioned close to the ground so the
hose will reach it.
6. Remove the valve stem cap from the flat tire by turning it counterclockwise.
7. Attach the sealant/air hose (2) to the tirevalve stem by turning it clockwise until
tight.
8. Plug the power plug (9) into the accessory power outlet in the vehicle.
Unplug all items from other accessory
power outlets. See Power Outlets077. If the vehicle has an accessory power
outlet, do not use the cigarette lighter.
If the vehicle only has a cigarette lighter,
use the cigarette lighter.
Do not pinch the power plug cord in the
door or window.
9. Start the vehicle. The vehicle must be running while using the air compressor.
10. Press the on/off button (5) to turn the tire sealant and compressor kit on.
The compressor will inject sealant and air
into the tire.
The pressure gauge (8) will initially show
a high pressure while the compressor
pushes the sealant into the tire. Once
the sealant is completely dispersed into
the tire, the pressure will quickly drop
and start to rise again as the tire inflates
with air only.
11. Inflate the tire to the recommended inflation pressure using the pressure
gauge (8). The recommended inflation
pressure can be found on the Tire and
Loading Information label. See Tire
Pressure 0266.
The pressure gauge (8) may read higher
than the actual tire pressure while the
compressor is on. Turn the compressor
Page 283 of 351
Chevrolet Malibu Owner Manual (GMNA-Localizing-U.S./Canada-
14584249) - 2021 - CRC - 11/9/20
282 Vehicle Care
off to get an accurate pressure reading.
The compressor may be turned on/off
until the correct pressure is reached.
Caution
If the recommended pressure cannot be
reached after approximately 25 minutes,
the vehicle should not be driven farther.
The tire is too severely damaged and the
tire sealant and compressor kit cannot
inflate the tire. Remove the power plug
from the accessory power outlet and
unscrew the inflating hose from the tire
valve. SeeRoadside Assistance Program
0 323.
12. Press the on/off button (5) to turn the tire sealant and compressor kit off.
The tire is not sealed and will continue
to leak air until the vehicle is driven and
the sealant is distributed in the tire.
Therefore, Steps 13–21 must be done
immediately after Step 12.
Be careful while handling the tire sealant
and compressor kit as it could be warm
after usage.
13. Unplug the power plug (9) from the accessory power outlet in the vehicle. 14. Turn the sealant/air hose (2)
counterclockwise to remove it from the
tire valve stem.
15. Replace the tire valve stem cap.
16. Remove the tire sealant canister (4) from the slot on top of the compressor (6).
17. Turn the air only hose (10) counterclockwise to remove it from the
tire sealant canister inlet valve (1).
18. Turn the sealant/air hose (2) clockwise onto the sealant canister inlet valve (1)
to prevent sealant leakage.
19. Return the air only hose (10) and power plug (9) back to their original storage
location.
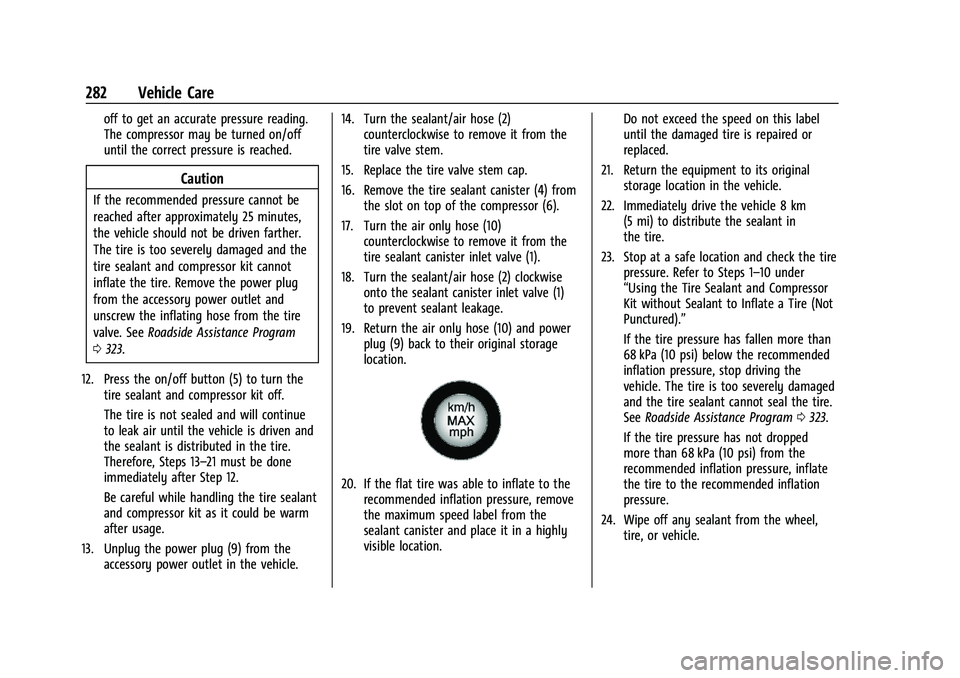
20. If the flat tire was able to inflate to therecommended inflation pressure, remove
the maximum speed label from the
sealant canister and place it in a highly
visible location. Do not exceed the speed on this label
until the damaged tire is repaired or
replaced.
21. Return the equipment to its original storage location in the vehicle.
22. Immediately drive the vehicle 8 km (5 mi) to distribute the sealant in
the tire.
23. Stop at a safe location and check the tire pressure. Refer to Steps 1–10 under
“Using the Tire Sealant and Compressor
Kit without Sealant to Inflate a Tire (Not
Punctured).”
If the tire pressure has fallen more than
68 kPa (10 psi) below the recommended
inflation pressure, stop driving the
vehicle. The tire is too severely damaged
and the tire sealant cannot seal the tire.
SeeRoadside Assistance Program 0323.
If the tire pressure has not dropped
more than 68 kPa (10 psi) from the
recommended inflation pressure, inflate
the tire to the recommended inflation
pressure.
24. Wipe off any sealant from the wheel, tire, or vehicle.
Page 285 of 351
Chevrolet Malibu Owner Manual (GMNA-Localizing-U.S./Canada-
14584249) - 2021 - CRC - 11/9/20
284 Vehicle Care
7. Start the vehicle. The vehicle must berunning while using the air compressor.
8. Press the on/off button (5) to turn the tire sealant and compressor kit on.
The compressor will inflate the tire with
air only.
9. Inflate the tire to the recommended inflation pressure using the pressure
gauge (8). The recommended inflation
pressure can be found on the Tire and
Loading Information label. See Tire
Pressure 0266.
The pressure gauge (8) may read higher
than the actual tire pressure while the
compressor is on. Turn the compressor
off to get an accurate pressure reading.
The compressor may be turned on/off
until the correct pressure is reached.
Caution
If the recommended pressure cannot be
reached after approximately 25 minutes,
the vehicle should not be driven farther.
The tire is too severely damaged and the
tire sealant and compressor kit cannot
inflate the tire. Remove the power plug
from the accessory power outlet and
(Continued)
Caution (Continued)
unscrew the inflating hose from the tire
valve. See Roadside Assistance Program
0 323.
10. Press the on/off button (5) to turn the tire sealant and compressor kit off.
Be careful while handling the compressor
as it could be warm after usage.
11. Unplug the power plug (9) from the accessory power outlet in the vehicle.
12. Turn the air only hose (10) counterclockwise to remove it from the
tire valve stem.
13. Replace the tire valve stem cap.
14. Return the air only hose (10) and power plug (9) back to their original storage
location.
15. Return the equipment to its original storage location in the vehicle.
The tire sealant and compressor kit has
accessory adapters located in a
compartment on the bottom of its housing
that can be used to inflate air mattresses,
balls, etc.
Storing the Tire Sealant and
Compressor Kit
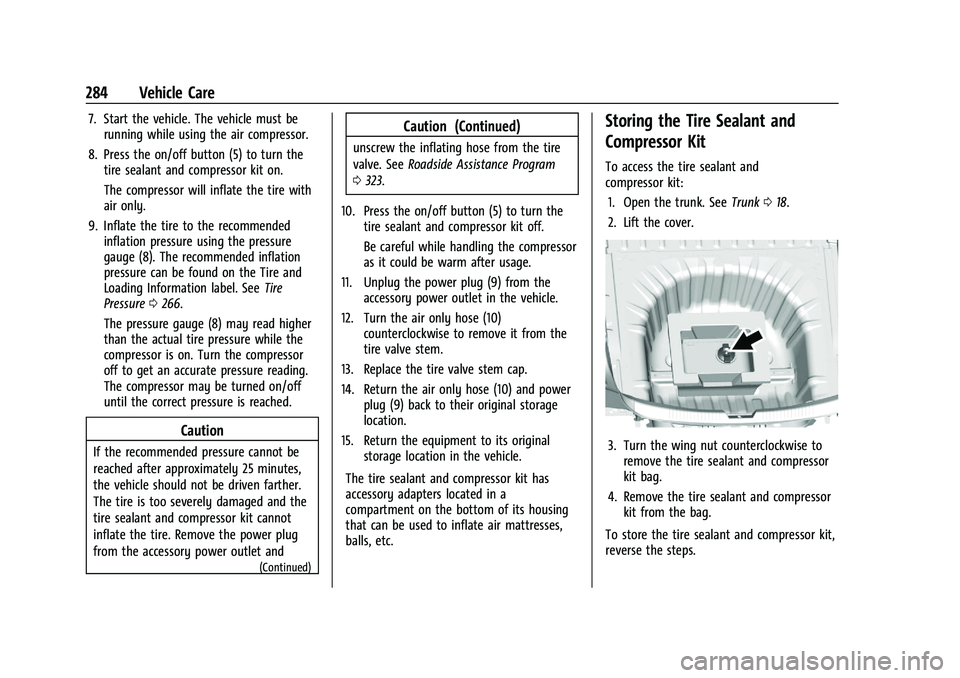
To access the tire sealant and
compressor kit: 1. Open the trunk. See Trunk018.
2. Lift the cover.
3. Turn the wing nut counterclockwise to remove the tire sealant and compressor
kit bag.
4. Remove the tire sealant and compressor kit from the bag.
To store the tire sealant and compressor kit,
reverse the steps.
Page 288 of 351
Chevrolet Malibu Owner Manual (GMNA-Localizing-U.S./Canada-
14584249) - 2021 - CRC - 11/9/20
Vehicle Care 287
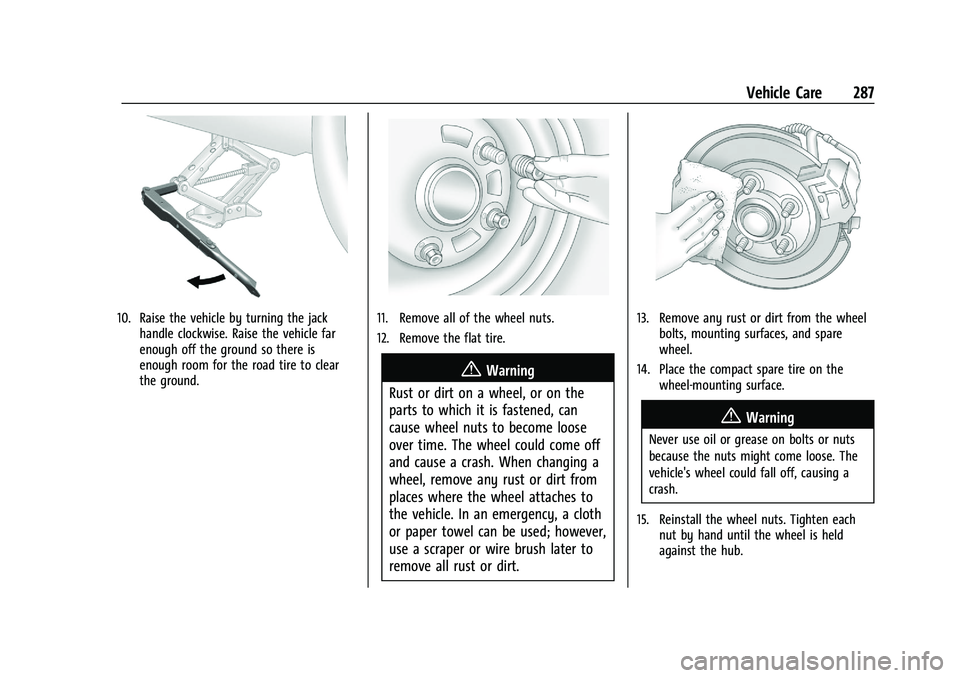
10. Raise the vehicle by turning the jackhandle clockwise. Raise the vehicle far
enough off the ground so there is
enough room for the road tire to clear
the ground.11. Remove all of the wheel nuts.
12. Remove the flat tire.
{Warning
Rust or dirt on a wheel, or on the
parts to which it is fastened, can
cause wheel nuts to become loose
over time. The wheel could come off
and cause a crash. When changing a
wheel, remove any rust or dirt from
places where the wheel attaches to
the vehicle. In an emergency, a cloth
or paper towel can be used; however,
use a scraper or wire brush later to
remove all rust or dirt.
13. Remove any rust or dirt from the wheel bolts, mounting surfaces, and spare
wheel.
14. Place the compact spare tire on the wheel-mounting surface.
{Warning
Never use oil or grease on bolts or nuts
because the nuts might come loose. The
vehicle's wheel could fall off, causing a
crash.
15. Reinstall the wheel nuts. Tighten each nut by hand until the wheel is held
against the hub.
Page 289 of 351
Chevrolet Malibu Owner Manual (GMNA-Localizing-U.S./Canada-
14584249) - 2021 - CRC - 11/9/20
288 Vehicle Care
16. Lower the vehicle by turning the jackhandle counterclockwise.
{Warning
Wheel nuts that are improperly or
incorrectly tightened can cause the
wheels to become loose or come off. The
wheel nuts should be tightened with a
torque wrench to the proper torque
specification after replacing. Follow the
torque specification supplied by the
aftermarket manufacturer when using
accessory locking wheel nuts. See
Capacities and Specifications 0317 for
original equipment wheel nut torque
specifications.
Caution
Improperly tightened wheel nuts can lead
to brake pulsation and rotor damage. To
avoid expensive brake repairs, evenly
tighten the wheel nuts in the proper
sequence and to the proper torque
specification. See Capacities and
Specifications 0317 for the wheel nut
torque specification.
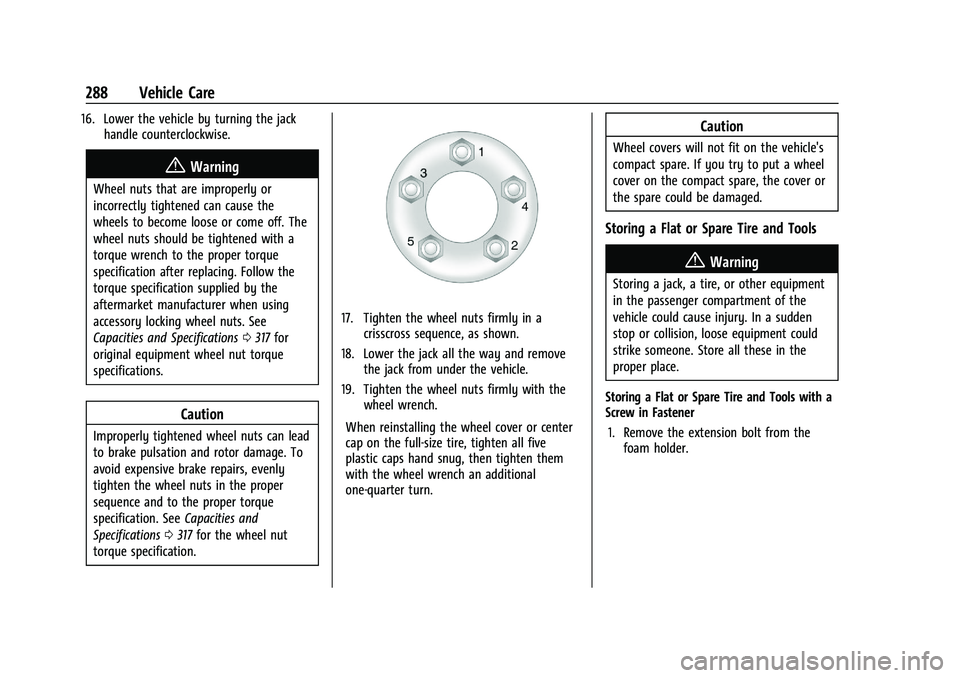
17. Tighten the wheel nuts firmly in a crisscross sequence, as shown.
18. Lower the jack all the way and remove the jack from under the vehicle.
19. Tighten the wheel nuts firmly with the wheel wrench.
When reinstalling the wheel cover or center
cap on the full-size tire, tighten all five
plastic caps hand snug, then tighten them
with the wheel wrench an additional
one-quarter turn.
Caution
Wheel covers will not fit on the vehicle's
compact spare. If you try to put a wheel
cover on the compact spare, the cover or
the spare could be damaged.
Storing a Flat or Spare Tire and Tools
{Warning
Storing a jack, a tire, or other equipment
in the passenger compartment of the
vehicle could cause injury. In a sudden
stop or collision, loose equipment could
strike someone. Store all these in the
proper place.
Storing a Flat or Spare Tire and Tools with a
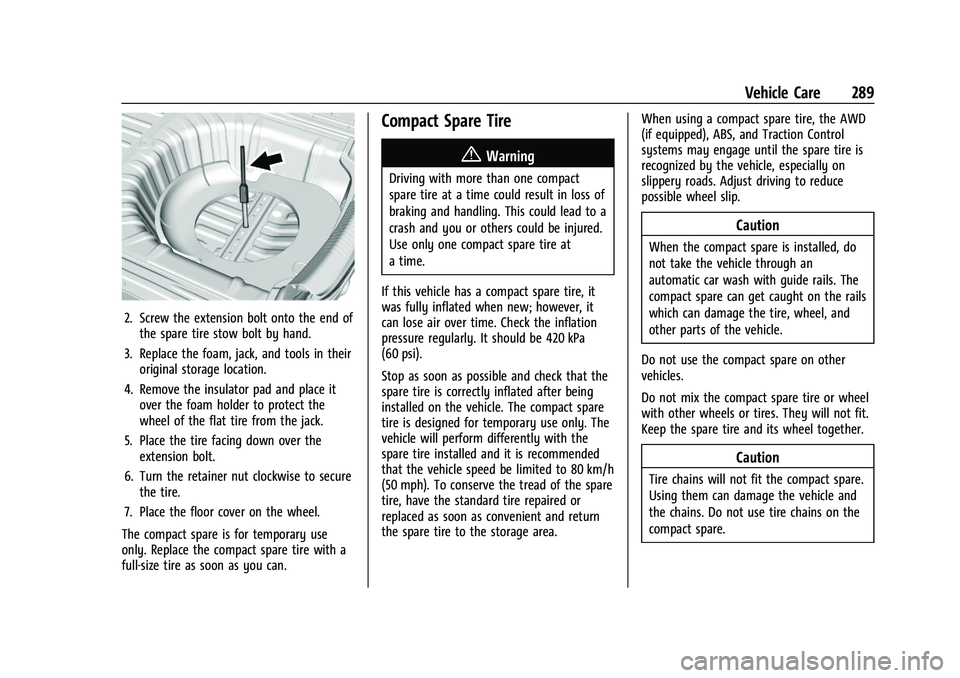
Screw in Fastener 1. Remove the extension bolt from the foam holder.
Page 290 of 351
Chevrolet Malibu Owner Manual (GMNA-Localizing-U.S./Canada-
14584249) - 2021 - CRC - 11/9/20
Vehicle Care 289
2. Screw the extension bolt onto the end ofthe spare tire stow bolt by hand.
3. Replace the foam, jack, and tools in their original storage location.
4. Remove the insulator pad and place it over the foam holder to protect the
wheel of the flat tire from the jack.
5. Place the tire facing down over the extension bolt.
6. Turn the retainer nut clockwise to secure the tire.
7. Place the floor cover on the wheel.
The compact spare is for temporary use
only. Replace the compact spare tire with a
full-size tire as soon as you can.
Compact Spare Tire
{Warning
Driving with more than one compact
spare tire at a time could result in loss of
braking and handling. This could lead to a
crash and you or others could be injured.
Use only one compact spare tire at
a time.
If this vehicle has a compact spare tire, it
was fully inflated when new; however, it
can lose air over time. Check the inflation
pressure regularly. It should be 420 kPa
(60 psi).
Stop as soon as possible and check that the
spare tire is correctly inflated after being
installed on the vehicle. The compact spare
tire is designed for temporary use only. The
vehicle will perform differently with the
spare tire installed and it is recommended
that the vehicle speed be limited to 80 km/h
(50 mph). To conserve the tread of the spare
tire, have the standard tire repaired or
replaced as soon as convenient and return
the spare tire to the storage area. When using a compact spare tire, the AWD
(if equipped), ABS, and Traction Control
systems may engage until the spare tire is
recognized by the vehicle, especially on
slippery roads. Adjust driving to reduce
possible wheel slip.
Caution
When the compact spare is installed, do
not take the vehicle through an
automatic car wash with guide rails. The
compact spare can get caught on the rails
which can damage the tire, wheel, and
other parts of the vehicle.
Do not use the compact spare on other
vehicles.
Do not mix the compact spare tire or wheel
with other wheels or tires. They will not fit.
Keep the spare tire and its wheel together.
Caution
Tire chains will not fit the compact spare.
Using them can damage the vehicle and
the chains. Do not use tire chains on the
compact spare.