2021 CHEVROLET MALIBU ECO mode
[x] Cancel search: ECO modePage 2 of 351

Chevrolet Malibu Owner Manual (GMNA-Localizing-U.S./Canada-
14584249) - 2021 - CRC - 11/9/20
Contents
Introduction . . . . . . . . . . . . . . . . . . . . . . . . . . . . . . 1
Keys, Doors, and Windows . . . . . . . . . . . . . . . 6
Seats and Restraints . . . . . . . . . . . . . . . . . . . . . 27
Storage . . . . . . . . . . . . . . . . . . . . . . . . . . . . . . . . . . 72
Instruments and Controls . . . . . . . . . . . . . . . . 74
Lighting . . . . . . . . . . . . . . . . . . . . . . . . . . . . . . . . 104
Infotainment System . . . . . . . . . . . . . . . . . . . 110
Climate Controls . . . . . . . . . . . . . . . . . . . . . . . . 164
Driving and Operating . . . . . . . . . . . . . . . . . . 172
Vehicle Care . . . . . . . . . . . . . . . . . . . . . . . . . . . . 227
Service and Maintenance . . . . . . . . . . . . . . . 303
Technical Data . . . . . . . . . . . . . . . . . . . . . . . . . . 316
Customer Information . . . . . . . . . . . . . . . . . . 320
Reporting Safety Defects . . . . . . . . . . . . . . . 328
OnStar . . . . . . . . . . . . . . . . . . . . . . . . . . . . . . . . . . 331
Connected Services . . . . . . . . . . . . . . . . . . . . . 336
Index . . . . . . . . . . . . . . . . . . . . . . . . . . 339
Introduction
The names, logos, emblems, slogans, vehicle
model names, and vehicle body designs
appearing in this manual including, but not
limited to, GM, the GM logo, CHEVROLET,
the CHEVROLET Emblem, MALIBU, and the
MALIBU Emblem are trademarks and/or
service marks of General Motors LLC, its
subsidiaries, affiliates, or licensors.
For vehicles first sold in Canada, substitute
the name“General Motors of Canada
Company” for Chevrolet Motor Division
wherever it appears in this manual.
This manual describes features that may or
may not be on the vehicle because of
optional equipment that was not purchased
on the vehicle, model variants, country
specifications, features/applications that may not be available in your region, or changes
subsequent to the printing of this owner’s
manual.
Refer to the purchase documentation
relating to your specific vehicle to confirm
the features.
Keep this manual in the vehicle for quick
reference.Canadian Vehicle Owners
A French language manual can be obtained
from your dealer, at www.helminc.com,
or from:
Propriétaires Canadiens
On peut obtenir un exemplaire de ce guide
en français auprès du concessionnaire ou à
l'adresse suivante:
Helm, Incorporated
Attention: Customer Service
47911 Halyard Drive
Plymouth, MI 48170
USA
Litho in U.S.A.
Part No. 84523389 B Second Printing©2020 General Motors LLC. All Rights Reserved.
Page 12 of 351

Chevrolet Malibu Owner Manual (GMNA-Localizing-U.S./Canada-
14584249) - 2021 - CRC - 11/9/20
Keys, Doors, and Windows 11
When all additional transmitters are
programmed, press and hold ENGINE
START/STOP for 12 seconds to exit
programming mode.
6. Put the key back into the transmitter.
7. Replace the key lock cylinder cap. See Door Locks 014.
Programming without Recognized
Transmitters
If two currently recognized transmitters are
not available, follow this procedure to
program up to eight transmitters. This
feature is not available in Canada. This
procedure will take approximately
30 minutes to complete. The vehicle must
be off and all of the transmitters to be
programmed must be with you. 1. Remove the key lock cylinder cap on the driver door handle. See Door Locks014.
Insert the vehicle key of the transmitter
into the key lock cylinder on the outside
of the driver door and turn the key
counterclockwise five times within
10 seconds.
The DIC displays REMOTE LEARN
PENDING, PLEASE WAIT. 2. Wait for 10 minutes until the DIC
displays PRESS ENGINE START BUTTON TO
LEARN and then press ENGINE
START/STOP.
The DIC will again display REMOTE LEARN
PENDING, PLEASE WAIT.
3. Repeat Step 2 two additional times. After the third time, all previously known
transmitters will no longer work with the
vehicle. Remaining transmitters can be
relearned during the next steps.
The DIC should now display READY FOR
REMOTE # 1.4. Place the new transmitter into thetransmitter pocket with the buttons
facing toward the rear of the vehicle.
The transmitter pocket is inside the
center console storage area.
5. Press ENGINE START/STOP. When the transmitter is learned, the DIC will show
that it is ready to program the next
transmitter.
6. Remove the transmitter from the transmitter pocket and press
KorQ.
To program additional transmitters,
repeat Steps 4–6.
When all additional transmitters are
programmed, press and hold ENGINE
START/STOP for 12 seconds to exit
programming mode.
7. Return the key back into the transmitter.
8. Replace the key lock cylinder cap. See Door Locks 014.
Starting the Vehicle with a Low
Transmitter Battery
While trying to start the vehicle, if the
transmitter battery is weak or if there is
interference with the signal, the DIC may
display NO REMOTE DETECTED or NO
REMOTE KEY WAS DETECTED PLACE KEY IN
Page 14 of 351

Chevrolet Malibu Owner Manual (GMNA-Localizing-U.S./Canada-
14584249) - 2021 - CRC - 11/9/20
Keys, Doors, and Windows 13
2. Separate the two halves of thetransmitter using a flat tool inserted into
the bottom center of the transmitter. Do
not use the key slot.
3. Remove the battery by pushing on thebattery and sliding it toward the bottom
of the transmitter. Do not use a metal
object.
4. Insert the new battery, positive side facing the back cover. Push the battery
down until it is held in place. Replace
with a CR2032 or equivalent battery.
5. Snap the battery cover back on to the transmitter.
6. Reinsert the key.
Remote Vehicle Start
If equipped, this feature allows the engine
to be started from outside the vehicle.
/: This button will be on the RKE
transmitter if the vehicle has remote start.
The climate control system will determine
the best mode and temperature setting for
operation during the remote start. Once the
vehicle is started with the Engine Start/Stop
button, the climate control system will
begin to operate at the last customer
selected operating mode and temperature.
The rear window defogger may come on
during a remote start based on cold ambient
conditions. The rear defog indicator light
does not come on during a remote start. If the vehicle has heated seats, they may
come on during a remote start. See
Heated
and Ventilated Front Seats 034.
Laws in some local communities may restrict
the use of remote starters. For example,
some laws require a person using remote
start to have the vehicle in view. Check local
regulations for any requirements.
Other conditions can affect the performance
of the transmitter. See Remote Keyless Entry
(RKE) System 07.
If your vehicle is low on fuel, do not use the
remote start feature. The vehicle may run
out of fuel.
Starting the Engine Using Remote Start
To start the engine using the remote start
feature:
1. Press and release
Q.
2. Immediately after completing Step 1, press and hold
/for at least
four seconds or until the turn signal
lamps flash. The turn signal lamps
flashing confirms the request to remote
start the vehicle has been received.
Page 40 of 351
Chevrolet Malibu Owner Manual (GMNA-Localizing-U.S./Canada-
14584249) - 2021 - CRC - 11/9/20
Seats and Restraints 39
Questions and Answers About Seat Belts
Q: Will I be trapped in the vehicle after acrash if I am wearing a seat belt?
A: You could be— whether you are
wearing a seat belt or not. Your chance
of being conscious during and after a
crash, so you canunbuckle and get out,
is much greater if you are belted.
Q: If my vehicle has airbags, why should I have to wear seat belts?
A: Airbags are supplemental systems only.
They work withseat belts —not instead
of them. Whether or not an airbag is
provided, all occupants still have to
buckle up to get the most protection.
Also, in nearly all states and in all
Canadian provinces, the law requires
wearing seat belts.
Buckle To Drive
If equipped, this feature prevents the vehicle
from shifting out of P (Park) when the driver
seat belt is not buckled. The Buckle to Drive
feature must be turned ON in the
infotainment system to work. See Vehicle
Personalization 0100 and if equipped, Teen
Driver 0153. If the engine is running, the
driver seat belt is not buckled, and the brake pedal is pressed with the vehicle in P (Park),
a message displays in the Driver Information
Center (DIC). Buckle the driver seat belt to
shift out of P (Park). Shifting from P (Park)
will be prevented once for each ignition
cycle.
For some fleet vehicles, the feature is
always ON and it cannot be turned OFF in
the infotainment system. Shifting from
P (Park) will be prevented each time the
above conditions exist.
On some models, Buckle to Drive may also
prevent shifting out of P (Park) if a front
passenger is unbuckled under similar
conditions. A message displays in the DIC.
Buckle the front passenger seat belt to shift
out of P (Park). This feature may not allow
the vehicle to shift out of P (Park) if an
object, such as a briefcase, handbag, grocery
bag, laptop, or other electronic device, is on
the front passenger seat. If this happens,
remove the object from the seat or buckle
the seat belt to shift out of P (Park).
If the driver, or on some vehicles, the
present front passenger remains unbuckled,
the DIC message will turn off after several
seconds and the vehicle can be shifted out
of P (Park). See
“Seat Belts”and“Child Restraints”
in the Index for information
about the importance of proper
restraint use.
If the driver seat belt, and in some vehicles
the front passenger seat belt, is unbuckled
when driving, the seat belt reminder chime
and light(s) will come on. See Seat Belt
Reminders 085. This feature may not
function properly if the airbag readiness
light is on. See Airbag Readiness Light 085.
How to Wear Seat Belts Properly
Follow these rules for everyone's protection.
There are additional things to know about
seat belts and children, including smaller
children and infants. If a child will be riding
in the vehicle, see Older Children055 or
Infants and Young Children 056. Review
and follow the rules for children in addition
to the following rules.
It is very important for all occupants to
buckle up. Statistics show that unbelted
people are hurt more often in crashes than
those who are wearing seat belts.
There are important things to know about
wearing a seat belt properly.
Page 49 of 351
Chevrolet Malibu Owner Manual (GMNA-Localizing-U.S./Canada-
14584249) - 2021 - CRC - 11/9/20
48 Seats and Restraints
Frontal airbags are designed to inflate in
moderate to severe frontal or near frontal
crashes to help reduce the potential for
severe injuries, mainly to the driver's or
front outboard passenger's head and chest.
Whether the frontal airbags will or should
inflate is not based primarily on how fast
the vehicle is traveling. It depends on what
is hit, the direction of the impact, and how
quickly the vehicle slows down.
Frontal airbags may inflate at different crash
speeds depending on whether the vehicle
hits an object straight on or at an angle,
and whether the object is fixed or moving,
rigid or deformable, narrow or wide.
Frontal airbags are not intended to inflate
during vehicle rollovers, rear impacts, or in
many side impacts.
In addition, the vehicle has advanced
technology frontal airbags. Advanced
technology frontal airbags adjust the
restraint according to crash severity.
Knee airbags are designed to inflate in
moderate to severe frontal or near frontal
impacts. Knee airbags are not designed to
inflate during vehicle rollovers, in rear
impacts, or in many side impacts.Seat-mounted side impact airbags are
designed to inflate in moderate to severe
side crashes depending on the location of
the impact. Seat-mounted side impact
airbags are not designed to inflate in frontal
impacts, near frontal impacts, rollovers,
or rear impacts. A seat-mounted side impact
airbag is designed to inflate on the side of
the vehicle that is struck.
Roof-rail airbags are designed to inflate in
moderate to severe side crashes depending
on the location of the impact. In addition,
these roof-rail airbags are designed to inflate
during a rollover or in a severe frontal
impact. Roof-rail airbags are not designed to
inflate in rear impacts. Both roof-rail airbags
will inflate when either side of the vehicle is
struck or if the sensing system predicts that
the vehicle is about to roll over on its side,
or in a severe frontal impact.
In any particular crash, no one can say
whether an airbag should have inflated
simply because of the vehicle damage or
repair costs.
What Makes an Airbag Inflate?
In a deployment event, the sensing system
sends an electrical signal triggering a release
of gas from the inflator. Gas from theinflator fills the airbag causing the bag to
break out of the cover. The inflator, the
airbag, and related hardware are all part of
the airbag module.
For airbag locations, see
Where Are the
Airbags? 046.
How Does an Airbag Restrain?
In moderate to severe frontal or near frontal
collisions, even belted occupants can contact
the steering wheel or the instrument panel.
In moderate to severe side collisions, even
belted occupants can contact the inside of
the vehicle.
Airbags supplement the protection provided
by seat belts by distributing the force of the
impact more evenly over the
occupant's body.
Rollover capable roof-rail airbags are
designed to help contain the head and chest
of occupants in the outboard seating
positions in the first and second rows. The
rollover capable roof-rail airbags are
designed to help reduce the risk of full or
partial ejection in rollover events, although
no system can prevent all such ejections.
Page 58 of 351
Chevrolet Malibu Owner Manual (GMNA-Localizing-U.S./Canada-
14584249) - 2021 - CRC - 11/9/20
Seats and Restraints 57
{Warning
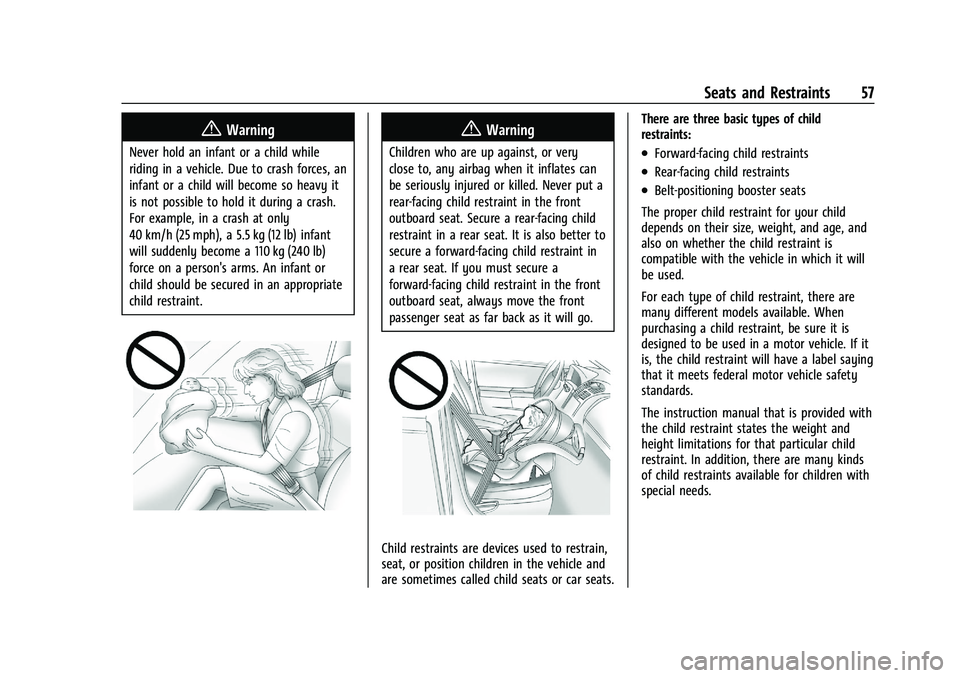
Never hold an infant or a child while
riding in a vehicle. Due to crash forces, an
infant or a child will become so heavy it
is not possible to hold it during a crash.
For example, in a crash at only
40 km/h (25 mph), a 5.5 kg (12 lb) infant
will suddenly become a 110 kg (240 lb)
force on a person's arms. An infant or
child should be secured in an appropriate
child restraint.
{Warning
Children who are up against, or very
close to, any airbag when it inflates can
be seriously injured or killed. Never put a
rear-facing child restraint in the front
outboard seat. Secure a rear-facing child
restraint in a rear seat. It is also better to
secure a forward-facing child restraint in
a rear seat. If you must secure a
forward-facing child restraint in the front
outboard seat, always move the front
passenger seat as far back as it will go.
Child restraints are devices used to restrain,
seat, or position children in the vehicle and
are sometimes called child seats or car seats.There are three basic types of child
restraints:
.Forward-facing child restraints
.Rear-facing child restraints
.Belt-positioning booster seats
The proper child restraint for your child
depends on their size, weight, and age, and
also on whether the child restraint is
compatible with the vehicle in which it will
be used.
For each type of child restraint, there are
many different models available. When
purchasing a child restraint, be sure it is
designed to be used in a motor vehicle. If it
is, the child restraint will have a label saying
that it meets federal motor vehicle safety
standards.
The instruction manual that is provided with
the child restraint states the weight and
height limitations for that particular child
restraint. In addition, there are many kinds
of child restraints available for children with
special needs.
Page 88 of 351
Chevrolet Malibu Owner Manual (GMNA-Localizing-U.S./Canada-
14584249) - 2021 - CRC - 11/9/20
Instruments and Controls 87
If the light stays on, or comes on while
driving, there may be a problem with the
electrical charging system. Have it checked
by your dealer. Driving while this light is on
could drain the battery.
When this light comes on, or is flashing, the
Driver Information Center (DIC) also displays
a message.
If a short distance must be driven with the
light on, be sure to turn off all accessories,
such as the radio and air conditioner. Find a
safe place to stop the vehicle.
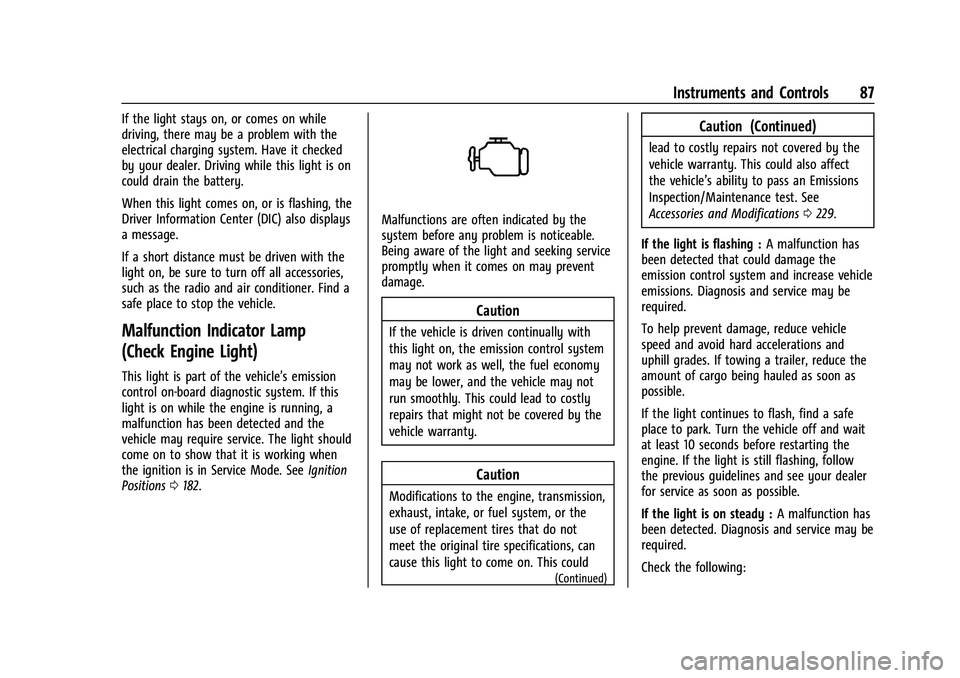
Malfunction Indicator Lamp
(Check Engine Light)
This light is part of the vehicle’s emission
control on-board diagnostic system. If this
light is on while the engine is running, a
malfunction has been detected and the
vehicle may require service. The light should
come on to show that it is working when
the ignition is in Service Mode. SeeIgnition
Positions 0182.
Malfunctions are often indicated by the
system before any problem is noticeable.
Being aware of the light and seeking service
promptly when it comes on may prevent
damage.
Caution
If the vehicle is driven continually with
this light on, the emission control system
may not work as well, the fuel economy
may be lower, and the vehicle may not
run smoothly. This could lead to costly
repairs that might not be covered by the
vehicle warranty.
Caution
Modifications to the engine, transmission,
exhaust, intake, or fuel system, or the
use of replacement tires that do not
meet the original tire specifications, can
cause this light to come on. This could
(Continued)
Caution (Continued)
lead to costly repairs not covered by the
vehicle warranty. This could also affect
the vehicle’s ability to pass an Emissions
Inspection/Maintenance test. See
Accessories and Modifications 0229.
If the light is flashing : A malfunction has
been detected that could damage the
emission control system and increase vehicle
emissions. Diagnosis and service may be
required.
To help prevent damage, reduce vehicle
speed and avoid hard accelerations and
uphill grades. If towing a trailer, reduce the
amount of cargo being hauled as soon as
possible.
If the light continues to flash, find a safe
place to park. Turn the vehicle off and wait
at least 10 seconds before restarting the
engine. If the light is still flashing, follow
the previous guidelines and see your dealer
for service as soon as possible.
If the light is on steady : A malfunction has
been detected. Diagnosis and service may be
required.
Check the following:
Page 89 of 351
Chevrolet Malibu Owner Manual (GMNA-Localizing-U.S./Canada-
14584249) - 2021 - CRC - 11/9/20
88 Instruments and Controls
.If fuel has been added to the vehicle
using the capless fuel funnel adapter,
make sure that it has been removed. See
“Filling the Tank with a Portable Gas Can”
underFilling the Tank 0219. The
diagnostic system can detect if the
adapter has been left installed in the
vehicle, allowing fuel to evaporate into
the atmosphere. A few driving trips with
the adapter removed may turn off the
light.
.Poor fuel quality can cause inefficient
engine operation and poor driveability,
which may go away once the engine is
warmed up. If this occurs, change the fuel
brand. It may require at least one full
tank of the proper fuel to turn the light
off. See Recommended Fuel (1.5L Engine)
0 218 or
Recommended Fuel (2.0L Engine) 0218.
If the light remains on, see your dealer.
Emissions Inspection and Maintenance
Programs
If the vehicle requires an Emissions
Inspection/Maintenance test, the test
equipment will likely connect to the
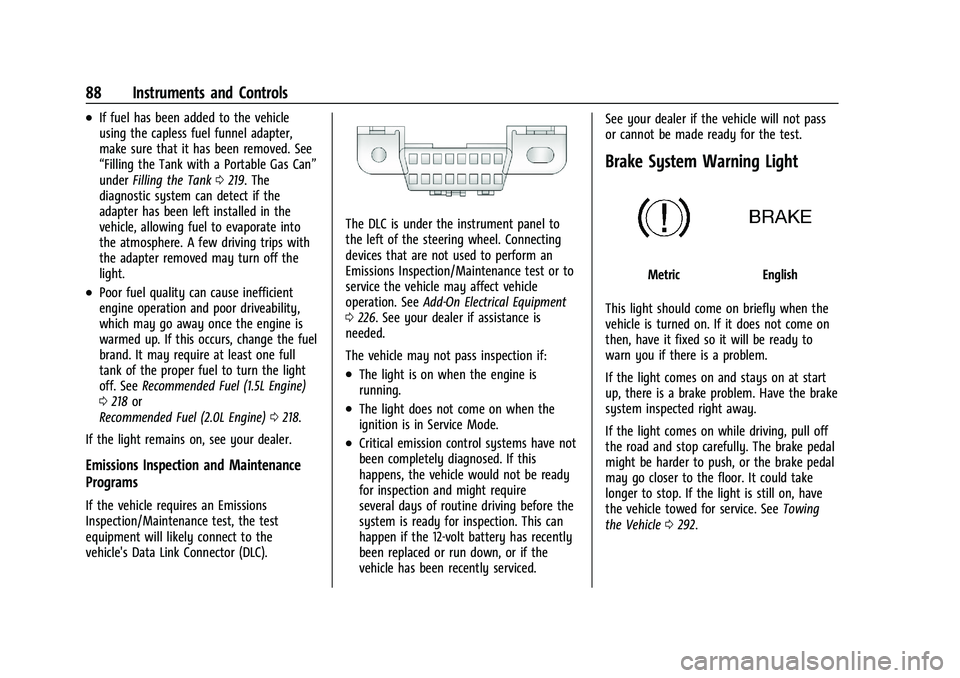
vehicle's Data Link Connector (DLC).
The DLC is under the instrument panel to
the left of the steering wheel. Connecting
devices that are not used to perform an
Emissions Inspection/Maintenance test or to
service the vehicle may affect vehicle
operation. See Add-On Electrical Equipment
0 226. See your dealer if assistance is
needed.
The vehicle may not pass inspection if:
.The light is on when the engine is
running.
.The light does not come on when the
ignition is in Service Mode.
.Critical emission control systems have not
been completely diagnosed. If this
happens, the vehicle would not be ready
for inspection and might require
several days of routine driving before the
system is ready for inspection. This can
happen if the 12-volt battery has recently
been replaced or run down, or if the
vehicle has been recently serviced. See your dealer if the vehicle will not pass
or cannot be made ready for the test.
Brake System Warning Light
MetricEnglish
This light should come on briefly when the
vehicle is turned on. If it does not come on
then, have it fixed so it will be ready to
warn you if there is a problem.
If the light comes on and stays on at start
up, there is a brake problem. Have the brake
system inspected right away.
If the light comes on while driving, pull off
the road and stop carefully. The brake pedal
might be harder to push, or the brake pedal
may go closer to the floor. It could take
longer to stop. If the light is still on, have
the vehicle towed for service. See Towing
the Vehicle 0292.