2021 CADILLAC ESCALADE display
[x] Cancel search: displayPage 15 of 20

15
ELECTRONIC PRECISION SHIFTDRIVER MODE SELECTOR
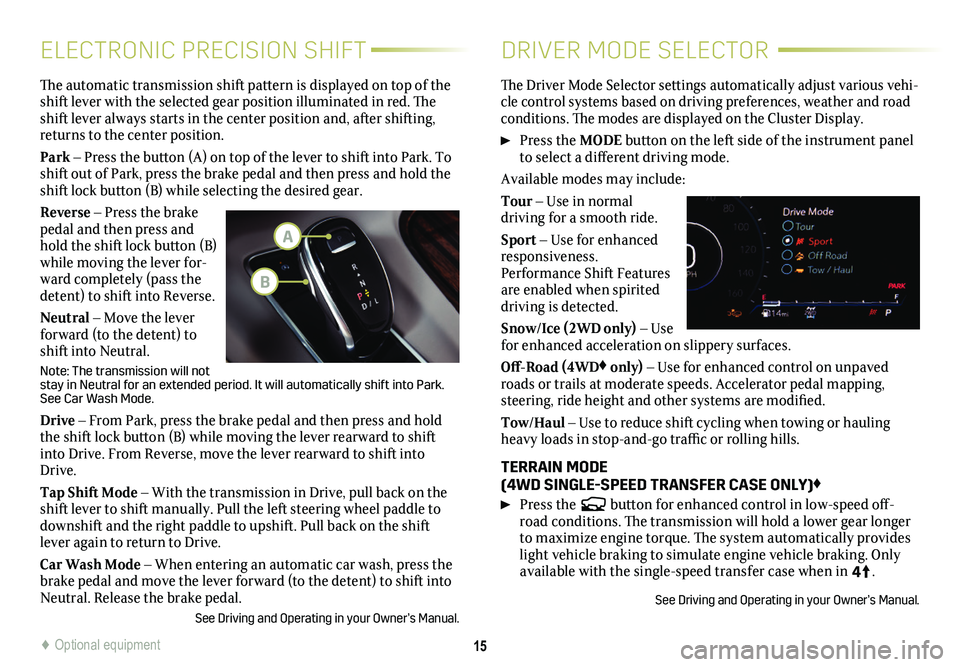
The automatic transmission shift pattern is displayed on top of the shift lever with the selected gear position illuminated in red. The shift lever always starts in the center position and, after shifting, returns to the center position.
Park – Press the button (A) on top of the lever to shift into Park. To shift out of Park, press the brake pedal and then press and hold the shift lock button (B) while selecting the desired gear.
Reverse – Press the brake pedal and then press and hold the shift lock button (B) while moving the lever for-ward completely (pass the detent) to shift into Reverse.
Neutral – Move the lever forward (to the detent) to shift into Neutral.
Note: The transmission will not stay in Neutral for an extended period. It will automatically shift into\
Park. See Car Wash Mode.
Drive – From Park, press the brake pedal and then press and hold the shift lock button (B) while moving the lever rearward to shift into Drive. From Reverse, move the lever rearward to shift into Drive.
Tap Shift Mode – With the transmission in Drive, pull back on the shift lever to shift manually. Pull the left steering wheel paddle to downshift and the right paddle to upshift. Pull back on the shift lever again to return to Drive.
Car Wash Mode – When entering an automatic car wash, press the brake pedal and move the lever forward (to the detent) to shift into Neutral. Release the brake pedal.
See Driving and Operating in your Owner’s Manual.
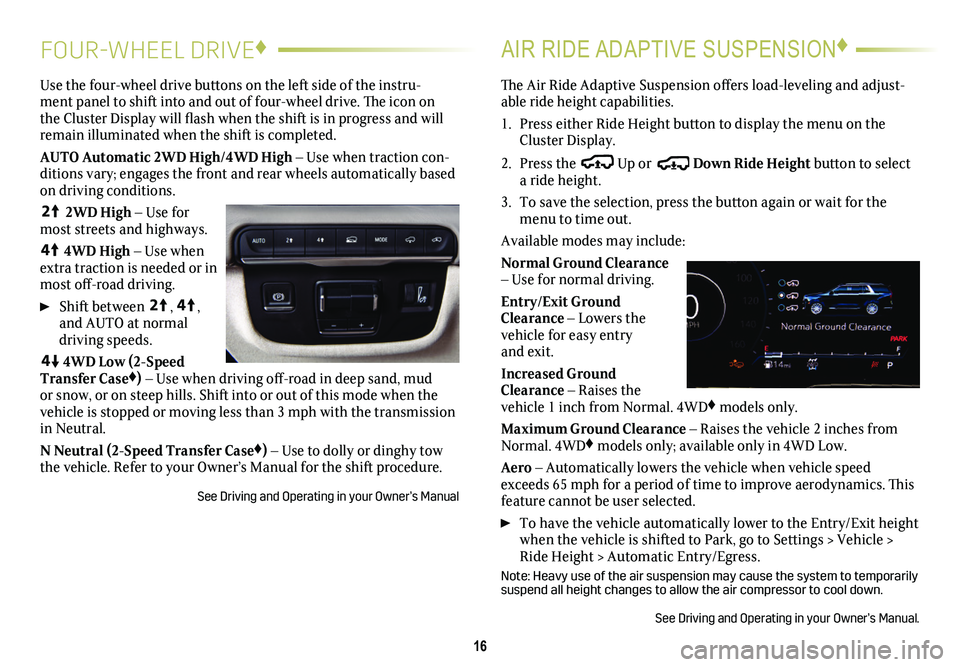
The Driver Mode Selector settings automatically adjust various vehi-cle control systems based on driving preferences, weather and road conditions. The modes are displayed on the Cluster Display.
Press the MODE button on the left side of the instrument panel to select a different driving mode.
Available modes may include:
Tour – Use in normal
driving for a smooth ride.
Sport – Use for enhanced responsiveness. Performance Shift Features are enabled when spirited driving is detected.
Snow/Ice (2WD only) – Use for enhanced acceleration on slippery surfaces.
Off-Road (4WD♦ only) – Use for enhanced control on unpaved roads or trails at moderate speeds. Accelerator pedal mapping, steering, ride height and other systems are modified.
Tow/Haul – Use to reduce shift cycling when towing or hauling heavy loads in stop-and-go traffic or rolling hills.
TERRAIN MODE (4WD SINGLE-SPEED TRANSFER CASE ONLY)♦
Press the button for enhanced control in low-speed off-road conditions. The transmission will hold a lower gear longer to maximize engine torque. The system automatically provides light vehicle braking to simulate engine vehicle braking. Only available with the single-speed transfer case when in 4
4
2
.
See Driving and Operating in your Owner’s Manual.
♦ Optional equipment
A
B
Page 16 of 20

16
FOUR-WHEEL DRIVE♦AIR RIDE ADAPTIVE SUSPENSION♦
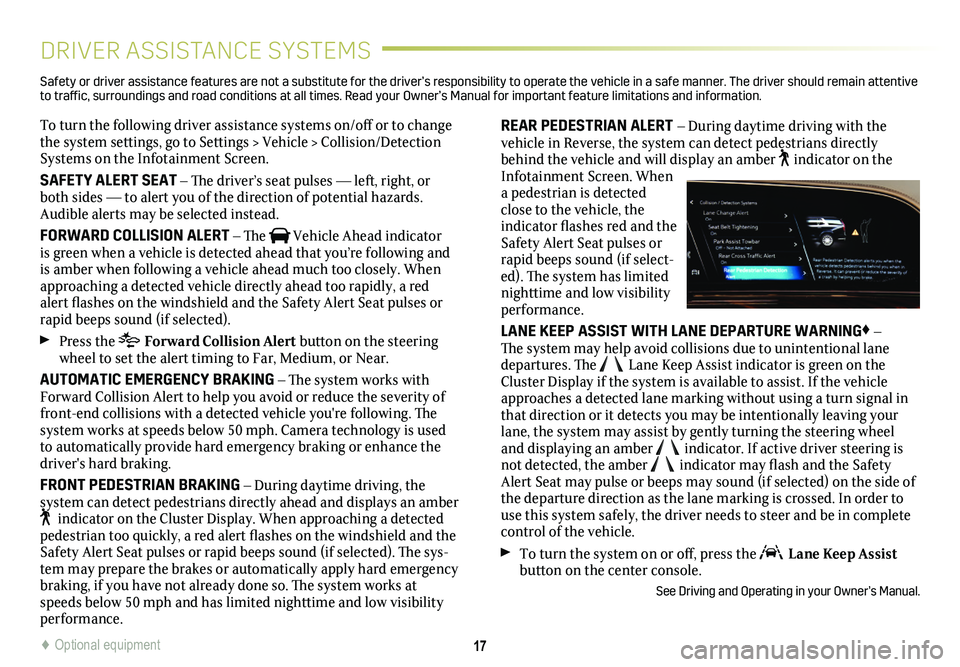
Use the four-wheel drive buttons on the left side of the instru-ment panel to shift into and out of four-wheel drive. The icon on the Cluster Display will flash when the shift is in progress and will remain illuminated when the shift is completed.
AUTO Automatic 2WD High/4WD High – Use when traction con-ditions vary; engages the front and rear wheels automatically based on driving conditions.
4
4
2
2WD High – Use for most streets and highways.
4
4
2
4WD High – Use when extra traction is needed or in most off-road driving.
Shift between
4
4
2
, 4
4
2
, and AUTO at normal driving speeds.
44
2
4WD Low (2-Speed Transfer Case♦) – Use when driving off-road in deep sand, mud or snow, or on steep hills. Shift into or out of this mode when the vehicle is stopped or moving less than 3 mph with the transmission in Neutral.
N Neutral (2-Speed Transfer Case♦) – Use to dolly or dinghy tow the vehicle. Refer to your Owner’s Manual for the shift procedure.
See Driving and Operating in your Owner’s Manual
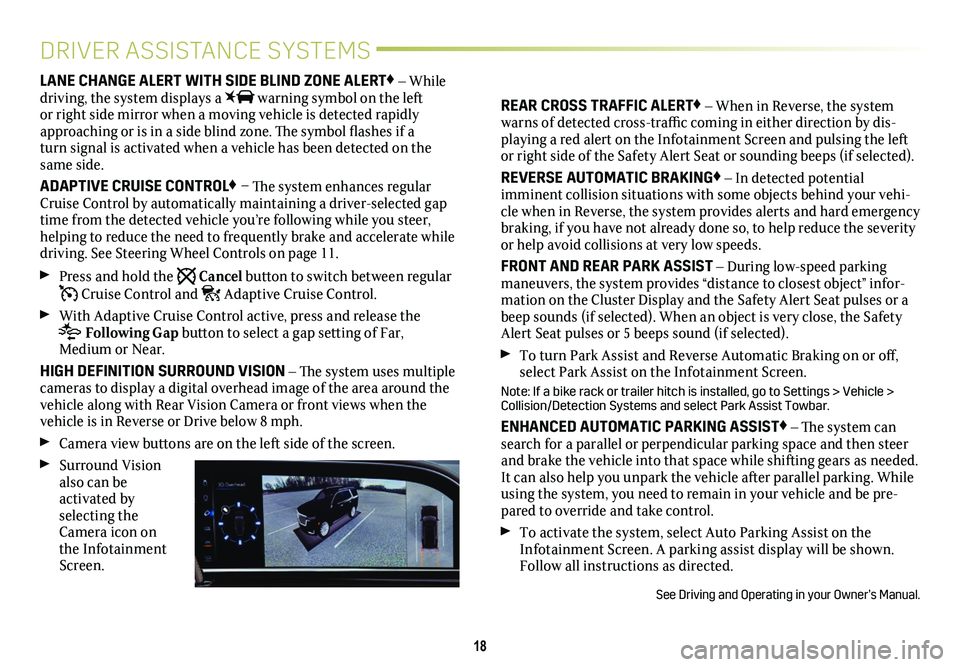
The Air Ride Adaptive Suspension offers load-leveling and adjust-able ride height capabilities.
1. Press either Ride Height button to display the menu on the Cluster Display.
2. Press the Up or Down Ride Height button to select a ride height.
3. To save the selection, press the button again or wait for the menu to time out.
Available modes may include:
Normal Ground Clearance – Use for normal driving.
Entry/Exit Ground Clearance – Lowers the vehicle for easy entry and exit.
Increased Ground Clearance – Raises the vehicle 1 inch from Normal. 4WD♦ models only.
Maximum Ground Clearance – Raises the vehicle 2 inches from Normal. 4WD♦ models only; available only in 4WD Low.
Aero – Automatically lowers the vehicle when vehicle speed exceeds 65 mph for a period of time to improve aerodynamics. This feature cannot be user selected.
To have the vehicle automatically lower to the Entry/Exit height when the vehicle is shifted to Park, go to Settings > Vehicle > Ride Height > Automatic Entry/Egress.
Note: Heavy use of the air suspension may cause the system to temporarily suspend all height changes to allow the air compressor to cool down.
See Driving and Operating in your Owner’s Manual.
Page 17 of 20

17
DRIVER ASSISTANCE SYSTEMS
To turn the following driver assistance systems on/off or to change the system settings, go to Settings > Vehicle > Collision/Detection Systems on the Infotainment Screen.
SAFETY ALERT SEAT – The driver’s seat pulses — left, right, or both sides — to alert you of the direction of potential hazards. Audible alerts may be selected instead.
FORWARD COLLISION ALERT – The Vehicle Ahead indicator is green when a vehicle is detected ahead that you’re following and is amber when following a vehicle ahead much too closely. When approaching a detected vehicle directly ahead too rapidly, a red alert flashes on the windshield and the Safety Alert Seat pulses or rapid beeps sound (if selected).
Press the Forward Collision Alert button on the steering wheel to set the alert timing to Far, Medium, or Near.
AUTOMATIC EMERGENCY BRAKING – The system works with Forward Collision Alert to help you avoid or reduce the severity of front-end collisions with a detected vehicle you're following. The system works at speeds below 50 mph. Camera technology is used to automatically provide hard emergency braking or enhance the driver's hard braking.
FRONT PEDESTRIAN BRAKING – During daytime driving, the
system can detect pedestrians directly ahead and displays an amber indicator on the Cluster Display. When approaching a detected pedestrian too quickly, a red alert flashes on the windshield and the Safety Alert Seat pulses or rapid beeps sound (if selected). The sys-tem may prepare the brakes or automatically apply hard emergency braking, if you have not already done so. The system works at speeds below 50 mph and has limited nighttime and low visibility performance.
REAR PEDESTRIAN ALERT – During daytime driving with the vehicle in Reverse, the system can detect pedestrians directly behind the vehicle and will display an amber indicator on the Infotainment Screen. When a pedestrian is detected close to the vehicle, the indicator flashes red and the Safety Alert Seat pulses or rapid beeps sound (if select-ed). The system has limited nighttime and low visibility performance.
LANE KEEP ASSIST WITH LANE DEPARTURE WARNING♦ – The system may help avoid collisions due to unintentional lane departures. The Lane Keep Assist indicator is green on the Cluster Display if the system is available to assist. If the vehicle approaches a detected lane marking without using a turn signal in that direction or it detects you may be intentionally leaving your lane, the system may assist by gently turning the steering wheel and displaying an amber indicator. If active driver steering is not detected, the amber indicator may flash and the Safety Alert Seat may pulse or beeps may sound (if selected) on the side of the departure direction as the lane marking is crossed. In order to use this system safely, the driver needs to steer and be in complete control of the vehicle.
To turn the system on or off, press the Lane Keep Assist button on the center console.
See Driving and Operating in your Owner’s Manual.
Safety or driver assistance features are not a substitute for the driver’s r\
esponsibility to operate the vehicle in a safe manner. The driver should remain attentive to traffic, surroundings and road conditions at all times. Read your Owner’s Manual for import\
ant feature limitations and information.
♦ Optional equipment
Page 18 of 20

18
DRIVER ASSISTANCE SYSTEMS
LANE CHANGE ALERT WITH SIDE BLIND ZONE ALERT♦ – While driving, the system displays a warning symbol on the left or right side mirror when a moving vehicle is detected rapidly approaching or is in a side blind zone. The symbol flashes if a turn signal is activated when a vehicle has been detected on the same side.
ADAPTIVE CRUISE CONTROL♦ – The system enhances regular Cruise Control by automatically maintaining a driver-selected gap time from the detected vehicle you’re following while you steer, helping to reduce the need to frequently brake and accelerate while driving. See Steering Wheel Controls on page 11.
Press and hold the Cancel button to switch between regular Cruise Control and Adaptive Cruise Control.
With Adaptive Cruise Control active, press and release the
Following Gap button to select a gap setting of Far, Medium or Near.
HIGH DEFINITION SURROUND VISION – The system uses multiple cameras to display a digital overhead image of the area around the vehicle along with Rear Vision Camera or front views when the vehicle is in Reverse or Drive below 8 mph.
Camera view buttons are on the left side of the screen.
Surround Vision also can be activated by selecting the Camera icon on the Infotainment Screen.
REAR CROSS TRAFFIC ALERT♦ – When in Reverse, the system warns of detected cross-traffic coming in either direction by dis-playing a red alert on the Infotainment Screen and pulsing the left or right side of the Safety Alert Seat or sounding beeps (if selected)\
.
REVERSE AUTOMATIC BRAKING♦ – In detected potential
imminent collision situations with some objects behind your vehi-cle when in Reverse, the system provides alerts and hard emergency braking, if you have not already done so, to help reduce the severity or help avoid collisions at very low speeds.
FRONT AND REAR PARK ASSIST – During low-speed parking maneuvers, the system provides “distance to closest object” infor-mation on the Cluster Display and the Safety Alert Seat pulses or a beep sounds (if selected). When an object is very close, the Safety Alert Seat pulses or 5 beeps sound (if selected).
To turn Park Assist and Reverse Automatic Braking on or off, select Park Assist on the Infotainment Screen.
Note: If a bike rack or trailer hitch is installed, go to Settings > Vehicle > Collision/Detection Systems and select Park Assist Towbar.
ENHANCED AUTOMATIC PARKING ASSIST♦ – The system can search for a parallel or perpendicular parking space and then steer and brake the vehicle into that space while shifting gears as needed. It can also help you unpark the vehicle after parallel parking. While using the system, you need to remain in your vehicle and be pre-pared to override and take control.
To activate the system, select Auto Parking Assist on the Infotainment Screen. A parking assist display will be shown. Follow all instructions as directed.
See Driving and Operating in your Owner’s Manual.
Page 19 of 20

♦ Optional equipment19
LIGHTING
INTELLIBEAM SYSTEM
The IntelliBeam system automatically turns the high-beam head-lamps on/off based on traffic conditions.
Press the button on the end of the lever with the lamp control in the AUTO or Headlamps position to turn the system on or off. A green indicator displays on the Cluster Display when the system is on; a blue indicator displays when the high-beam headlamps are on.
Note: IntelliBeam activates the high beam headlamps only when driving over 25 mph.
DOME LAMPS
To turn a reading lamp on/off, press the lamp lens.
To turn on/off all reading/dome lamps with the doors closed, press and hold either reading lamp in the overhead console.
To turn all dome lamps off when the doors are open, press the
OFF button on the overhead console.
See Lighting in your Owner’s Manual.
The Rear Camera Mirror provides a wider, less obstructed field of view than a traditional mirror to assist when driving,
changing lanes and check-ing traffic conditions.
A. On/Off
Pull or push the lever at the bottom of the mirror to turn the video display on or off.
B. Selection Control
Press and release the button to select the brightness, zoom, or tilt setting.
C. Adjustment
Press and release either button to adjust the selected setting.
Rotate the Rear Wiper control band to the washer position to clean the Rear Camera Mirror lens and rear window.
See Keys, Doors and Windows in your Owner’s Manual.
REAR CAMERA MIRROR♦
TIRE PRESSURE MONITOR
The Low Tire Pressure light illuminates when one or more of the vehicle’s tires is significantly underinflated. Fill the tires to the proper tire pressures listed on the Tire and Loading Information label, locat-ed below the driver’s door latch. Current tire pressures can be viewe\
d on the Infotainment Screen.
The Tire Fill Alert sounds the horn and changes the turn signals from flashing to solid when the recommended tire pressure is reached (does not apply to spare tire).
See Vehicle Care in your Owner's Manual.
ABC