2021 AUDI TT transmission
[x] Cancel search: transmissionPage 85 of 280

8S1012721BE
Driving
emergency release can be used if this hap-
pens > page 88.
Selector lever lock
The selector lever lock prevents you from select-
ing a gear accidentally, causing the vehicle to
roll.
BFV-0112
Fig. 88 Selector lever lock
To release the selector lever lock:
> Switch the ignition on.
> Press the brake pedal while pressing the inter-
lock button.
Automatic shift lock (ASL)
The selector lever is locked in the "P" and "N" po-
sitions when the ignition is switched on. You
must press the brake pedal to select another po-
sition. You must also press the interlock button if
you are moving from the "P" position. The follow-
ing message appears in the display when the se-
lector lever is in the "P" or "N" position to remind
the driver:
To select a gear, please press brake pedal and
press lock button on selector lever
The automatic shift lock only functions when the
vehicle is stationary or at speeds below 1 mph
(2 km/h). At higher speeds, the lock is automati-
cally deactivated in the "N" position.
The selector lever is not locked when shifting
quickly through "N", for example from "R" to "D".
This makes it possible to free the vehicle when it
is stuck by “rocking” it. The selector lever lock en-
gages if the lever stays in the "N" position longer
than approximately two seconds when the brake
pedal is not pressed.
Interlock button
The interlock button in the selector lever handle
prevents you from moving the selector lever in-
advertently while in some selector lever posi-
tions. The positions that require the interlock
button to be pressed are marked in color in the il-
lustration > fig. 88.
Z\ WARNING
Read and follow all WARNINGS. > A\ in Selec-
tor lever positions on page 82.
G) Tips
— If the selector lever does not engage, there
is a malfunction. The engine is disabled to
prevent the vehicle from driving off uninten-
tionally. To allow the selector lever to en-
gage again, proceed as follows:
— Briefly press the brake pedal.
— If the vehicle does not move forward or in
reverse even though a drive position is se-
lected, proceed as follows:
— If the vehicle does not move in the desired
direction, the system may not have engaged
the drive position correctly. Press the brake
pedal
and select the drive position again.
— If the vehicle still does not move in the de-
sired direction, there is a system malfunc-
tion. See an authorized Audi dealer or au-
thorized Audi Service Facility for assistance
to have the system checked.
The transmission shifts up and down automati-
cally when in the driving gears.
Fig. 89 Section of the center console: selector lever with
interlock button
83
>
Page 86 of 280

Driving
Starting the engine
> The selector lever must be in the P or the N po-
sition.
At low temperatures (below 14 °F (-10 °C)), the
engine can only be started when the selector lev-
er is in the "P" position.
Starting from a stop
> Press and hold the brake pedal.
> Start the engine > page 75.
> Press and hold the interlock button in the selec-
tor lever handle, select the desired selector lev-
er position such as "D" > page 87 and release
the lock button.
> Wait a moment until the transmission shifts.
You will notice a slight movement when the
gear engages.
> Release the brake pedal and press the accelera-
tor pedal > A\.
Various convenience functions are available for
starting on hills > page 80.
Stopping temporarily
> Press the brake pedal to stop the vehicle, for
example at a traffic light. Do not press the ac-
celerator pedal when doing this.
> To prevent the vehicle from rolling when you
start driving, set the parking brake when stop-
ping on steep hills > A\ and >@).
> The parking brake will release automatically
and the vehicle will start moving once you press
the accelerator pedal.
Stopping/parking
If the selector lever is not in the "P" position
when you open the driver’s door, the vehicle
could roll.
In vehicles with a convenience key*, the message
Shift to P, otherwise vehicle can roll away.
Doors do not lock if gearshift is not in P ap-
pears. A warning tone will also sound.
> Press and hold the brake pedal > A\.
> Set the parking brake.
> Select the "P" selector lever position.
Under certain circumstances, such as driving in
the mountains, it may be useful to switch tempo-
84
rarily to tiptronic mode in order to manually ad-
just the gears to the driving conditions
=> page 85.
On
hills, activate the parking brake first and then
shift into the "P" selector lever position. This pre-
vents too much stress from being placed on the
locking mechanism.
ZA WARNING
— The vehicle can roll even when the engine is
switched off.
— Unintended vehicle movement can lead to
serious injuries.
— Never leave your vehicle with the engine
running while in gear. If you must leave your
vehicle when the engine is running, set the
parking brake and move the selector lever to
the P position.
— Power is still transferred to the wheels when
the engine is running at idle. To prevent the
vehicle from “creeping”, you must keep your
foot on the brake when the engine is run-
ning and the selector lever is in the "D", "S"
or
"R" position or “tiptronic” mode is select-
ed.
— Do not inadvertently press the accelerator
pedal when the vehicle is stationary. Other-
wise the vehicle will start to move immedi-
ately, even if the parking brake is set. This
could result in a crash.
— Do not press the accelerator pedal when
changing the selector lever position while
the vehicle is stationary and the engine is
running.
— Never engage the R or P selector level posi-
tions while driving. It could cause a crash.
— Before driving down a steep slope, reduce
your speed and shift into a lower gear with
“tiptronic”.
— Do not ride the brakes or press the brake
pedal
too often or too long when driving
downhill. Constant braking causes the
brakes to overheat and can substantially re-
duce braking performance, increase braking
distance, or cause complete failure of the
brake system.
Page 87 of 280

8S1012721BE
Driving
— If the engine must run while you are working
in the engine compartment with the hood
open, make sure a gear is not engaged. The
selector lever must be firmly in the P posi-
tion and locked in place and the parking
brake must be set > page 200. Otherwise,
the vehicle could begin moving when in-
creasing the engine speed, even with the
parking brake set.
() Note
— If you have to stop on an incline, always
press the brake pedal to hold the vehicle in
place to reduce the risk of the vehicle rolling
backward. Do not try to hold the vehicle in
place by pressing and holding the accelera-
tor pedal. The transmission can overheat,
which increases the risk of damage.
— Allowing the vehicle to roll when the engine
is stopped and the selector lever is in the N
position will damage the automatic trans-
mission because it is not lubricated under
those circumstances.
— The transmission can overheat and be dam-
aged under certain driving and traffic condi-
tions such as frequent starts, creeping fora
long time, or stop-and-go traffic. When the
i or os] indicator light turns on, stop the
vehicle at the next opportunity and let the
transmission cool > page 87.
— Allowing the vehicle to roll when the engine
is stopped will damage the S tronic trans-
mission because it is not lubricated
= page 250, Towing.
@® Tips
For safety reasons, the parking brake is re-
leased automatically only when the driver's
safety belt is fastened.
Hill descent control
The hill descent control system assists the driver
when driving down hills.
Hill descent control is activated when the selec-
tor lever is in the "D" or "S" position and you
press the brake pedal. The transmission auto-
matically selects a gear that is suitable for the
hill. Hill descent control tries to maintain the
speed that was selected at the time of braking,
within physical and technical limitations. If may
still be necessary to adjust the speed with the
brakes. Because hill descent control cannot shift
down farther than 3rd gear, it may be necessary
to shift into tiptronic mode in very steep areas. In
this case, shift manually into 1st or 2nd gear in
tiptronic mode to use the engine's braking force
to relieve the brakes.
Hill descent control switches off once the hill lev-
els
out or if you press the accelerator pedal.
On vehicles with a cruise control system*
= page 89, hill descent control is also activated
when the speed is set.
ZA\ WARNING
Hill descent control may not be able to main-
tain a constant speed under all conditions. Al-
ways be ready to apply the brakes.
Shifting manually (tiptronic mode)
The tiptronic mode allows the driver to shift the
gears manually.
| 8Fv-0114]
Fig. 90 Center console: shifting manually with the selector
lever
Fig. 91 Steering wheel: shift paddles*
8s
Page 88 of 280

Driving
You can shift the gears manually when in “D”
mode. The transmission must be in tiptronic
mode.
Shifting with the selector lever
You can shift into manual shifting mode while the
vehicle is stationary or while driving.
> To switch to manual shifting mode, tilt the se-
lector lever toward the front passenger's side
> fig. 90. “M” will be displayed in the instru-
ment cluster.
> Upshifting: push the selector lever forward G).
> Downshifting: push the selector lever toward
the rear ©).
> To switch back to automatic mode, tilt the se-
lector lever toward the driver's side.
Shifting with the shift paddles
Applies to: vehicles with shift paddles
> Upshifting: press the @) shift paddle © fig. 97.
> Downshifting: press the ©) shift paddle.
» Applies to: RS models: To select the lowest/
highest possible gear, press and hold the shift
paddle @)/@).
If the shift paddles are tapped while in the D/S
selector lever position, automatic mode switches
off briefly. To switch from manually shifting back
to automatic shifting immediately, tap the shift
paddle @) © fig. 97 for 1 second.
To keep shifting manually, tilt the selector lever
toward the front passenger's side.
@ Tips
— The transmission only allows manual shift-
ing when the engine speed is within the per-
mitted range.
— The transmission automatically shifts up or
down before critical engine speed is
reached.
— Applies to: RS models: When accelerating,
the transmission will not automatically shift
to the next gear shortly before the maxi-
mum permitted engine RPM is reached.
Shift to the next highest gear at the right
time.
86
Kick-down enables maximum acceleration.
When you press the accelerator pedal down be-
yond the resistance point, the automatic trans-
mission downshifts into a lower gear and the en-
gine utilizes its full power, if the vehicle speed
and engine RPM permit. It shifts up into the next
higher gear once the maximum permitted engine
RPM is reached.
ZA\ WARNING
Please note that the wheels could spin on
slick or slippery roads when kick-down is ac-
tive.
Launch Control
Applies to: vehicles with Launch Control
Launch Control provides the best possible accel-
eration when starting from a stop.
Requirements
— The engine must be at operating temperature.
— The steering wheel must not be turned.
— Start/Stop system* must be deactivated
=> page 79.
— ESC must be limited > page 105.
— Driving program “S” > page 82 or the Dynamic
Audi drive select* mode must be selected
=> page 96.
Using Launch Control
— Press the brake pedal with your left foot and
hold it all the way down for at least one second.
— With the brake pedal pressed, press the accel-
erator pedal all the way down with your right
foot at the same time.
— Once the engine reaches a constant speed, re-
move your foot from the brake pedal.
Once the vehicle has started moving, reactivate
the ESC so that it is fully functional.
ZA WARNING
Only use Launch Control when road and traffic
conditions allow it and other road users will
not be endangered or impacted by your >
Page 89 of 280

8S1012721BE
Driving
driving and the vehicle's acceleration. The
driving wheels could spin and the vehicle
could swerve, especially on slick or slippery
road surfaces, which increases the risk of an
accident.
@) Note
When accelerating using Launch Control, all
vehicle components are subject to heavy
loads. This can result in increased wear.
G) Tips
After accelerating using the Launch Control,
the temperature of some vehicle components
may increase greatly. If that happens, the
function will not be available for a few mi-
nutes to reduce the risk of damage. After a
cool-down period, Launch Control will be
available again.
Peeler ias tea)
os] Transmission: malfunction! Safely stop vehi-
cle
Do not continue driving. Stop the vehicle as soon
as possible in a safe location and secure it so it
does not roll. See an authorized Audi dealer or
authorized Audi Service Facility for assistance.
[i Transmission: too hot. Please stop vehicle
The transmission is too hot and can become dam-
aged. Stop and let the transmission cool with the
engine running (at idle) in the "P" selector lever
position. Then the indicator light and the mes-
sage turn off, drive to an authorized Audi dealer
or authorized Audi Service Facility immediately to
have the malfunction corrected. If the indicator
light and the driver message do not turn off, do
not continue driving. See an authorized Audi
dealer or authorized Audi Service Facility for as-
sistance.
[GJ Transmission: malfunction! You can contin-
ue driving. See owner's manual
Drive immediately to an authorized Audi dealer
or authorized Audi Service Facility to have the
malfunction repaired.
fs] Transmission: malfunction! You can contin-
ue driving with limited function. No reverse
gear
There is a system malfunction in the transmis-
sion. The transmission is switching to emergency
mode. This mode only shifts into certain gears or
may no longer shift at all. The engine may stall.
You cannot engage the reverse gear. Drive to an
authorized Audi dealer or authorized Audi Service
Facility immediately to have the malfunction cor-
rected.
1} Transmission: malfunction! You can contin-
ue driving in D until engine is off
There is a system malfunction in the transmis-
sion. The transmission is switching to emergency
mode. If you turn the engine off, you will not be
able to select any other selector lever positions
after starting the engine again. Drive to an au-
thorized Audi dealer or authorized Audi Service
Facility immediately to have the malfunction cor-
rected.
isl Transmission: too hot. Please adapt driving
style
The transmission temperature has increased sig-
nificantly. Drive very cautiously or take a break
from driving until the temperature returns to the
normal range and the indicator light turns off.
Transmission: please press brake pedal and
select gear again
Press the brake pedal and select the desired se-
lector lever position again. You can then continue
driving.
87
Page 98 of 280

Assist systems
The system cannot guarantee that it will detect
vehicles correctly and it has switched off. The
sensors have been moved or are faulty. Have the
system checked by an authorized Audi dealer or
authorized Audi Service Facility soon.
Audi drive select (drive
settings)
Introduction
Applies to: vehicles with Audi drive select
Drive select makes it possible to experience dif-
ferent types of vehicle characteristics in one vehi-
cle. With different driving modes, the driver can
switch the setting, for example from sporty to
comfortable. In the Individual mode, the set-
tings can be adjusted to your personal preferen-
ces. This makes it possible to combine settings
such as a sporty drivetrain setting with comforta-
ble steering.
Using Audi drive select incorrectly can lead to
collisions, other accidents and serious inju-
ries.
Applies to: vehicles with Audi drive select
The vehicle setup in each mode depends on the
vehicle's features.
Engine and automatic transmission
Depending on the mode, the engine and auto-
matic transmission respond more quickly or ina
more balanced manner to accelerator pedal
movements.
Suspension control (Audi magnetic ride)*
The suspension control uses sensors to record in-
formation regarding steering movements, brak-
ing and acceleration operations by the driver, as
well as information about the road surface, driv-
ing speed, and load. With drive select, you can
adjust the suspension control to sporty (dynam-
ic), comfortable (comfort) or balanced (auto).
96
Steering
The power steering adapts. Indirect steering that
moves easily as in comfort mode is especially
suited to long drives on a highway. The dynamic
mode provides sporty, direct steering.
Engine sound*
The engine sound adapts to the current mode
and can be subtle to sporty.
— Certain vehicle settings will be reset when
the ignition is switched off.
— In some models, the maximum vehicle
speed can only be reached in the auto and
dynamic modes.
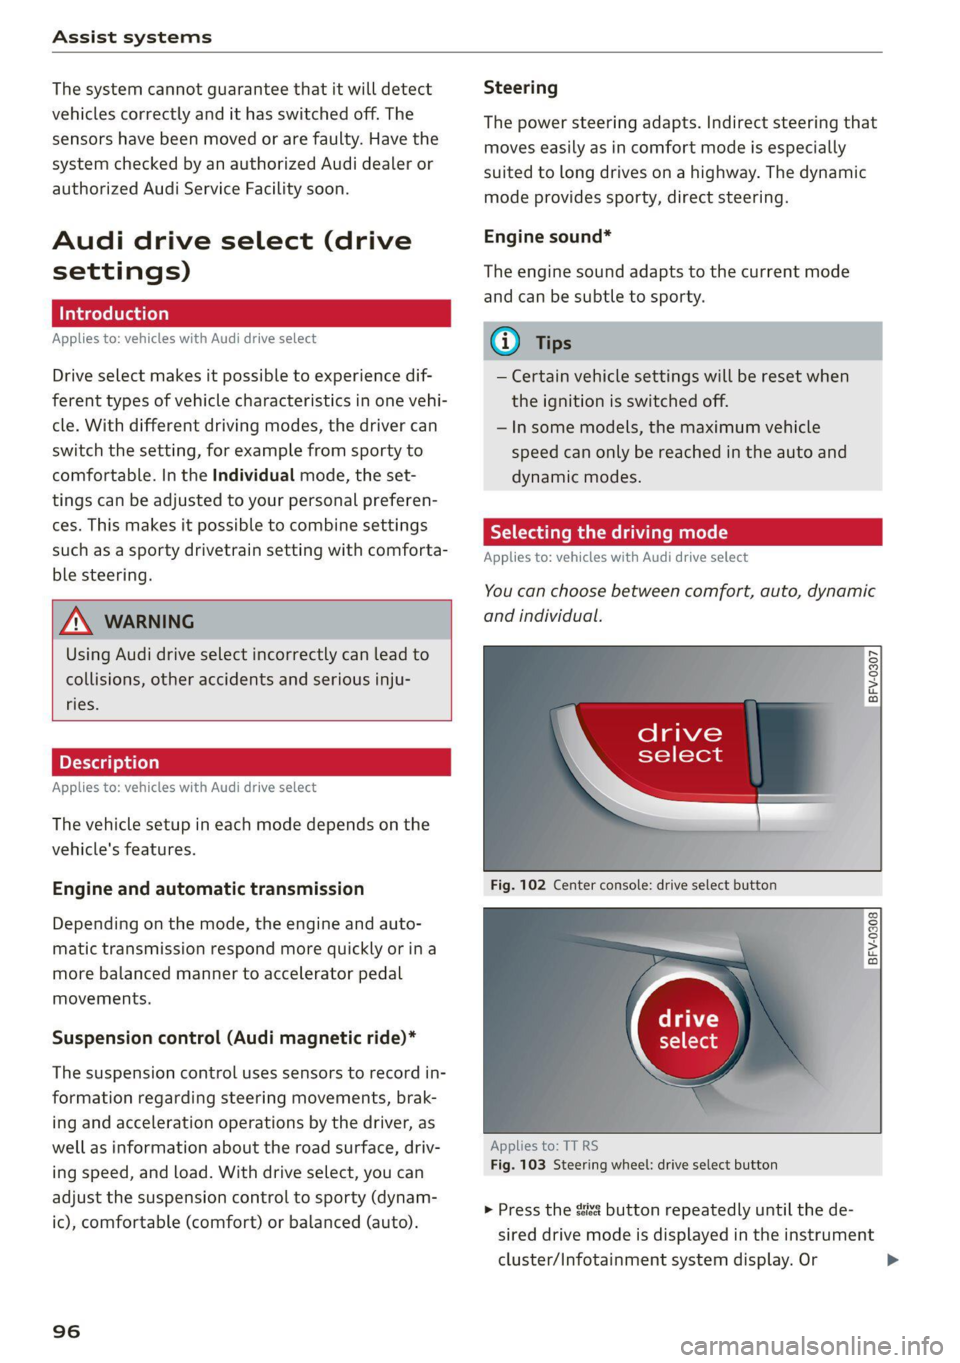
Selecting the driving mode
Applies to: vehicles with Audi drive select
You can choose between comfort, auto, dynamic
and individual.
BFV-0307
drive
select
Fig. 102 Center console: drive select button
BFV-0308
Applies to: TT RS
Fig. 103 Steering wheel: drive select button
> Press the ste button repeatedly until the de-
sired drive mode is displayed in the instrument
cluster/Infotainment system display. Or
Page 133 of 280

8S1012721BE
Telephone
— The mobile device may become hot during
wireless charging. Pay attention to the tem-
perature of your mobile device and be care-
ful when removing it from the Audi phone
box.
— An alternating magnetic field is used for
wireless charging. Maintain a minimum dis-
tance of approximately 2.4 inches (6 cm) to
the Audi phone box charging plate. The
thresholds for prolonged exposure at this
distance comply with ICNIRP1998. There-
fore, interactions such as irritation of senso-
ry organs, malfunctions of active implants
(such as pacemakers, infusion pumps, or
neurostimulators) or effects on passive im-
plants (such as prosthetic limbs) is highly
unlikely. If you have an implant, consult a
medical specialist if you have any questions.
@) Note
Applicable to U.S.A.
Operation of the Audi phone box is subject to
the following requirements of the Federal
Communications Commission:
— This is a CONSUMER device.
— BEFORE USE, you MUST REGISTER THIS DE-
VICE with your wireless provider and have
your provider’s consent. Most wireless pro-
viders consent to the use of signal boosters.
Some providers may not consent to the use
of this device on their network. If you are
unsure, contact your service provider.
— You MUST operate this device with approved
antennas and cables as specified by the
manufacturer. Antennas MUST be installed
at least 20 cm (8 inches) from any person.
— You MUST cease operating this device im-
mediately if requested by the FCC or a li-
censed wireless service provider.
— WARNING: E911 location information may
not be provided or may be inaccurate for
calls served by using this device.
@) Note
Applicable to Canada
In Canada, operation of a Zone Enhancer,
such as an Audi phone box, is subject to the
following requirements of the Innovation,
Science and Economic Development Canada
(ISED):
—This is a CONSUMER device.
— BEFORE USE, you MUST meet all require-
ments set out in CPC-2-1-05. At the time of
printing this user manual, the CPC-2-1-05
client procedures circular of ISED Canada
was available at the following web page:
http://www.ic.gc.ca/eic/site/smt-gst.
nsf/eng/sf08942.html.
— You MUST operate this device with approved
antennas and cables as specified by the
manufacturer. Antennas MUST NOT be in-
stalled within 20 cm of any person.
— You MUST cease operating this device im-
mediately if requested by ISED or a licensed
wireless service provider.
— WARNING: £911 location information may
not be provided or may be inaccurate for
calls served by using this device.
G@) Tips
— The system complies with United States FCC
regulations and ISED regulations
=> page 267.
— Placing the mobile device in a bag or protec-
tive sleeve inside the Audi phone box can in-
terfere with the connection to the external
antenna*.
— Metallic objects in the Audi phone box block
the wireless charging of your mobile device
and calls made using the exterior antenna”.
— The charging time and temperature will vary
depending on the mobile device being used.
— Your mobile device can only be charged in
the Audi phone box when the ignition is
switched on.
—To reduce the risk of malfunctions, make
sure the mobile device is positioned correct-
ly in the Audi phone box.
—The maximum charging output is 5 W.
— Strong transmission quality* cannot be
guaranteed if more than one mobile device
is in the box.
— Only one mobile device at a time can be
charged wirelessly in the Audi phone box.
131
>
Page 219 of 280

8S1012721BE
Wheels
Glossary of tire and loading
terminology
Accessory weight
means the combined weight (in
excess of those standard items
which may be replaced) of auto-
matic transmission, power steer-
ing, power brakes, power win-
dows, power Seats, radio, and
heater, to the extent that these
items are available as factory-in-
stalled equipment (whether in-
stalled or not).
Aspect ratio
means the ratio of the height to
the width of the tire in percent.
Numbers of 55 or lower indicate a
low sidewall for improved steer-
ing response and better overall
handling on dry pavement.
Bead
means the part of the tire that is
made of steel wires, wrapped or
reinforced by ply cords and that is
shaped to fit the rim.
Bead separation
means a breakdown of the bond
between components in the bead.
Cord
means the strands forming the
plies in the tire.
Cold tire inflation pressure
means the tire pressure recom-
mended by the vehicle manufac-
turer for a tire of a designated
size that has not been driven for
more than a couple of miles (kilo-
meters) at low speeds in the three
hour period before the tire pres-
sure is measured or adjusted.
Curb weight
means the weight of a motor ve-
hicle with standard equipment in-
cluding the maximum capacity of
fuel, oil, and coolant, air condi-
tioning and additional weight of
optional equipment.
Extra load tire
means a tire designed to operate
at higher loads and at higher in-
flation pressures than the corre-
sponding standard tire. Extra load
tires may be identified as “XL”,
“xl”, “EXTRA LOAD”, or “RF” on
the sidewall.
217