2020 YAMAHA TRICITY 300 lights
[x] Cancel search: lightsPage 8 of 114

Table of contentsSafety information ............................ 1-1
Further safe-riding points ............... 1-5
Description ....................................... 2-1
Left view ......................................... 2-1
Right view ....................................... 2-2
Controls and instruments ............... 2-3
Smart key system ........................... 3-1
Smart key system ........................... 3-1
Operating range of the smart key system......................................... 3-2
Handling of the smart key and mechanical keys ......................... 3-3
Smart key ....................................... 3-4
Replacing the smart key battery..... 3-6
Main switch .................................... 3-7
Stan din g assist ................................. 4-1
Standing assist ............................... 4-1
Instrument an d control functions ... 5-1
Indicator lights and warning
lights............................................ 5-1
Multi-function meter unit ................ 5-3
Handlebar switches ........................ 5-8
Front brake lever .......................... 5-10
Brake pedal .................................. 5-10
Rear brake lever ........................... 5-11
Parking brake lever ....................... 5-12
ABS .............................................. 5-12 Traction control system ................ 5-13
Fuel tank cap ................................ 5-15
Fuel ............................................... 5-16
Fuel tank overflow hose ................ 5-18
Catalytic converter ........................ 5-18
Storage compartment ................... 5-18
Adjusting the shock absorber
assemblies ................................. 5-20
Auxiliary DC jack ........................... 5-20
Sidestand ...................................... 5-21
Ignition circuit cut-off system ....... 5-22
For your safety – pre-operation
checks ............................................... 6-1
Operation an d important ri din g
points ................................................. 7-1
Engine break-in ............................... 7-1
Starting the engine .......................... 7-2
Starting off ...................................... 7-3
Acceleration and deceleration ........ 7-3
Braking ............................................ 7-3
Tips for reducing fuel consumption ................................ 7-4
Parking ............................................ 7-4
Perio dic maintenance an d
a d justment ........................................ 8-1
Tool kit ............................................ 8-2
Periodic maintenance charts .......... 8-3 Periodic maintenance chart for the
emission control system ............. 8-3
General maintenance and lubrication chart .......................... 8-4
Removing and installing the
panel............................................ 8-9
Checking the spark plug............... 8-10
Canister ........................................ 8-11
Engine oil and oil filter element..... 8-12
Why Yamalube.............................. 8-14
Final transmission oil .................... 8-14
Coolant ......................................... 8-15
Air filter and V-belt case air filter elements .................................... 8-17
Checking the throttle grip free play ............................................ 8-21
Valve clearance............................. 8-21
Tires .............................................. 8-22
Cast wheels .................................. 8-23
Checking the front brake lever
free play..................................... 8-24
Checking the rear brake lever free play..................................... 8-24
Checking the parking brake ......... 8-25
Checking the front and rear brake pads ................................ 8-25
Checking the brake fluid level ...... 8-26
Changing the brake fluid .............. 8-27
Checking the V-belt ...................... 8-27
Checking and lubricating the cables ........................................ 8-28UBX9E0E0.book Page 1 Monday, January 20, 2020 10:54 AM
Page 9 of 114

Table of contents
Checking and lubricating the
throttle grip and cable ................8-28
Lubricating the front and rear brake levers................................8-28
Checking and lubricating the
brake pedal ................................8-29
Checking and lubricating the centerstand and sidestand ........8-29
Checking the front fork..................8-30
Checking the steering ...................8-31
Lubricating the steering bearings .....................................8-31
Checking the wheel bearings ........8-31
Battery ...........................................8-32
Replacing the fuses .......................8-33
Vehicle lights .................................8-35
Replacing a turn signal light bulb ............................................8-35
Replacing the license plate light bulb ............................................8-36
Troubleshooting ............................8-36
Troubleshooting chart ...................8-38
Emergency mode .........................8-40
Vehicle care an d stora ge .................9-1
Matte color caution .........................9-1
Care .................................................9-1
Storage ............................................9-3 Specifications
................................. 10-1
Consumer information ................... 11-1
Identification numbers .................. 11-1
Diagnostic connector.................... 11-2
Vehicle data recording .................. 11-2
In dex ................................................ 12-1
UBX9E0E0.book Page 2 Monday, January 20, 2020 10:54 AM
Page 13 of 114

Safety information
1-4
1
able only from a Yamaha dealer, have
been designed, tested, and approved
by Yamaha for use on your vehicle.
Many companies with no connection
to Yamaha manufacture parts and ac-
cessories or offer other modifications
for Yamaha vehicles. Yamaha is not in
a position to test the products that
these aftermarket companies produce.
Therefore, Yamaha can neither en-
dorse nor recommend the use of ac-
cessories not sold by Yamaha or
modifications not specifically recom-
mended by Yamaha, even if sold and
installed by a Yamaha dealer.
Aftermarket Parts, Accessories, an
d
Mo difications
While you may find aftermarket prod-
ucts similar in design and quality to
genuine Yamaha accessories, recog-
nize that some aftermarket accesso-
ries or modifications are not suitable
because of potential safety hazards to
you or others. Installing aftermarket
products or having other modifications
performed to your vehicle that change
any of the vehicle’s design or operation
characteristics can put you and others at greater risk of serious injury or
death. You are responsible for injuries
related to changes in the vehicle.
Keep the following guidelines in mind,
as well as those provided under “Load-
ing” when mounting accessories.
Never install accessories or carry
cargo that would impair the per-
formance of your vehicle. Careful-
ly inspect the accessory before
using it to make sure that it does
not in any way reduce ground
clearance or cornering clearance,
limit suspension travel, steering
travel or control operation, or ob-
scure lights or reflectors.
• Accessories fitted to the han- dlebar or the front fork area can
create instability due to improp-
er weight distribution or aerody-
namic changes. If accessories
are added to the handlebar or
front fork area, they must be as
lightweight as possible and
should be kept to a minimum.
• Bulky or large accessories may seriously affect the stability of
the vehicle due to aerodynamic
effects. Wind may attempt to lift the vehicle, or the vehicle may
become unstable in cross
winds. These accessories may
also cause instability when
passing or being passed by lar-
ge vehicles.
• Certain accessories can dis- place the operator from his or
her normal riding position. This
improper position limits the
freedom of movement of the
operator and may limit control
ability, therefore, such accesso-
ries are not recommended.
Use caution when adding electri-
cal accessories. If electrical ac-
cessories exceed the capacity of
the vehicle’s electrical system, an
electric failure could result, which
could cause a dangerous loss of
lights or engine power.
Aftermarket Tires an d Rims
The tires and rims that came with your
vehicle were designed to match the
performance capabilities and to pro-
vide the best combination of handling,
braking, and comfort. Other tires, rims,
sizes, and combinations may not be
UBX9E0E0.book Page 4 Monday, January 20, 2020 10:54 AM
Page 23 of 114

Smart key system
3-5
3
To turn the smart key on or off
Push the smart key button for approxi-
mately 1 second to turn the smart key
on or off. When the smart key is turned
off, the vehicle cannot be operated
even if the smart key is within operating
range. To operate the vehicle, turn the
smart key on and bring it within operat-
ing range.
To check whether the smart key is
turne
d on or off
Push the smart key button to confirm
the current operating status of the
smart key.
If the smart key indicator light: Short flash (0.1 seconds): The
smart key is turned on.
Long flash (0.5 seconds): The
smart key is turned off.
Remote answer- back function
Push the smart key button to operate
the answer-back function remotely.
The beeper will sound twice and all of
the turn signal lights will flash twice.
This feature is convenient for locating
your vehicle in a parking lot and other
areas. Operatin
g ran ge of the answer- back
function
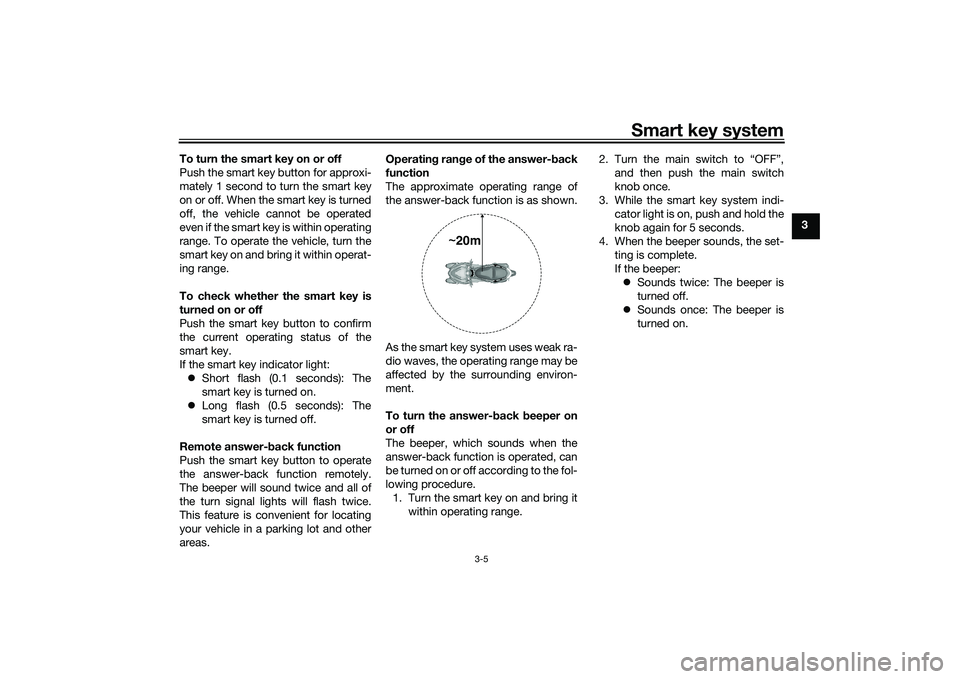
The approximate operating range of
the answer-back function is as shown.
As the smart key system uses weak ra-
dio waves, the operating range may be
affected by the surrounding environ-
ment.
To turn the answer- back beeper on
or off
The beeper, which sounds when the
answer-back function is operated, can
be turned on or off according to the fol-
lowing procedure. 1. Turn the smart key on and bring it within operating range. 2. Turn the main switch to “OFF”,
and then push the main switch
knob once.
3. While the smart key system indi- cator light is on, push and hold the
knob again for 5 seconds.
4. When the beeper sounds, the set- ting is complete.
If the beeper: Sounds twice: The beeper is
turned off.
Sounds once: The beeper is
turned on.
~20m
UBX9E0E0.book Page 5 Monday, January 20, 2020 10:54 AM
Page 26 of 114

Smart key system
3-8
3main switch knob and confirmation
with the smart key has taken place, the
main switch can be turned while the
smart key system indicator light is on
(approximately 4 seconds).
WARNING
EWA18720
Never turn the main switch to
“OFF”, “ ”, or “OPEN” while the ve-
hicle is movin
g. Otherwise the elec-
trical systems will be switche d off,
which may result in loss of control or
an acci dent.TIPDo not push the main switch knob re-
peatedly or turn the main switch back
and forth beyond normal use. Other-
wise, to protect the main switch from
damage, the smart key system will
temporarily disable and the smart key
system indicator light will flash. If this
occurs, wait until the indicator light
stops flashing before operating the
main switch again.The main switch positions are de-
scribed below.
EAU76500
ON (on)
All electrical circuits are supplied with
the power, and the engine can be start-
ed.
To turn the vehicle power on1. Turn the smart key on and bring it
within operating range.
2. Push the main switch knob and the smart key indicator light will
come on for approximately 4 sec-
onds. 3. While the smart key system indi-
cator light is on, turn the main
switch to “ON”. All of the turn sig-
nal lights flash twice and the vehi-
cle power turns on.
TIPIf the vehicle battery voltage is
low, the turn signal lights will not
flash.
See “Emergency mode” on page
8-40 for information on turning the
vehicle power on without the
smart key.
EAU76510
OFF (off)
All electrical systems are off.
1. Push.
2. Turn.1
2
1. Turn.
1
UBX9E0E0.book Page 8 Monday, January 20, 2020 10:54 AM
Page 27 of 114

Smart key system
3-9
3
To turn the vehicle power off
1. With the smart key turned on and
within operating range, turn the
main switch to “OFF”.
2. The turn signal lights flash once and the vehicle power turns off.TIPWhen the main switch is turned to
“OFF” but the smart key cannot be
confirmed (the smart key is either out-
side operation range or has been
turned off), the beeper will sound for 3
seconds and the smart key system in-
dicator light will flash for 30 seconds. During this 30 seconds, the main
switch can be freely operated.
After 30 seconds, the vehicle
power will turn off automatically.
To turn the vehicle power off im-
mediately, push the main switch
knob four times within 2 seconds.
EAU89021
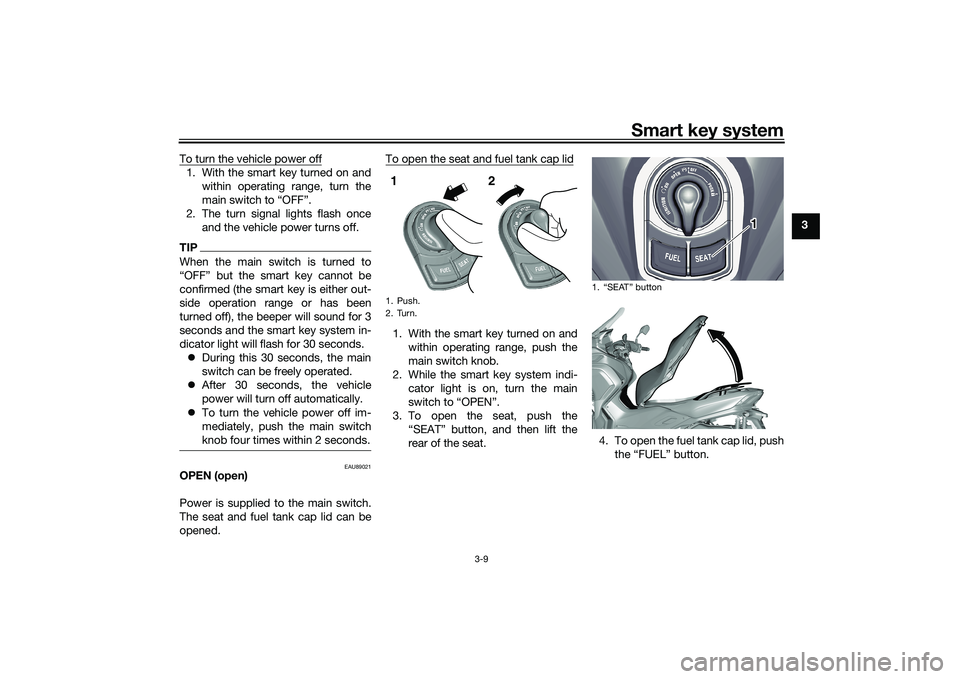
OPEN (open)
Power is supplied to the main switch.
The seat and fuel tank cap lid can be
opened. To open the seat and fuel tank cap lid
1. With the smart key turned on and
within operating range, push the
main switch knob.
2. While the smart key system indi- cator light is on, turn the main
switch to “OPEN”.
3. To open the seat, push the “SEAT” button, and then lift the
rear of the seat. 4. To open the fuel tank cap lid, push
the “FUEL” button.1. Push.
2. Turn.1 2
1. “SEAT” button
1
UBX9E0E0.book Page 9 Monday, January 20, 2020 10:54 AM
Page 32 of 114

Instrument and control functions
5-1
5
EAU4939M
In dicator li ghts an d warnin g
li g hts
EAU88900
Turn si gnal in dicator li ghts “ ”
an d“”
Each indicator light will flash when its
corresponding turn signal lights are
flashing.
EAU88910
Hi gh beam in dicator li ght “ ”
This indicator light comes on when the
high beam of the headlight is switched
on.
EAU89121
Parkin g b rake in dicator li ght “ ”
This indicator light comes on when the
parking brake is applied.
EAU88880
Coolant temperature warnin g
li g ht “ ”
This warning light comes on when the
engine is overheating. If this occurs,
stop the engine immediately and allow
the engine to cool. (See page 8-39.)
For vehicles with a radiator fan, the ra-
diator fan(s) automatically switch on or
off according to the coolant tempera-
ture.
TIPWhen the vehicle is turned on, the light
will come on for a few seconds, and
then go off. If the light does not come
on, or if the light remains on, have a
Yamaha dealer check the vehicle.NOTICE
ECA10022
Do not continue to operate the en-
g ine if it is overheatin g.
EAU88920
En gine trou ble warnin g lig ht “ ”
This warning light comes on if a prob-
lem is detected in the engine or other
vehicle control system. If this occurs,
have a Yamaha dealer check the on-
board diagnostic system.TIPWhen the vehicle is turned on, this light
should come on for a few seconds and
then go off. Otherwise, have a Yamaha
dealer check vehicle.
1. ABS warning light “ ”
2. Smart key system indicator light “ ”
3. Left turn signal indicator light “ ”
4. Coolant temperature warning light “ ”
5. Parking brake indicator light “ ”
6. Standing assist indicator light “ ”
7. High beam indicator light “ ”
8. Standing assist warning light “ ”
9. Right turn signal indicator light “ ”
10.Traction control system indicator light “ ”
11.Engine trouble warning light “ ”1
11
2
3
4
5
6
7
8
9
10
UBX9E0E0.book Page 1 Monday, January 20, 2020 10:54 AM
Page 40 of 114

Instrument and control functions
5-9
5 Ri
ght
EAU89310
Dimmer/Pass switch “ / /PASS”
Set this switch to “ ” for the high
beam and to “ ” for the low beam.
To flash the high beam, press the
switch down to “PASS” while the
headlights are on low beam.TIPWhen the switch is set to low beam,
the outer two headlights come on.
When the switch is set to high beam, all
four headlights come on.
EAU12461
Turn si gnal switch “ / ”
To signal a right-hand turn, push this
switch to “ ”. To signal a left-hand
turn, push this switch to “ ”. When
released, the switch returns to the cen-
ter position. To cancel the turn signal
lights, push the switch in after it has re-
turned to the center position.
EAU12501
Horn switch “ ”
Press this switch to sound the horn.
EAU89273
Stan din g assist switch “ ”
To engage the standing assist, press
the switch once when the standing as-
sist indicator light is flashing.
To disengage the standing assist,
press the switch twice.
EAU54213
Stop/Run/Start switch “ / / ”
To crank the engine with the starter,
set this switch to “ ”, and then push
the switch down towards “ ”. See
page 7-2 for starting instructions prior
to starting the engine. Set this switch to “ ” to stop the en-
gine in case of an emergency, such as
when the vehicle overturns or when the
throttle cable is stuck.
EAU79500
Hazar
d switch “ ”
With the main switch in the “ON” posi-
tion, use this switch to turn on the haz-
ard lights (simultaneous flashing of all
turn signal lights).
The hazard lights are used in case of an
emergency or to warn other drivers
when your vehicle is stopped where it
might be a traffic hazard.NOTICE
ECA10062
Do not use the hazard lights for an
exten ded len gth of time with the en-
g ine not runnin g, otherwise the bat-
tery may dischar ge.
EAU88941
“SEL/RES” switch
This switch is used to make setting and
display changes in the multi-function
meter unit. See page 5-3 for more in-
formation.
1. Stop/Run/Start switch “ / / ”
2. Hazard switch “ ”
3. “SEL/RES” switch
12
3
UBX9E0E0.book Page 9 Monday, January 20, 2020 10:54 AM