2020 VOLVO S90 steering wheel
[x] Cancel search: steering wheelPage 90 of 643
||
DISPLAYS AND VOICE CONTROL
883. Scroll down to the option buttons to
choose which information to show in the instrument panel: Odometer
Distance to empty tank
Tourist (alternative speedometer)
Mileage for trip odometer TM, TA or no display of mileage
Current fuel consumption, average fuelconsumption for TM or TA, or no dis-play of fuel consumption
Select or clear a selection using the O but-
ton (4). The change will apply immedi-ately.
Related information
Trip computer (p. 85)
Resetting the trip odometer (p. 88)
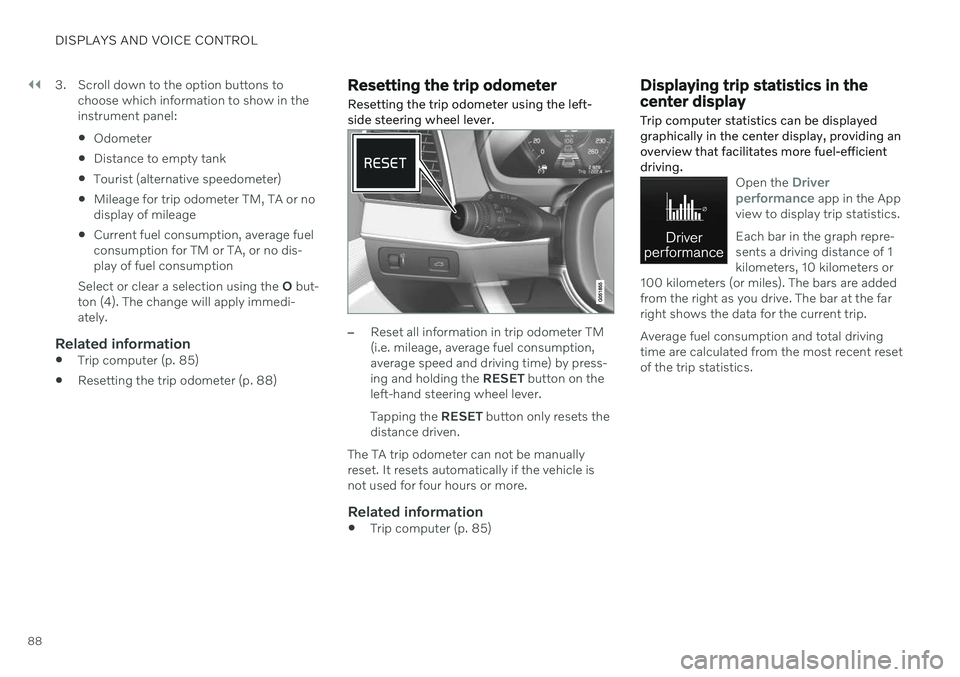
Resetting the trip odometer Resetting the trip odometer using the left- side steering wheel lever.
–Reset all information in trip odometer TM (i.e. mileage, average fuel consumption,average speed and driving time) by press-ing and holding the
RESET button on the
left-hand steering wheel lever. Tapping the RESET button only resets the
distance driven.
The TA trip odometer can not be manually reset. It resets automatically if the vehicle isnot used for four hours or more.
Related information
Trip computer (p. 85)
Displaying trip statistics in the center display Trip computer statistics can be displayed graphically in the center display, providing anoverview that facilitates more fuel-efficientdriving.
Open the Driver
performance app in the App
view to display trip statistics. Each bar in the graph repre- sents a driving distance of 1kilometers, 10 kilometers or
100 kilometers (or miles). The bars are addedfrom the right as you drive. The bar at the farright shows the data for the current trip. Average fuel consumption and total driving time are calculated from the most recent resetof the trip statistics.
Page 95 of 643
DISPLAYS AND VOICE CONTROL
}}
93
Symbol Meaning
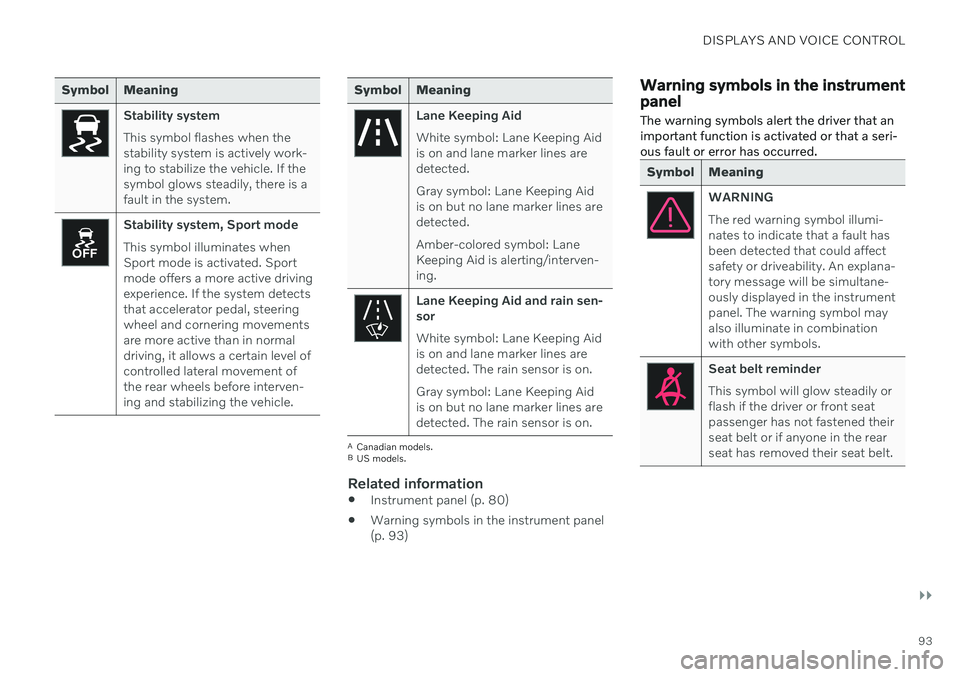
Stability system This symbol flashes when the stability system is actively work-ing to stabilize the vehicle. If thesymbol glows steadily, there is afault in the system.
Stability system, Sport mode This symbol illuminates when Sport mode is activated. Sportmode offers a more active drivingexperience. If the system detectsthat accelerator pedal, steeringwheel and cornering movementsare more active than in normaldriving, it allows a certain level ofcontrolled lateral movement ofthe rear wheels before interven-ing and stabilizing the vehicle.
Symbol Meaning
Lane Keeping Aid White symbol: Lane Keeping Aid is on and lane marker lines aredetected. Gray symbol: Lane Keeping Aid is on but no lane marker lines aredetected. Amber-colored symbol: Lane Keeping Aid is alerting/interven-ing.
Lane Keeping Aid and rain sen- sor White symbol: Lane Keeping Aid is on and lane marker lines aredetected. The rain sensor is on. Gray symbol: Lane Keeping Aid is on but no lane marker lines aredetected. The rain sensor is on.
ACanadian models.
B US models.
Related information
Instrument panel (p. 80)
Warning symbols in the instrument panel (p. 93)
Warning symbols in the instrument panel
The warning symbols alert the driver that an important function is activated or that a seri-ous fault or error has occurred.
Symbol Meaning
WARNING The red warning symbol illumi- nates to indicate that a fault hasbeen detected that could affectsafety or driveability. An explana-tory message will be simultane-ously displayed in the instrumentpanel. The warning symbol mayalso illuminate in combinationwith other symbols.
Seat belt reminder This symbol will glow steadily or flash if the driver or front seatpassenger has not fastened theirseat belt or if anyone in the rearseat has removed their seat belt.
Page 103 of 643
DISPLAYS AND VOICE CONTROL
101
advertising or otherwise to promote the sale, use or other dealings in this Software withoutprior written authorization from SiliconGraphics, Inc.
Related information
Instrument panel (p. 80)
App menu in instrument panel
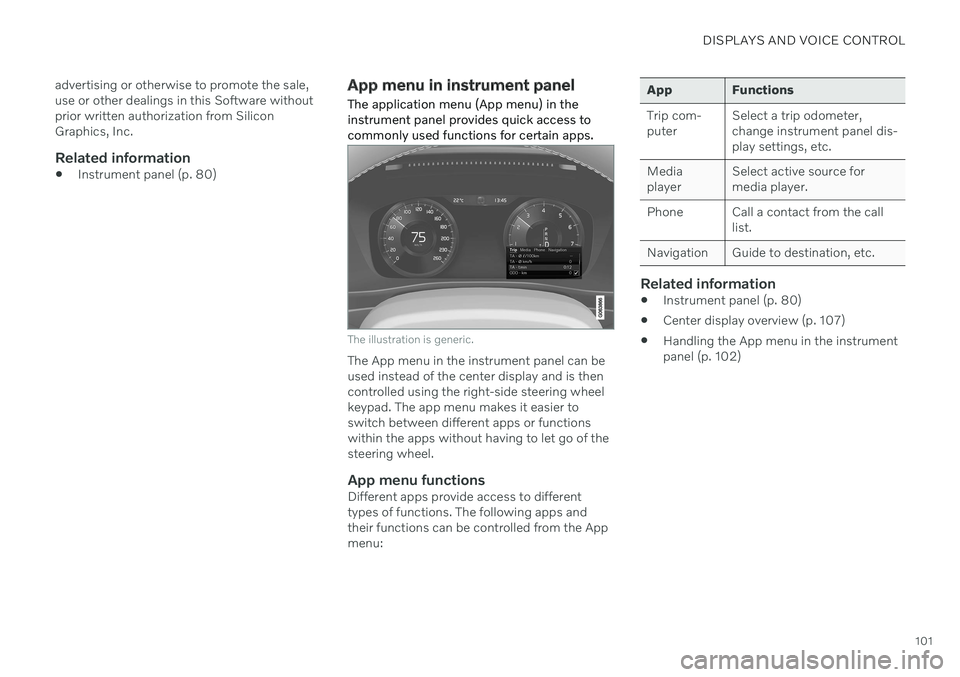
The application menu (App menu) in the instrument panel provides quick access tocommonly used functions for certain apps.
The illustration is generic.
The App menu in the instrument panel can be used instead of the center display and is thencontrolled using the right-side steering wheelkeypad. The app menu makes it easier toswitch between different apps or functionswithin the apps without having to let go of thesteering wheel.
App menu functionsDifferent apps provide access to differenttypes of functions. The following apps andtheir functions can be controlled from the Appmenu:
App Functions Trip com- puter Select a trip odometer,change instrument panel dis-play settings, etc.
Mediaplayer Select active source formedia player.
Phone Call a contact from the call list.
Navigation Guide to destination, etc.
Related information
Instrument panel (p. 80)
Center display overview (p. 107)
Handling the App menu in the instrument panel (p. 102)
Page 104 of 643
DISPLAYS AND VOICE CONTROL
102
Handling the App menu in the instrument panel
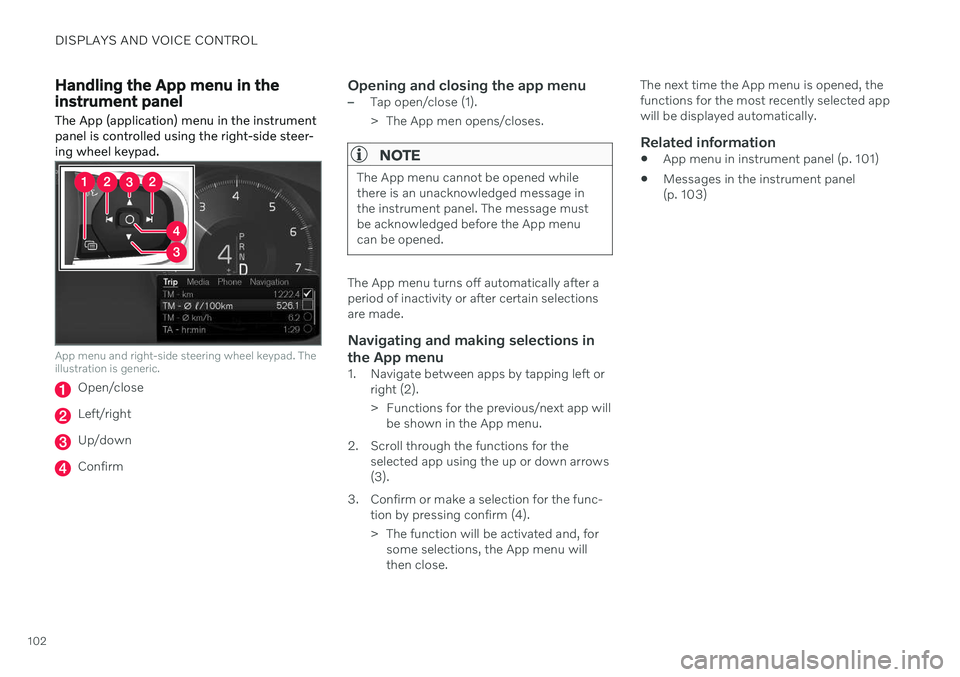
The App (application) menu in the instrument panel is controlled using the right-side steer-ing wheel keypad.
App menu and right-side steering wheel keypad. The illustration is generic.
Open/close
Left/right
Up/down
Confirm
Opening and closing the app menu–Tap open/close (1).
> The App men opens/closes.
NOTE
The App menu cannot be opened while there is an unacknowledged message inthe instrument panel. The message mustbe acknowledged before the App menucan be opened.
The App menu turns off automatically after a period of inactivity or after certain selectionsare made.
Navigating and making selections in the App menu
1. Navigate between apps by tapping left or right (2).
> Functions for the previous/next app willbe shown in the App menu.
2. Scroll through the functions for the selected app using the up or down arrows (3).
3. Confirm or make a selection for the func- tion by pressing confirm (4).
> The function will be activated and, forsome selections, the App menu will then close. The next time the App menu is opened, thefunctions for the most recently selected appwill be displayed automatically.
Related information
App menu in instrument panel (p. 101)
Messages in the instrument panel(p. 103)
Page 106 of 643
||
DISPLAYS AND VOICE CONTROL
104
Service messages
The following table lists a selection of impor- tant service messages and what they mean.
Message Meaning
Stop safelyAStop and switch off the engine. Serious risk ofdamage - contact a workshop B
.
Turn off engineA Stop and switch off the engine. Serious risk ofdamage - contact a workshop
B
.
Service urgent Drive to work- shop
A Contact a workshop
B
to
have the vehicle inspec- ted immediately.
Service requiredA Contact a workshop
B
to
have the vehicle inspec- ted as soon as possible.
Regular main- tenance Book time for maintenanceTime for service - contact a workshop B
. Shown
before the next service date.
Regular main- tenance Time for main- tenanceTime for service - contact a workshop B
. Shown on
the next service date.
Message Meaning
Regular main- tenance Maintenance overdueTime for service - contact a workshop B
. Shown
when the date for service has passed.
Temporarily offA A function has been tem- porarily deactivated andwill be reactivated auto-matically while driving orafter the engine is restar-ted.
A
Part of message, shown along with information on the loca- tion of the problem.
B An authorized Volvo workshop is recommended.
Related information
Handling messages in the instrument panel (p. 104)
Handling messages saved from the instru- ment panel (p. 105)
Messages in the center display (p. 137)
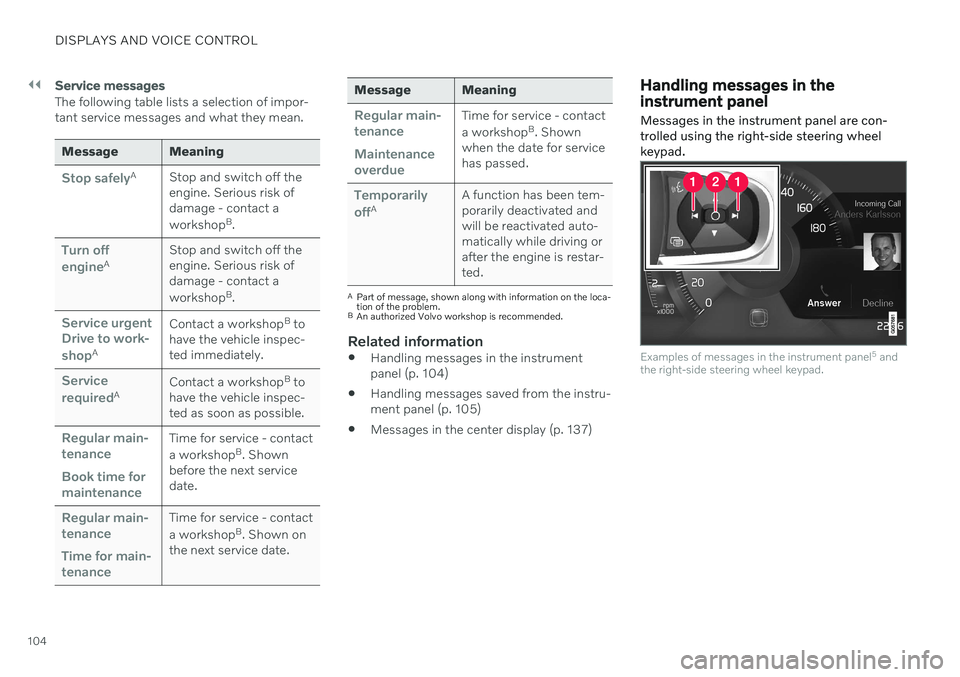
Handling messages in the instrument panel
Messages in the instrument panel are con- trolled using the right-side steering wheelkeypad.
Examples of messages in the instrument panel 5
and
the right-side steering wheel keypad.
Page 107 of 643

DISPLAYS AND VOICE CONTROL
}}
105
Examples of messages in the instrument panel6
and
the right-side steering wheel keypad. The illustration is generic - details may vary according to vehiclemodel.
Left/right
Confirm
Some messages in the instrument panel con- tain one or more buttons for e.g. confirmingthe message or accepting a request.
Handling new messages
For messages with buttons:
1. Navigate between the buttons by tapping left or right (1). 2. Confirm your selection by pressing con-
firm (2).
> The message will disappear from theinstrument panel.
For messages without buttons:
–Close the message by pressing confirm (2) or let the message automatically time-out after a short period.
> The message will disappear from the instrument panel.
Messages that need to be saved are stored in the
Car Status app, which can be opened
from the App view in the center display. The message
Vehicle message stored in Car
Status app will simultaneously appear in the
center display.
Related information
Messages in the instrument panel (p. 103)
Handling messages saved from the instru- ment panel (p. 105)
Messages in the center display (p. 137)
Handling messages saved from the instrument panel
Messages saved from the instrument panel and center displays are handled in the centerdisplay.
Saved messages can be viewed in the Car Status
app.
The messages displayed in the instrument panel thatneed to be saved are stored in the
Car Status app in the
center display. The message
Vehicle message stored in Car Status app will simulta-
neously appear in the center display.
5 With 8" instrument panel.
6 With 12" instrument panel.
Page 110 of 643

||
DISPLAYS AND VOICE CONTROL
* Option/accessory.
108
Function view ‒ vehicle functions that can
be activated or deactivated with one tap. Certain functions, called "trigger func-tions", open windows with settingsoptions. One example is the
Camera. Set-
tings for the head-up display * are also
started from Function view, but adjusted using the right-side steering wheel key-pad.
Home view ‒ the initial view displayed
when the screen is turned on.
App view ‒ shows downloaded apps
(third-party apps) as well as apps for inte- grated functions, such as
FM radio. Tap
an app icon to open that app.
Status bar ‒ current vehicle activities are
shown at the top of the screen. Network and connection information is shown tothe left of the status bar. Media-relatedinformation, the clock and informationabout background activities are shown tothe right.
Top view ‒ pull the tab down to open Top
view. From here, you can access Settings,Owner's manual, Profile and messages
stored in the vehicle. In certain cases, con- textual setting (e.g.
Navigation Settings)
and the contextual Owner's Manual (e.g.
Navigation Manual) can also be accessed
in Top view.
Navigation ‒ takes you to map navigation
with e.g. Sensus Navigation *. Tap the tile
to expand it.
Media ‒ most recently used media-related
apps. Tap the tile to expand it.
Phone ‒ used to access phone-related
functions. Tap the tile to expand it.
Fourth tile ‒ most recently used apps or
vehicle functions not associated with the other tiles. Tap the tile to expand it.
Climate row - information and direct inter- action to set temperature and seat heating for example *. Tap the symbol in the center
of the climate bar to open Climate view and additional setting options.
Related information
Handling the center display (p. 109)
Navigating in the center display's views (p. 112)
Function view in the center display (p. 119)
Apps (p. 436)
Symbols in the center display status bar(p. 121)
Changing settings in the center display'sTop view (p. 129)
Opening contextual setting in the centerdisplay (p. 130)
Owner's Manual in the center display(p. 17)
Media player (p. 455)
Phone (p. 471)
Climate system controls (p. 207)
Turning off and adjusting the volume ofthe center display system sounds(p. 128)
Changing the appearance of the centerdisplay (p. 128)
Changing system language (p. 129)
Changing system units of measurement(p. 129)
Cleaning the center display (p. 591)
Messages in the center display (p. 137)
8
In right-hand drive vehicles, these views are mirror images of the ones shown here.
Page 143 of 643

DISPLAYS AND VOICE CONTROL
}}
* Option/accessory.141
Head-up display settings *
Adjusting settings for the head-up display.
Settings can be adjusted when the vehicle is started and a projected image is displayed onthe windshield.
Selecting display optionsSelect the functions to be shown in the head-up display. 1. Tap
Settings in the center display's Top
view.
2. Tap
My CarDisplaysHead-Up
Display Options.
3. Select one or more functions:
Show Navigation
Show Road Sign Information
Show Driver Support
Show Phone
This setting is stored as a personal setting in the driver profile.
Adjusting brightness and height position
1.Press the Head-up Display Adjustmentsbutton in the center display's Function view.
2. Adjust the brightness of the projected image and the height position in the driv-er's field of vision using the right-sidesteering wheel lever.
Decreasing brightness
Increasing brightness
Raising position
Lowering position
Confirm
The brightness of the graphic is automatically adapted to the light conditions in its back-ground. Brightness is also affected by adjust-ments to the brightness of the other displaysin the vehicle. The height position can be stored in the front power seat's * memory function using the key-
pad in the driver's door.