2020 VOLKSWAGEN TRANSPORTER oil level
[x] Cancel search: oil levelPage 127 of 486
Always stow all items of luggage in the vehicle securely.
• Distribute items in the vehicle, on the roof and on the trailer as evenly as possible.
• Place heavy objects as far forward in the lug-gage compartment as possible. Position the rear seat backrests securely in the upright position.
• Secure luggage in the luggage compartment to the fastening rings with suitable straps 130.
• Adjust the headlight range 106.
• Adjust the tyre pressure according to the vehi-cle load. Adhere to the tyre pressure plate 367.
• In vehicles with a tyre monitoring system, set the new vehicle load level as necessary 318.
Stowing cargo
r-111 First read and observe the introductory L-l=:.LI information and safety warnings & on page 125.
Stow the load securely in the vehicle or on the load surface
• Before loading the vehicle, place a sturdy mat or similar cover flush with the vehicle floor. Where necessary, do not cover protruding parts of the ve-hicle floor.
• If necessary, remove the seats to increase the load area.
• The vehicle floor must be free of oil and dust, dry and fully clean in order to help prevent the load from sliding.
• Observe gross axle weight ratings and the gross vehicle weight rating.
• Distribute items in the vehicle, on the load sur-face, on the roof and on the trailer as evenly as possible.
• Stow heavy objects directly on the floor and above or in front of the rear axle and engage the rear seat backrests securely in an upright position.
CD
Hard objects on the shelf can chafe against the wires of the heating element in the rear window and cause damage.
m • Observe any information concerning the l!J loading of a trailer 139 .
• Observe any information concerning the load-ing of a roof carrier 137.
• Protect the seat rails or seat anchor points from damage.
• Secure luggage with suitable securing straps on the fastening rings 130.
• Adjust the headlight range 106.
• Adjust the tyre pressure according to the vehi-cle load. Adhere to the tyre pressure plate 367.
• In vehicles with a tyre monitoring system, set the new vehicle load level as necessary 318.
CD
Hard objects on the shelf can chafe against the wires of the heating element in the rear window and cause damage.
m • Observe any information concerning the l!J loading of a trailer =>page 139 .
• Observe any information concerning the load-ing of a roof carrier =>page 137 .
Page 158 of 486
Removing the central table
The central table can be removed more easily by two people than by one person.
• Remove front protective covers from the central seat rails.
• Turn the single seats so that they face the di-rection of travel.
• Adjust the back rest of single seats to an upright position.
• Fold up the armrests of the single seats.
• Pull the handle @ up and hold the central table with the handle and the handle recess@.
• Push the central table forwards to the point where it can be lifted out of the slots in the seat rails.
• Lift the central table out.
• Put down the central table carefully so that the rollers and feet are not soiled or damaged.
• Place the removed covers on the open slots in the seat rails.
Fitting the central table
The central table can be installed more easily by two people than by one person.
• Remove front protective covers from the central seat rails.
• Turn the single seats so that they face the di-rection of travel.
Cool box
c:cn Introduction
This chapter contains information on the following subjects:
Fitting and removing the cool box
Switching the cool box on and off 159 161
The cool box may be used while the vehicle is in motion only if it is fitted to the adapter plate.
Power for the cool box can be supplied by any of the 12-volt sockets in the vehicle. The power con-sumption is approx. 33 watts. The cool box has a capacity of 32 litres.
Follow instructions provided for the installation and use of the cool box and keep it in the vehicle wal-let.
As far as possible, keep food and drinks in the cool box in leak-proof containers. Do not overfill the cool box such that air circulation is impaired.
158 Before the journey
• Adjust the backrest of single seats to an upright position.
• Fold up the armrests of the single seats.
• Pull the handle @ up and hold the central table with the handle and the handle recess®.
• Insert the central table guides into the recesses in the seat rails.
• Insert the central table into the seat rails and push them back, so that the removed covers can be placed on the open slots in the seat rails.
• Fold the handle@ back to engage the central table in the seat rails.
• Check that the central table is locked securely. it should now no longer be possible to move the central table.
• Do not raise the table module when the cen-tral table Is located between the single seats. This could cause damage to the table.
The vehicle battery will be drained if the cool box is used when the engine is switched off. For this rea-son, the cool box is fitted with a battery monitor. The battery monitor will switch the cool box off if the vehicle battery has a low charge level. The bat-tery monitor will switch the cool box on again as soon as the battery has reached a suitable charge level, for example, after a long journey.
Additional information and warnings:
• Seat functions, front =>page 69
• Seat functions, rear =>page 72
• Seat functions, rear, Business =>page 182
• Seat functions, rear, California =>page 193
• Electrical sockets =>page 163
• Battery =>page 350
Page 270 of 486
Warning and indicator lamps
[Q First read and observe the Introductory information and safety warnings & on page 269.
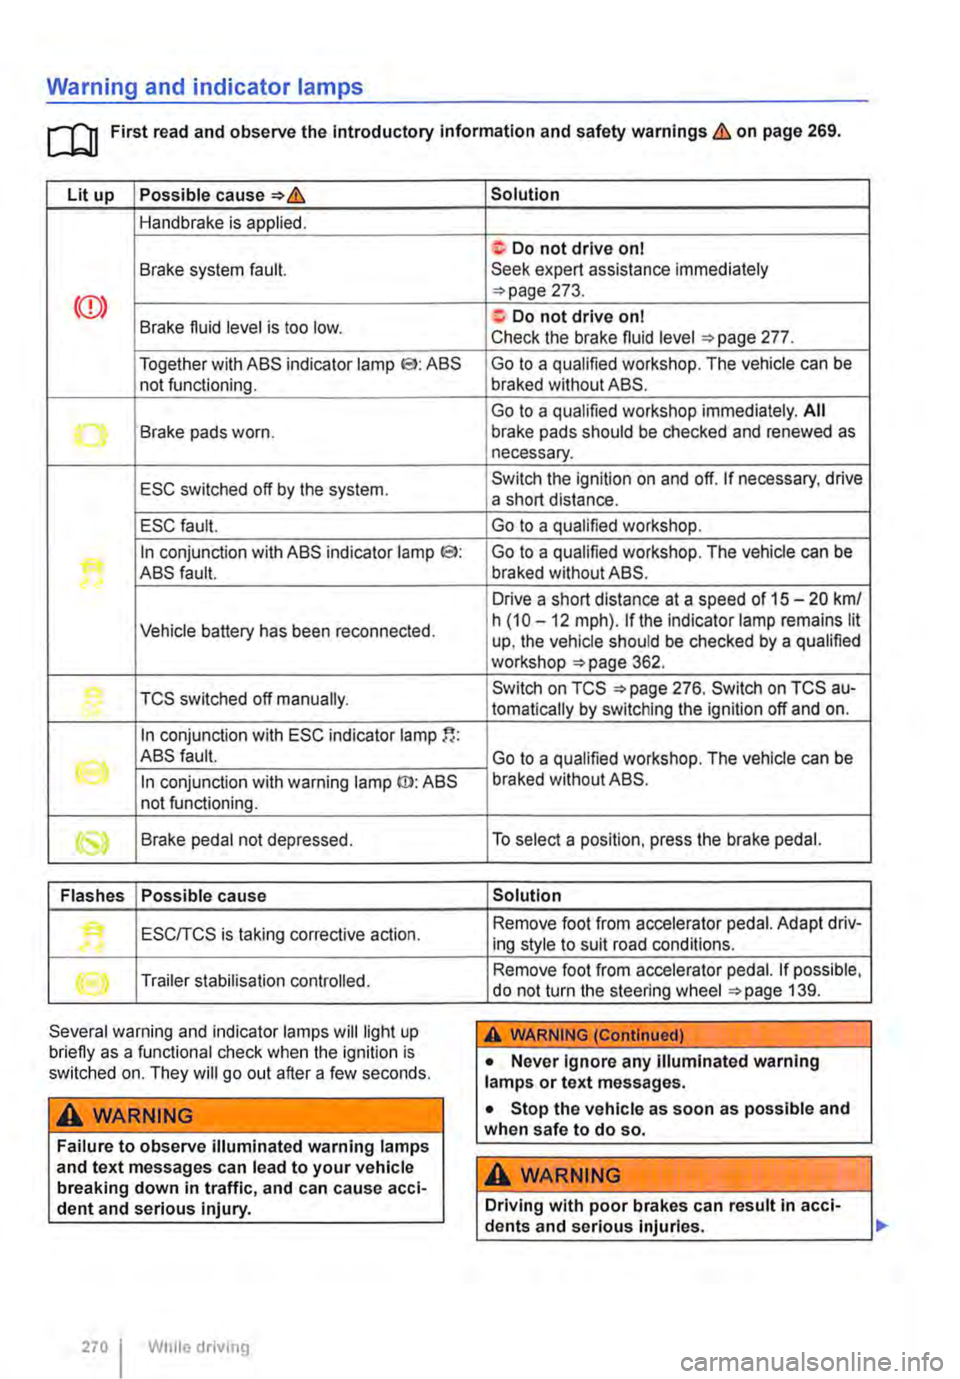
Lit up Possible cause=>&
Handbrake is applied.
Brake system fault.
Together with ABS indicator lamp El: ABS not functioning.
-...-Brake pads worn .
ESC switched off by the system.
ESC fault.
In conjunction with ABS indicator lamp CS>: ABS fault.
Vehicle battery has been reconnected.
TCS switched off manually.
In conjunction with ESC indicator lamp
((oil ABS fault.
In conjunction with warning lamp ID: ABS not functioning.
Brake pedal not depressed.
Flashes Possible cause
'• ESCITCS is taking corrective action.
Trailer stabilisation controlled.
Several warning and indicator lamps will light up briefly as a functional check when the ignition is switched on. They will go out after a few seconds.
A WARNING
Failure to observe illuminated warning lamps and text messages can lead to your vehicle breaking down in traffic, and can cause acci-dent and serious injury.
270 I While driving
Solution
f; Do not drive on I Seek expert assistance immediately =>page 273.
a:. Do not drive on I Check the brake fluid level =>page 277.
Go to a qualified workshop. The vehicle can be braked without ABS.
Go to a qualified workshop immediately. All brake pads should be checked and renewed as necessary.
Switch the ignition on and off. If necessary, drive a short distance.
Go to a qualified workshop.
Go to a qualified workshop. The vehicle can be braked without ABS.
Drive a short distance at a speed of 15 -20 km/ h (10 -12 mph). if the indicator lamp remains lit up, the vehicle should be checked by a qualified workshop =>page 362.
Switch on TCS =>page 276. Switch on TCS au-tomatically by switching the ignition off and on.
Go to a qualified workshop. The vehicle can be braked without ABS.
To select a position, press the brake pedal.
Solution
Remove foot from accelerator pedal. Adapt driv-ing style to suit road conditions.
Remove foot from accelerator pedal. If possible, do not turn the steering wheel =>page 139.
A WARNING (Continued)
• Never ignore any illuminated warning lamps or text messages.
• Stop the vehicle as soon as possible and when safe to do so.
A WARNING
Driving with poor brakes can result in acci-dents and serious injuries.
Page 273 of 486

heavy load on the brakes should be avoided. For example, when driving too close to the vehicle ahead.
The rate of wear of the brake pads depends to a great extent on the conditions under which the ve-hicle is operated and the way in which the vehicle is driven. With regular urban trips, short journeys and a sporty driving style, the brake pads must be checked by a qualified workshop more regularly than stated in the service schedule.
When driving with wet brakes, for example after driving through water, after heavy rainfall or after washing the vehicle, the braking effect may be de-layed as the brake discs will be wet, or possibly ic-ed up (in winter). The brakes must be "dried" as quickly as possible by careful braking at higher speed. Ensure that no vehicle behind you or no other road user is put at risk as a result of this ac-
Any salt layer accumulating on the discs and pads will delay the braking effect and increase the braking distance. If the brakes on the vehicle have not been applied for a long time on roads that have been gritted with salt, the layer of salt must be re-duced through careful braking &.
Corrosion on the brake discs and dirt in the brake pads are facilitated through long periods of inactivi-ty, low mileage and low load levels. With inactivity or low use levels for the brake pads as well as cor-rosion, Volkswagen Commercial Vehicles recom-mends that the brake discs and brake pads be cleaned by braking strongly several times from high speed. Ensure that no vehicle behind you or no other road user is put at risk as a result of this
Fault in the brake system
A brake circuit may have failed if you have to re-duce speed and the vehicle does not brake as nor-mal (sudden increase in braking distance). This will be indicated by the warning lamp m and in some cases a text message. Go to the nearest qualified workshop immediately to have the fault corrected. Drive at low speed when doing this and anticipate much longer braking distances and an increase in the pressure required on the pedal.
Brake servo
The brake serve will only function when the engine is running and reinforces the pressure applied by the driver on the brake pedal.
If the brake serve is not functioning or the vehicle is being towed, the brake pedal will have to be de-pressed more forcefully as the braking distance will be increased due to the lack of assistance for the brake system &.
A WARNING
New brake pads will not have the optimal braking effect when first fitted.
• New brake pads cannot generate the full braking effect during the first 300 km and must first be run In. A reduced braking effect can be Increased by applying more pressure to the brake pedal.
• You must drive particularly carefully when driving with new brake pads In order to re-duce the risk of accidents, serious Injuries and loss of control of the vehicle.
• Never drive too close to other vehicles when running in new brake pads, and never create a driving situation that will place a heavy load on the brakes.
A WARNING
Overheated brakes reduce the braking effect and considerably Increase the braking dis-tance.
• When driving downhill the brakes are placed under particular strain and become hot very quickly.
• Before driving down a long, steep gradi-ent, reduce speed and change to a lower gear or move the selector lever to a lower position. This will make use of the engine braking ef-fect and relieve the load on the brakes.
• Non-standard or damaged front spoilers could restrict the airflow to the brakes and cause them to overheat.
A WARNING
Wet brakes or brakes coated with ice or road salt react more slowly and require longer braking distances.
• Carefully apply the brakes to test them.
• Always dry brakes and clean off any coat-Ing of Ice and salt with a few cautious appli-cations of the brake when visibility, weather, road and traffic conditions permit.
A WARNING
Driving without the brake servo can consider-ably Increase the braking distance and thus cause accidents and serious Injuries.
• Never allow the vehicle to roll if the engine Is switched off.
Starting the engine, changing gear and parking 273
Page 277 of 486
Brake fluid
B7E.02AO
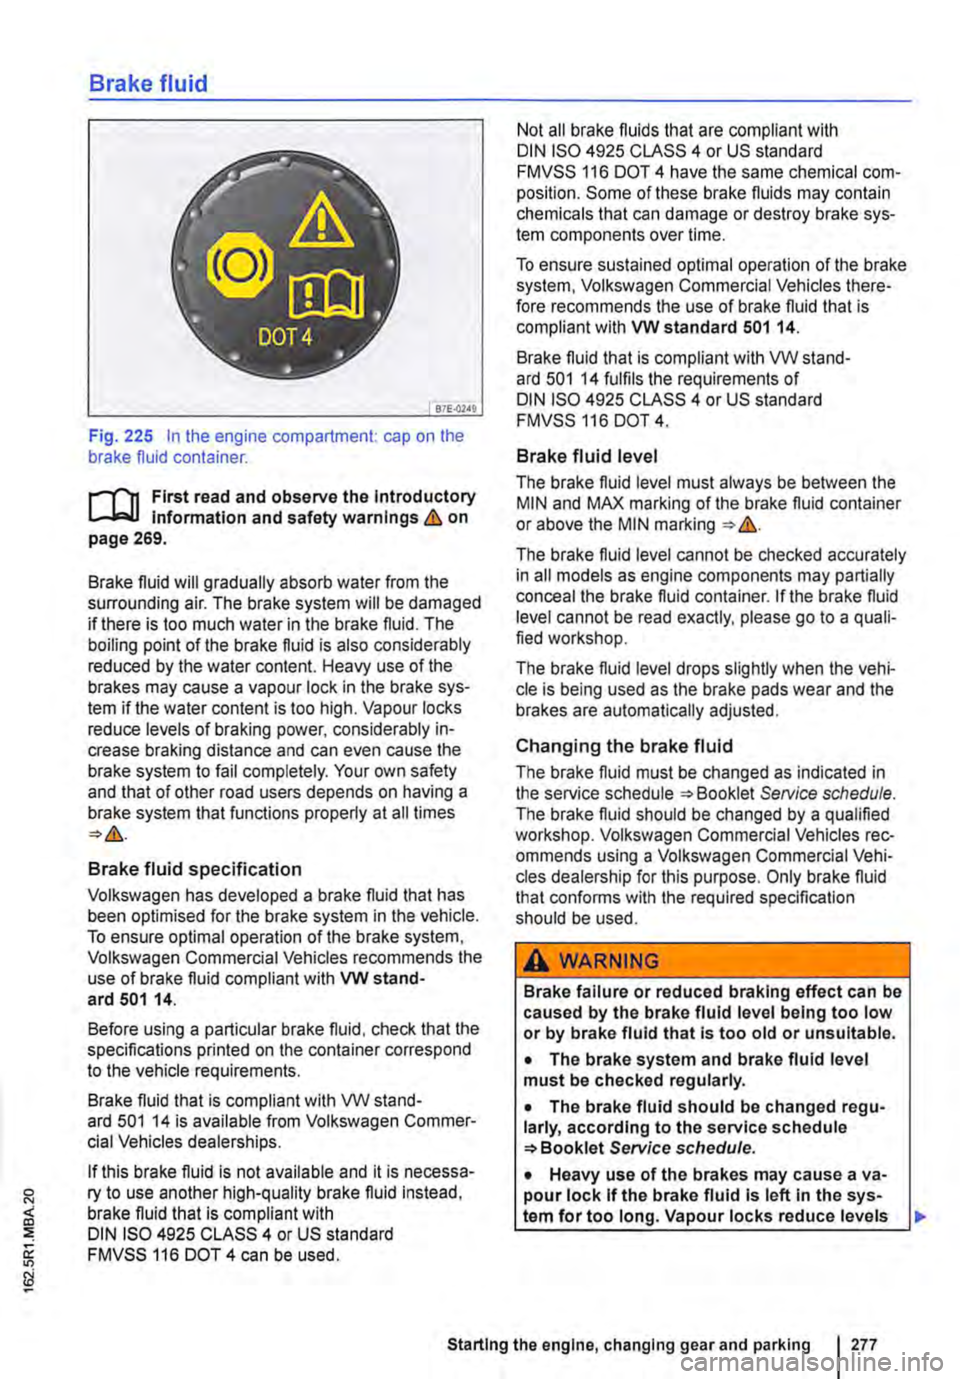
Fig. 225 In the engine compartment: cap on the brake fluid container.
r-111 First read and observe the Introductory l-Jr:,U Information and safety warnings&. on page 269.
Brake fluid will gradually absorb water from the surrounding air. The brake system will be damaged if there is too much water in the brake fluid. The boiling point of the brake fluid is also considerably reduced by the water content. Heavy use of the brakes may cause a vapour lock in the brake sys-tem if the water content is too high. Vapour locks reduce levels of braking power, considerably in-crease braking distance and can even cause the brake system to fail completely. Your own safety and that of other road users depends on having a brake system that functions properly at all times
Brake fluid specification
Volkswagen has developed a brake fluid that has been optimised for the brake system in the vehicle. To ensure optimal operation of the brake system, Volkswagen Commercial Vehicles recommends the use of brake fluid compliant with VW stand-ard 501 14.
Before using a particular brake fluid, check that the specifications printed on the container correspond to the vehicle requirements.
Brake fluid that is compliant with VW stand-ard 501 14 is available from Volkswagen Commer-cial Vehicles dealerships.
If this brake fluid is not available and it is necessa-ry to use another high-quality brake fluid instead, brake fluid that is compliant with DIN ISO 4925 CLASS 4 or US standard FMVSS 116 DOT 4 can be used.
Not all brake fluids that are compliant with DIN ISO 4925 CLASS 4 or US standard FMVSS 116 DOT 4 have the same chemical com-position. Some of these brake fluids may contain chemicals that can damage or destroy brake sys-tem components over time.
To ensure sustained optimal operation of the brake system, Volkswagen Commercial Vehicles there-fore recommends the use of brake fluid that is compliant with VW standard 501 14.
Brake fluid that is compliant with VW stand-ard 501 14 fulfils the requirements of DIN ISO 4925 CLASS 4 or US standard FMVSS 116 DOT 4.
Brake fluid level
The brake fluid level must always be between the MIN and MAX marking of the brake fluid container or above the MIN marking &.
The brake fluid level cannot be checked accurately in all models as engine components may partially conceal the brake fluid container. If the brake fluid level cannot be read exactly, please go to a quali-fied workshop.
The brake fluid level drops slightly when the vehi-cle is being used as the brake pads wear and the brakes are automatically adjusted.
Changing the brake fluid
The brake fluid must be changed as indicated in the service schedule Service schedule. The brake fluid should be changed by a qualified workshop. Volkswagen Commercial Vehicles rec-ommends using a Volkswagen Commercial Vehi-cles dealership for this purpose. Only brake fluid that confonns with the required specification should be used.
A WARNING
Brake failure or reduced braking effect can be caused by the brake fluid level being too low or by brake fluid that Is too old or unsuitable.
• The brake system and brake fluid level must be checked regularly.
• The brake fluid should be changed regu-larly, according to the service schedule Service schedule.
• Heavy use of the brakes may cause a va-pour lock If the brake fluid Is left In the sys-tem for too long. Vapour locks reduce levels
Starting the engine, changing gear and parking I 277
Page 280 of 486
Saving fuel
1/100 km
-10°C
+20 oc
L----------------tkm 5 15 25 30
en-o11S
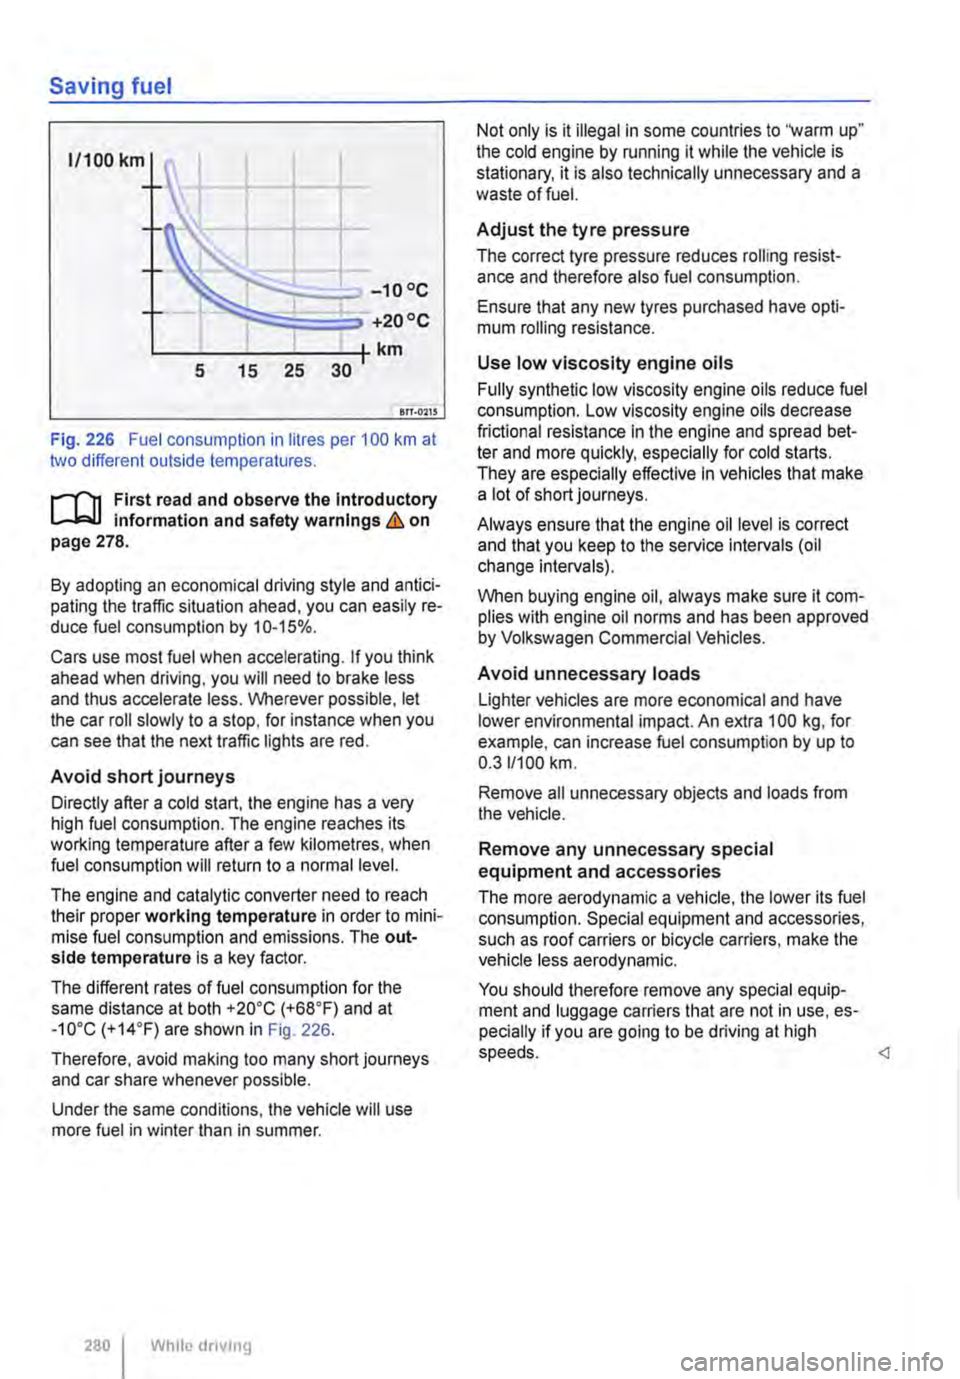
Fig. 226 Fuel consumption in litres per 100 km at two different outside temperatures.
r-1"'11 First read and observe the Introductory Information and safety warnings&. on page 278.
By adopting an economical driving style and antici-pating the traffic situation ahead, you can easily re-duce fuel consumption by 10-15%.
Cars use most fuel when accelerating. If you think ahead when driving, you will need to brake less and thus accelerate less. Wherever possible, let the car roll slowly to a stop, for instance when you can see that the next traffic lights are red.
Avoid short journeys
Directly after a cold start, the engine has a very high fuel consumption. The engine reaches its working temperature after a few kilometres, when fuel consumption will return to a normal level.
The engine and catalytic converter need to reach their proper working temperature in order to mini-mise fuel consumption and emissions. The out-side temperature is a key factor.
The different rates of fuel consumption for the same distance at both +20"C (+68"F) and at -10"C (+14"F) are shown in Fig. 226.
Therefore, avoid making too many short journeys and car share whenever possible.
Under the same conditions, the vehicle will use more fuel in winter than in summer.
280 I While dnvmg
Not only is it illegal in some countries to "warm up" the cold engine by running it while the vehicle is stationary, it is also technically unnecessary and a waste of fuel.
Adjust the tyre pressure
The correct tyre pressure reduces rolling resist-ance and therefore also fuel consumption.
Ensure that any new tyres purchased have opti-mum rolling resistance.
Use low viscosity engine oils
Fully synthetic low viscosity engine oils reduce fuel consumption. Low viscosity engine oils decrease frictional resistance in the engine and spread bet-ter and more quickly, especially for cold starts. They are especially effective In vehicles that make alotofshortjourneys.
Always ensure that the engine oil level is correct and that you keep to the service intervals (oil change intervals).
When buying engine oil, always make sure it com-plies with engine oil norms and has been approved by Volkswagen Commercial Vehicles.
Avoid unnecessary loads
Lighter vehicles are more economical and have lower environmental impact. An extra 100 kg, for example, can increase fuel consumption by up to 0.311100 km.
Remove all unnecessary objects and loads from the vehicle.
Remove any unnecessary special equipment and accessories
The more aerodynamic a vehicle, the lower its fuel consumption. Special equipment and accessories, such as roof carriers or bicycle carriers, make the vehicle less aerodynamic.
You should therefore remove any special equip-ment and luggage carriers that are not in use, es-pecially if you are going to be driving at high speeds.
Page 308 of 486

A WARNING (Continued)
• Front Assist can Issue unnecessary warn-ings and carry out unwanted braking inter-ventions when Its function is Impaired, e.g. if the position of the radar sensor has been soiled or changed.
• The Front Assist does not react to per-sons, animals or vehicles crossing or ap-proaching In the same lane.
• The driver must be prepared to take full control of the vehicle at all times.
m The brake pedal feels "harder" when Front W Assist triggers the brakes.
Displays
A
m Automatic brake intervention by Front Assist W can be stopped by using the accelerator or through steering intervention.
m Deactivate Front Assist if it does not function W as described in this chapter, e.g. if multiple unwanted interventions occur, deactivate Front As-sist and have the system checked by a qualified workshop as soon as possible. Volkswagen recom-mends using a Volkswagen dealership for this pur-pose. <1
BSG 0075
Fig. 244 In the instrument cluster display: Assist deactivated . ..!!. Distance warning lamp.
Fig. 245 The display in the instrument cluster: ad-vance warning display.
,....--m First read and observe the Introductory l.-.J,:.,U information and safety warnings & on page 307.
308 I While dnving
Distance warning
If the safe distance to the vehicle in front drops be-low the minimum level, a distance warning will ap-pear in the instrument cluster display ::.Fig. 244 !ID.
Increase the distance.
Advance warning
The system detects a potential collision with a ve-hicle in front ::.Fig. 245.
Brake or take avoiding action!
A WARNING
Failure to observe illuminated warning lamps and displays can cause accidents and seri-ous Injuries.
• Never ignore Illuminated warning lamps
La_n_d __
Page 314 of 486

Operation
Fig. 248 Display in the exterior mirror
r-f"n First read and observe the introductory L-W! information and safety warnings & on page 312.
Visual display in the exterior Situation mirror housing
The lane change assist system uses radar sensors to monitor the area behind the vehicle. The system then measures the distance and the difference in speed to other vehicles. The lane change assist system is activated at speeds over approximately 10 km/h (6 m ph) and deactivated at speeds under 5 km/h (3 mph). The driver receives infonmation via the visual display in the exterior mirror housing.
Visual display in the exterior mirror housing
The visual displays 248 in the exterior mirror housing notify the driver of following traffic on ei-ther side of the vehicle whenever a traffic situation is classified as critical when the driver intends to change lanes.
Tinted side windows or retrofitted tinting foils can negatively affect or distort the visual displays in the exterior mirror.
None No other vehicle at a critical distance from your vehicle detected by -the lane change assist system & in Indicator lamp on page 313.
Lights up once briefly. The lane change assist system is switched on and ready for use.
Lit up (information level). The lane change assist system has detected a potentially critical sit-uation.
Flashes several times The turn signal is active and the lane change assist system has de-
(warning level). tected a potentially critical situation on the corresponding side of the in Indicator/amp on page 313.
Radar sensors
The radar sensors are on the left and right behind the rear bumper and are not visible from outside. They monitor an area of approximately 70 metres behind the vehicle and the blind spots to the right and left of the vehicle. The monitored area to the side of the vehicle is approximately one lane wide.
The width of the lane is not detected in individual cases. but is predefined in the system. For this rea-son. incorrect displays could be shown when driv-
314 I While driving
ing in narrow lanes or when driving in the middle of 2 lanes. In the same way, vehicles travelling in the lane next to the one you wish to change to could be detected, as could solid objects such as safety barriers. and trigger an incorrect warning.