Page 37 of 418
37
Lighting dimmerThis system allows the brightness of the instruments and controls to be adjusted to suit the ambient light level.
F With the exterior lighting on, press this button to raise the level of brightness.F With the exterior lighting on, press this button to lower the level of brightness.As soon as the lighting reaches the required
level of brightness, release the button.
At the instrument panelWith the touch screen
F In the Settings menu, select "Brightness". Or select "OPTIONS", "Screen configuration" then "Brightness".F Adjust the brightness by pressing the arrows or moving the slider.
The brightness can be adjusted differently for day mode and night mode.
1
Instruments
Page 39 of 418
39
Trip reset
With LCD text instrument panel
F When the trip is displayed, press the button
on the end of the wiper control stalk.
F Or, depending on equipment, press the thumbwheel on the steering wheel for more than two seconds.
F When the desired trip is displayed, press the reset button in the instrument panel for more than two seconds.
With LCD text or matrix instrument panel
1
Instruments
Page 51 of 418

51
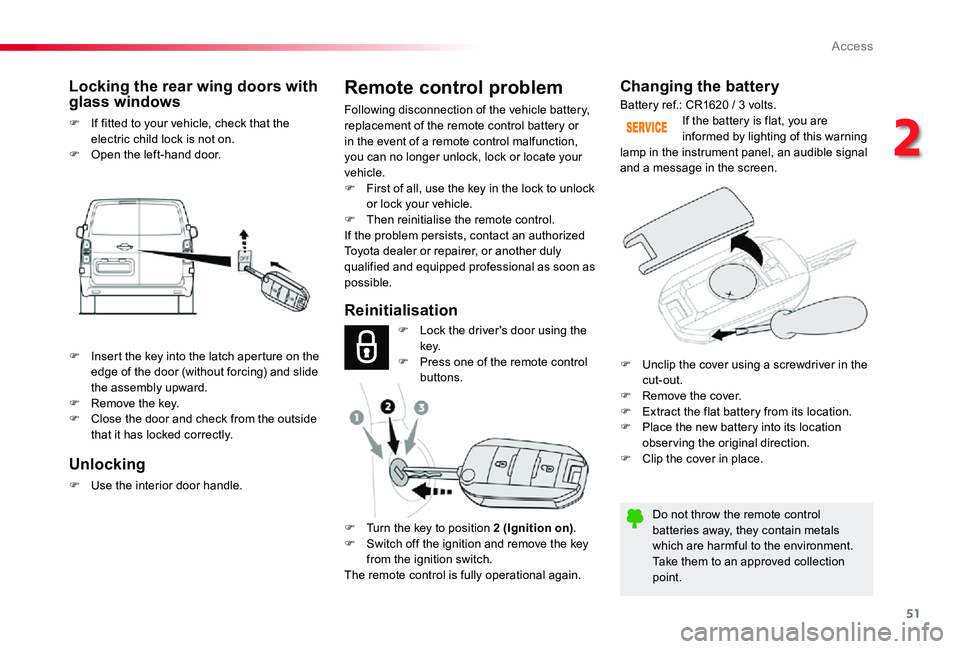
Changing the battery
Do not throw the remote control batteries away, they contain metals which are harmful to the environment.Take them to an approved collection point.
If the battery is flat, you are informed by lighting of this warning lamp in the instrument panel, an audible signal and a message in the screen.
Reinitialisation
Locking the rear wing doors with glass windows
F If fitted to your vehicle, check that the electric child lock is not on.F Open the left-hand door.
Battery ref.: CR1620 / 3 volts.
F Lock the driver's door using the key.F Press one of the remote control buttons.
F Turn the key to position 2 (Ignition on).F Switch off the ignition and remove the key from the ignition switch.The remote control is fully operational again.
Unlocking
F Use the interior door handle.
Remote control problem
Following disconnection of the vehicle battery, replacement of the remote control battery or in the event of a remote control malfunction, you can no longer unlock, lock or locate your vehicle.F First of all, use the key in the lock to unlock or lock your vehicle.F Then reinitialise the remote control.If the problem persists, contact an authorized
Toyota dealer or repairer, or another duly qualified and equipped professional as soon as possible.
F Insert the key into the latch aperture on the edge of the door (without forcing) and slide the assembly upward.F Remove the key.F Close the door and check from the outside that it has locked correctly.
F Unclip the cover using a screwdriver in the cut-out.F Remove the cover.F Extract the flat battery from its location.F Place the new battery into its location obser ving the original direction.F Clip the cover in place.
2
Access
Page 62 of 418

62
Changing the cell battery
Battery ref.: CR2032 / 3 volts.This replacement battery is available from an authorized Toyota dealer or repairer, or another duly qualified and equipped professional.A message appears in the instrument panel screen when replacement of the battery is needed.
Do not throw the remote control batteries away, they contain metals
which are harmful to the environment.Take them to an approved collection point.
F Place the remote control against the reader.F Keeping it in place, switch on the ignition by pressing "START/STOP".The remote control is fully operational again.
Reinitialisation
Remote control problem
Following disconnection of the vehicle battery, replacement of the remote control battery or in the event of a remote control malfunction, you can no longer unlock, lock or locate your vehicle.F First, use the integral key in the door lock to unlock or lock your vehicle.F Then, reinitialise the remote control.
If the problem persists, contact an authorized Toyota dealer or repairer, or another duly qualified and equipped professional as soon as possible.
F Unlock the driver's door using the integral key.
F Press one of the remote control buttons.
F Place the integral key in the lock to unlock your vehicle.
F Unclip the cover using a small screwdriver at the cutout.F Lift off the cover.F Remove the flat battery from its location.F Fit the new battery into its location obser ving the original direction of fitment.F Clip the cover onto the casing.
Access
Page 147 of 418

147
Front daytime running
lamps
(light-emitting diodes)
If fitted to your vehicle, they come on automatically when the engine is started, when the lighting control stalk is in position "0" or "AUTO".
Automatic illumination of
headlamps
Activation
When a low level of ambient light is detected by a sunshine sensor, the number plate lamps, sidelamps and dipped beam headlamps are switched on automatically, without any action on the part of the driver. They can also come on if rain is detected, at the same time as automatic operation of the windscreen wipers.As soon as the brightness returns to a
sufficient level or after the windscreen wipers are switched off, the lamps are switched off automatically.
Deactivation
F Turn the ring to another position. Deactivation of the function is accompanied by the display of a message.
Operating fault
In the event of a malfunction of the sunshine sensor, the lighting comes on; this warning lamp is displayed
Contact an authorized Toyota dealer or repairer, or another duly qualified and equipped professional.
in the instrument panel accompanied by an
audible signal and/or a message.
In fog or snow, the sunshine sensor may detect sufficient light. In this case, the lighting will not come on automatically.Do not cover the sunshine sensor, coupled with the rain sensor and located in the top of the windscreen behind the rear view mirror; the
associated functions would no longer be controlled.
F Turn the ring to the "AUTO" position. The
activation of the function is accompanied by the display of a message.
4
Lighting and visibility
Page 155 of 418

155
Automatic rain sensitive windscreen wipers
Switching on
Briefly push the control stalk downwards.A wiping cycle confirms that the instruction has been accepted.This warning lamp comes on in the instrument panel and a message is displayed.
Briefly push the control stalk downwards again, or place the control stalk in another position (Int, 1 or 2).This warning lamp goes off in the instrument panel and a message is displayed.
Switching off
The automatic rain sensitive windscreen wipers must be reactivated by pushing the control stalk downwards, if the ignition has been off for more than one minute.
The windscreen wipers operate automatically, without any action on the part of the driver, if rain is detected (sensor behind the rear view mirror), adapting their speed to the intensity of the rainfall.
Do not cover the rain sensor, linked with the sunshine sensor and located in the top of the windscreen behind the rear view m i r r o r.Switch off the automatic rain sensitive wipers when using an automatic car wash.In winter, it is advisable to wait until the windscreen is completely clear of ice before activating the automatic rain sensitive wipers.
Operating fault
If a fault occurs with the automatic rain sensitive wipers, the wipers will operate in intermittent mode.Have it checked by an authorized Toyota dealer or repairer, or another duly qualified and
equipped professional.
Park.
Intermittent wipe.
Wash-wipe (set duration).
Rear wiper
4
Lighting and visibility
Page 156 of 418

156
If a significant accumulation of snow or ice is present, or when using a bicycle carrier on the boot, deactivate the automatic rear wiper.
This function is activated by default.
Reverse gear
When reverse gear is engaged, the rear wiper will come into operation automatically if the windscreen wipers are operating.
Activation / Deactivation
Activation or deactivation of the function is done in the vehicle configuration menu.
F Pull the windscreen wiper stalk towards you. The screenwash then the wipers operate for a fixed period.The headlamp wash is only activated if the dipped headlamps are on and the vehicle is moving.With daytime running lamps, to activate the headlamp wash, position the lighting stalk in the dipped beam position.
Windscreen and headlamp
wash
On vehicles fitted with automatic air conditioning, any action on the windscreen wash control results in temporary closing of the air intake to avoid odours inside the passenger compartment.
Screenwash/headlamp wash level low
In the case of vehicles fitted with headlamp washers, when the fluid reser voir low level is reached this warning lamp comes on in the instrument panel, accompanied by an audible signal and a message.
The warning lamp comes on when the ignition is switched on, or every time the stalk is operated, until the reser voir is refilled.Next time you stop, refill the screenwash / headlamp wash reser voir.
With audio system or touch screen
The system is activated or deactivated via the vehicle configuration menu.
Lighting and visibility
Page 161 of 418

161
This is indicated by flashing of this warning lamp in the instrument panel.
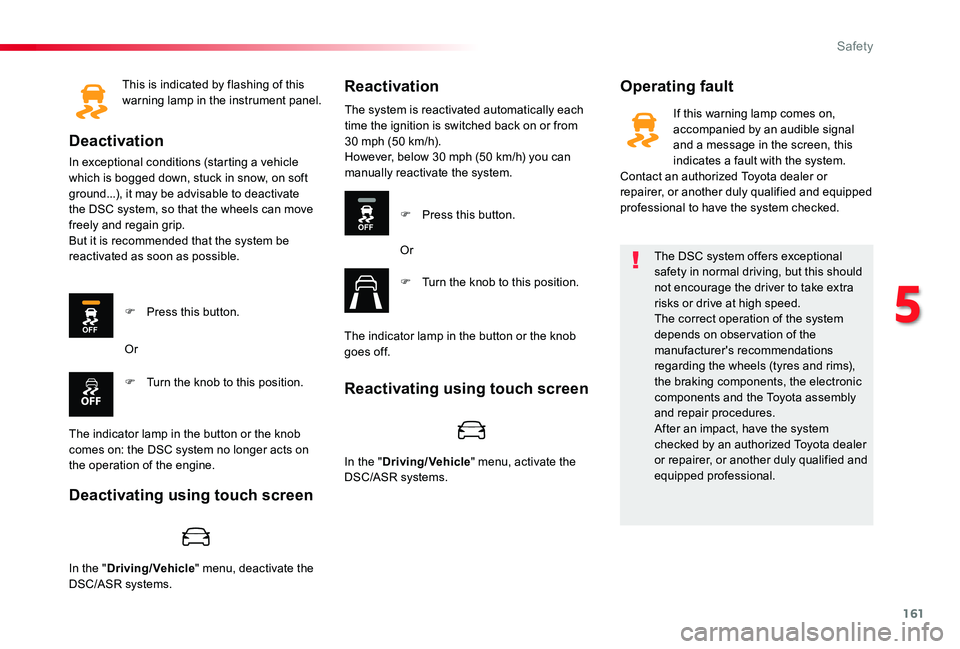
Deactivation
In exceptional conditions (starting a vehicle which is bogged down, stuck in snow, on soft ground...), it may be advisable to deactivate the DSC system, so that the wheels can move freely and regain grip.But it is recommended that the system be reactivated as soon as possible.
Operating faultReactivation
F Press this button.
F Turn the knob to this position.
Or
The indicator lamp in the button or the knob comes on: the DSC system no longer acts on the operation of the engine.
The system is reactivated automatically each time the ignition is switched back on or from 30 mph (50 km/h).However, below 30 mph (50 km/h) you can manually reactivate the system.
F Press this button.
Or
F Turn the knob to this position.
The indicator lamp in the button or the knob goes off.
The DSC system offers exceptional safety in normal driving, but this should not encourage the driver to take extra risks or drive at high speed.The correct operation of the system depends on obser vation of the manufacturer's recommendations regarding the wheels (tyres and rims), the braking components, the electronic components and the Toyota assembly and repair procedures.After an impact, have the system checked by an authorized Toyota dealer or repairer, or another duly qualified and equipped professional.
If this warning lamp comes on, accompanied by an audible signal and a message in the screen, this indicates a fault with the system.Contact an authorized Toyota dealer or repairer, or another duly qualified and equipped professional to have the system checked.
Deactivating using touch screen
Reactivating using touch screen
In the "Driving/Vehicle" menu, deactivate the DSC/ASR systems.
In the "Driving/Vehicle" menu, activate the DSC/ASR systems.
5
Safety