2020 TOYOTA PROACE CITY VERSO child restraint
[x] Cancel search: child restraintPage 42 of 272
42
Electric unfolding
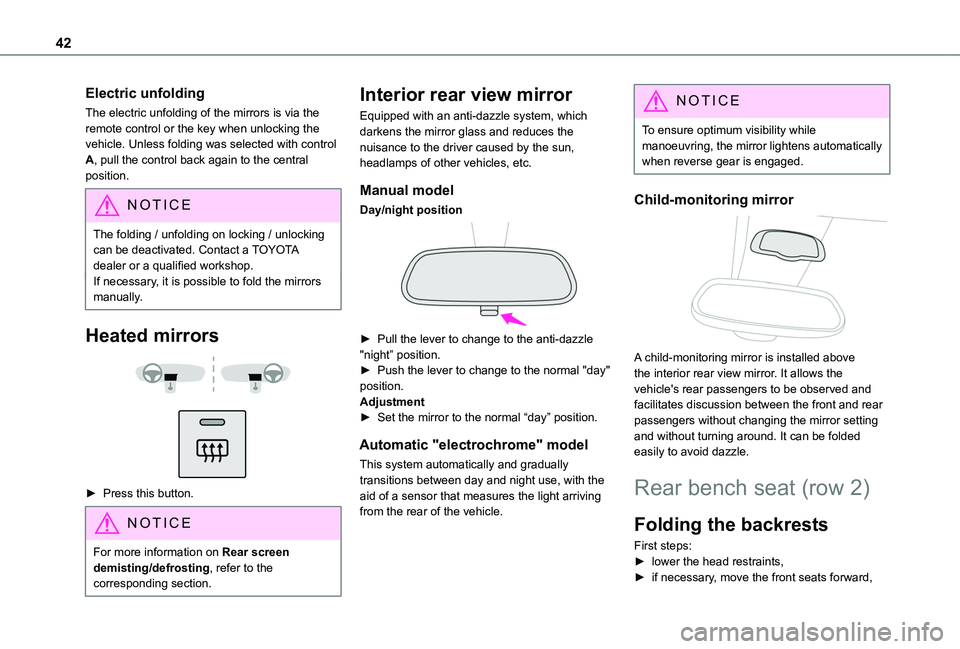
The electric unfolding of the mirrors is via the remote control or the key when unlocking the vehicle. Unless folding was selected with control A, pull the control back again to the central position.
NOTIC E
The folding / unfolding on locking / unlocking
can be deactivated. Contact a TOYOTA dealer or a qualified workshop.If necessary, it is possible to fold the mirrors manually.
Heated mirrors
► Press this button.
NOTIC E
For more information on Rear screen demisting/defrosting, refer to the corresponding section.
Interior rear view mirror
Equipped with an anti-dazzle system, which darkens the mirror glass and reduces the nuisance to the driver caused by the sun, headlamps of other vehicles, etc.
Manual model
Day/night position
► Pull the lever to change to the anti-dazzle "night” position.► Push the lever to change to the normal "day" position.Adjustment► Set the mirror to the normal “day” position.
Automatic "electrochrome" model
This system automatically and gradually transitions between day and night use, with the aid of a sensor that measures the light arriving from the rear of the vehicle.
NOTIC E
To ensure optimum visibility while manoeuvring, the mirror lightens automatically when reverse gear is engaged.
Child-monitoring mirror
A child-monitoring mirror is installed above the interior rear view mirror. It allows the vehicle's rear passengers to be observed and facilitates discussion between the front and rear passengers without changing the mirror setting and without turning around. It can be folded easily to avoid dazzle.
Rear bench seat (row 2)
Folding the backrests
First steps:► lower the head restraints,► if necessary, move the front seats forward,
Page 85 of 272
85
Safety
5
NOTIC E
It is recommended that children travel on the rear seats of the vehicle:– ‘rear facing’ up to the age of 3,– ‘forward facing’ over the age of 3.
WARNI NG
Make sure that the seat belt is correctly positioned and tightened.For child seats with a support leg, ensure that the support leg is in firm and steady contact with the floor.
WARNI NG
Remove and stow the head restraint before installing a child seat with backrest on a passenger seat. Refit the head restraint once the child seat has been removed.
Advice
WARNI NG
An incorrectly installed child seat compromises the child's safety in the event of an accident.Ensure that there is no seat belt or seat belt buckle under the child seat, as this could destabilise it.
Remember to fasten the seat belts or the harness of child seats, keeping the slack relative to the child's body to a minimum, even for short journeys.When installing a child seat using the seat belt, ensure that the seat belt is tightened correctly on the child seat and that it secures the child seat firmly on the seat of the vehicle. If the passenger seat is adjustable, move it forwards if necessary.Remove the head restraint before installing a child seat with a backrest on a passenger seat.Ensure that the head restraint is stored or attached securely to prevent it from being thrown around the vehicle in the event of sharp braking. Refit the head restraint once the child seat has been removed.
WARNI NG
Installing a booster seatThe chest part of the seat belt must be positioned on the child's shoulder without touching the neck.Ensure that the lap part of the seat belt passes correctly over the child's thighs.Use a booster seat with backrest, equipped with a belt guide at shoulder level.
WARNI NG
Additional protectionsTo prevent accidental opening of the doors and rear windows, use the "Child lock".Take care not to open the rear windows by more than one third.To protect young children from the rays of the sun, fit side blinds on the rear windows.As a safety precaution, do not leave:– a child alone and unattended in a vehicle,– a child or an animal in a vehicle which is exposed to the sun, with the windows closed,– the keys within reach of children inside the vehicle.
Page 87 of 272
87
Safety
5
child seat. Otherwise, the child risks being seriously injured or killed if the airbag deploys.
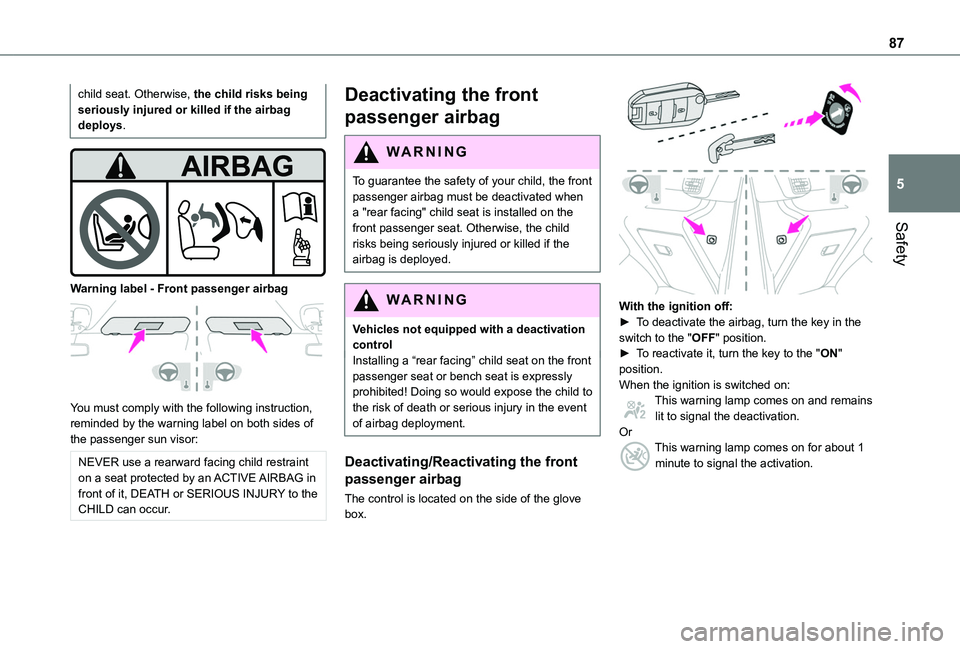
Warning label - Front passenger airbag
You must comply with the following instruction, reminded by the warning label on both sides of the passenger sun visor:
NEVER use a rearward facing child restraint on a seat protected by an ACTIVE AIRBAG in front of it, DEATH or SERIOUS INJURY to the CHILD can occur.
Deactivating the front
passenger airbag
WARNI NG
To guarantee the safety of your child, the front passenger airbag must be deactivated when a "rear facing" child seat is installed on the front passenger seat. Otherwise, the child
risks being seriously injured or killed if the airbag is deployed.
WARNI NG
Vehicles not equipped with a deactivation controlInstalling a “rear facing” child seat on the front passenger seat or bench seat is expressly prohibited! Doing so would expose the child to the risk of death or serious injury in the event of airbag deployment.
Deactivating/Reactivating the front
passenger airbag
The control is located on the side of the glove box.
With the ignition off:► To deactivate the airbag, turn the key in the switch to the "OFF" position. ► To reactivate it, turn the key to the "ON" position.When the ignition is switched on:This warning lamp comes on and remains lit to signal the deactivation.OrThis warning lamp comes on for about 1 minute to signal the activation.
Page 88 of 272
88
Recommended child
seats
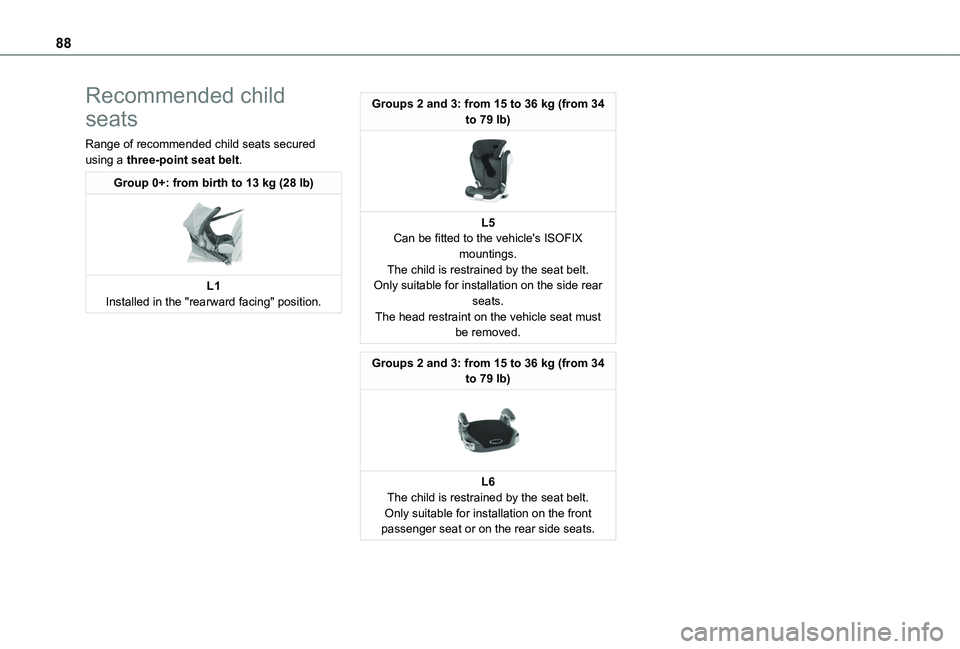
Range of recommended child seats secured using a three-point seat belt.
Group 0+: from birth to 13 kg (28 lb)
L1Installed in the "rearward facing" position.
Groups 2 and 3: from 15 to 36 kg (from 34 to 79 lb)
L5Can be fitted to the vehicle's ISOFIX mountings.The child is restrained by the seat belt.Only suitable for installation on the side rear seats.The head restraint on the vehicle seat must be removed.
Groups 2 and 3: from 15 to 36 kg (from 34 to 79 lb)
L6The child is restrained by the seat belt.Only suitable for installation on the front passenger seat or on the rear side seats.
Page 90 of 272
90
For more information on the Front seats and, in particular, the folded position for the backrest, refer to the corresponding secti\
on.(g) On the L1 version, fold down the backrests in row 2.(h) Installing child seats with a support leg is prohibited in the third ro\
w.U Seat position suitable for installing a child seat secured using the se\
at belt and universally approved for rearward-facing and/or forward-faci\
ng use.UF Seat position suitable for installing a child seat secured using a seat\
belt and universally approved for forward-facing use.X Seat position not suitable for installing a child seat for the stated w\
eight class.
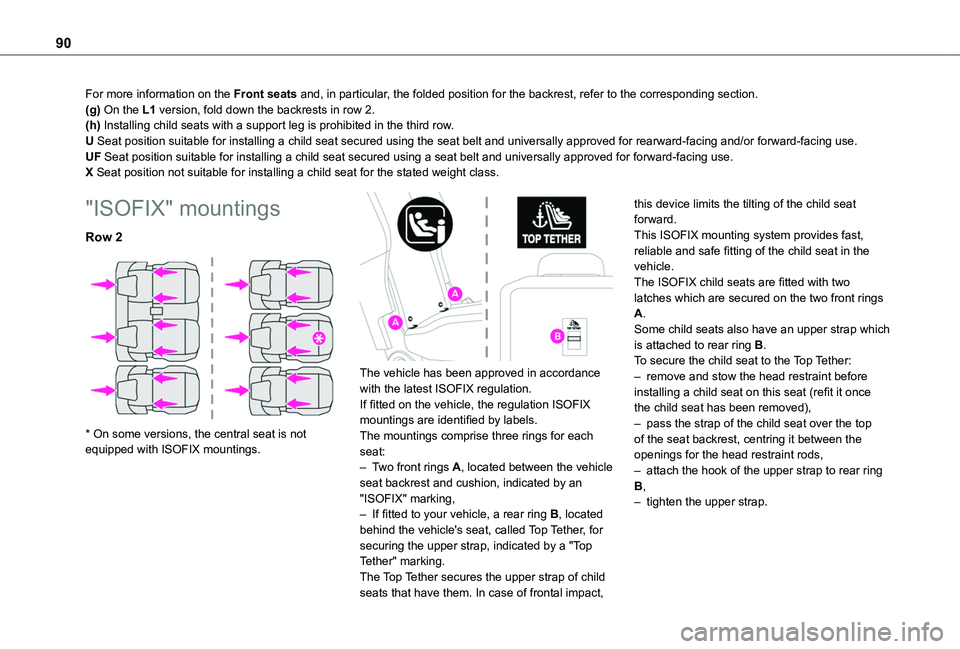
"ISOFIX" mountings
Row 2
* On some versions, the central seat is not equipped with ISOFIX mountings.
The vehicle has been approved in accordance with the latest ISOFIX regulation.If fitted on the vehicle, the regulation ISOFIX mountings are identified by labels.The mountings comprise three rings for each seat:– Two front rings A, located between the vehicle seat backrest and cushion, indicated by an "ISOFIX" marking,– If fitted to your vehicle, a rear ring B, located behind the vehicle's seat, called Top Tether, for securing the upper strap, indicated by a "Top Tether" marking.The Top Tether secures the upper strap of child seats that have them. In case of frontal impact,
this device limits the tilting of the child seat forward.This ISOFIX mounting system provides fast, reliable and safe fitting of the child seat in the vehicle.The ISOFIX child seats are fitted with two latches which are secured on the two front rings A.Some child seats also have an upper strap which is attached to rear ring B.To secure the child seat to the Top Tether:– remove and stow the head restraint before installing a child seat on this seat (refit it once the child seat has been removed),– pass the strap of the child seat over the top of the seat backrest, centring it between the
openings for the head restraint rods,– attach the hook of the upper strap to rear ring B,– tighten the upper strap.
Page 93 of 272
93
Safety
5
IL Seat suitable for an ISOFIX Semi-Universal child seat, which may be eit\
her:– rearward-facing, fitted with an upper strap or a support leg.– forward-facing, fitted with a support leg.– a carrycot fitted with an upper strap or a support leg.For more information on ISOFIX child seats and in particular on securing the upper strap, refer to the correspondi\
ng section.
i-Size child seats
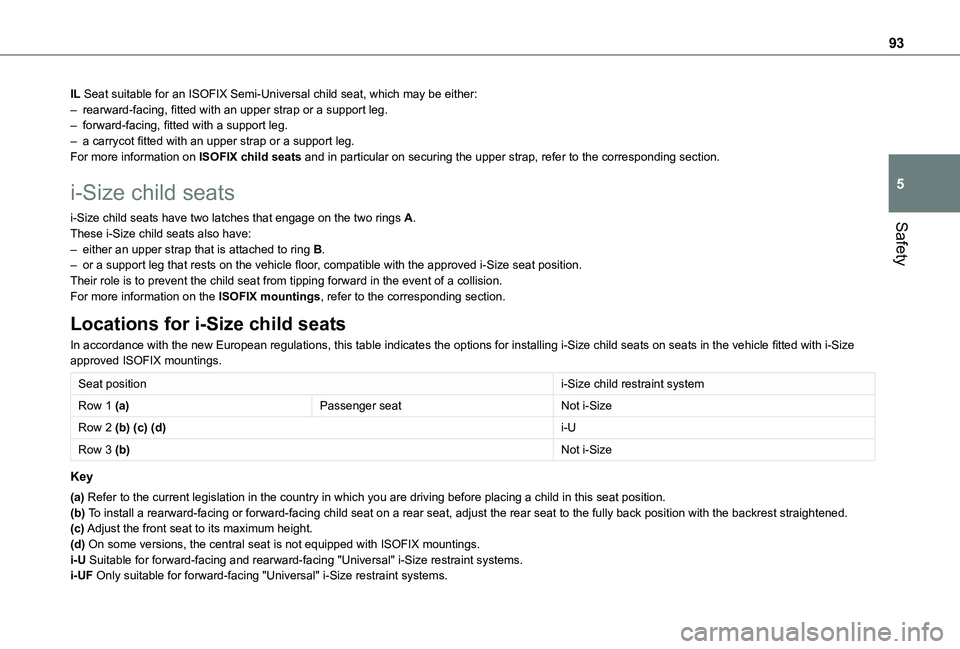
i-Size child seats have two latches that engage on the two rings A.These i-Size child seats also have:– either an upper strap that is attached to ring B.– or a support leg that rests on the vehicle floor, compatible with the approved i-Size seat position.Their role is to prevent the child seat from tipping forward in the even\
t of a collision.For more information on the ISOFIX mountings, refer to the corresponding section.
Locations for i-Size child seats
In accordance with the new European regulations, this table indicates the options for installing i-Size child seats on seats in the vehicle fitted with i-Size approved ISOFIX mountings.
Seat positioni-Size child restraint system
Row 1 (a)Passenger seatNot i-Size
Row 2 (b) (c) (d)i-U
Row 3 (b)Not i-Size
Key
(a) Refer to the current legislation in the country in which you are drivin\
g before placing a child in this seat position.(b) To install a rearward-facing or forward-facing child seat on a rear seat,\
adjust the rear seat to the fully back position with the backrest strai\
ghtened.(c) Adjust the front seat to its maximum height.(d) On some versions, the central seat is not equipped with ISOFIX mounting\
s.i-U Suitable for forward-facing and rearward-facing "Universal" i-Size rest\
raint systems.i-UF Only suitable for forward-facing "Universal" i-Size restraint systems.