2020 TOYOTA PROACE CITY fuse box
[x] Cancel search: fuse boxPage 5 of 272
5
Overview
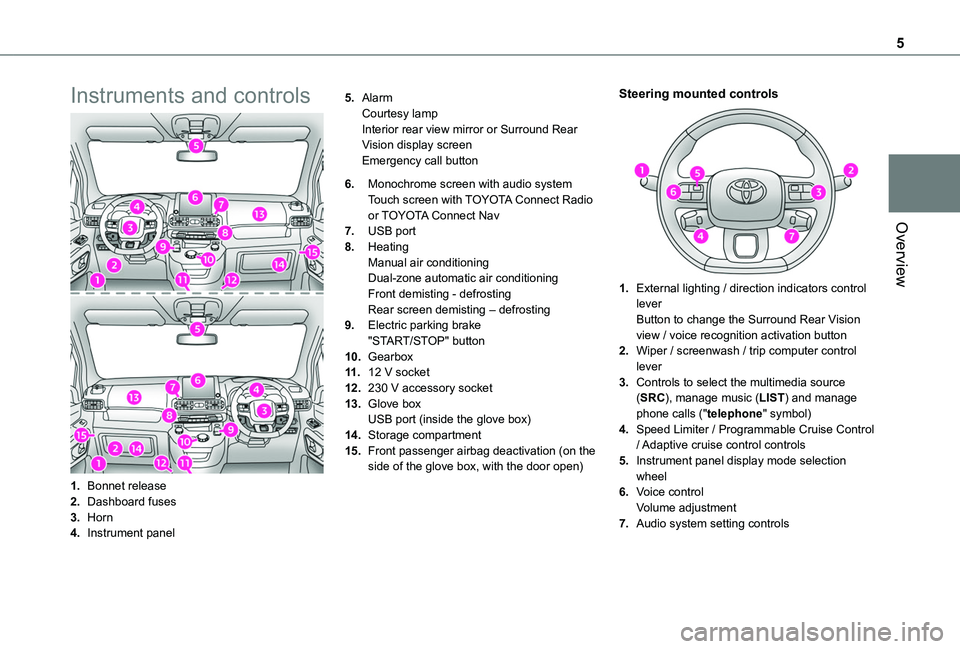
Instruments and controls
1.Bonnet release
2.Dashboard fuses
3.Horn
4.Instrument panel
5.AlarmCourtesy lampInterior rear view mirror or Surround Rear Vision display screenEmergency call button
6.Monochrome screen with audio systemTouch screen with TOYOTA Connect Radio or TOYOTA Connect Nav
7.USB port
8.HeatingManual air conditioningDual-zone automatic air conditioningFront demisting - defrostingRear screen demisting – defrosting
9.Electric parking brake"START/STOP" button
10.Gearbox
11 .12 V socket
12.230 V accessory socket
13.Glove boxUSB port (inside the glove box)
14.Storage compartment
15.Front passenger airbag deactivation (on the side of the glove box, with the door open)
Steering mounted controls
1.External lighting / direction indicators control leverButton to change the Surround Rear Vision view / voice recognition activation button
2.Wiper / screenwash / trip computer control lever
3.Controls to select the multimedia source (SRC), manage music (LIST) and manage phone calls ("telephone" symbol)
4.Speed Limiter / Programmable Cruise Control
/ Adaptive cruise control controls
5.Instrument panel display mode selection wheel
6.Voice controlVolume adjustment
7.Audio system setting controls
Page 153 of 272
153
Practical information
7
6.Fusebox
7.Air filter
8.Engine oil filler cap
9.Engine oil dipstick
WARNI NG
The Diesel fuel system operates under very high pressure.All work on this circuit must be carried out only by a TOYOTA dealer or a qualified workshop.
Checking levels
Check all of the following levels regularly in accordance with the manufacturer's service schedule. Top them up if required, unless otherwise indicated.If a level drops significantly, have the corresponding system checked by a TOYOTA dealer or a qualified workshop.
WARNI NG
The fluids must comply with the manufacturer's requirements and with the vehicle's engine.
WARNI NG
Take care when working under the bonnet, as certain areas of the engine may be extremely hot (risk of burns) and the cooling fan could start at any time (even with the ignition off).
Used products
WARNI NG
Avoid prolonged contact of used oil or fluids with the skin.Most of these fluids are harmful to health and very corrosive.
ECO
Do not discard used oil or fluids into sewers or onto the ground.Empty used oil into the containers reserved for this purpose at a TOYOTA dealer or a qualified workshop.
Engine oil
The level is checked, with the engine having been switched off for at least 30
minutes and on level ground, either using the oil level indicator in the instrument panel when the ignition is switched on (for vehicles equipped with an electric gauge), or using the dipstick.
It is normal to top up the oil level between two services (or oil changes). It is recommended that you check the level, and top up if necessary, every 5,000 km (3,000 miles).
WARNI NG
In order to maintain the reliability of the engine and emissions control system, never use additives in the engine oil.
Checking using the dipstick
For the location of the dipstick, please refer to the illustration of the corresponding engine compartment.► Grasp the dipstick by its coloured grip and pull it out completely.► Wipe the end of the dipstick using a clean, lint-free cloth.
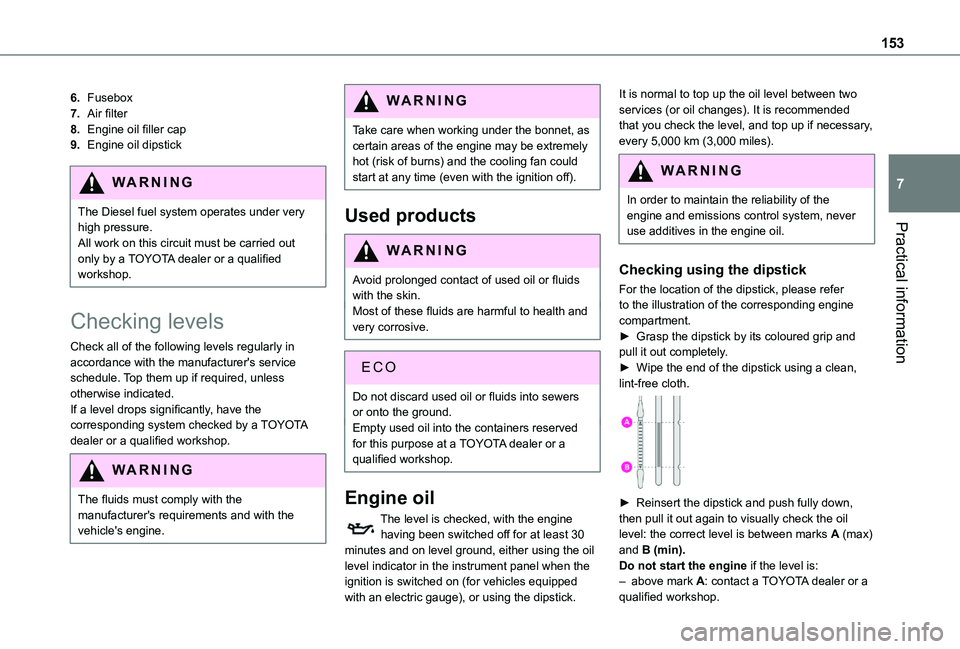
► Reinsert the dipstick and push fully down, then pull it out again to visually check the oil level: the correct level is between marks A (max) and B (min).Do not start the engine if the level is:– above mark A: contact a TOYOTA dealer or a qualified workshop.
Page 174 of 272
174
NOTIC E
After changing a rear direction indicator bulb, the reinitialisation time is approximately 2 minutes or more.
Number plate lamps
Type A, W5W - 5W
With side-hinged doors
► Unclip the interior trim.► Disconnect the connector by moving aside its tab.► Turn the bulb holder a quarter turn anti-clockwise.► Change the bulb.► Put the bulb holder back in place and reconnect the connector.► Put the trim back in place.
With tailgate
► Remove the plastic lens using a screwdriver.► Change the bulb.► Refit the plastic lens and press on it.
Third brake lamp
Type A, W16W - 16W
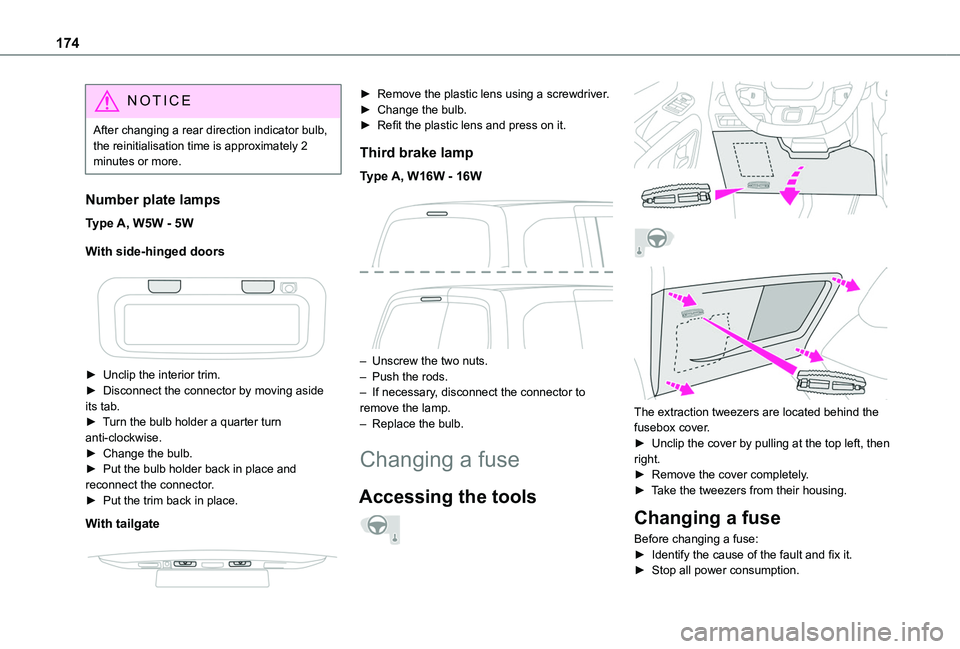
– Unscrew the two nuts.– Push the rods.– If necessary, disconnect the connector to remove the lamp.– Replace the bulb.
Changing a fuse
Accessing the tools
The extraction tweezers are located behind the fusebox cover.► Unclip the cover by pulling at the top left, then
right.► Remove the cover completely.► Take the tweezers from their housing.
Changing a fuse
Before changing a fuse:► Identify the cause of the fault and fix it.► Stop all power consumption.
Page 175 of 272
175
In the event of a breakdown
8
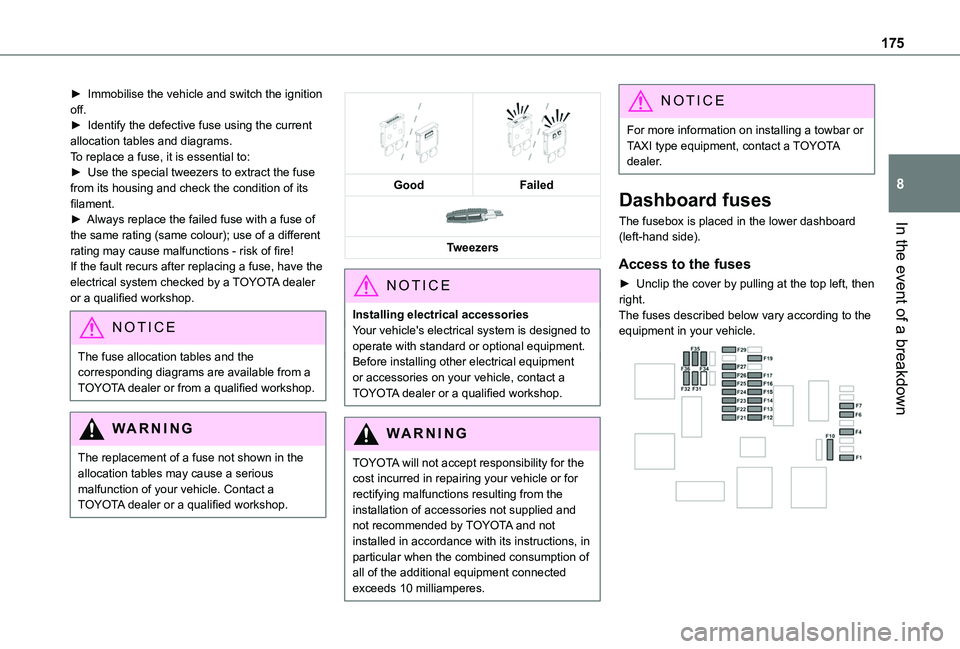
► Immobilise the vehicle and switch the ignition off.► Identify the defective fuse using the current allocation tables and diagrams.To replace a fuse, it is essential to:► Use the special tweezers to extract the fuse from its housing and check the condition of its filament.► Always replace the failed fuse with a fuse of the same rating (same colour); use of a different rating may cause malfunctions - risk of fire!If the fault recurs after replacing a fuse, have the electrical system checked by a TOYOTA dealer or a qualified workshop.
NOTIC E
The fuse allocation tables and the corresponding diagrams are available from a TOYOTA dealer or from a qualified workshop.
WARNI NG
The replacement of a fuse not shown in the allocation tables may cause a serious malfunction of your vehicle. Contact a TOYOTA dealer or a qualified workshop.
GoodFailed
Tweezers
NOTIC E
Installing electrical accessoriesYour vehicle's electrical system is designed to operate with standard or optional equipment.Before installing other electrical equipment or accessories on your vehicle, contact a TOYOTA dealer or a qualified workshop.
WARNI NG
TOYOTA will not accept responsibility for the cost incurred in repairing your vehicle or for rectifying malfunctions resulting from the installation of accessories not supplied and not recommended by TOYOTA and not installed in accordance with its instructions, in
particular when the combined consumption of all of the additional equipment connected exceeds 10 milliamperes.
NOTIC E
For more information on installing a towbar or TAXI type equipment, contact a TOYOTA dealer.
Dashboard fuses
The fusebox is placed in the lower dashboard (left-hand side).
Access to the fuses
► Unclip the cover by pulling at the top left, then right.The fuses described below vary according to the equipment in your vehicle.
Page 176 of 272
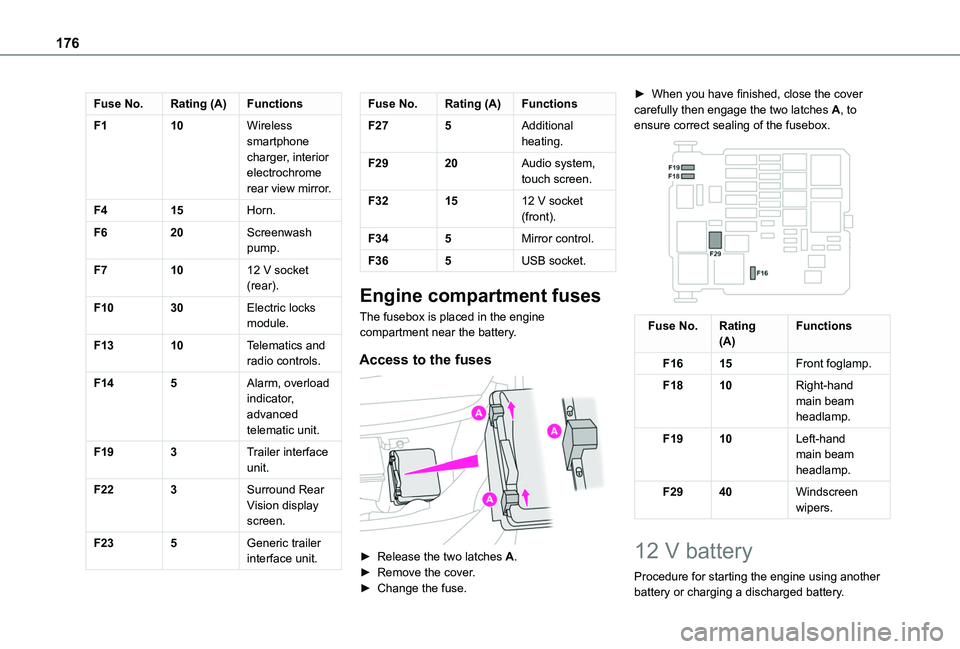
176
Fuse No.Rating (A)Functions
F110Wireless smartphone charger, interior electrochrome rear view mirror.
F415Horn.
F620Screenwash pump.
F71012 V socket (rear).
F1030Electric locks module.
F1310Telematics and radio controls.
F145Alarm, overload indicator, advanced telematic unit.
F193Trailer interface unit.
F223Surround Rear Vision display screen.
F235Generic trailer interface unit.
Fuse No.Rating (A)Functions
F275Additional heating.
F2920Audio system, touch screen.
F321512 V socket (front).
F345Mirror control.
F365USB socket.
Engine compartment fuses
The fusebox is placed in the engine compartment near the battery.
Access to the fuses
► Release the two latches A.► Remove the cover.► Change the fuse.
► When you have finished, close the cover carefully then engage the two latches A, to ensure correct sealing of the fusebox.
Fuse No.Rating(A)Functions
F1615Front foglamp.
F1810Right-hand main beam headlamp.
F1910Left-hand main beam headlamp.
F2940Windscreen wipers.
12 V battery
Procedure for starting the engine using another battery or charging a discharged battery.
Page 247 of 272
247
Alphabetical index
Flap, removable 53–54Flashing indicators 68–69, 173Fluid, brake 154Fluid, engine coolant 154Foglamp, rear 173Foglamps 172Foglamps, front 67, 170Foglamps, rear 67Folding the rear seats 47Frequency (radio) 233–234Fuel 7, 144Fuel consumption 7Fuel tank 144–146Fusebox, dashboard 174Fusebox, engine compartment 174, 176Fuses 174–176
G
Gauge, fuel 144–145Gearbox, automatic 100, 104–11 0, 155
Gearbox, manual 104–105, 11 0, 155Gear lever, automatic gearbox 105–108Gear lever, manual gearbox 104–105Gear shift indicator ~ Gear efficiency indicator 109Glove box 48G.P.S. 226
H
Hazard warning lamps 78headlamp adjustment 71Headlamp adjustment 71Headlamps, automatic dipping 70–71, 135Headlamps, automatic illumination 68–70Headlamps, dipped beam 67, 170–171Headlamps, halogen 170Headlamps, main beam 67, 170, 172Head restraints, front 48Head restraints, rear 47Head-up display 11 3–11 4Heating 58–59, 62–65Heating, additional 37, 63–65Heating, programmable 37, 63–65Hill Assist Descent Control (HADC) 82–83Hill Descent Control 82–83Hill start assist 104Horn 78
I
Ignition 99–100, 238Ignition on 100Immobiliser, electronic 96Indicator, coolant temperature 16Indicator lamps, operation 67Indicators, direction 68Inflating tyres 156, 190
Inflating tyres and accessories (using the kit) 163, 165Infrared camera 11 5Instrument panel 9, 11 6Internet browser 227, 231
J
Jack 165Jump starting 177
K
Key 23–24, 26–28, 30Key, electronic 23–24, 100Keyless Entry and Starting 23, 25–28, 98–99Key with remote control 28Kit, hands-free 198–199, 212–213, 236–237Kit, puncture repair 162Kit, temporary puncture repair 162–163, 165
L
Labels 4Labels, identification 190Lamps, parking 69Lamps, rear 173Lane departure warning active 131, 136LEDs - Light-emitting diodes 69, 170