2020 TOYOTA PROACE CITY instrument panel
[x] Cancel search: instrument panelPage 135 of 272
135
Driving
6
– flashing, after a delay of about one second, when overtaking a vehicle slowly, and when the direction indicator is used.
Activation / Deactivation
Activation or deactivation is set via the vehicle configuration menu.
NOTIC E
The system state remains in memory when the ignition is switched off.
NOTIC E
The system is automatically deactivated when towing with a towbar approved by TOYOTA.
Conditions for operation
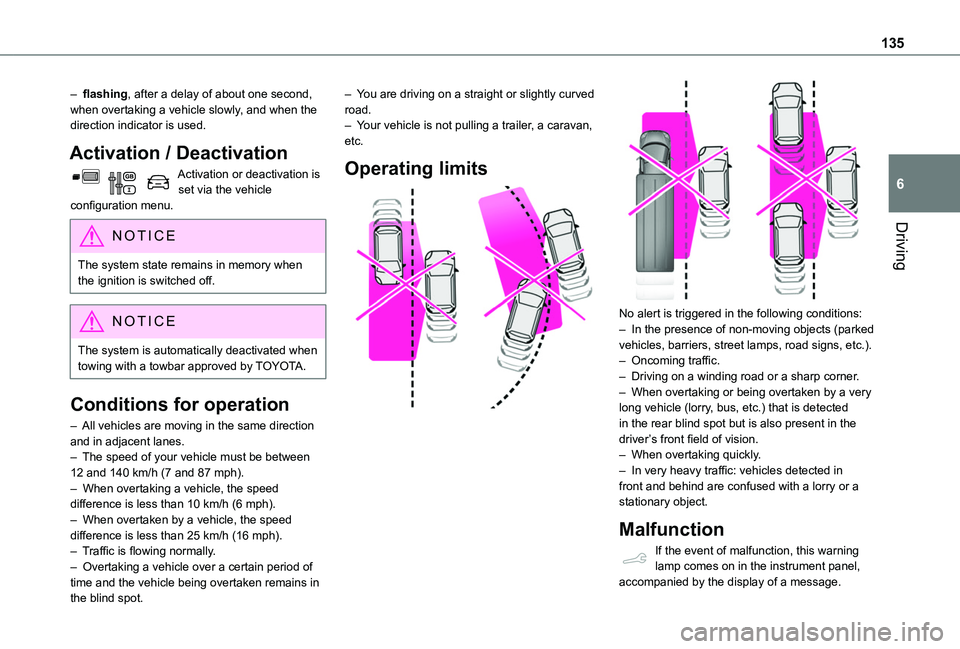
– All vehicles are moving in the same direction and in adjacent lanes.– The speed of your vehicle must be between 12 and 140 km/h (7 and 87 mph).– When overtaking a vehicle, the speed difference is less than 10 km/h (6 mph).– When overtaken by a vehicle, the speed difference is less than 25 km/h (16 mph).– Traffic is flowing normally.– Overtaking a vehicle over a certain period of time and the vehicle being overtaken remains in the blind spot.
– You are driving on a straight or slightly curved road.– Your vehicle is not pulling a trailer, a caravan, etc.
Operating limits
No alert is triggered in the following conditions:– In the presence of non-moving objects (parked vehicles, barriers, street lamps, road signs, etc.).– Oncoming traffic.– Driving on a winding road or a sharp corner.– When overtaking or being overtaken by a very long vehicle (lorry, bus, etc.) that is detected in the rear blind spot but is also present in the driver’s front field of vision.– When overtaking quickly.– In very heavy traffic: vehicles detected in front and behind are confused with a lorry or a stationary object.
Malfunction
If the event of malfunction, this warning lamp comes on in the instrument panel, accompanied by the display of a message.
Page 139 of 272
139
Driving
6
Side parking sensors
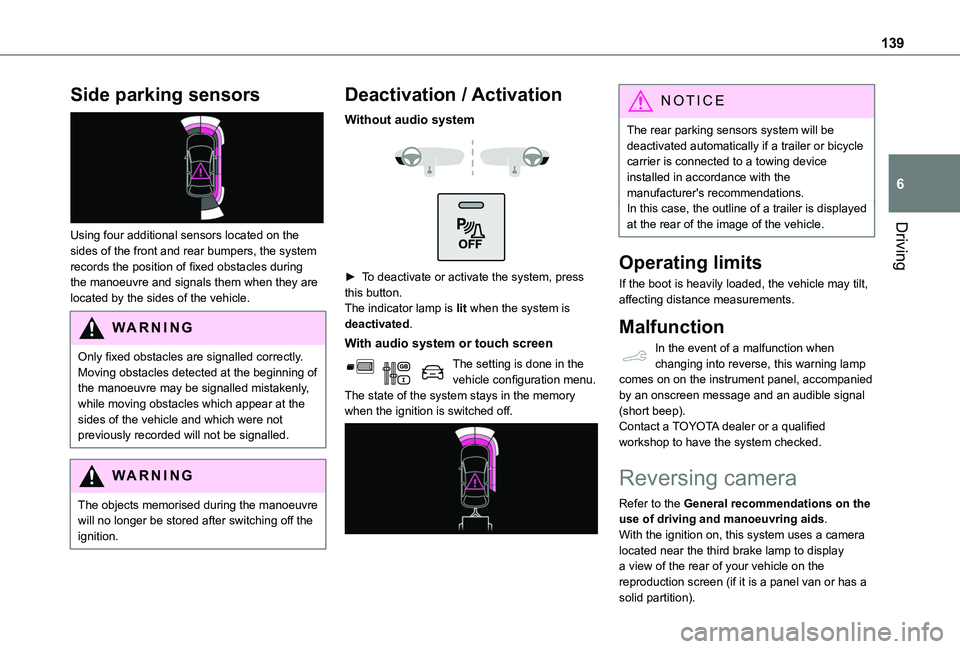
Using four additional sensors located on the sides of the front and rear bumpers, the system records the position of fixed obstacles during the manoeuvre and signals them when they are located by the sides of the vehicle.
WARNI NG
Only fixed obstacles are signalled correctly. Moving obstacles detected at the beginning of the manoeuvre may be signalled mistakenly, while moving obstacles which appear at the sides of the vehicle and which were not previously recorded will not be signalled.
WARNI NG
The objects memorised during the manoeuvre will no longer be stored after switching off the ignition.
Deactivation / Activation
Without audio system
► To deactivate or activate the system, press this button.The indicator lamp is lit when the system is deactivated.
With audio system or touch screen
The setting is done in the vehicle configuration menu.The state of the system stays in the memory when the ignition is switched off.
NOTIC E
The rear parking sensors system will be deactivated automatically if a trailer or bicycle carrier is connected to a towing device installed in accordance with the manufacturer's recommendations.In this case, the outline of a trailer is displayed at the rear of the image of the vehicle.
Operating limits
If the boot is heavily loaded, the vehicle may tilt, affecting distance measurements.
Malfunction
In the event of a malfunction when changing into reverse, this warning lamp comes on on the instrument panel, accompanied by an onscreen message and an audible signal (short beep).Contact a TOYOTA dealer or a qualified workshop to have the system checked.
Reversing camera
Refer to the General recommendations on the use of driving and manoeuvring aids.With the ignition on, this system uses a camera located near the third brake lamp to display a view of the rear of your vehicle on the reproduction screen (if it is a panel van or has a
solid partition).
Page 144 of 272
144
Compatibility of fuels
Petrol fuels conforming to the EN228 standard containing up to 5% and 10% ethanol respectively.
Diesel fuels conforming to the EN590, EN16734 and EN16709 standards and containing up to 7%, 10%, 20% and 30% fatty acid methyl ester respectively. The use of B20 or B30 fuels, even occasionally, imposes special maintenance conditions referred to as "Arduous conditions".
Paraffinic Diesel fuel conforming to the EN15940 standard.
WARNI NG
The use of any other type of (bio) fuel (vegetable or animal oils, pure or diluted, domestic fuel, etc.) is strictly prohibited (risk of damage to the engine and fuel system).
NOTIC E
The only fuel additives authorised for use are those that meet the B715001 (petrol) or B715000 (Diesel) standards.
Diesel at low temperature
At temperatures below 0 °C (+32 °F), the formation of paraffins in summer-type Diesel fuels could prevent the engine from operating correctly. In these temperature conditions, use winter-type Diesel fuel and keep the fuel tank more than 50 % full.At temperatures below -15 °C (+5 °F) to avoid problems starting, it is best to park the vehicle under shelter (heated garage).
Travelling abroad
Certain fuels could damage your vehicle’s engine.In certain countries, the use of a particular fuel may be required (specific octane rating, specific trade name, etc.) to ensure correct operation of the engine.For all additional information, consult a dealer.
Refuelling
Fuel tank capacity: approximately 61 litres (petrol) or 50 litres (Diesel).Reserve level: approximately 6 litres.
Low fuel level
/2
1 1When the low fuel level is reached, this warning lamp comes on on the instrument panel, accompanied by an onscreen message and an audible signal. When it first
comes on, about 6 litres of fuel remain in the tank.Until sufficient fuel is added, this warning lamp appears every time the ignition is switched on, accompanied by an onscreen message and an audible signal. When driving, this message and audible signal are repeated with increasing frequency as the fuel level drops towards 0.You must refuel as soon as possible to avoid running out of fuel.For more information on Running out of fuel (Diesel), refer to the corresponding section.
W
ARNI NG
Stop & StartNever refuel with the engine in STOP mode; you must switch off the ignition.
Refuelling
At least 10 litres of fuel must be added, in order to be registered by the fuel gauge.
Opening the filler cap may create a noise caused by an inrush of air. This is entirely normal and results from the sealing of the fuel system.To refuel in complete safety:► Always switch off the engine.► Unlock the vehicle using the Keyless Entry and Starting.► Open the fuel filler flap.
Page 149 of 272
149
Practical information
7
Overload indicator
The overload indicator is a driving aid and informs you that the maximum authorised weight has been exceeded; this may be either the gross vehicle weight (GVW) or the maximum authorised weight on either axle (front and rear) (GAWR).
WARNI NG
The indicator does not relieve the user from their responsibility.
NOTIC E
Even if you correctly measure the weight of the vehicle's load, any factor that may vary this weight (driver/additional passengers seated or taking on additional fuel) after the measurement may put the vehicle into the overload condition.
WARNI NG
The load includes the weight of the items stored in the loading area (including any fittings such as shelves), but also the weight of all persons on board the vehicle, the amount of fuel and various equipment fitted on the vehicle.For optimal performance, the vehicle must be parked and loaded on level ground (avoid the following conditions: parking on a slope or straddling a pavement).
WARNI NG
Attaching a trailer to your vehicle may affect the operation of the system.
Operation
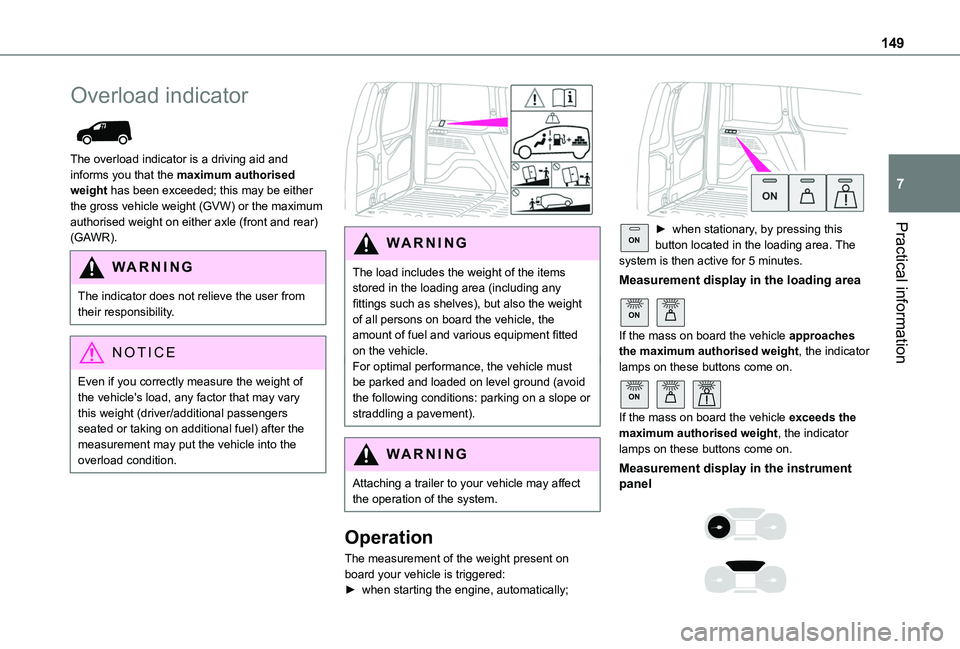
The measurement of the weight present on board your vehicle is triggered:► when starting the engine, automatically;
ON► when stationary, by pressing this button located in the loading area. The system is then active for 5 minutes.
Measurement display in the loading area
ON
If the mass on board the vehicle approaches the maximum authorised weight, the indicator lamps on these buttons come on.
ON
If the mass on board the vehicle exceeds the maximum authorised weight, the indicator
lamps on these buttons come on.
Measurement display in the instrument panel
Page 150 of 272
150
If the mass on board the vehicle exceeds the maximum authorised weight, this indicator lamp comes on.
Malfunction
Display of the malfunction in the loading area
After the measurement is triggered from the loading area, the LEDs of the 3 buttons flash simultaneously for about 3 seconds and then go out.Contact a TOYOTA dealer or a qualified workshop.
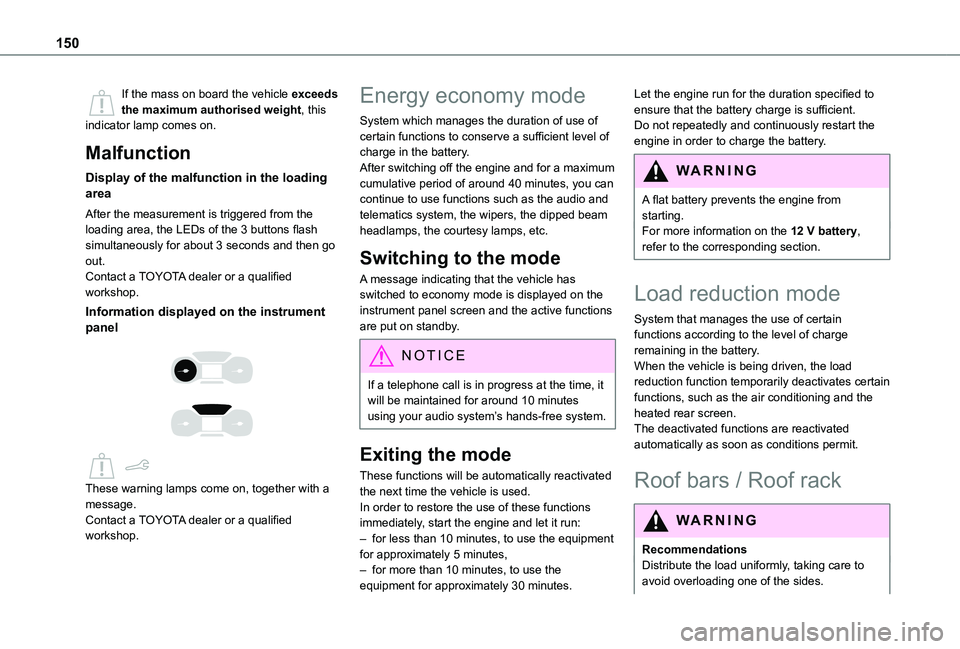
Information displayed on the instrument panel
These warning lamps come on, together with a message.Contact a TOYOTA dealer or a qualified workshop.
Energy economy mode
System which manages the duration of use of certain functions to conserve a sufficient level of charge in the battery.After switching off the engine and for a maximum cumulative period of around 40 minutes, you can continue to use functions such as the audio and telematics system, the wipers, the dipped beam headlamps, the courtesy lamps, etc.
Switching to the mode
A message indicating that the vehicle has switched to economy mode is displayed on the instrument panel screen and the active functions are put on standby.
NOTIC E
If a telephone call is in progress at the time, it will be maintained for around 10 minutes using your audio system’s hands-free system.
Exiting the mode
These functions will be automatically reactivated the next time the vehicle is used.In order to restore the use of these functions immediately, start the engine and let it run:– for less than 10 minutes, to use the equipment for approximately 5 minutes,– for more than 10 minutes, to use the equipment for approximately 30 minutes.
Let the engine run for the duration specified to ensure that the battery charge is sufficient.Do not repeatedly and continuously restart the engine in order to charge the battery.
WARNI NG
A flat battery prevents the engine from starting.For more information on the 12 V battery,
refer to the corresponding section.
Load reduction mode
System that manages the use of certain functions according to the level of charge remaining in the battery.When the vehicle is being driven, the load reduction function temporarily deactivates certain functions, such as the air conditioning and the heated rear screen.The deactivated functions are reactivated automatically as soon as conditions permit.
Roof bars / Roof rack
WARNI NG
RecommendationsDistribute the load uniformly, taking care to avoid overloading one of the sides.
Page 153 of 272
153
Practical information
7
6.Fusebox
7.Air filter
8.Engine oil filler cap
9.Engine oil dipstick
WARNI NG
The Diesel fuel system operates under very high pressure.All work on this circuit must be carried out only by a TOYOTA dealer or a qualified workshop.
Checking levels
Check all of the following levels regularly in accordance with the manufacturer's service schedule. Top them up if required, unless otherwise indicated.If a level drops significantly, have the corresponding system checked by a TOYOTA dealer or a qualified workshop.
WARNI NG
The fluids must comply with the manufacturer's requirements and with the vehicle's engine.
WARNI NG
Take care when working under the bonnet, as certain areas of the engine may be extremely hot (risk of burns) and the cooling fan could start at any time (even with the ignition off).
Used products
WARNI NG
Avoid prolonged contact of used oil or fluids with the skin.Most of these fluids are harmful to health and very corrosive.
ECO
Do not discard used oil or fluids into sewers or onto the ground.Empty used oil into the containers reserved for this purpose at a TOYOTA dealer or a qualified workshop.
Engine oil
The level is checked, with the engine having been switched off for at least 30
minutes and on level ground, either using the oil level indicator in the instrument panel when the ignition is switched on (for vehicles equipped with an electric gauge), or using the dipstick.
It is normal to top up the oil level between two services (or oil changes). It is recommended that you check the level, and top up if necessary, every 5,000 km (3,000 miles).
WARNI NG
In order to maintain the reliability of the engine and emissions control system, never use additives in the engine oil.
Checking using the dipstick
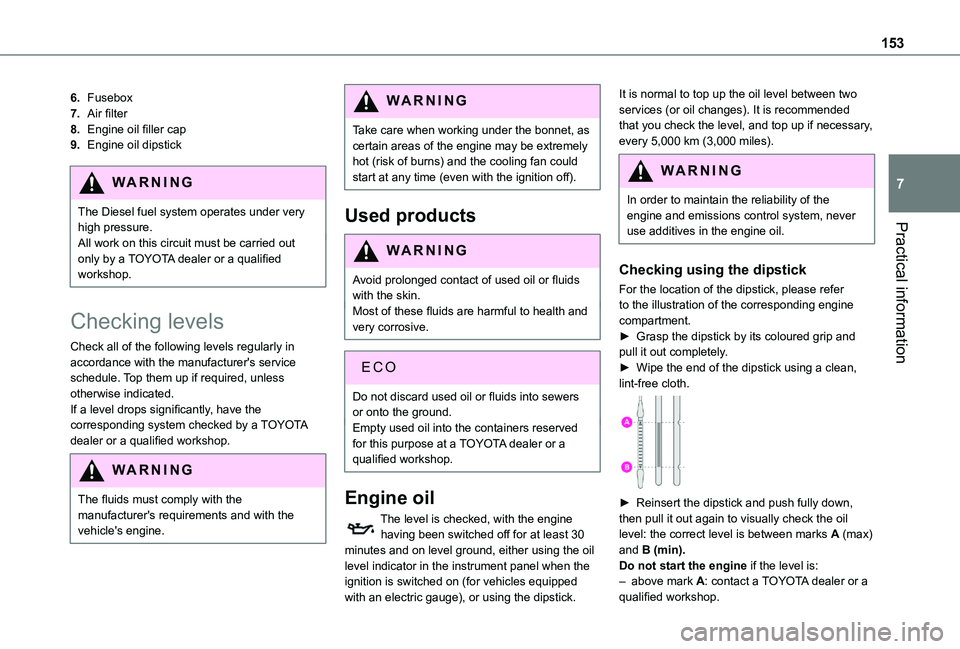
For the location of the dipstick, please refer to the illustration of the corresponding engine compartment.► Grasp the dipstick by its coloured grip and pull it out completely.► Wipe the end of the dipstick using a clean, lint-free cloth.
► Reinsert the dipstick and push fully down, then pull it out again to visually check the oil level: the correct level is between marks A (max) and B (min).Do not start the engine if the level is:– above mark A: contact a TOYOTA dealer or a qualified workshop.
Page 154 of 272
154
– below mark B: top up the engine oil immediately.
WARNI NG
Oil gradeBefore topping up or changing the engine oil, check that the oil is suitable for the engine and complies with the recommendations in the service schedule supplied with the vehicle
(or available from your TOYOTA dealer and qualified workshops).Use of non-recommended oil may invalidate the contractual warranty in the event of engine failure.
Topping up the engine oil level
The location of the oil filler cap is shown in the corresponding underbonnet layout view.► Add oil in small quantities, avoiding any spills on engine components (risk of fire).► Wait a few minutes before checking the level again using the dipstick.► Add more oil if necessary.► After checking the level, carefully refit the oil filler cap and the dipstick in its tube.
NOTIC E
During the 30 minutes after topping up the oil, the check performed with the oil level indicator in the instrument panel when the ignition is switched on is not valid.
Brake fluid
The level of this fluid should be close to the "MAX" mark. If not, check the brake pad wear.To know how often the brake fluid should be replaced, refer to the manufacturer's servicing schedule.
WARNI NG
If topping up, clean the cap before replacing it. Use only DOT4 brake fluid from a sealed canister.
Engine coolant
Check the engine coolant level regularly.It is normal to top up this fluid between two services.The check and top-up must only be done with the engine cold.A low level presents a risk of serious damage to the engine.The level of this fluid should be close to the "MAX" mark but should never exceed it.If the level is close to or below the "MIN” mark, it is essential to top up.When the engine is hot, the temperature of this fluid is regulated by the fan.In addition, as the cooling system is pressurised, wait at least one hour after switching off the engine before carrying out any work.
To avoid the risk of scalding if you need to top up in an emergency, wrap a cloth around the cap and unscrew the cap by two turns to allow the pressure to drop.Once the pressure has dropped, remove the cap and top up to the required level.
Screenwash fluid
Top up to the required level when necessary.Capacity of the tank:– 5.3 litres for "very cold climate" versions.– 2.2 litres for other versions.
Fluid specification
The fluid must be topped up with a ready-to-use mixture.In winter (temperatures below zero), a liquid containing an agent to prevent freezing must be used which is appropriate for the prevailing conditions, in order to protect the elements of the system (pump, tank, ducts, jets, etc.).
WARNI NG
Filling with pure water is prohibited under all circumstances (risk of freezing, limestone deposits, etc.).
Page 167 of 272
167
In the event of a breakdown
8
With an automatic gearbox, select mode P to lock the wheels, apply the parking brake, unless it is programmed to be in automatic mode, and switch off the ignition.Check for the fixed illumination of the parking brake warning lamps in the instrument panel.The occupants must get out of the vehicle and wait where they are safe.If necessary, place a chock under the wheel diagonally opposite the wheel to be changed.Never go underneath a vehicle raised using a jack; use an axle stand.
NOTIC E
Wheel with wheel trimWhen removing the wheel, first remove the wheel trim by pulling at the valve aperture using the wheelbrace.When refitting the wheel, refit the wheel trim, starting by placing its aperture in line with the valve and then pushing it into place
all round its edge with the palm of your hand.
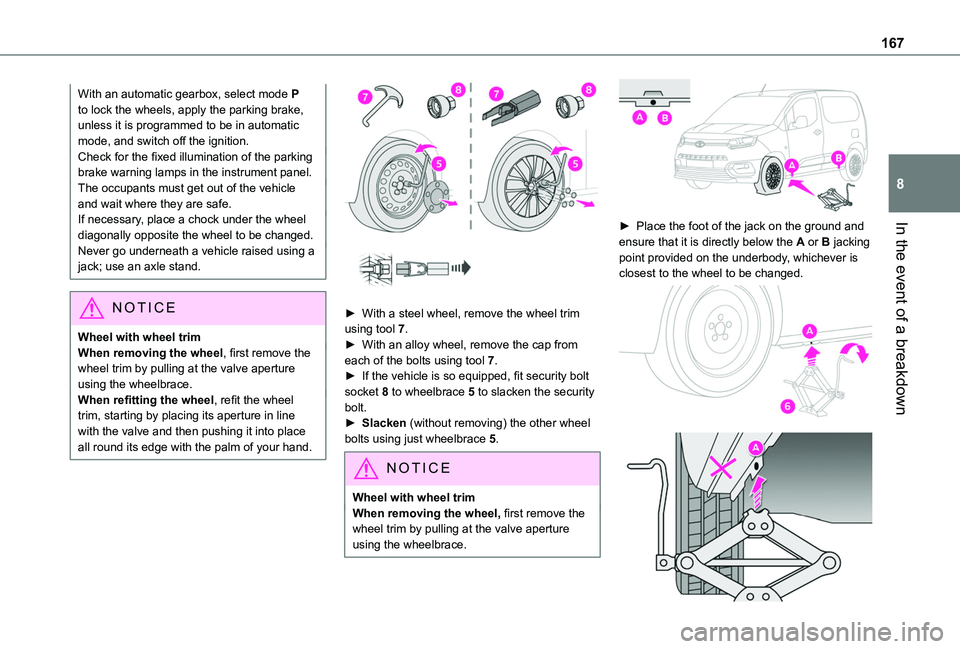
► With a steel wheel, remove the wheel trim using tool 7.► With an alloy wheel, remove the cap from each of the bolts using tool 7.► If the vehicle is so equipped, fit security bolt socket 8 to wheelbrace 5 to slacken the security bolt.► Slacken (without removing) the other wheel bolts using just wheelbrace 5.
NOTIC E
Wheel with wheel trimWhen removing the wheel, first remove the wheel trim by pulling at the valve aperture using the wheelbrace.
► Place the foot of the jack on the ground and ensure that it is directly below the A or B jacking
point provided on the underbody, whichever is closest to the wheel to be changed.