2020 TOYOTA HILUX ECO mode
[x] Cancel search: ECO modePage 373 of 744

3734-5. Using the driving support systems
4
Driving
HILUX_OM_OM0K321E_(EE)
Press the “ON-OFF” button to
activate the cruise control.
Dynamic radar cruise control indi-
cator will come on and a message
will be displayed on the multi-infor-
mation display. Press the button
again to deactivate the cruise con-
trol.
If the “ON-OFF” button is pressed
and held for 1.5 seconds or more,
the system turns on in constant
speed control mode. ( P. 377)
Accelerate or decelerate, with
accelerator pedal operation, to
the desired vehicle speed (at or
above approximately 30 km/h
[20 mph]) and push the lever
down to set the speed.
Cruise control “SET” indicator will
come on.
The vehicle speed at the moment
the lever is released becomes the
set speed.
Setting the vehicle speed (vehicle-to-vehicle distance control
mode)
1
2
Page 377 of 744

3774-5. Using the driving support systems
4
Driving
HILUX_OM_OM0K321E_(EE)
When constant speed control mode is selected, your vehicle will main-
tain a set speed without controlling the vehicle-to-vehicle distance.
Select this mode only when vehicle-to-vehicle distance control mode
does not function correctly due to a dirty radar, etc.
With the cruise control off,
press and hold the “ON-OFF”
button for 1.5 seconds or more.
Immediately after the “ON-OFF”
button is pressed, the dynamic
radar cruise control indicator will
come on. Afterwards, it switches to
the cruise control indicator.
Switching to constant speed con-
trol mode is only possible when
operating the lever with the cruise
control off.
Accelerate or decelerate, with
accelerator pedal operation, to
the desired vehicle speed (at or
above approximately 30 km/h
[20 mph]) and push the lever
down to set the speed.
Cruise control “SET” indicator will
come on.
The vehicle speed at the moment
the lever is released becomes the
set speed.
Adjusting the speed setting: P. 374
Canceling and resuming the speed setting: P. 376
Selecting constant speed control mode
1
2
Page 378 of 744

3784-5. Using the driving support systems
HILUX_OM_OM0K321E_(EE)
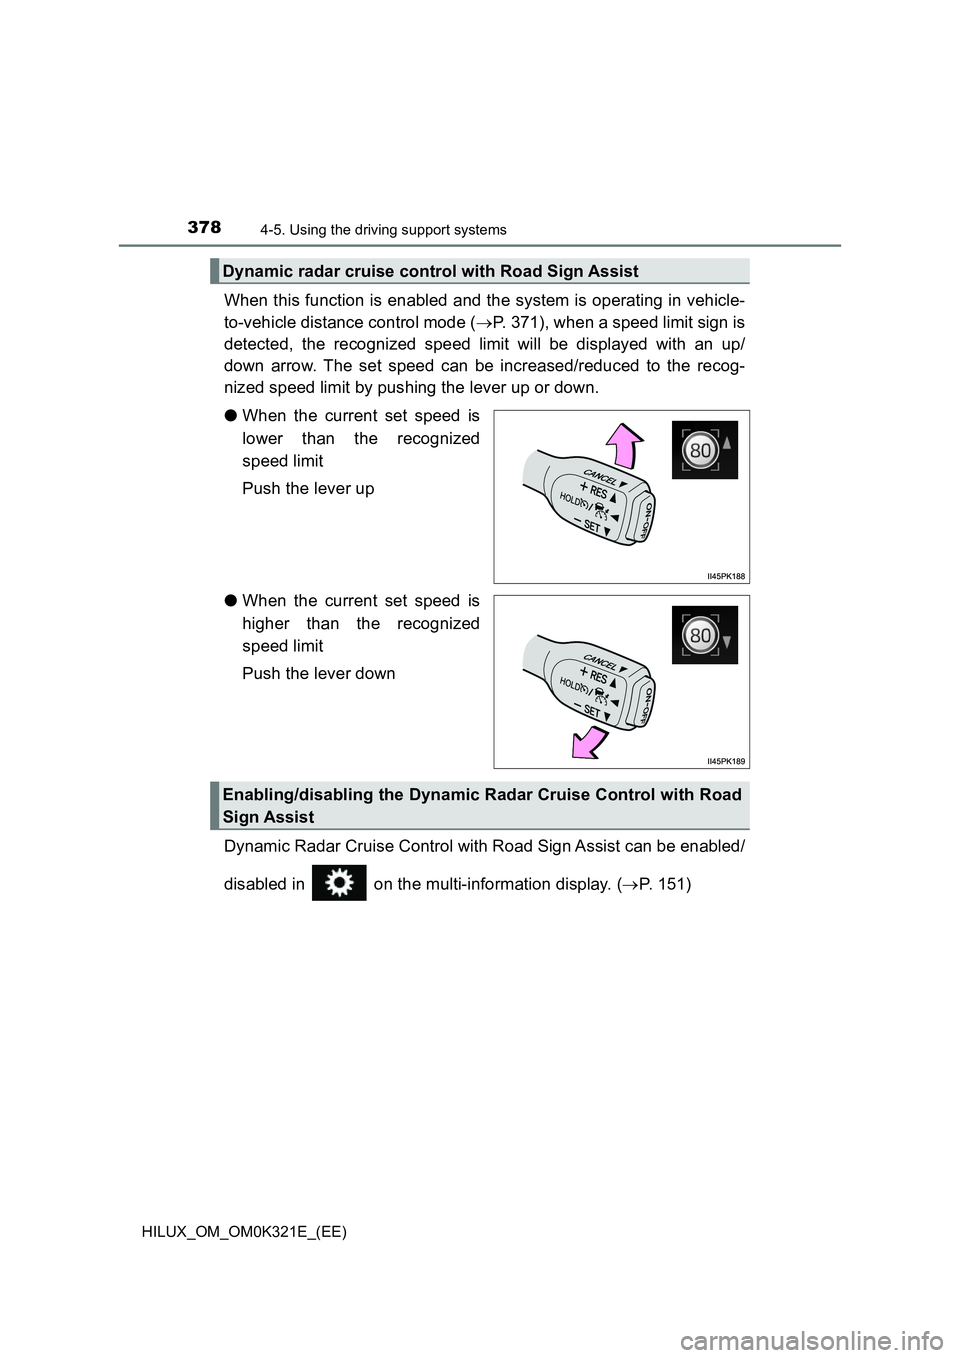
When this function is enabled and the system is operating in vehicle-
to-vehicle distance control mode ( P. 371), when a speed limit sign is
detected, the recognized speed limit will be displayed with an up/
down arrow. The set speed can be increased/reduced to the recog-
nized speed limit by pushing the lever up or down.
● When the current set speed is
lower than the recognized
speed limit
Push the lever up
● When the current set speed is
higher than the recognized
speed limit
Push the lever down
Dynamic Radar Cruise Control with Road Sign Assist can be enabled/
disabled in on the multi-information display. ( P. 151)
Dynamic radar cruise control with Road Sign Assist
Enabling/disabling the Dynamic Radar Cruise Control with Road
Sign Assist
Page 380 of 744

3804-5. Using the driving support systems
HILUX_OM_OM0K321E_(EE)
■ Automatic cancelation of constant speed control mode
Constant speed control mode is automatically canceled in the following situa-
tions:
● Actual vehicle speed is more than approximately 16 km/h (10 mph) below
the set vehicle speed.
● Actual vehicle speed falls below approximately 30 km/h (20 mph).
● VSC is activated.
● TRC/A-TRC is activated for a period of time.
● When the VSC, TRC/A-TRC system is turned off.
● Pre-collision braking is activated.
● When the shift lever is in N or the clutch pedal is depressed for a certain
amount of time or more. (Vehicles with manual transmission)
● 4WD models: Switching the transfer mode is not completed within 5 sec-
onds while the cruise control system is on.
If constant speed control mode is automatically canceled for any reasons
other than the above, there may be a malfunction in the system. Contact any
authorized Toyota retailer or Toyota authorized repairer, or any reliable
repairer.
■ The Dynamic Radar Cruise Control with Road Sign Assist may not oper-
ate properly when
As the Dynamic Radar Cruise Control with Road Sign Assist may not oper-
ate properly in conditions in which RSA may not operate or detect correctly
( P. 365), when using this function, make sure to check the speed limit
sign displayed.
In the following situations, the set speed may not be changed to the recog-
nized speed limit by pushing the lever up or down.
● If speed limit information is not available
● When the recognized speed limit is the same as the set speed
● When the recognized speed limit is outside of the speed range that the
dynamic radar cruise control system can operate
■ Brake operation
A brake operation sound may be heard and the brake pedal response may
change, but these are not malfunctions.
■ Warning messages and buzzers for dynamic radar cruise control
Warning messages and buzzers are used to indicate a system malfunction or
to inform the driver of the need for caution while driving. If a warning message
is shown on the multi-information display, read the message and follow the
instructions. ( P. 337, 643)
Page 398 of 744

3984-5. Using the driving support systems
HILUX_OM_OM0K321E_(EE)
Four-wheel drive system
H2 (high speed position, two-
wheel drive)
Use this for normal driving on dry
hard-surfaced roads. This position
gives greater economy, quietest
ride and least wear.
H4 (high speed position, four-
wheel drive)
Use this for driving only on tracks
that permit the tires slide, like off-
road, icy or snow-covered roads.
This position provides greater trac-
tion than two-wheel drive.
The four-wheel drive indicator
light comes on
L4 (low speed position, four-
wheel drive)
Use this for maximum power and traction. Use L4 for climbing or descend-
ing steep hills, off-road driving, and hard pulling in sand, mud or deep
snow.
The four-wheel drive and low speed four-wheel drive indicator lights
come on
The A.D.D. can be engaged or disengaged by the shifting operations
described in the following shifting procedures.
: If equipped
Use the front-wheel drive control switch to select the following
transfer modes.
1
2
3
A.D.D. (automatic disconnecting differential) (if equipped)
Page 417 of 744

4174-5. Using the driving support systems
4
Driving
HILUX_OM_OM0K321E_(EE)
■ If an odor comes from the air conditioning system while the engine is
stopped by the Stop & Start system
Vehicles with manual air conditioning system:
If the idling stop time is set to “Long”, change the setting to “Normal”. If an
odor occurs even when “Normal” is selected, press the Stop & Start cancel
switch to deactivate the Stop & Start system.
Vehicles with automatic air conditioning system:
Press the Stop & Start cancel switch to deactivate the Stop & Start system.
■ Changing the idling stop time with the air conditioning system on
The length of time the Stop & Start system will operate when the air condition-
ing system is on can be changed by performing the following operation. (The
length of time the Stop & Start system will operate when the air conditioning
system is off cannot be changed.)
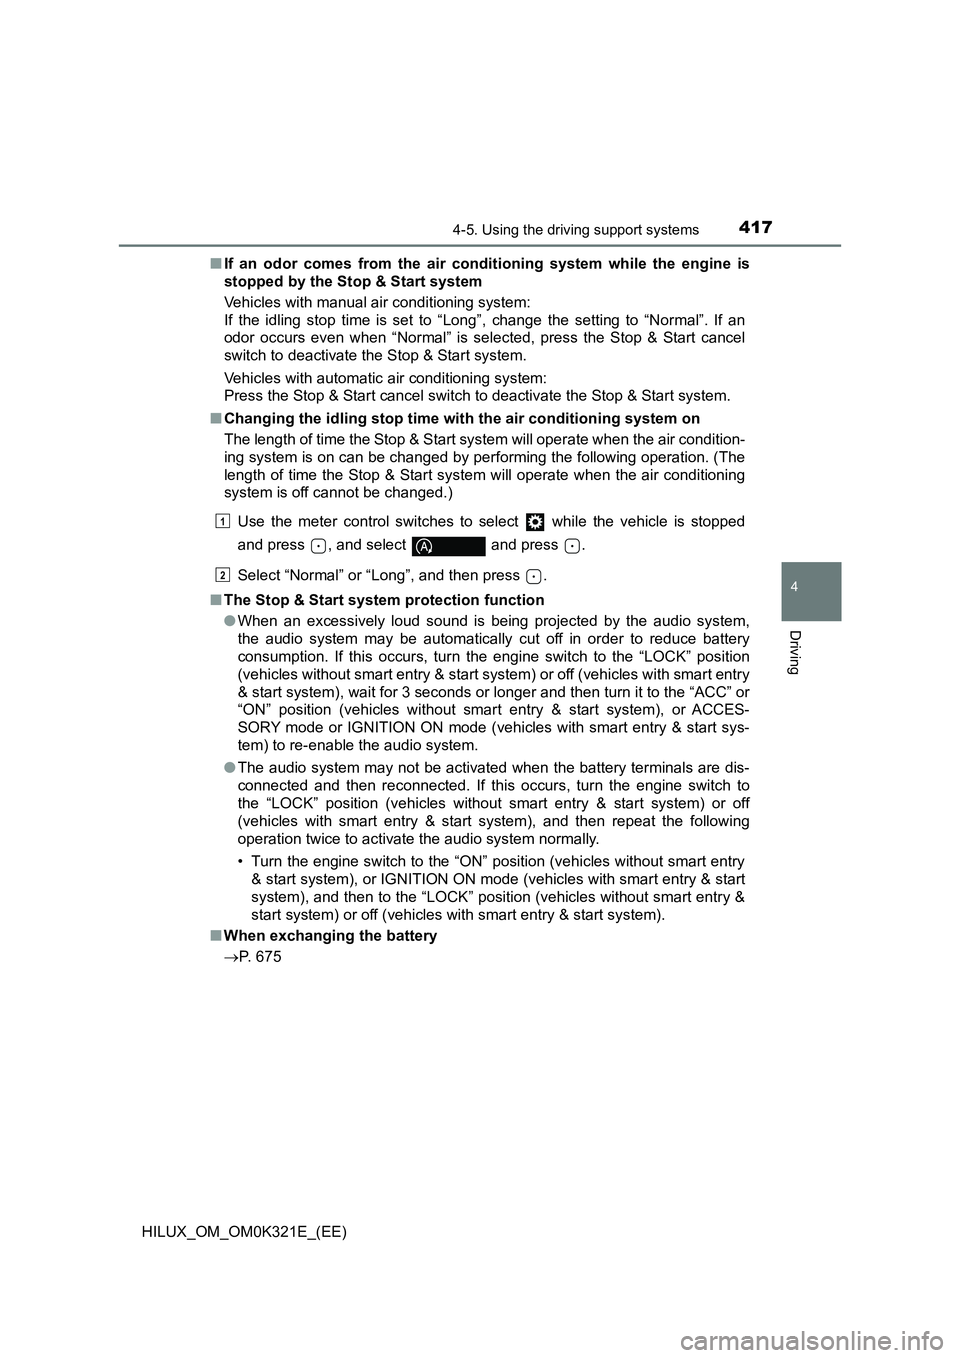
Use the meter control switches to select while the vehicle is stopped
and press , and select and press .
Select “Normal” or “Long”, and then press .
■ The Stop & Start system protection function
● When an excessively loud sound is being projected by the audio system,
the audio system may be automatically cut off in order to reduce battery
consumption. If this occurs, turn the engine switch to the “LOCK” position
(vehicles without smart entry & start sy stem) or off (vehicles with smart entry
& start system), wait for 3 seconds or longer and then turn it to the “ACC” or
“ON” position (vehicles without smart entry & start system), or ACCES-
SORY mode or IGNITION ON mode (vehicles with smart entry & start sys-
tem) to re-enable the audio system.
● The audio system may not be activated when the battery terminals are dis-
connected and then reconnected. If this occurs, turn the engine switch to
the “LOCK” position (vehicles without smart entry & start system) or off
(vehicles with smart entry & start system), and then repeat the following
operation twice to activate the audio system normally.
• Turn the engine switch to the “ON” position (vehicles without smart entry
& start system), or IGNITION ON mode (vehicles with smart entry & start
system), and then to the “LOCK” position (vehicles without smart entry &
start system) or off (vehicles with smart entry & start system).
■ When exchanging the battery
P. 675
1
2
Page 431 of 744

4314-5. Using the driving support systems
4
Driving
HILUX_OM_OM0K321E_(EE)
■Operating tips (vehicles with automatic transmission)
The system will operate when the shift lever is in a position other than P, how-
ever to make effective use of the system it is recommended to select a lower
shift range.
■ The system will not operate when
● The transfer mode is in H2.
● The rear differential is locked. (if equipped)
■ If the downhill assist control system indicator flashes
● In the following situations, the indicator flashes and the system will not oper-
ate:
• The transfer mode is not in L4 or H4.
• The rear differential is locked. (if equipped)
• The shift lever is in P. (vehicles with automatic transmission)
• The accelerator or brake pedal is depressed.
• The vehicle speed exceeds approximately 30 km/h (18 mph).
• The brake system overheats.
● In the following situations, the indicator flashes to alert the driver, but the
system will operate:
• The shift lever is in N. (vehicles with automatic transmission)
• The clutch pedal is depressed. (vehicles with manual transmission)
• The “DAC” switch is turned off while the system is operating.
The system will gradually ceases operat ion. The indicator will flash during
operation, and then go off when the system is fully off.
■ When the downhill assist control system is operated continuously
This may cause the brake actuator to overheat. In this case, the downhill
assist control system will stop operating, a buzzer will sound and the downhill
assist control system indicator will start flashing, and “TRC turned off” is
shown on the multi-information display. Refrain from using the system until
the downhill assist control system indicator stays on and “TRC turned off” dis-
played on the multi-information display goes out. (The vehicle can be driven
normally during this time.)
■ Sounds and vibrations caused by the downhill assist control system
● A sound may be heard from the engine compartment when the engine is
started or just after the vehicle begins to move. This sound does not indicate
that a malfunction has occurred in downhill assist control system.
● Either of the following conditions may occur when the downhill assist control
system is operating. None of these are indicators that a malfunction has
occurred.
• Vibrations may be felt through the vehicle body and steering.
• A motor sound may be heard after the vehicle comes to a stop.
Page 447 of 744

447
5
5-1. Basic Operations
Audio system
HILUX_OM_OM0K321E_(EE)
AUX port/USB port
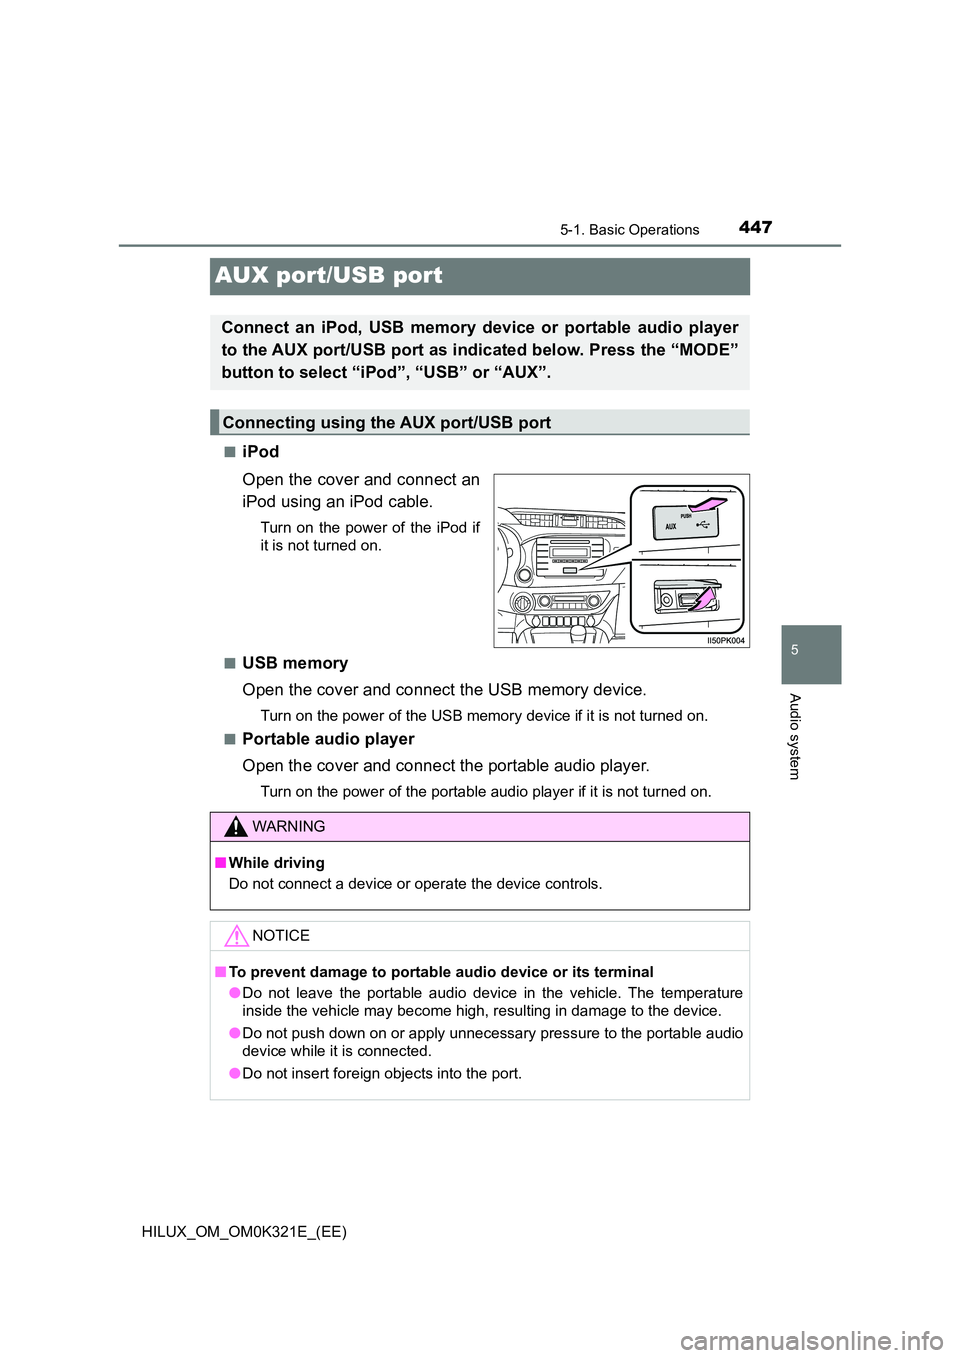
■iPod
Open the cover and connect an
iPod using an iPod cable.
Turn on the power of the iPod if
it is not turned on.
■USB memory
Open the cover and connect the USB memory device.
Turn on the power of the USB memory device if it is not turned on.
■Portable audio player
Open the cover and connect the portable audio player.
Turn on the power of the portable audio player if it is not turned on.
Connect an iPod, USB memory device or portable audio player
to the AUX port/USB port as indicated below. Press the “MODE”
button to select “iPod”, “USB” or “AUX”.
Connecting using the AUX port/USB port
WARNING
■ While driving
Do not connect a device or operate the device controls.
NOTICE
■ To prevent damage to portable audio device or its terminal
● Do not leave the portable audio device in the vehicle. The temperature
inside the vehicle may become high, resulting in damage to the device.
● Do not push down on or apply unnecessary pressure to the portable audio
device while it is connected.
● Do not insert foreign objects into the port.