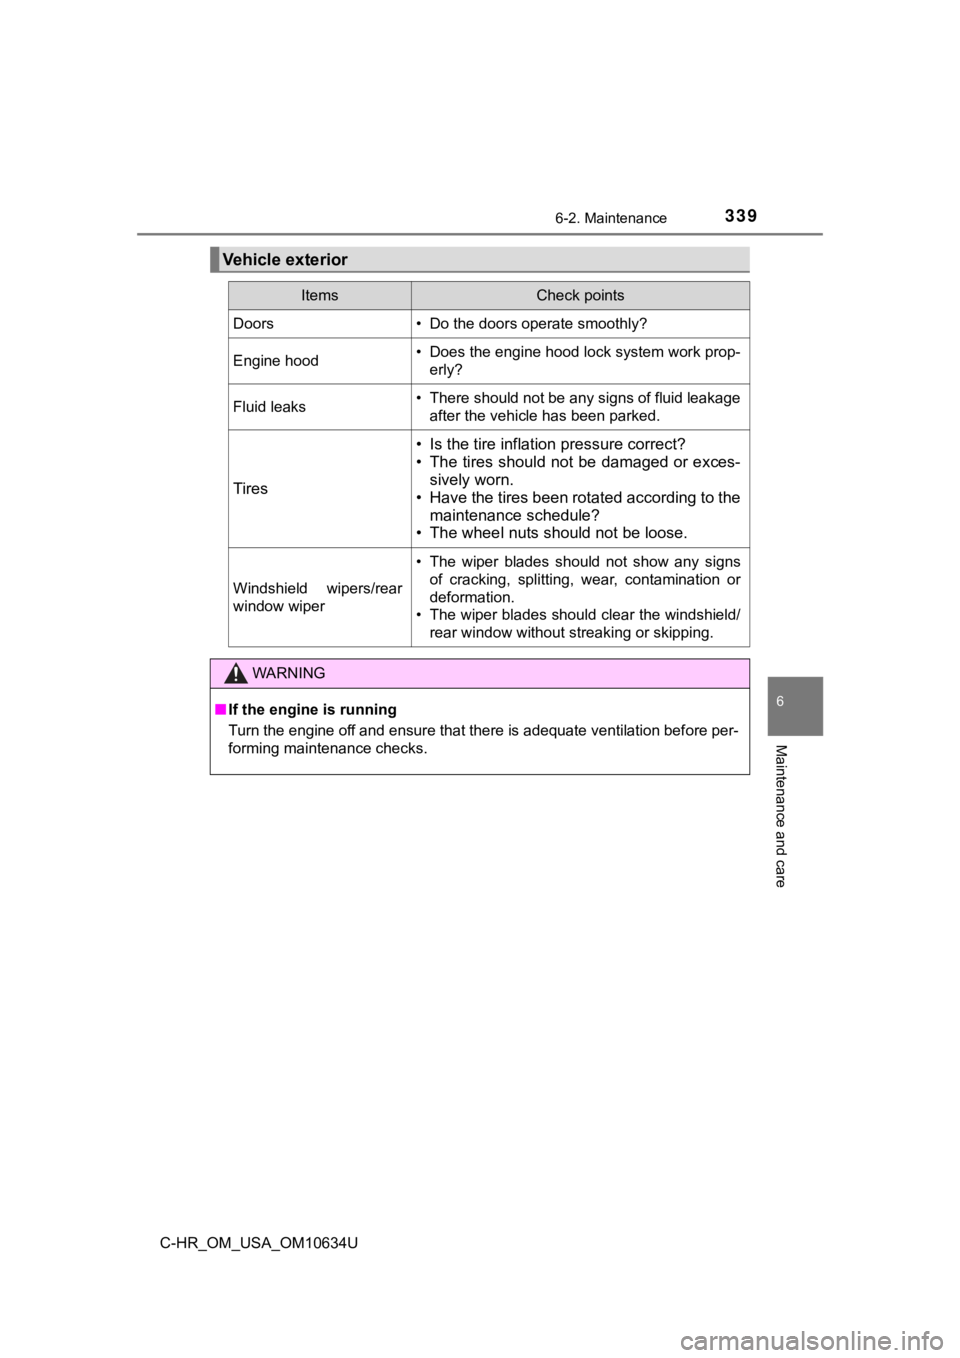
Page 339 of 536
3396-2. Maintenance
6
Maintenance and care
C-HR_OM_USA_OM10634U
Vehicle exterior
ItemsCheck points
Doors• Do the doors operate smoothly?
Engine hood• Does the engine hood lock system work prop-erly?
Fluid leaks• There should not be any signs of fluid leakageafter the vehicle has been parked.
Tires
• Is the tire inflati on pressure correct?
• The tires should not be damaged or exces- sively worn.
• Have the tires been rotated according to the
maintenance schedule?
• The wheel nuts should not be loose.
Windshield wipers/rear
window wiper
• The wiper blades should not show any signs
of cracking, splitting, wear, contamination or
deformation.
• The wiper blades should clear the windshield/
rear window without streaking or skipping.
WARNING
■If the engine is running
Turn the engine off and ensure that there is adequate ventilati on before per-
forming maintenance checks.
Page 376 of 536

3766-3. Do-it-yourself maintenance
C-HR_OM_USA_OM10634U
Wheels
When replacing wheels, care should be taken to ensure that they are
equivalent to those removed in load capacity, diameter, rim wid th and
inset
*.
Replacement wheels are available at your Toyota dealer.
*: Conventionally referred to as “offset”.
Toyota does not recommend using the following:
● Wheels of different sizes or types
● Used wheels
● Bent wheels that hav e been straightened
● Use only Toyota wheel nuts and wrenches designed for use with
your aluminum wheels.
● When rotating, repairing or changi ng your tires, check that the
wheel nuts are still tight afte r driving 1000 miles (1600 km).
● Be careful not to damage the aluminum wheels when using tire
chains.
● Use only Toyota genuine balance we ights or equivalent and a plas-
tic or rubber hammer when balancing your wheels.
■When replacing wheels
The wheels of your vehicle are equipped with tire pressure warn ing
valves and transmitters that allow the tire pressure warning sy stem to
provide advance warning in the event of a loss in tire inflatio n pressure.
Whenever wheels are replaced, tir e pressure warning valves and trans-
mitters must be installed. ( P. 363)
If a wheel is bent, cracked or heavily corroded, it should be
replaced. Otherwise, the tire may separate from the wheel or
cause a loss of handling control.
Wheel selection
Aluminum wheel pre cautions (if equipped)
Page 377 of 536

3776-3. Do-it-yourself maintenance
6
Maintenance and care
C-HR_OM_USA_OM10634U
WARNING
■When replacing wheels
●Do not use wheels that are a different size from those recommended in
the Owner’s Manual, as this may result in a loss of handling control.
●Never use an inner tube in a leaking wheel which is designed fo r a
tubeless tire. Doing so may resu lt in an accident, causing death or seri-
ous injury.
■When installing the wheel nuts
●Never use oil or grease on the wheel bolts or wheel nuts.
Oil and grease may cause the wheel nuts to be excessively tight ened,
leading to bolt or disc wheel damage. In addition, the oil or g rease can
cause the wheel nuts to loosen and the wheel may fall off, caus ing an
accident and resulting in death or serious injury. Remove any oil or
grease from the wheel bolts or wheel nuts.
■Use of defective wheels prohibited
Do not use cracked or deformed wheels.
Doing so could cause the tire to leak air during driving, possibly causing
an accident.
●Be sure to install the wheel nuts with
the tapered ends facing inward.
Installing the nuts with the tapered
ends facing outward can cause the
wheel to break and eventually cause
the wheel to come off while driving,
which could lead to an accident
resulting in death o r serious injury.
Tapered
portion
Page 440 of 536
4407-2. Steps to take in an emergency
C-HR_OM_USA_OM10634U
Chock the tires.
Slightly loosen the wheel nuts
(one turn).
Turn the tire jack portion by
hand until the center of the
recessed portion of the jack is
in contact with the center of the
jack point.
Replacing a flat tire
1
Flat tireWheel chock positions
FrontLeft-hand sideBehind the rear right-hand side tire
Right-hand sideBehind the rear left-hand side tire
RearLeft-hand sideIn front of the front right-hand side tire
Right-hand sideIn front of the front left-hand side tire
2
3
Page 441 of 536
4417-2. Steps to take in an emergency
7
When trouble arises
C-HR_OM_USA_OM10634U
Assemble the jack handle and
the wheel nut wrench as shown
in the illustration.
Raise the vehicle until the tire is
slightly raised off the ground.
Remove all the wheel nuts and
the tire.
When resting the tire on the
ground, place the tire so that the
wheel design faces up to avoid
scratching the wheel surface.
4
5
6
Page 442 of 536

4427-2. Steps to take in an emergency
C-HR_OM_USA_OM10634U
WARNING
■Replacing a flat tire
●Observe the following precautions.
Failure to do so may result in serious injury:
• Do not try to remove the wheel ornament by hand. Take due care in
handling the ornament to avoi d unexpected personal injury.
• Do not touch the disc wheels or the area around the brakes imm edi-
ately after the vehicle has been driven.
After the vehicle has been driven, the disc wheels and the area
around the brakes will be extreme ly hot. Touching these areas with
hands, feet or other body parts while changing a tire, etc., ma y
result in burns.
●Failure to follow these precautions could cause the wheel nuts to
loosen and the t ire to fall off, resulting in death or serious injury.
• Have the wheel nuts tightened with a torque wrench to 76 ft
·lbf
(103 N
·m, 10.5 kgf·m) as soon as possible after changing wheels.
• Do not attach a heavily damaged wheel ornament, as it may fly off
the wheel while the vehicle is moving.
• When installing a tire, only use wheel nuts that have been spe cifi-
cally designed for that wheel.
• If there are any cracks or defo rmations in the bolt screws, nut
threads or bolt holes of the wheel, have the vehicle inspected by
your Toyota dealer.
• When installing the wheel nuts, b e sure to install them with the
tapered ends facing inward. ( P. 377)
Page 443 of 536
4437-2. Steps to take in an emergency
7
When trouble arises
C-HR_OM_USA_OM10634U
Remove any dirt or foreign mat-
ter from the wheel contact sur-
face.
If foreign matter is on the wheel
contact surface, the wheel nuts
may loosen while the vehicle is in
motion, causing the tire to come
off.
Install the tire and loosely tighten each wheel nut by hand by
approximately the same amount.
When replacing a steel wheel
with a steel wheel, tighten the
wheel nuts until the tapered
portion comes into loose con-
tact with the disc wheel seat.
When replacing an aluminum
wheel with a steel wheel,
tighten the wheel nuts until the
tapered portion comes into
loose contact with the disc
wheel seat.
Lower the vehicle.
Installing the spare tire
1
2
Tapered portion
Disc wheel seat
Tapered portion
Disc wheel seat
P