Page 63 of 232

WARNING: Always maintain a safe driving
distance from the vehicle in front of you and
exercise caution when driving conditions are
hazardous. Do not rely on brake disc wiping or
hydraulic fade compensation to act as a
substitute for adequately applying the brakes.
Hydraulic Boost Compensation
Model Y is equipped with a brake booster that provides
a mechanical advantage that
effectively activates the
brakes when the brake pedal is pressed. Hydraulic boost
compensation provides mechanical assist in the event of a brake booster failure. If a brake booster failure is detected, the brake pedal may feel harder to press and you may hear some noise when you press the brake
pedal. To stop the vehicle, apply adequate steady force on the brake pedal without releasing or "pumping" them. Exercise caution while driving and maintain a safe
distance as brake pedal responsiveness and braking performance may be degraded.
Regenerative Braking
Whenever Model Y is moving and your foot is off the
accelerator, regenerative braking slows down
Model Y
and feeds any surplus energy back to the Battery.
By anticipating your stops and reducing or removing
pressure from the accelerator pedal to slow down, you
can take advantage of regenerative braking to increase
driving range. Of course, this is no substitute for regular
braking when needed for safety.
NOTE: If regenerative braking is aggressively slowing
Model Y (such as when your foot is completely off the
accelerator pedal at highway speeds), the brake lights turn on to alert others that you are slowing down.
NOTE: Installing winter tires with aggressive compound
and tread design may result in temporarily-reduced regenerative braking power. However, your vehicle is
designed to continuously recalibrate itself, and after changing tires it will increasingly restore regenerative braking power after some moderate-torque straight-line accelerations. For most drivers this occurs after a short period of normal driving, but drivers who normally
accelerate lightly may need to use slightly harder accelerations while the recalibration is in progress.
WARNING: In snowy or icy conditions Model Y
may experience traction loss during regenerative
braking.
The amount of energy fed back to the Battery using regenerative braking can depend on the current state of the Battery. For example, regenerative braking may be
limited if the Battery is already fully charged or if the
ambient temperature is too cold.
NOTE: If regenerative braking is limited, a dashed line
displays on the energy bar (see
Driving Status on page
57).
Stopping Mode
Regenerative braking decelerates Model Y whenever you
release the accelerator pedal when driving. You can
choose what you want
Model Y to do once the driving
speed has been reduced to a very low speed (almost at
a stop) and both the accelerator pedal and brake pedal
are released. While in Park, touch
Controls > Driving >
Stopping Mode and choose from these options:
Page 68 of 232

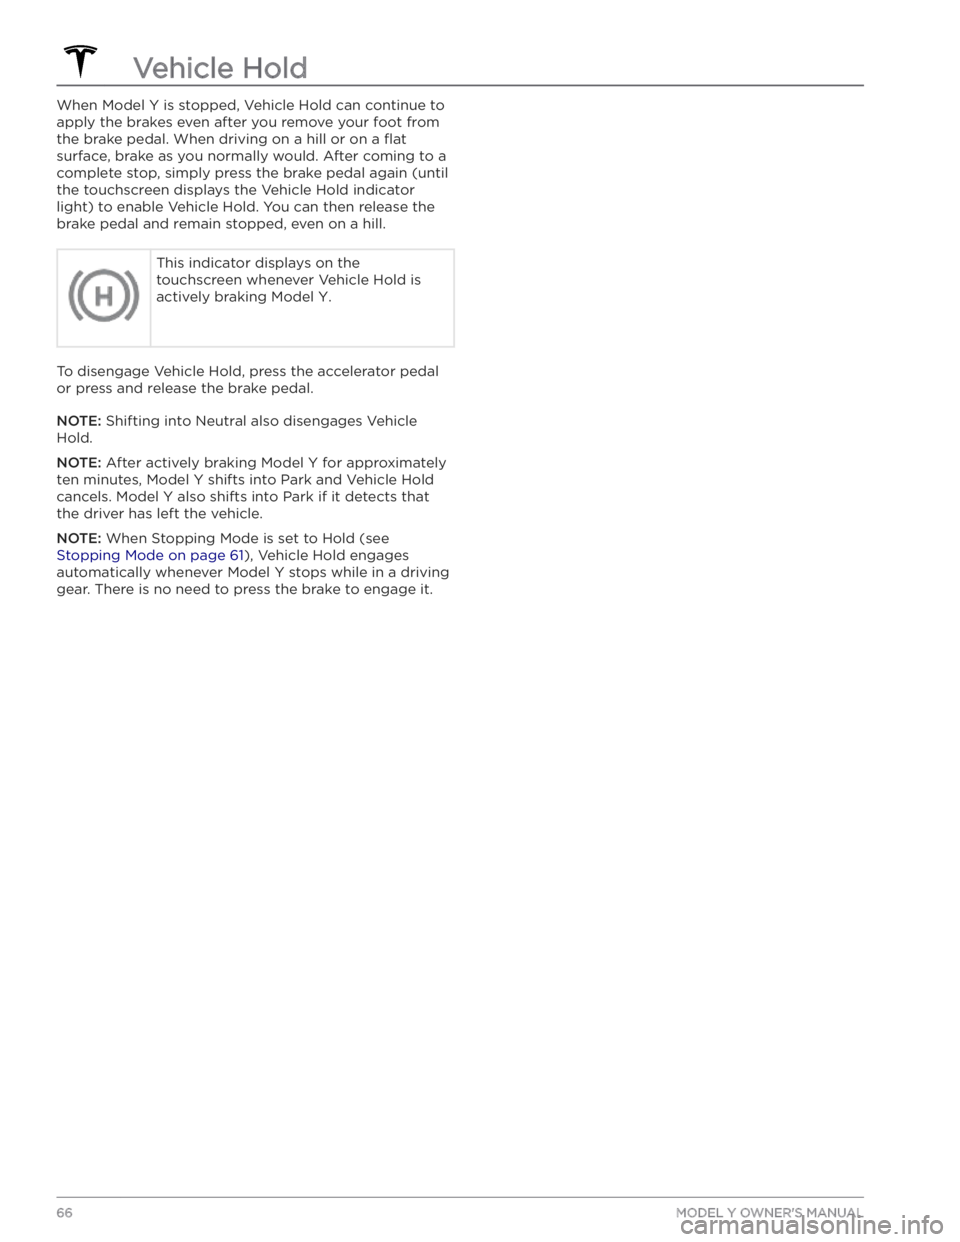
When Model Y is stopped, Vehicle Hold can continue to
apply the brakes even after you remove your foot from
the brake pedal. When driving on a hill or on a
flat
surface, brake as you normally would. After coming to a
complete stop, simply press the brake pedal again (until
the
touchscreen displays the Vehicle Hold indicator
light) to enable Vehicle Hold. You can then release the
brake pedal and remain stopped, even on a hill.
This indicator displays on the
touchscreen whenever Vehicle Hold is
actively braking
Model Y.
To disengage Vehicle Hold, press the accelerator pedal or press and release the brake pedal.
NOTE: Shifting into Neutral also disengages Vehicle
Hold.
NOTE: After actively braking Model Y for approximately
ten minutes,
Model Y shifts into Park and Vehicle Hold
cancels.
Model Y also shifts into Park if it detects that
the driver has left the vehicle.
NOTE: When Stopping Mode is set to Hold (see
Stopping Mode on page 61), Vehicle Hold engages
automatically whenever
Model Y stops while in a driving
gear. There is no need to press the brake to engage it.
Vehicle Hold
66MODEL Y OWNER
Page 75 of 232

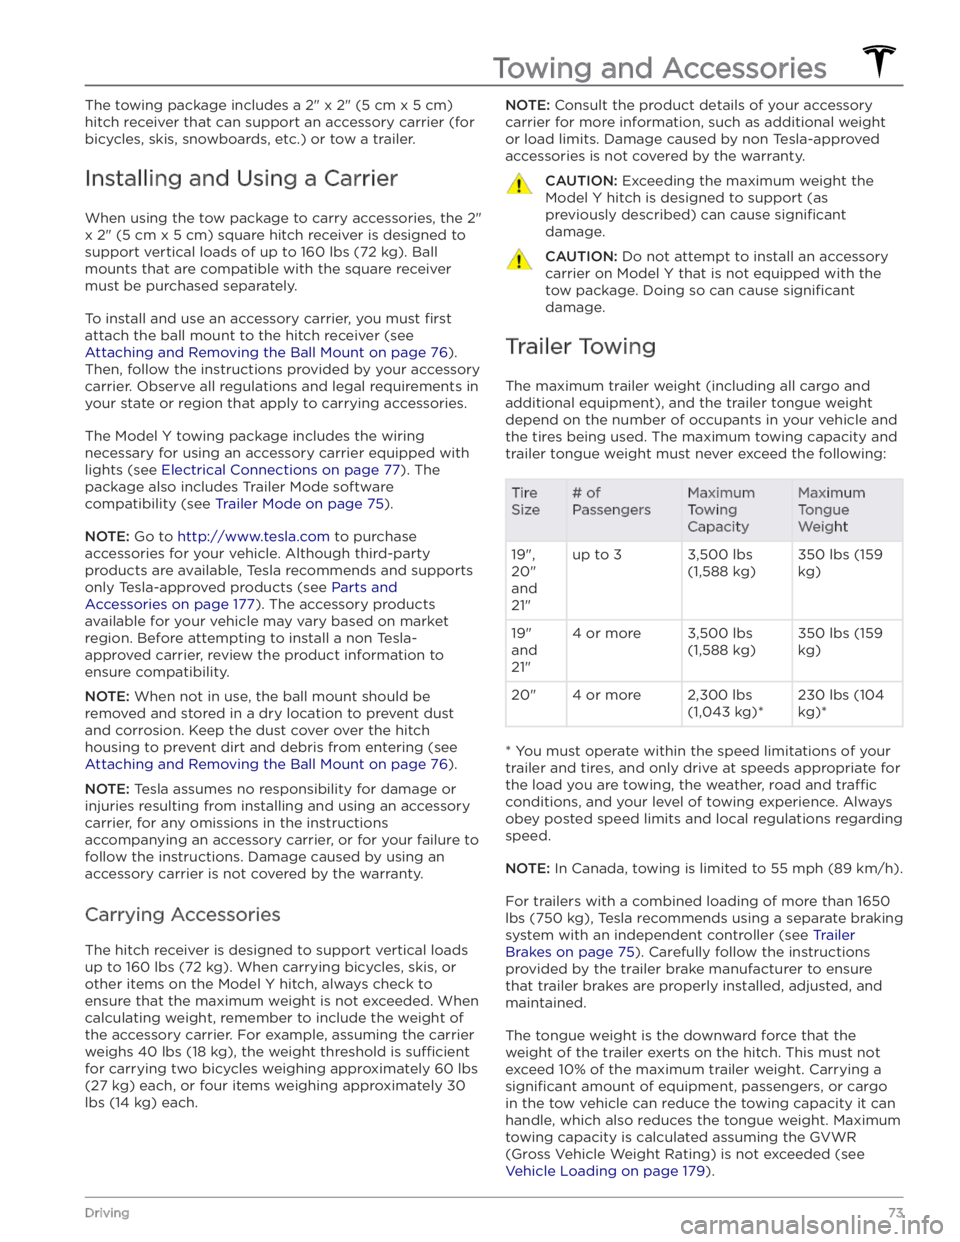
The towing package includes a 2" x 2" (5 cm x 5 cm)
hitch receiver that can support an accessory carrier (for bicycles, skis, snowboards, etc.) or tow a trailer.
Installing and Using a Carrier
When using the tow package to carry accessories, the 2"
x 2" (5 cm x 5 cm) square hitch receiver is designed to
support vertical loads of up to
160 lbs (72 kg). Ball
mounts that are compatible with the square receiver
must be purchased separately.
To install and use an accessory carrier, you must first
attach the ball mount to the hitch receiver (see
Attaching and Removing the Ball Mount on page 76).
Then, follow the instructions provided by your accessory
carrier. Observe all regulations and legal requirements in your state or region that apply to carrying accessories.
The Model Y towing package includes the wiring
necessary for using an accessory carrier equipped with lights (see
Electrical Connections on page 77). The
package also includes Trailer Mode software compatibility (see
Trailer Mode on page 75).
NOTE: Go to http://www.tesla.com to purchase
accessories for your vehicle. Although third-party products are available, Tesla recommends and supports
only Tesla-approved products (see
Parts and
Accessories on page 177). The accessory products
available for your vehicle may vary based on market
region. Before attempting to install a non Tesla-
approved carrier, review the product information to ensure compatibility.
NOTE: When not in use, the ball mount should be
removed and stored in a dry location to prevent dust and corrosion. Keep the dust cover over the hitch housing to prevent dirt and debris from entering (see
Attaching and Removing the Ball Mount on page 76).
NOTE: Tesla assumes no responsibility for damage or
injuries resulting from installing and using an accessory carrier, for any omissions in the instructions accompanying an accessory carrier, or for your failure to follow the instructions. Damage caused by using an accessory carrier is not covered by the warranty.
Carrying Accessories
The hitch receiver is designed to support vertical loads
up to
160 lbs (72 kg). When carrying bicycles, skis, or
other items on the
Model Y hitch, always check to
ensure that the maximum weight is not exceeded. When calculating weight, remember to include the weight of
the accessory carrier.
For example, assuming the carrier
weighs 40 lbs (18 kg), the weight threshold is su
Page 79 of 232

To attach a ball mount:
1.
Remove the dust cover from the hitch housing by using a small object, such as a
flat screwdriver, to pry
between the dust cover and hitch housing. Store the dust cover in a secure location.
2.
If necessary, remove the cotter pin from the locking
bolt and slide the locking bolt out of the hitch assembly.
3.
Slide the ball holder into the hitch assembly.
4.
Align the hole in the ball holder with the one in the hitch assembly.
5.
Slide the locking bolt through the hitch assembly/ball holder.
6.
Insert the cotter pin in the hole at the end of the
locking bolt.
To remove a ball mount:
1.
Remove the cotter pin from the locking bolt and slide
the locking bolt out of the ball holder/hitch assembly.
2. Pull the ball holder out of the hitch assembly.3.
Re-install the dust cover for the hitch housing and
store the ball mount in a secure location.
Electrical Connections
Regulations require all trailers to be equipped with tail lights, brake lights, side marker lights, and turn signals.
To provide power for trailer lighting, a built-in 7-pin
wiring connector is provided near the hitch support
Page 80 of 232
NOTE: Loss of trailer lights when towing may be the
result of a fault in the trailer wiring or excessive power
consumption by the lights connected to the trailer output(s). When this occurs, a Trailer Mode icon
appears on the touchscreen. Fix any issues with the wiring and/or reduce the number of lights connected to the trailer output(s), then toggle Trailer Mode
off and
on again.
CAUTION: Always ensure that the trailer electrical
cable does not contact or drag on the ground and
there is enough slack in the cable to allow for
turns.
WARNING: Use only the electrical connections
designed by Tesla. Do not attempt to directly
splice or attempt to connect a trailer’s electrical
wiring using any other method. Doing so can
damage the vehicle
Page 94 of 232
Stop Light and Stop Sign Warning
NOTE: Depending on market region, vehicle
configuration, options purchased, and software version,
your vehicle may not be equipped with Stop Light and
Stop Sign Warning.
While Autosteer is in use, Model Y displays a warning
on the
touchscreen and sounds a chime if it detects
that you are likely to run through a red stop light or stop sign. If this happens,
TAKE IMMEDIATE
CORRECTIVE ACTION!
The visual and audible warnings cancel after a few seconds, or when you press the brake pedal, whichever
comes
first.
Stop Light and Stop Sign Warning provides warnings
only. It makes no attempt to slow down or stop
Model Y
at red tra
Page 98 of 232
NOTE: Depending on market region, vehicle configuration, options purchased, and software version, your vehicle
may not be equipped with Traffic Light and Stop Sign Control.
Tra
Page 111 of 232
Immediately after initiating Smart Summon in either
mode, hazard lights
briefly flash, mirrors fold, and Model
Y shifts into the appropriate driving gear (Drive or
Reverse).
Model Y then slowly moves to within 3 feet (1
meter) of you (COME TO ME) or your chosen destination
(GO TO TARGET), navigating obstacles as needed. As
Model Y moves, the corresponding red arrow on the
map also moves to show the vehicle’s location. As you
move, the corresponding blue dot also moves to show
your location.
In either mode, Model Y stops moving and shifts into
park when: