Page 103 of 220
Summon
Summon (if equipped) allows you to
automatically park and retrieve Model 3 while
you are standing outside the vehicle. Summon
uses data from the ultrasonic sensors to move
Model 3 forward and reverse up to 39 feet (12
meters) in, or out of, a parking space.
To move Model 3 a longer distance while steering around objects, you can use Smart
Summon (if equipped) and your mobile phone. Smart Summon allows your vehicle to
find you (or you can send your vehicle to a
chosen location). See Smart Summon on page
105.
Warning: Summon is designed and
intended for use only on parking lots and
driveways on private property where the
surrounding area is familiar and
predictable.Warning: Summon is a BETA feature. You
must continually monitor the vehicle and
its surroundings and stay prepared to
take immediate action at any time. It is
the driver
Page 113 of 220
area being monitored by Forward
Collision Warning can be adversely
affected by road and weather conditions.
Use appropriate caution when driving.Warning: Forward Collision Warning is
designed only to provide visual and
audible alerts. It does not attempt to
apply the brakes or decelerate Model 3.
When seeing and/or hearing a warning, it
is the driver
Page 114 of 220
Obstacle-Aware AccelerationObstacle-Aware Acceleration is designed toreduce the impact of a collision by reducing
motor torque if Model 3 detects an object in
its driving path. For example, Model 3, while
parked in front of a closed garage door with
the Drive gear engaged, detects that you have
pressed hard on the accelerator pedal.
Although Model 3 still accelerates and hits the
garage door, the reduced torque may result in
less damage.
Obstacle-Aware Acceleration is designed to operate only when all of these conditions are
simultaneously met:
Page 115 of 220

Speed Assist
How Speed Assist Works
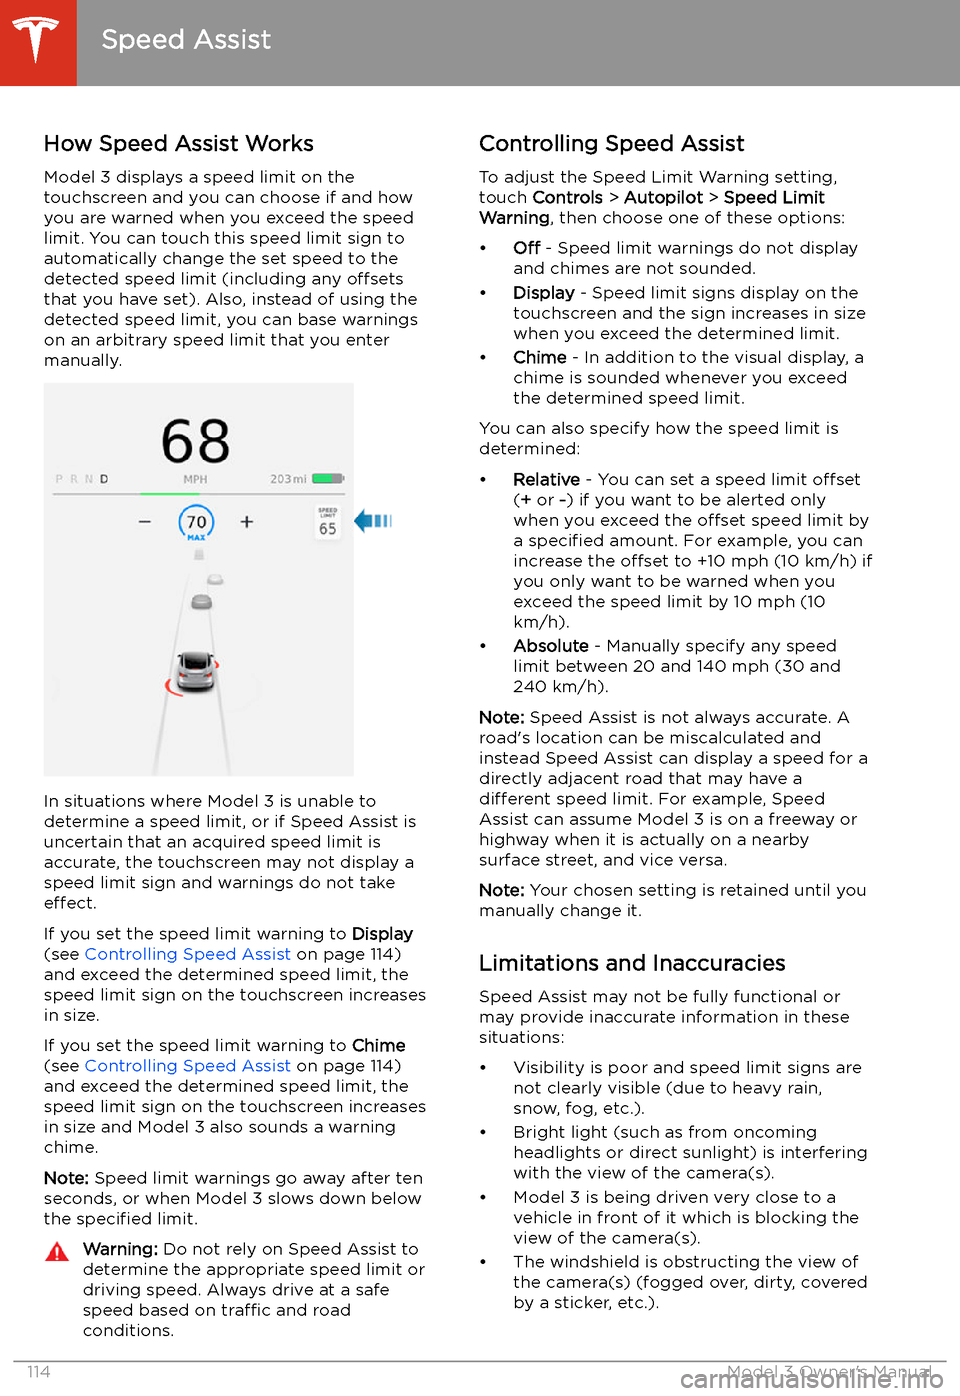
Model 3 displays a speed limit on the
touchscreen and you can choose if and how
you are warned when you exceed the speed
limit. You can touch this speed limit sign to automatically change the set speed to thedetected speed limit (including any offsets
that you have set). Also, instead of using the detected speed limit, you can base warnings
on an arbitrary speed limit that you enter manually.
In situations where Model 3 is unable to
determine a speed limit, or if Speed Assist is
uncertain that an acquired speed limit is
accurate, the touchscreen may not display a
speed limit sign and warnings do not take effect.
If you set the speed limit warning to Display
(see Controlling Speed Assist on page 114)
and exceed the determined speed limit, the
speed limit sign on the touchscreen increases
in size.
If you set the speed limit warning to Chime
(see Controlling Speed Assist on page 114)
and exceed the determined speed limit, the
speed limit sign on the touchscreen increases
in size and Model 3 also sounds a warning
chime.
Note: Speed limit warnings go away after ten
seconds, or when Model 3 slows down below
the specified limit.
Warning:
Do not rely on Speed Assist to
determine the appropriate speed limit or driving speed. Always drive at a safe
speed based on traffic and road
conditions.Controlling Speed Assist
To adjust the Speed Limit Warning setting,
touch Controls > Autopilot > Speed Limit
Warning , then choose one of these options:
Page 128 of 220
Operating Seat Heaters
To control the front seat heaters for the driver
and passenger, touch the corresponding
control on the main climate control area at the
bottom of the touchscreen. To control the rear
seat heaters (if equipped) or access duplicate
controls for the front seat heaters, touch the
fan icon, then touch the seat heater icon
followed by the seat for which you want to
adjust heating. Seat heaters operate at three
setting levels from 3 (highest) to 1 (lowest).
When operating, the associated seat icon displays twisting lines that turn red to indicatethe setting level. You can touch All Off to turn
off all seat heaters simultaneously.
Adjusting the Front Vents Model 3 has a unique horizontal face-level
vent that spans the width of the dashboard.
Using the touchscreen, you can pinpoint
exactly where you want to direct the air
Page 156 of 220

Battery Information
About the Battery
Model 3 has one of the most sophisticated
battery systems in the world. The most
important way to preserve the Battery is to LEAVE YOUR VEHICLE PLUGGED IN when
you are not using it. This is particularly important if you are not planning to drive
Model 3 for several weeks. When plugged in,
Model 3 wakes up when needed to
automatically maintain a charge level that
maximizes the lifetime of the Battery.
Note: When left idle and unplugged, your
vehicle periodically uses energy from the Battery for system tests and recharging the
12V battery when necessary.
There is no advantage to waiting until the
Battery’s level is low before charging. In fact, the Battery performs best when charged
regularly.
Note: If you allow the Battery to discharge to
0%, other components may become damaged
or require replacement (for example, the 12V
battery). In these cases, you are responsible for repair and/or transporting expenses.
Discharge-related expenses are not covered
by the warranty or under the Roadside
Assistance policy.
The peak charging rate of the Battery may
decrease slightly after a large number of DC
Fast Charging sessions, such as those at
Superchargers. To ensure maximum driving
range and Battery safety, the Battery charge
rate is decreased when the Battery is too cold,
when the Battery’s charge is nearly full, and when the Battery conditions change with
usage and age. These changes in the condition of the Battery are driven by battery physics
and may increase the total Supercharging
duration by a few minutes over time.
Battery Care
Never allow the Battery to fully discharge.
Even when Model 3 is not being driven, its
Battery discharges very slowly to power the
onboard electronics. The Battery can
discharge at a rate of approximately 1% per day, though the discharge rate may vary
depending on environmental factors (such as
cold weather), vehicle configuration, and your
selected settings on the touchscreen.
Situations can arise in which you must leave
Model 3 unplugged for an extended period of time (for example, at an airport when
traveling). In these situations, keep the 1% in
mind to ensure that you leave the Battery with a sufficient charge level. For example, over a
two week period (14 days), the Battery may
discharge by approximately 14%.
Discharging the Battery to 0% may result in
damage to vehicle components. To protect
against a complete discharge, Model 3 enters
a low-power consumption mode when the
displayed charge level drops to approximately
0%. In this mode, the Battery stops supporting
the onboard electronics and auxiliary 12V
battery. Once this low-power consumption
mode is active, immediately plug in Model 3 to
prevent a jump-start and 12V battery
replacement.
Note: If the vehicle is unresponsive and will
not unlock, open, or charge, then the 12V
battery may have become discharged. In this
situation, contact Tesla.
Temperature Limits
For better long-term performance, avoid
exposing Model 3 to ambient temperatures
above 140
Page 162 of 220

Scheduled Charging is best used to determinewhen your vehicle should start charging;
Scheduled Departure is best used to
determine when charging should complete for
your drive.
Note: Your vehicle aims to finish charging
before 6am (end of off-peak hours). If given
sufficient time to charge, charging may stop at
6am, even if your scheduled departure is later.
The vehicle warms the Battery and
preconditions the cabin shortly before your
scheduled departure time. If the vehicle does
not have enough time to complete charging before 6am, it will continue to charge until it
reaches the target Battery percentage.
Note: If your vehicle is not plugged into a
charger, Scheduled departure will not
precondition the cabin or battery.
Supercharger Usage Fees and IdleFees
When charging using a Tesla supercharger,
SUPERCHARGING information displays at the
bottom of the charging screen. This information includes the location, the time
that charging started, and an estimate of how
much the session will cost. When you stop
supercharging, the estimated cost of that
session displays until a new supercharging
session begins.
Note: Estimated pricing is displayed for your
convenience only and may not re
Page 166 of 220
Checking and Adjusting Tire PressuresFollow these steps when tires are cold andModel 3 has been stationary for over three
hours:
1. Refer to the Tire and Loading Information
label located on the driver’s center door
pillar for the target tire pressure.
2. Remove the valve cap.
3. Firmly press an accurate tire pressure
gauge onto the valve to measure pressure.
4. If required, add or remove air to reach the
recommended pressure.
Note: You can release air by pressing the
metal stem in the center of the valve.
5. Re-check pressure using the accurate tire
gauge.
6. Repeat steps 3 and 4 as necessary until
the tire pressure is correct.
7. Reinstall the valve cap to prevent dirt from
entering. Periodically check the valve for
damage and leaks.Inspecting and Maintaining Tires
Regularly inspect the tread and side walls for
any sign of distortion (bulges), foreign objects,
cuts or wear.Warning: Do not drive Model 3 if a tire is
damaged, excessively worn, or in