Page 103 of 220
Summon
Summon (if equipped) allows you to
automatically park and retrieve Model 3 while
you are standing outside the vehicle. Summon
uses data from the ultrasonic sensors to move
Model 3 forward and reverse up to 39 feet (12
meters) in, or out of, a parking space.
To move Model 3 a longer distance while steering around objects, you can use Smart
Summon (if equipped) and your mobile phone. Smart Summon allows your vehicle to
find you (or you can send your vehicle to a
chosen location). See Smart Summon on page
105.
Warning: Summon is designed and
intended for use only on parking lots and
driveways on private property where the
surrounding area is familiar and
predictable.Warning: Summon is a BETA feature. You
must continually monitor the vehicle and
its surroundings and stay prepared to
take immediate action at any time. It is
the driver
Page 113 of 220
area being monitored by Forward
Collision Warning can be adversely
affected by road and weather conditions.
Use appropriate caution when driving.Warning: Forward Collision Warning is
designed only to provide visual and
audible alerts. It does not attempt to
apply the brakes or decelerate Model 3.
When seeing and/or hearing a warning, it
is the driver
Page 115 of 220

Speed Assist
How Speed Assist Works
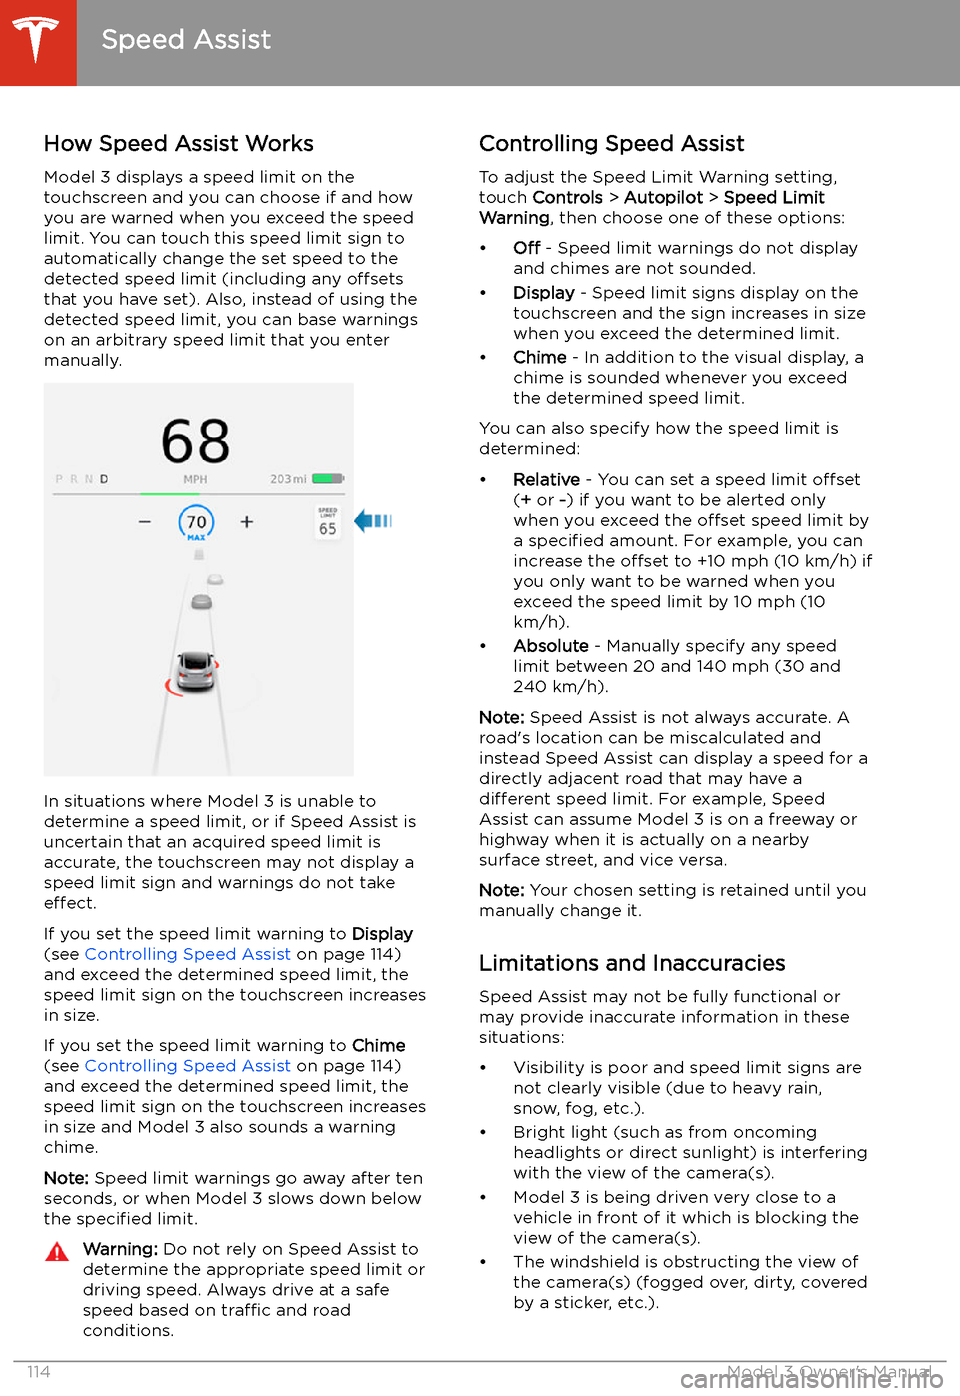
Model 3 displays a speed limit on the
touchscreen and you can choose if and how
you are warned when you exceed the speed
limit. You can touch this speed limit sign to automatically change the set speed to thedetected speed limit (including any offsets
that you have set). Also, instead of using the detected speed limit, you can base warnings
on an arbitrary speed limit that you enter manually.
In situations where Model 3 is unable to
determine a speed limit, or if Speed Assist is
uncertain that an acquired speed limit is
accurate, the touchscreen may not display a
speed limit sign and warnings do not take effect.
If you set the speed limit warning to Display
(see Controlling Speed Assist on page 114)
and exceed the determined speed limit, the
speed limit sign on the touchscreen increases
in size.
If you set the speed limit warning to Chime
(see Controlling Speed Assist on page 114)
and exceed the determined speed limit, the
speed limit sign on the touchscreen increases
in size and Model 3 also sounds a warning
chime.
Note: Speed limit warnings go away after ten
seconds, or when Model 3 slows down below
the specified limit.
Warning:
Do not rely on Speed Assist to
determine the appropriate speed limit or driving speed. Always drive at a safe
speed based on traffic and road
conditions.Controlling Speed Assist
To adjust the Speed Limit Warning setting,
touch Controls > Autopilot > Speed Limit
Warning , then choose one of these options:
Page 160 of 220
4.Pull the charge cable from the charge
port.Caution: The release cable is designed for
use only in situations where the charge
cable cannot be released from the charge
port using the usual methods. Continuous
use may result in damage to the release
cable or charging equipment.Warning: Do not perform this procedure
while your vehicle is charging or if any
orange high voltage conductors are
exposed. Failure to follow these
instructions can result in electric shock and serious injury or damage to the
vehicle. If you have any uncertainty as to
how to safely perform this procedure,
contact your closest Service Center.Warning: Do not attempt to remove the
charge cable while simultaneously pulling the release cable. Always pull the release
cable before attempting to remove the
charge cable from the charge port.
Failure to follow these instructions can
result in electric shock and serious injury.
Charge Port Light
Page 166 of 220
Checking and Adjusting Tire PressuresFollow these steps when tires are cold andModel 3 has been stationary for over three
hours:
1. Refer to the Tire and Loading Information
label located on the driver’s center door
pillar for the target tire pressure.
2. Remove the valve cap.
3. Firmly press an accurate tire pressure
gauge onto the valve to measure pressure.
4. If required, add or remove air to reach the
recommended pressure.
Note: You can release air by pressing the
metal stem in the center of the valve.
5. Re-check pressure using the accurate tire
gauge.
6. Repeat steps 3 and 4 as necessary until
the tire pressure is correct.
7. Reinstall the valve cap to prevent dirt from
entering. Periodically check the valve for
damage and leaks.Inspecting and Maintaining Tires
Regularly inspect the tread and side walls for
any sign of distortion (bulges), foreign objects,
cuts or wear.Warning: Do not drive Model 3 if a tire is
damaged, excessively worn, or in
Page 170 of 220
As an added safety feature, your vehicle has
been equipped with a TPMS that displays a
tire pressure telltale (Tire Pressure Warning)
on the touchscreen when one or more of your
tires is significantly under- or over-in
Page 171 of 220

TPMS malfunctions can occur for a variety of
reasons, including installing replacement or
alternate tires or wheels that prevent the
TPMS from functioning properly. Always check
the TPMS malfunction indicator light after replacing one or more tires or wheels on yourvehicle to ensure that the replacement tires or
wheels allow the TPMS to continue to function
properly.
Note: If a tire has been replaced or repaired
using a different tire sealant than the one
available from Tesla, and a low tire pressure is
detected, it is possible that the tire sensor has
been damaged. Contact Tesla to have the fault repaired as soon as possible.Seasonal Tire Types
Summer Tires
Your vehicle may be originally equipped with high performance summer tires or all season
tires. Tesla recommends using winter tires if
driving in cold temperatures or on roads
where snow or ice may be present. Contact
Tesla for winter tire recommendations.Warning: In cold temperatures or on snow
or ice, summer tires do not provide
adequate traction. Selecting and installing the appropriate tires for winter conditions
is important to ensure the safety and
optimum performance of your Model 3.
All-Season Tires
Your Model 3 may be originally equipped with all-season tires. These tires are designed to
provide adequate traction in most conditions
year-round, but may not provide the same level of traction as winter tires in snowy or icy
conditions. All-season tires can be identified
by “ALL SEASON" and/or "M+S” (mud and
snow) on the tire sidewall.
Winter Tires
Use winter tires to increase traction in snowy
or icy conditions. When installing winter tires,
always install a complete set of four tires at
the same time. Winter tires must be the same
diameter, brand, construction and tread
pattern on all four wheels. Contact Tesla for
winter tire recommendations.
Winter tires can be identified by a
mountain/snow
Page 179 of 220
Jacking and Lifting
Jacking Procedure
Follow the steps below to lift Model 3. Ensure
that any non-Tesla repair facility is aware of
these lifting points.
1. Position Model 3 centrally between the lift
posts.
2. Position the lift arm pads under the
designated body lift points at the
locations shown.
Warning: DO NOT position the lift
arm pads under the Battery or side
rails, as shown in red.
3. Adjust the height and position of the lift
arm pads to ensure that they are correctly
located.
4. With assistance, raise the lift to the
desired height, ensuring the lift arm pads remain in their correct positions.
5. Engage any lift safety locks. Follow the lift
manufacturer