Page 14 of 132

Head Restraint Adjustment
Pull the head restraint up to raise it. To lower it,
push it down while pressing the release button
on the top of the seatback. Each head restraint
should be adjusted so that the center of the
head restraint is closest to the top of the
occupant’s ears. This adjustment should be
made for any seating position, front or rear,
that has a new occupant.
You can adjust the angle of the front head
restraints by tilting them forward. You will hear
a click when the restraint is locked. Pulling the
head restraint as far forward as it will go will
allow it to return to the fully upright position.
Seatbelt Adjuster
Always position the seatbelt adjuster so the
shoulder belt passes over the middle of your
shoulder without touching your neck. Pull the
adjuster out and slide it up or down. Release
the adjuster and make sure it is locked in
place.
TILT AND TELESCOPIC STEERING COLUMN
Pull the lever down firmly to unlock, then adjust the
height and lengthwise position of the column. Push
the lever firmly back up to lock the column in place.
GETTING COMFORTABLE
12
Page 31 of 132
GAUGES
1Tachometer
2 Combination Meter Display (CMD)
3 Speedometer
4 Fuel gauge 5
Trip meter and odometer
6 Select lever/gear position indicator
7 Engine coolant temperature gauge
WARNING AND INDICATOR LIGHTS
Red lights indicate immediate attention is required. Some examples are:
Seatbelt
warningDoor
openBrake system
Yellow lights indicate caution. Some examples are:
Low fuelEngine oil
level warning lightTire pressurewarning light
Green and blue lights are for information. Some examples are:
Headlight indicator lightAuto VehicleHold ONHigh beamindicator light
GAUGES AND WARNING LIGHTS
29
Page 35 of 132

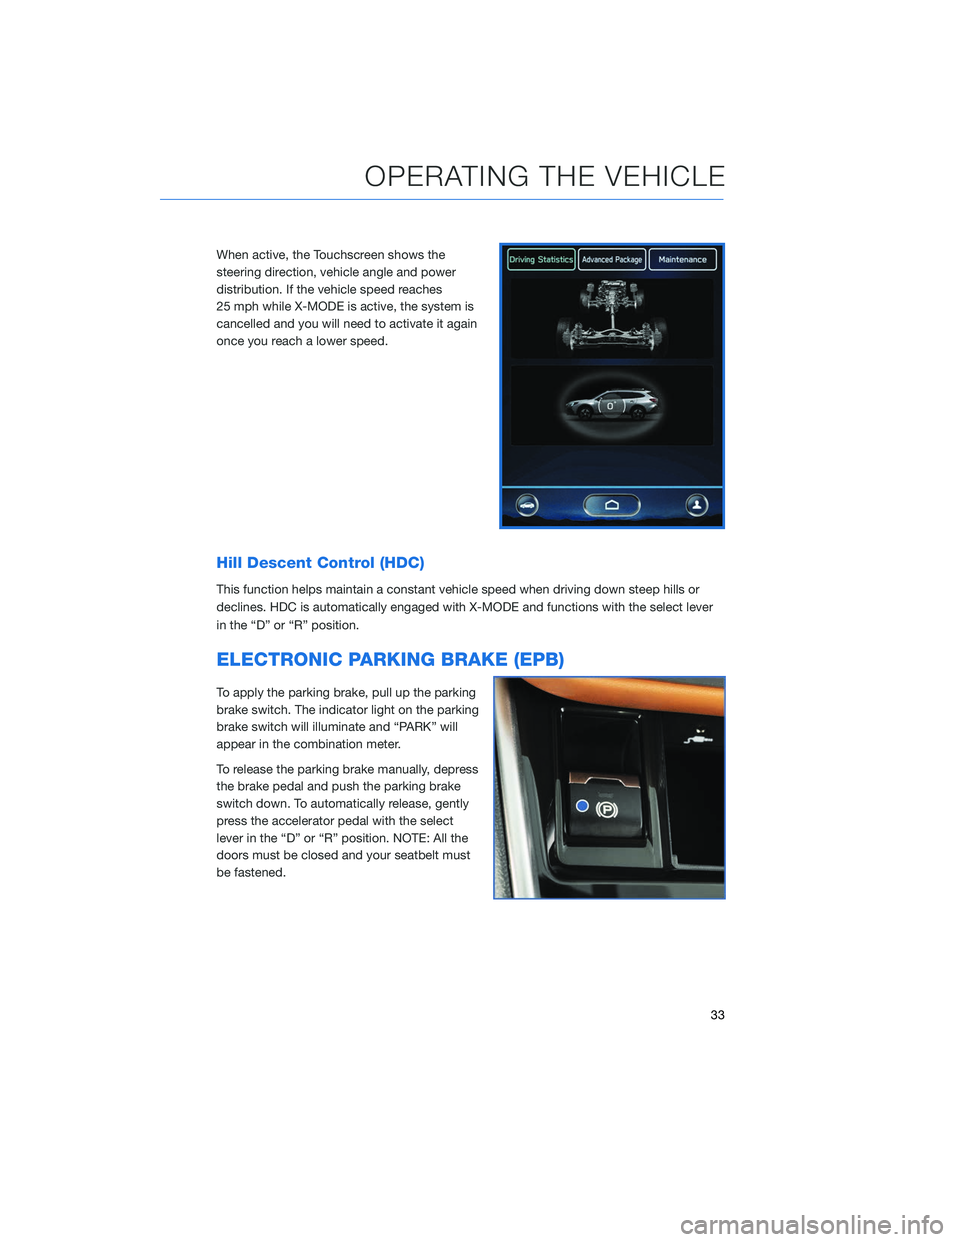
When active, the Touchscreen shows the
steering direction, vehicle angle and power
distribution. If the vehicle speed reaches
25 mph while X-MODE is active, the system is
cancelled and you will need to activate it again
once you reach a lower speed.
Hill Descent Control (HDC)
This function helps maintain a constant vehicle speed when driving down steep hills or
declines. HDC is automatically engaged with X-MODE and functions with the select lever
in the “D” or “R” position.
ELECTRONIC PARKING BRAKE (EPB)
To apply the parking brake, pull up the parking
brake switch. The indicator light on the parking
brake switch will illuminate and “PARK” will
appear in the combination meter.
To release the parking brake manually, depress
the brake pedal and push the parking brake
switch down. To automatically release, gently
press the accelerator pedal with the select
lever in the “D” or “R” position. NOTE: All the
doors must be closed and your seatbelt must
be fastened.
OPERATING THE VEHICLE
33
Page 43 of 132
LATCH/ANCHOR
Your Subaru is equipped with Lower Anchors
and Tethers for Children (LATCH). For
maximum safety, first carefully read the LATCH
system instructions from the device
manufacturer, as well as the installation
instructions in your Owner’s Manual, to
properly install the LATCH compatible restraint
system. Use the appropriate seatbelts or
anchorages provided in your Subaru. Children
age 12 and under must properly occupy the
rear seat at all times.
PASSENGER/CARGO AREAS
41
Page 128 of 132

Power Rear Gate Button . . . . . . . . 42
Power Rear Gate Lock . . .......42
POWER WINDOWS . . . . . . ......16
PUSH-BUTTON IGNITION SWITCH . . 30
R
RADIO AM/FM Radio . . . . . . . . . . ....66
Satellite Radio . . . . . . . . . . . . . . 67
Setting Presets . . . . . . . ......67
REARRANGING ICONS . . . . . . ....59
REAR VIEW MIRROR Auto-dimming Mirror . . . . ......15
HomeLink
®5 Accessory Mirror . . . 15
REAR WINDOW WIPER . . . . . .....27
RECEIVING A CALL . . . . . . . .....71
ROOF RAIL CAPACITY . . . . . .....49
S
SEATING Head Restraint Adjustment . . . . . . 10
Manual Seats . . . . . . . . . .....10
Memory Driver’s Seat . . . . . . . . . 11
Power Driver’s Seat . . . . . .....10
Seatbelt Adjuster . . . . . .......12
SOUND ..................102
SPARE TIRE . . . . . . . . . . . . . . . . . 45
STARTING THE ENGINE Without Push-button Ignition .....30
With Push-button Ignition . . . ....30
STEERING WHEEL CONTROLS . . . . . 55
SUBARU STARLINK™ ENROLLMENT . 79
SUBARU STARLINK™ MOBILE APP Chimani .................75
eBird ...................76
Quick Guide ...............75
SUBARU STARLINK™ WI-FI HOTSPOT* – STAY CONNECTED
How to Enroll: . . . . . . . . . . . . . . 80 T
TEXT MESSAGES . . . . . . . . . . . . . 72
THE SUBARU STARLINK™ EXPERIENCE ..............78
TILT AND TELESCOPIC STEERING COLUMN . . . . . . . . . . . . . . . . 12
TIRE PRESSURE MONITORING SYSTEM (TPMS) . . . ...............50
TOUCHSCREEN ..............54
TOWING YOUR ALL-WHEEL DRIVE SUBARU . . . ...............3
TRAILER TOWING CAPACITY . . . . . . 50
TURNING OFF THE VEHICLE Without Push-button Ignition . . . . . 37
With Push-button Ignition Switch . . 37
TURN SIGNALS . . . . ..........26
V
VOICE RECOGNITION Common Commands . . . . . . . . . . 55
Limitations ................57
Tips . . . .................55
W
WARNING AND INDICATOR LIGHTS . . 29
WHAT ARE SUBARU STARLINK™ APPS? Android™ Auto .............73
Apple CarPlay™ . . . .........74
Pandora
®.................73
SiriusXM®Travel Link . . . . . .....74
WHY YOU SHOULD CREATE A PROFILE . . . . . ............62
WI-FI Connecting to a Wi-Fi Network . . . 120
Wi-Fi Hotspot Subscription . . . . . 121
WINDSHIELD WIPERS . . . . . . . . . . 26
INDEX
126