Page 17 of 132
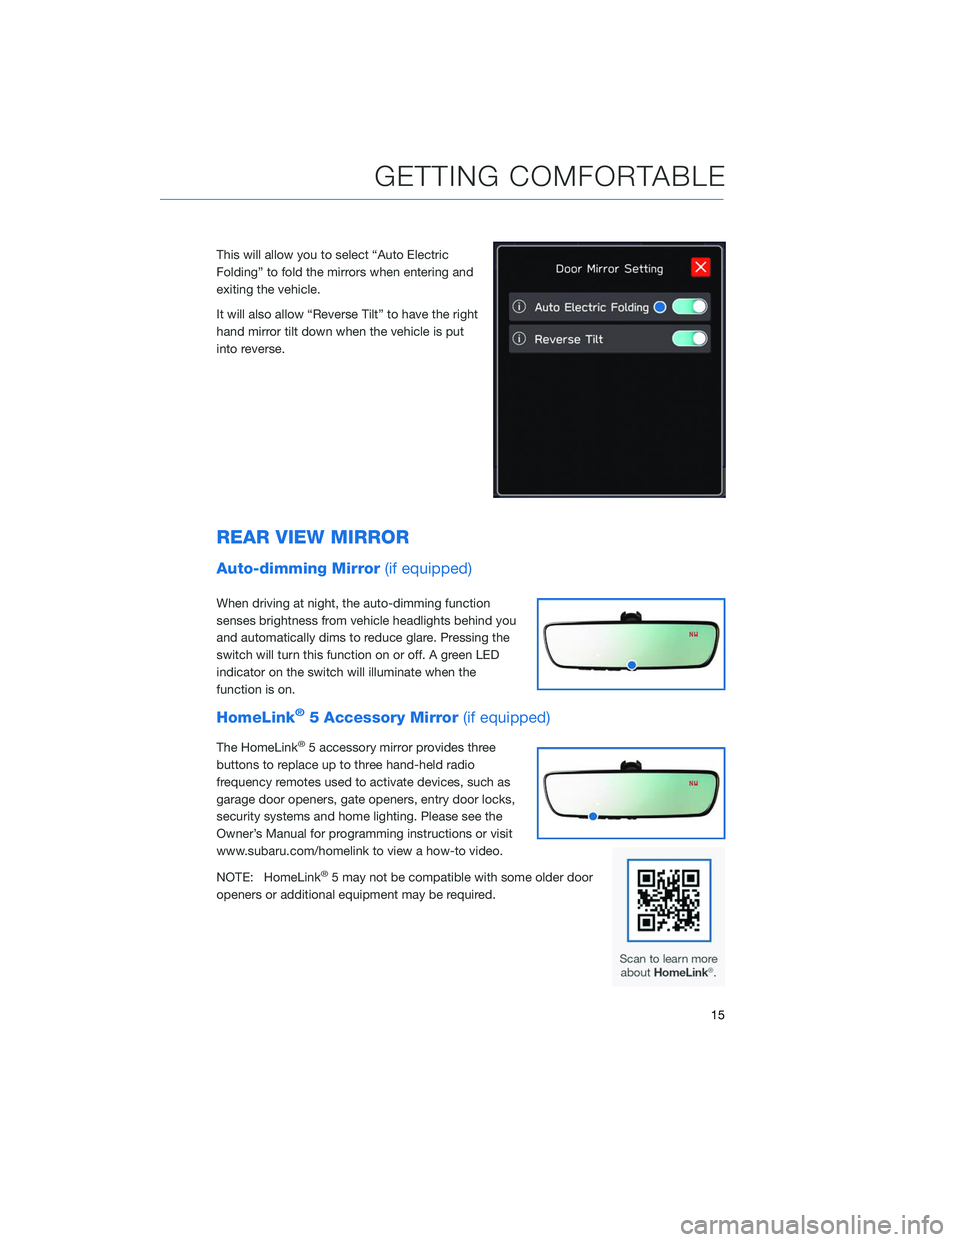
This will allow you to select “Auto Electric
Folding” to fold the mirrors when entering and
exiting the vehicle.
It will also allow “Reverse Tilt” to have the right
hand mirror tilt down when the vehicle is put
into reverse.
REAR VIEW MIRROR
Auto-dimming Mirror(if equipped)
When driving at night, the auto-dimming function
senses brightness from vehicle headlights behind you
and automatically dims to reduce glare. Pressing the
switch will turn this function on or off. A green LED
indicator on the switch will illuminate when the
function is on.
HomeLink®5 Accessory Mirror(if equipped)
The HomeLink®5 accessory mirror provides three
buttons to replace up to three hand-held radio
frequency remotes used to activate devices, such as
garage door openers, gate openers, entry door locks,
security systems and home lighting. Please see the
Owner’s Manual for programming instructions or visit
www.subaru.com/homelink to view a how-to video.
NOTE: HomeLink
®5 may not be compatible with some older door
openers or additional equipment may be required.
GETTING COMFORTABLE
15
Page 30 of 132
OVERHEAD PANEL
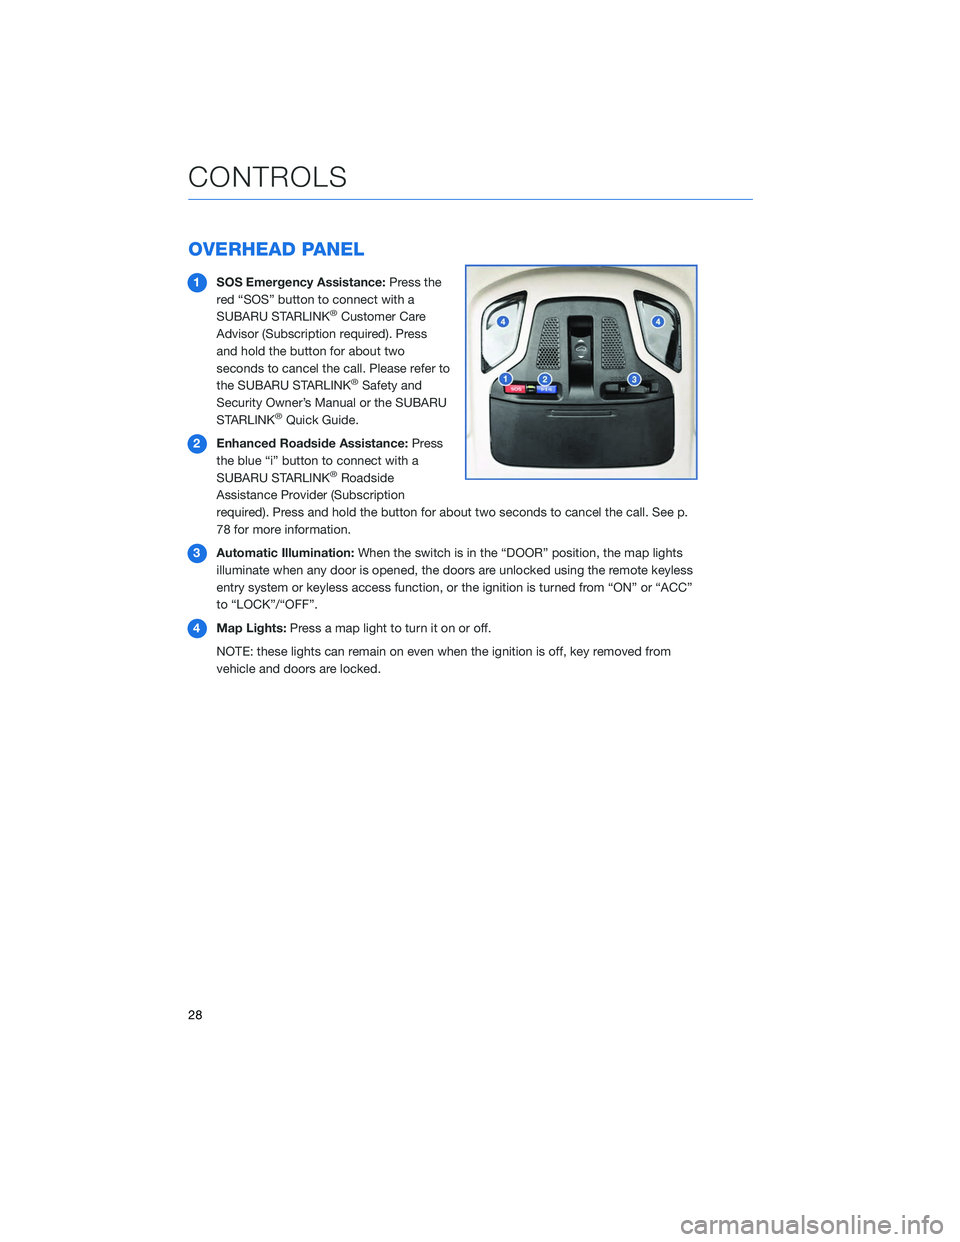
1SOS Emergency Assistance: Press the
red “SOS” button to connect with a
SUBARU STARLINK
®Customer Care
Advisor (Subscription required). Press
and hold the button for about two
seconds to cancel the call. Please refer to
the SUBARU STARLINK
®Safety and
Security Owner’s Manual or the SUBARU
STARLINK
®Quick Guide.
2 Enhanced Roadside Assistance: Press
the blue “i” button to connect with a
SUBARU STARLINK
®Roadside
Assistance Provider (Subscription
required). Press and hold the button for about two seconds to cancel the call. See p.
78 for more information.
3 Automatic Illumination: When the switch is in the “DOOR” position, the map lights
illuminate when any door is opened, the doors are unlocked using the remote keyless
entry system or keyless access function, or the ignition is turned from “ON” or “ACC”
to “LOCK”/“OFF”.
4 Map Lights: Press a map light to turn it on or off.
NOTE: these lights can remain on even when the ignition is off, key removed from
vehicle and doors are locked.
CONTROLS
28
Page 32 of 132
IGNITION SWITCH
The ignition switch has four positions:
LOCK:You can only insert or remove the key in this position.
ACC (Accessory): Provides power to the radio and accessory power outlets.
ON: All electrical systems are available. The key returns to this position after starting the
engine.
START: Turn the key to this position to start the engine.
PUSH-BUTTON IGNITION SWITCH (IF EQUIPPED)
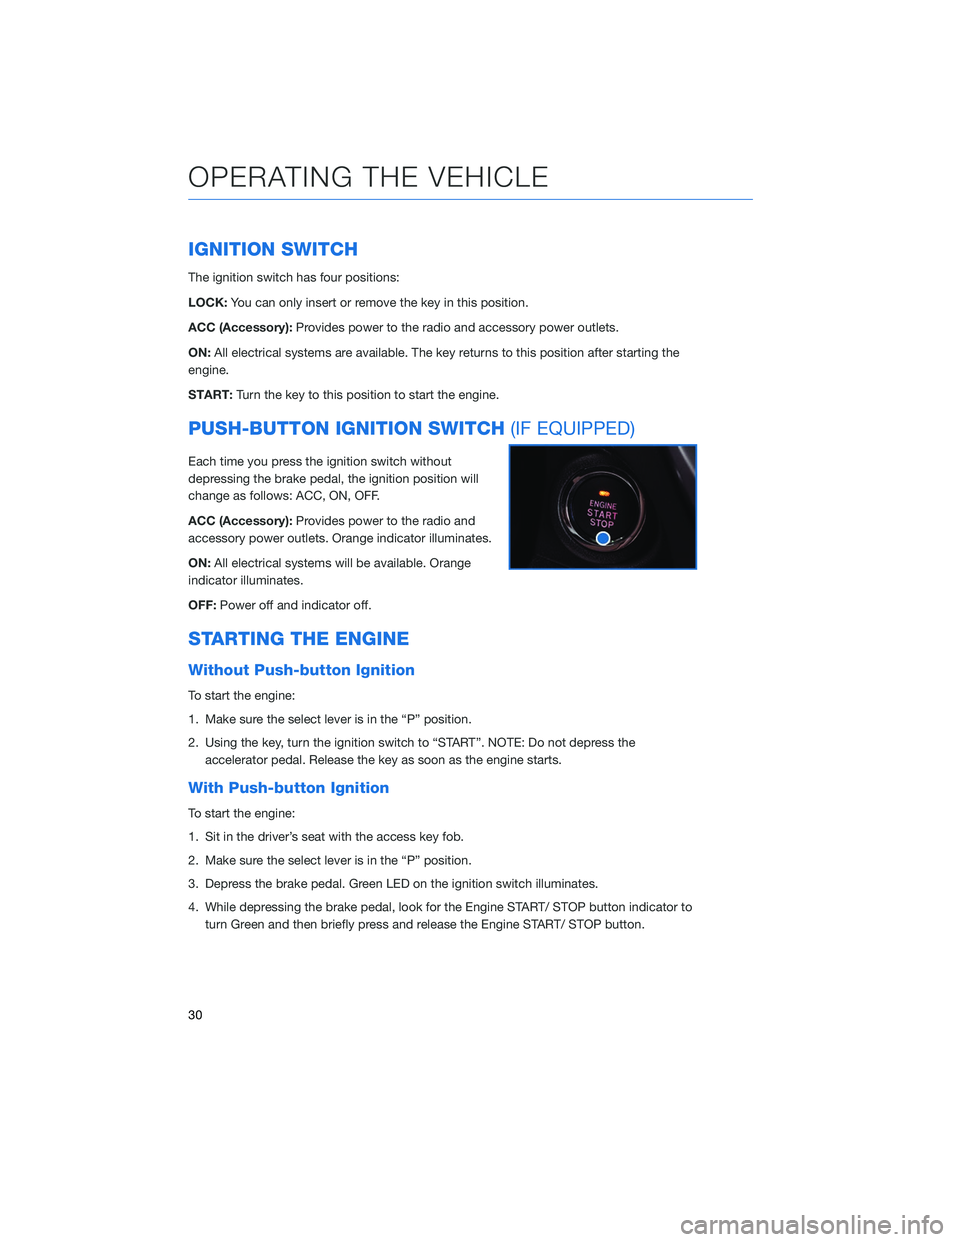
Each time you press the ignition switch without
depressing the brake pedal, the ignition position will
change as follows: ACC, ON, OFF.
ACC (Accessory):Provides power to the radio and
accessory power outlets. Orange indicator illuminates.
ON: All electrical systems will be available. Orange
indicator illuminates.
OFF: Power off and indicator off.
STARTING THE ENGINE
Without Push-button Ignition
To start the engine:
1. Make sure the select lever is in the “P” position.
2. Using the key, turn the ignition switch to “START”. NOTE: Do not depress the
accelerator pedal. Release the key as soon as the engine starts.
With Push-button Ignition
To start the engine:
1. Sit in the driver’s seat with the access key fob.
2. Make sure the select lever is in the “P” position.
3. Depress the brake pedal. Green LED on the ignition switch illuminates.
4. While depressing the brake pedal, look for the Engine START/ STOP button indicator toturn Green and then briefly press and release the Engine START/ STOP button.
OPERATING THE VEHICLE
30
Page 40 of 132
FUEL FILLER LID
The fuel filler lid is located toward the rear of the
passenger side. To open the lid:
1. Make sure your vehicle is stopped and the selectorplaced in PARK. Then turn the ignition to the
"LOCK"/ "OFF" position.
2. Unlock the lid by pressing the unlock/disarm button on the access key fob or transmitter, pressing the
unlock side of the power door locking switch, or
putting the vehicle in “LOCK”/“OFF”.
3. Push the rear side of the lid.
4. When the lid opens slightly, open it further by hand.
While refueling, place the fuel filler cap on the cap
holder inside the lid.
To close the lid, press it until you hear it latch.
FUEL
Use regular unleaded gasoline with an octane rating of 87 AKI or higher. Do not use fuels
with more than 10% ethanol. See the Owner’s Manual for more information.
FUEL CAPACITY
18.5 US gallons
The low fuel warning light illuminates when the tank is nearly empty,
at approximately 2.6 US gallons.
REFUELING
38
Page 42 of 132
The rear seat will also recline by pulling up on
this lever and pushing back.
CHILD SAFETY LOCKS
The child safety locks are located on the inside
edges of the rear doors. In the locked position,
the rear doors can only be opened from the
outside.
PASSENGER/CARGO AREAS
40
Page 44 of 132
POWER REAR GATE (PRG)(if equipped)
Power Rear Gate Button
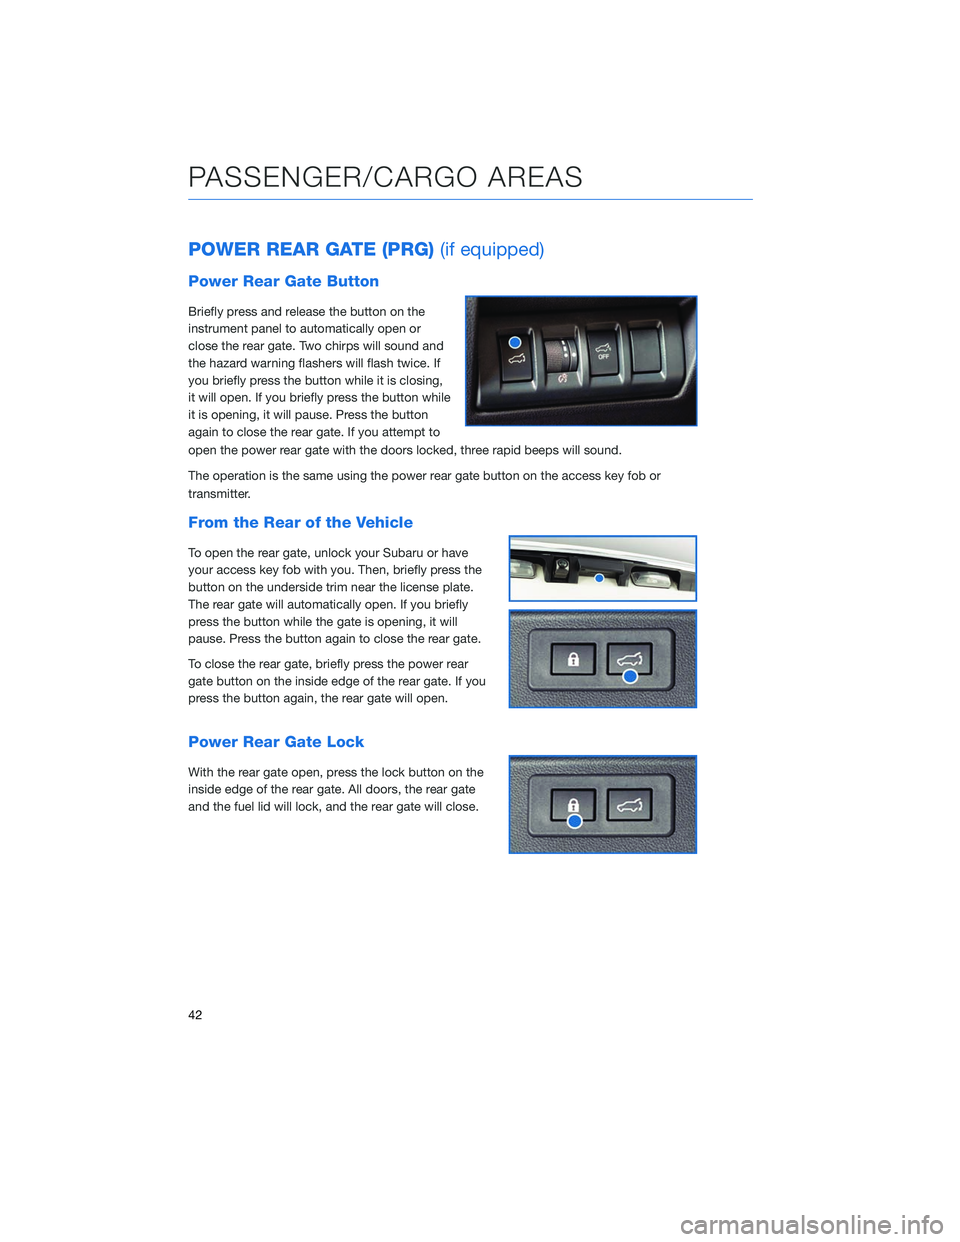
Briefly press and release the button on the
instrument panel to automatically open or
close the rear gate. Two chirps will sound and
the hazard warning flashers will flash twice. If
you briefly press the button while it is closing,
it will open. If you briefly press the button while
it is opening, it will pause. Press the button
again to close the rear gate. If you attempt to
open the power rear gate with the doors locked, three rapid beeps will sound.
The operation is the same using the power rear gate button on the access key fob or
transmitter.
From the Rear of the Vehicle
To open the rear gate, unlock your Subaru or have
your access key fob with you. Then, briefly press the
button on the underside trim near the license plate.
The rear gate will automatically open. If you briefly
press the button while the gate is opening, it will
pause. Press the button again to close the rear gate.
To close the rear gate, briefly press the power rear
gate button on the inside edge of the rear gate. If you
press the button again, the rear gate will open.
Power Rear Gate Lock
With the rear gate open, press the lock button on the
inside edge of the rear gate. All doors, the rear gate
and the fuel lid will lock, and the rear gate will close.
PASSENGER/CARGO AREAS
42
Page 54 of 132
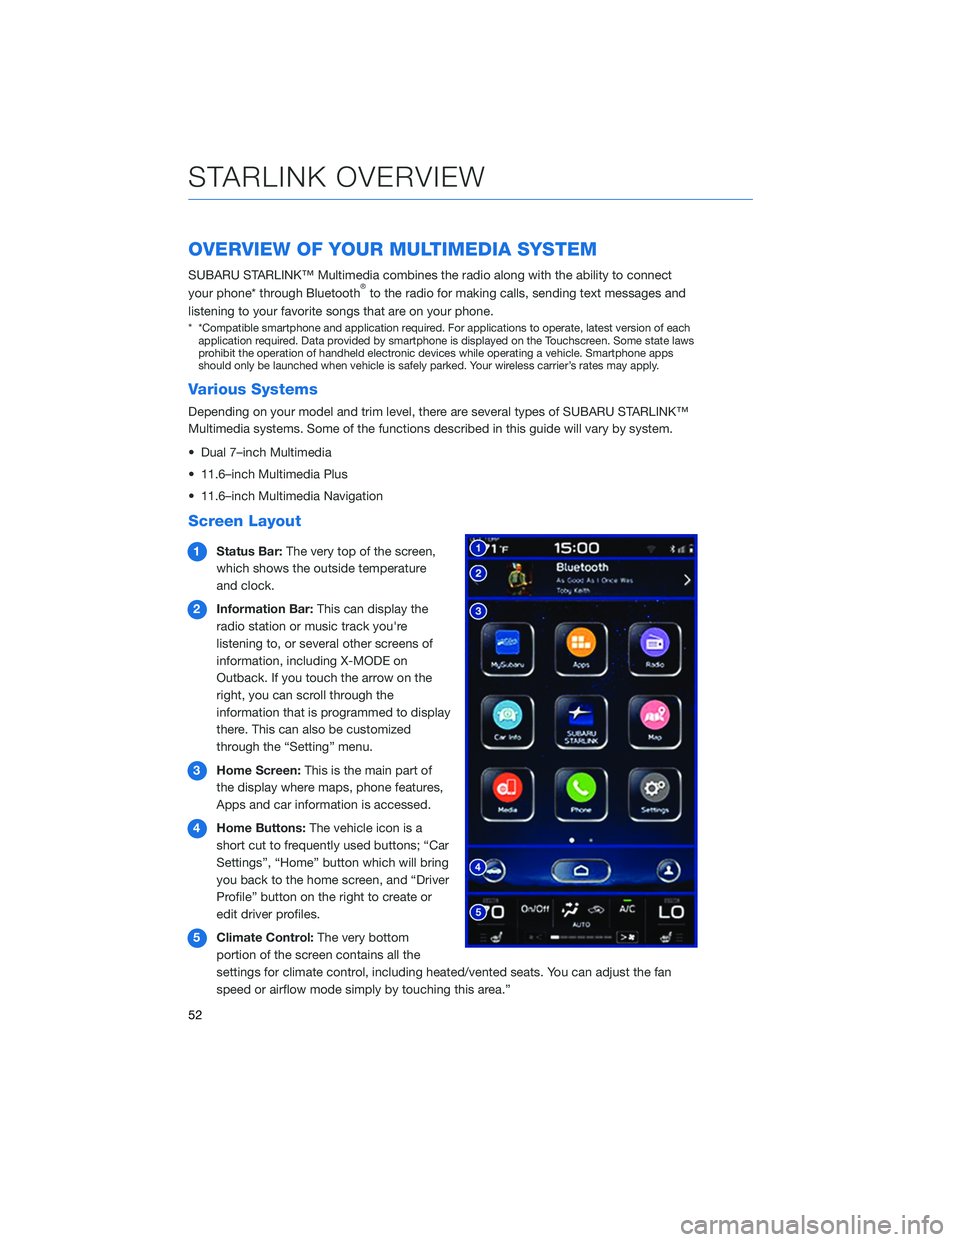
OVERVIEW OF YOUR MULTIMEDIA SYSTEM
SUBARU STARLINK™ Multimedia combines the radio along with the ability to connect
your phone* through Bluetooth®to the radio for making calls, sending text messages and
listening to your favorite songs that are on your phone.
* *Compatible smartphone and application required. For applications to operate, latest version of each application required. Data provided by smartphone is displayed on the Touchscreen. Some state laws
prohibit the operation of handheld electronic devices while operating a vehicle. Smartphone apps
should only be launched when vehicle is safely parked. Your wireless carrier’s rates may apply.
Various Systems
Depending on your model and trim level, there are several types of SUBARU STARLINK™
Multimedia systems. Some of the functions described in this guide will vary by system.
• Dual 7–inch Multimedia
• 11.6–inch Multimedia Plus
• 11.6–inch Multimedia Navigation
Screen Layout
1 Status Bar: The very top of the screen,
which shows the outside temperature
and clock.
2 Information Bar: This can display the
radio station or music track you're
listening to, or several other screens of
information, including X-MODE on
Outback. If you touch the arrow on the
right, you can scroll through the
information that is programmed to display
there. This can also be customized
through the “Setting” menu.
3 Home Screen: This is the main part of
the display where maps, phone features,
Apps and car information is accessed.
4 Home Buttons: The vehicle icon is a
short cut to frequently used buttons; “Car
Settings”, “Home” button which will bring
you back to the home screen, and “Driver
Profile” button on the right to create or
edit driver profiles.
5 Climate Control: The very bottom
portion of the screen contains all the
settings for climate control, including heated/vented seats. You can adjust the fan
speed or airflow mode simply by touching this area.”
STARLINK OVERVIEW
52
Page 103 of 132
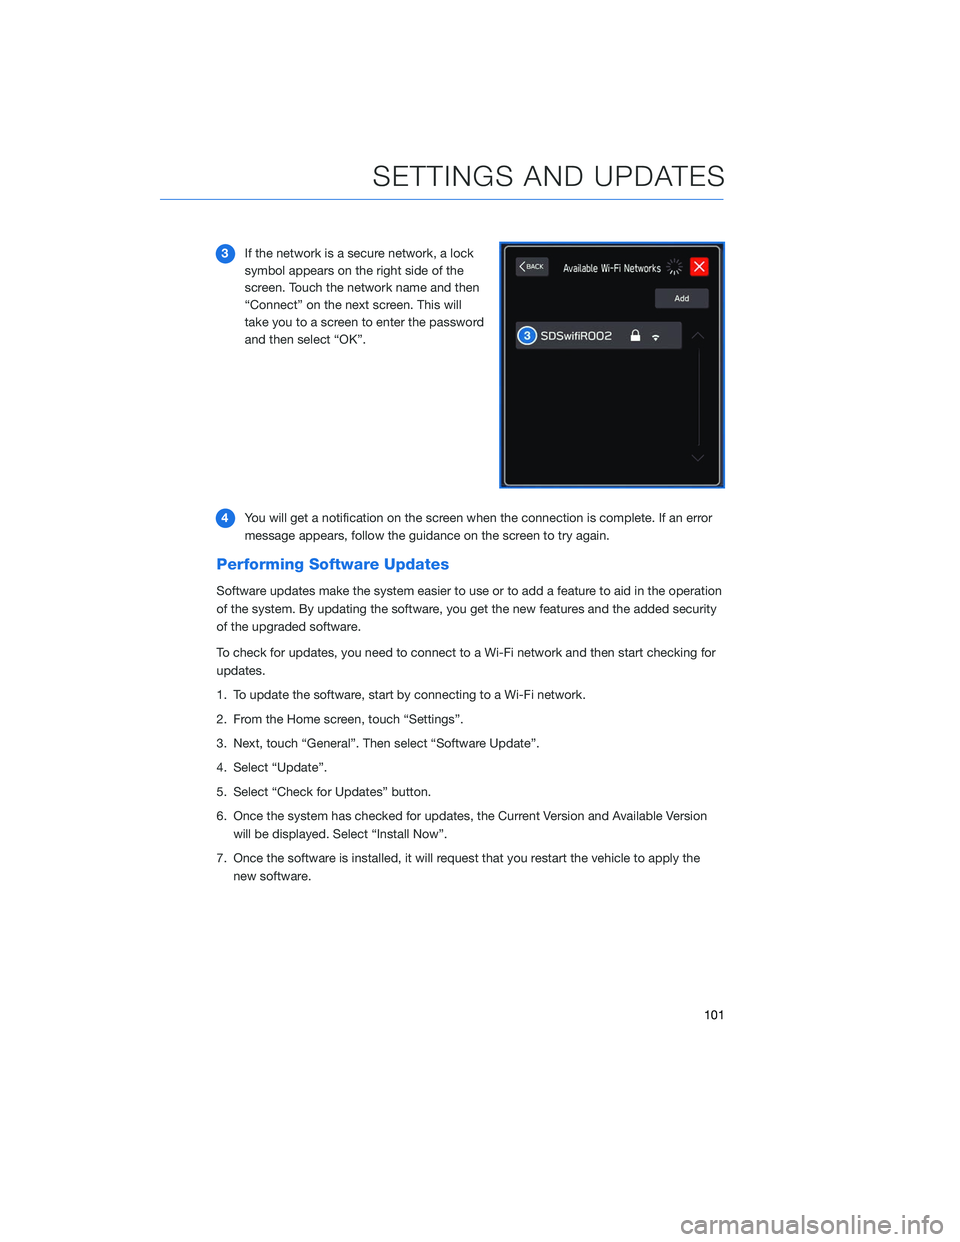
3If the network is a secure network, a lock
symbol appears on the right side of the
screen. Touch the network name and then
“Connect” on the next screen. This will
take you to a screen to enter the password
and then select “OK”.
4 You will get a notification on the screen when the connection is complete. If an error
message appears, follow the guidance on the screen to try again.
Performing Software Updates
Software updates make the system easier to use or to add a feature to aid in the operation
of the system. By updating the software, you get the new features and the added security
of the upgraded software.
To check for updates, you need to connect to a Wi-Fi network and then start checking for
updates.
1. To update the software, start by connecting to a Wi-Fi network.
2. From the Home screen, touch “Settings”.
3. Next, touch “General”. Then select “Software Update”.
4. Select “Update”.
5. Select “Check for Updates” button.
6. Once the system has checked for updates, the Current Version and Available Version
will be displayed. Select “Install Now”.
7. Once the software is installed, it will request that you restart the vehicle to apply the new software.
SETTINGS AND UPDATES
101