2020 Ram 2500 ad blue
[x] Cancel search: ad bluePage 475 of 553

MULTIMEDIA473
Uconnect 4/4C/4C NAV Settings
Uconnect 4/4C/4C NAV With 8.4-inch Display Buttons
On The Touchscreen And Buttons On The Faceplate
Press the Apps button on the touchscreen then
press the Settings button on the touchscreen to
display the settings menu screen. In this mode
the Uconnect system allows you to access
programmable features that may be equipped
such as Language, Display, Units, Voice, Clock,
Safety & Driving Assistance, Mirrors & Wipers,
Lights, Doors & Locks, Power Side Steps (if
equipped), Auto-On Comfort (if equipped),
Engine Off Options, Suspension, Trailer, Audio,
Phone/Bluetooth®, SiriusXM® Setup (if
equipped), Restore Settings, and System Infor
-
mation.
When making a selection, press the button on
the touchscreen to enter the desired menu. Once in the desired menu, press and release
the preferred setting until a check-mark
appears next to the setting, showing that setting
has been selected. Once the setting is
complete, press the Back Arrow button on the
touchscreen to return to the previous menu or
press the X button on the touchscreen to close
out of the settings screen. Pressing the Up or
Down Arrow buttons on the touchscreen on the
right side of the screen will allow you to toggle
up or down through the list of available settings.
NOTE:
All settings should be changed with the ignition
in the ON/RUN position.
Language
After pressing the Set Language button on the touchscreen, the following settings will be available:
1 — Uconnect Buttons On The Touchscreen
2 — Uconnect Buttons On The Faceplate
Setting Name
Selectable Options
Set LanguageEnglishFrançais Español
NOTE:
When the “Set Language” feature is selected, you may select one of multiple languages (English / Français / Español) for all display nomenclature,
including the trip functions and the navigation system (if equipped). Press the Set Language button on the touchscreen, then press the desired
language button on the touchscreen until a check-mark appears next to the language, showing that setting has been selected.9
20_DJD2_OM_EN_USC_t.book Page 473
Page 491 of 553

MULTIMEDIA489
Phone/Bluetooth® Settings
After pressing the Phone/Bluetooth® Settings button on the touchscreen, the following settings will be available:Speed Adjusted Volume
Off123
NOTE:
The “Speed Adjusted Volume” feature increases or decreases volume relative to vehicle speed. Surround Sound — If Equipped On
Off
NOTE:
The “Surround Sound” feature provides simulated surround sound mode. AUX Volume Offset — If Equipped On
Off
NOTE:
The “AUX Volume Offset” feature provides the ability to tune the audio level for portable devices connected through the AUX input. Auto Play On Off
Setting Name Selectable Options
Setting NameSelectable Options
Phone Pop-ups Displayed in Cluster — If
Equipped On
Off
Do Not Disturb List of Settings
NOTE:
Press “Do Not Disturb” to access the available settings. The following settings are: Auto Reply (Both, Text, Call), Auto Reply Message (Custom, Default),
and Custom Auto Reply Message (Create Message).9
20_DJD2_OM_EN_USC_t.book Page 489
Page 494 of 553

492MULTIMEDIA
Clear Personal Data
After pressing the Clear Personal Data Settings button on the touchscreen, the following settings will be available:
System Information — If Equipped
After pressing the System Information button on the touchscreen, the following settings will be available:
Setting Name Selectable Options
Clear Personal DataYesCancel
NOTE:
When this feature is selected it will remove all personal data including Bluetooth® devices and presets. If “Yes” is selected a pop-up will appear asking
"Are you sure you want to clear all personal data?” select “Yes” to Clear, or “Cancel” to exit.
Setting Name Selectable Options
Software License System Software Information Screen
NOTE:
When the “Software License” feature is selected, a “System Software Information” screen will appear, displaying the system software version.
20_DJD2_OM_EN_USC_t.book Page 492
Page 495 of 553

MULTIMEDIA493
Uconnect 4C NAV With 12-inch Display
Settings
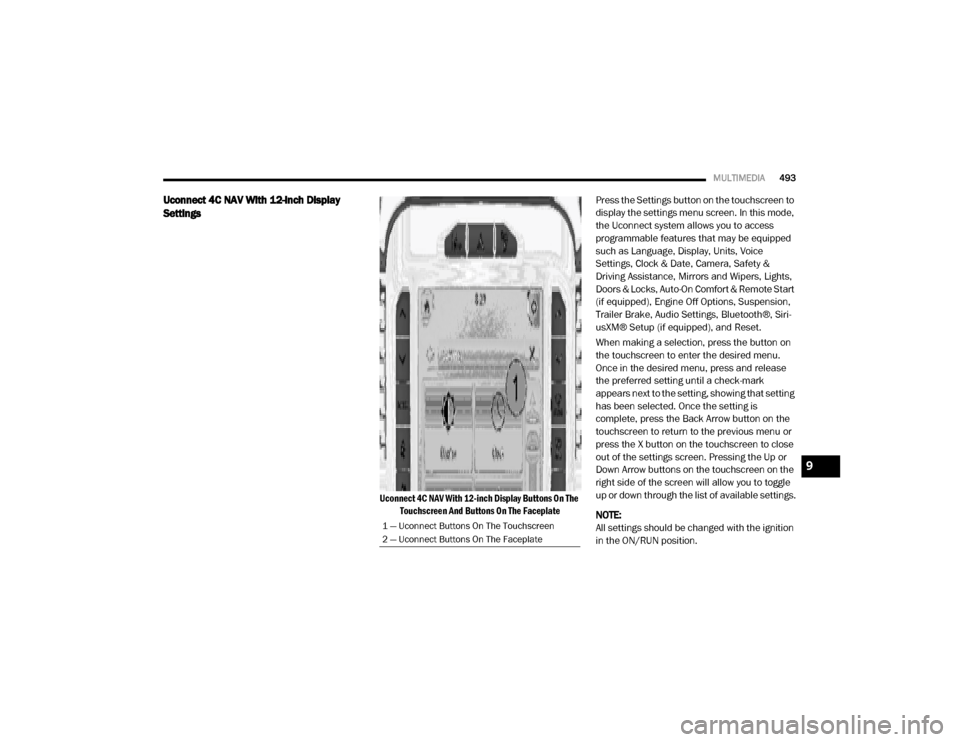
Uconnect 4C NAV With 12-inch Display Buttons On The
Touchscreen And Buttons On The Faceplate
Press the Settings button on the touchscreen to
display the settings menu screen. In this mode,
the Uconnect system allows you to access
programmable features that may be equipped
such as Language, Display, Units, Voice
Settings, Clock & Date, Camera, Safety &
Driving Assistance, Mirrors and Wipers, Lights,
Doors & Locks, Auto-On Comfort & Remote Start
(if equipped), Engine Off Options, Suspension,
Trailer Brake, Audio Settings, Bluetooth®, Siri-
usXM® Setup (if equipped), and Reset.
When making a selection, press the button on
the touchscreen to enter the desired menu.
Once in the desired menu, press and release
the preferred setting until a check-mark
appears next to the setting, showing that setting
has been selected. Once the setting is
complete, press the Back Arrow button on the
touchscreen to return to the previous menu or
press the X button on the touchscreen to close
out of the settings screen. Pressing the Up or
Down Arrow buttons on the touchscreen on the
right side of the screen will allow you to toggle
up or down through the list of available settings.
NOTE:
All settings should be changed with the ignition
in the ON/RUN position.
1 — Uconnect Buttons On The Touchscreen
2 — Uconnect Buttons On The Faceplate
9
20_DJD2_OM_EN_USC_t.book Page 493
Page 510 of 553

508MULTIMEDIA
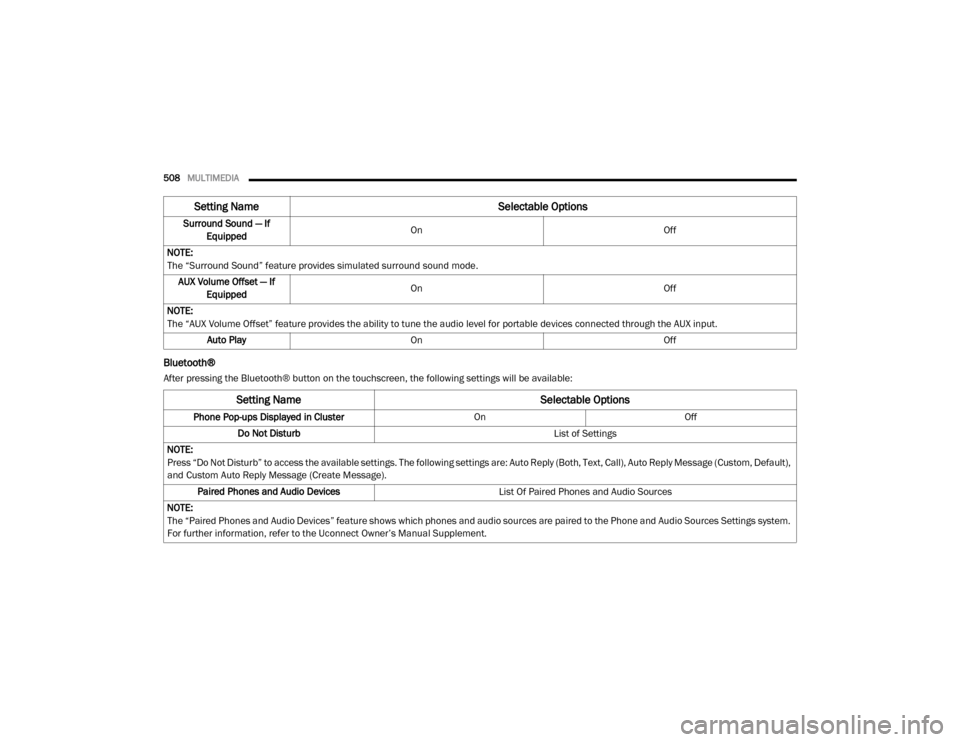
Bluetooth®
After pressing the Bluetooth® button on the touchscreen, the following settings will be available:Surround Sound — If
Equipped On
Off
NOTE:
The “Surround Sound” feature provides simulated surround sound mode. AUX Volume Offset — If Equipped On
Off
NOTE:
The “AUX Volume Offset” feature provides the ability to tune the audio level for portable devices connected through the AUX input. Auto Play On Off
Setting Name Selectable Options
Setting NameSelectable Options
Phone Pop-ups Displayed in Cluster OnOff
Do Not Disturb List of Settings
NOTE:
Press “Do Not Disturb” to access the available settings. The following settings are: Auto Reply (Both, Text, Call), Auto Reply Message (Custom, Default),
and Custom Auto Reply Message (Create Message). Paired Phones and Audio Devices List Of Paired Phones and Audio Sources
NOTE:
The “Paired Phones and Audio Devices” feature shows which phones and audio sources are paired to the Phone and Audio Sources Settings system.
For further information, refer to the Uconnect Owner’s Manual Supplement.
20_DJD2_OM_EN_USC_t.book Page 508
Page 513 of 553

MULTIMEDIA511
SAFETY AND GENERAL INFORMATION
Safety Guidelines
Ensure that all persons read this manual care -
fully before using the system. It contains
instructions on how to use the system in a safe
and effective manner.
Do NOT attach any object to the touchscreen.
Doing so can result in damage to the touch -
screen.
Please read and follow these safety precau -
tions. Failure to do so may result in injury or
property damage.
Glance at the screen only when safe to do so.
If prolonged viewing of the screen is required,
park in a safe location and set the parking
brake.
Stop use immediately if a problem occurs.
Failure to do so may cause injury or damage
to the product. Return it to an authorized
dealer for repair.
Ensure the volume level of the system is set
to a level that still allows you to hear outside
traffic and emergency vehicles.
Clear Personal Data
Yes Cancel
NOTE:
When the “Clear Personal Data” feature is selected it removes all personal data including Bluetooth® devices and presets.
Setting Name Selectable Options
Clear SiriusXM® Data Done
NOTE:
You must contact SiriusXM® Customer Care at 1-855-290-6593 in order to remove your account and profile information associated with SiriusXM®
in this vehicle.
Setting Name Selectable Options
WARNING!
ALWAYS drive safely with your hands on the
steering wheel. You have full responsibility
and assume all risks related to the use of the
Uconnect features and applications in this
vehicle. Only use Uconnect when it is safe to
do so. Failure to do so may result in an
accident involving serious injury or death.
9
20_DJD2_OM_EN_USC_t.book Page 511
Page 515 of 553

MULTIMEDIA513
4 — MORE
Push the MORE button on the faceplate to
access additional options.
5 — ENTER/BROWSE & TUNE/SCROLL
Push the ENTER/BROWSE button to accept a
highlighted selection on the screen. Rotate the
TUNE/SCROLL rotary knob to scroll through a
list or tune to a radio station.
6 — SCREEN OFF
Push the SCREEN OFF button to turn the touch -
screen off. To turn the touchscreen back on,
press the screen.
7 — MUTE
Push the MUTE button to turn off the audio of
the radio system. Press it again to turn the
audio back on.
8 — VOLUME/POWER
Rotate the rotary knob to adjust the Volume.
Push the VOLUME/POWER button to turn the
system ON or OFF.
9 — PHONE
Push the PHONE button on the faceplate to
access the Uconnect Phone feature. 10 — MEDIA
Pushing the MEDIA button on the faceplate will
allow you to switch to Media mode: CD (if
equipped), USB, AUX, and Bluetooth®.
Radio Mode
Operating Radio Mode
Radio Mode
The radio is equipped with the following modes:
FM
AM
SiriusXM® Radio – If Equipped
Push the RADIO button on the faceplate, to
enter the Radio Mode. The different tuner
modes – FM/AM/SXM (if equipped) – can then
be selected by pressing the corresponding
buttons on the touchscreen in the Radio mode.
VOLUME/POWER Knob
Rotate the VOLUME/POWER rotary knob to
adjust the Volume. When the audio system is
turned on, the sound will be set at the same
volume level as last played.
Push the VOLUME/POWER button to turn the
system on or off.
MUTE Button
Push the MUTE button to mute the system.
Push the MUTE button again to unmute the
system.
1 — Station Presets
2 — All Presets
3 — Seek Up
4 — Audio
5 — Info
6 — Tune
7 — AM/FM/SXM
8 — Seek Down
9
20_DJD2_OM_EN_USC_t.book Page 513
Page 518 of 553

516MULTIMEDIA
Clock Settings
1. Push the SETTINGS button on the face -
plate, or push the MORE button on the
faceplate, and then the SETTINGS button
on the touchscreen.
2. Select the Clock and Date button on the touchscreen.
3. Next, select Set Time to change the time.
4. Select Set Date to change the date.
5. To set the time, select the Seek Up or Seek Down arrows as appropriate. Select “12 hrs
vs 24 hrs”, “AM” or “PM” or select the “Time
Zones” (if equipped).
6. Select the Done button when complete.
Media Mode
Operating Media Mode
Media Mode
Media Mode is entered by pushing the MEDIA
button located on the faceplate.
Audio Source Selection
Once in Media Mode, press the Source button
on the touchscreen and the desired mode
button on the touchscreen. Disc (if equipped),
USB, SD Card (if equipped), AUX and Blue-
tooth® (if equipped), are the Media sources
available. When available, you can select the
Browse button on the touchscreen to be given
these options:
Now Playing
Artists
Albums
Genres
Songs
Playlists
Folders
You can press the Source, Pause/Play, or the
Info button on the touchscreen for artist infor -
mation on the current song playing.
1 — Seek Down
2 — Seek Up
3 — Additional Functions
4 — Info
5 — Pause/Play
6 — Source
7 — Browse
20_DJD2_OM_EN_USC_t.book Page 516