Page 49 of 260

47
Ease of use and comfort
3Never drive with passengers seated at
the rear when the head restraints are
removed or not in the high position; the head
restraints must be in place and in the high
position.
For more information on the Seat belts,
refer to the corresponding section.
Interior fittings
Mats
Fitting
When fitting the mat for the first time, on the
driver's side use only the fasteners supplied in
the enclosed sachet.
The other mats are simply laid over the carpet.
Removing/refitting
► To remove it on the driver's side, move the
seat backwards and unclip the fasteners.
►
T
o refit it, position the mat and secure it by
pressing.
►
Check that the mat is secured correctly
.
To avoid any risk of jamming the pedals:– Only use mats which are suitable for
the fasteners already present in the vehicle;
these fasteners must be used.
–
Never fit one mat on top of another
.
The use of mats not approved by PEUGEOT
may interfere with access to the pedals and
hinder the operation of the cruise control/
speed limiter.
The approved mats have two fasteners
located underneath the seat.
Overhead storage unit
This compartment, located above the sun visors,
can be used to store various objects.
12 V accessory socket(s)
► Plug in a 12 V accessory (with a maximum
rated power of 120 W) using a suitable adapter.
Observe the maximum power rating to
avoid damaging your accessory.
The connection of an electrical device not approved by PEUGEOT, such as a
USB charger, may adversely affect the
operation of vehicle electrical systems,
causing faults such as poor radio reception or
interference with displays in the screens.
Page 50 of 260

48
Ease of use and comfort
USB port
The port can be used to charge a portable
device.
It also enables audio files sent to your audio
system to be played via the vehicle's speakers.
When the USB port is used, the portable
device charges automatically.
A message is displayed if the power drawn
by the portable device exceeds the current
supplied by the vehicle.
For more information on how to use this
equipment, refer to the Audio equipment
and telematics section .
It also allows a smartphone
to be connected by MirrorLink
TM, Android Auto® or CarPlay®, enabling
certain smartphone applications to be used on
the touch screen.
For best results, use a cable made or approved
by the device manufacturer.
These applications can be managed using the
steering mounted controls or the audio system
controls.
220 V/50 Hz socket
AC 220V
50Hz 120W
It is located on the side of the central storage
compartment.
This socket (max. power: 150
W) operates with
the engine running, and with the Stop & Start
system in STOP mode.
►
Lift the protective cover
.
►
Check that the green indicator lamp is on.
►
Connect your multimedia or other electrical
device (telephone charger
, laptop computer,
CD-DVD player, bottle warmer, etc.).
In the event of a malfunction, the
green
indicator lamp flashes.
Have the socket checked by a PEUGEOT dealer
or a qualified workshop.
Connect only one device at a time to the
socket (do not use extension leads or
multi-socket adapters).
Connect only devices with class II insulation
(shown on the device).
Do not use metal-cased devices (e.g. electric
shaver, etc.).
As a safety measure, if power consumption is high and power is
required by the vehicle's electrical system
(due to severe weather conditions, electrical
overload, etc.), power to the socket may be
cut off, in which case the green indicator lamp
goes off.
Wireless smartphone
charger
It allows wireless charging of a portable device
such as a smartphone, using the magnetic
induction principle, in accordance with the Qi 1.1
standard.
The portable device to be charged must be
compatible with the Qi standard, either by design
or by using a compatible holder or shell.
The charging area is identified by the Qi symbol.
The charger works with the engine running and
with the Stop & Start system in STOP mode.
Charging is managed by the smartphone.
With Keyless Entry and Starting, the charger’s
operation may be briefly disrupted when a door
is opened or the ignition is switched off.
Charging
► With the charging area clear, place a device
in its centre.
When the portable device is detected, the
charger’s indicator lamp lights up green. It
remains lit for the whole time that the battery is
being charged.
The system is not designed to charge multiple devices simultaneously.
Do not leave any metal objects (coins,
keys, vehicle remote control, etc.) in the
charging area while a device is being
charged, due to the risk of overheating or
interrupting the charging process.
Page 51 of 260

49
Ease of use and comfort
3The portable device to be charged must be
compatible with the Qi standard, either by design
or by using a compatible holder or shell.
The charging area is identified by the Qi symbol.
The charger works with the engine running and
with the Stop & Start system in STOP mode.
Charging is managed by the smartphone.
With Keyless Entry and Starting, the charger’s
operation may be briefly disrupted when a door
is opened or the ignition is switched off.
Charging
► With the charging area clear, place a device
in its centre.
When the portable device is detected, the
charger’s indicator lamp lights up green. It
remains lit for the whole time that the battery is
being charged.
The system is not designed to charge multiple devices simultaneously.
Do not leave any metal objects (coins,
keys, vehicle remote control, etc.) in the
charging area while a device is being
charged, due to the risk of overheating or
interrupting the charging process.
Operating check
The state of the indicator lamp allows the
operation of the charger to be monitored.
State of the
indicator lamp Meaning
Off Engine switched off.
No compatible devices
detected.
Charging finished.
Fixed green Compatible device detected.
Charging.
Flashing orange Foreign object detected in the charging zone.
Device not well centred in
the charging zone.
Fixed orange Fault with the device's battery meter.
Device battery
temperature too high.
Charger malfunction.
If the indicator lamp is lit orange:
– remove the device, then place it back in the
centre of the charging zone.
or
–
remove the device and try again in a quarter
of an hour
.
If the problem persists, have the system checked
by a PEUGEOT dealer or a qualified workshop.
Load retaining partition
On the floor, behind the front seats, a vertical
partition protects the driver and front passengers
against the risk of load movement.
Steel or glazed partitions separate the loading
area from the cab.
When washing your vehicle, never clean
the inside directly using a water jet.
Stowing rings
Page 52 of 260

50
Ease of use and comfort
Use the stowing rings on the rear floor to secure
loads.
As a safety precaution in case of sharp braking,
we recommend placing heavy objects as far
forwards as possible (i.e. near the cab).
We recommend using the stowing rings on the
floor to firmly secure the load.
When washing your vehicle, never clean
the inside directly using a water jet.
Recommendations on
loading
The weight of the load must comply with the Gross Train Weight (GTW).
For more information on Engine technical
data and towed loads , refer to the
corresponding section.
If you are using a carrying system (roof
bars/roof rack), comply with the
maximum loads associated with this system.
For more information on Roof bars/Roof
rack , refer to the corresponding section.
Make sure that the size, shape and
volume of the loads carried are
compatible with the highway code and safety
regulations and do not impair the driver’s field
of vision.
The load must be evenly distributed in the loading area so as not to interfere
with driving the vehicle.
Place the load close to the side panels, or
even push it against the side panels between
the wheel arches.
However, it is recommended that heavy
objects are placed as close to the cab as
possible as a precaution in case of sharp
braking.
Firmly secure all parts of the load using
the stowing rings on the floor of the
loading area.
For more information on the Interior
fittingsand in particular on the stowing rings,
refer to the corresponding section.
To avoid the risk of injury or accident, the load must be made stable so that it
cannot slide, tip over, fall or be thrown. To do
this, use only retaining straps that conform to
current standards (DIN for example).
For more information on putting straps in
place, refer to the manufacturer’s user guide.
There must not be any empty space between
the components of the load.
To prevent the load sliding, there must not be
any empty space between the load and the
panels of the vehicle.
As well as the straps, optimise the stability
of the load with stable handling equipment
(wedges, rigid blocks of wood or padding).
When washing your vehicle, never clean
the inside directly using a water jet.
For the Multi-Flex bench
seat and the Crew cab
Do not place sharp or pointed objects in
the protective cover to avoid damaging it.
Do not place objects on the
dashboard.
Deactivate the front passenger airbag when
carrying long objects.
For more information on Deactivating
the front passenger airbag, refer to the
corresponding section.
Avoid placing short or heavy loads in the protective cover; use the loading area
whenever possible.
Avoid anchoring loads or hanging items on the wall of the partition.
For safety reasons, ensure that small objects
do not slip through the gaps of about 3 cm
between the partition and the vehicle's
bodywork.
Page 53 of 260

51
Ease of use and comfort
3For the Multi-Flex bench
seat and the Crew cab
Do not place sharp or pointed objects in
the protective cover to avoid damaging it.
Do not place objects on the
dashboard.
Deactivate the front passenger airbag when
carrying long objects.
For more information on Deactivating
the front passenger airbag, refer to the
corresponding section.
Avoid placing short or heavy loads in the protective cover; use the loading area
whenever possible.
Avoid anchoring loads or hanging items on the wall of the partition.
For safety reasons, ensure that small objects
do not slip through the gaps of about 3
cm
between the partition and the vehicle's
bodywork.
Multi-Flex bench seat
This assembly comprises the two-seat front
bench seat and a removable flap.
For more information on the two-seat front
bench seat, refer to the corresponding section.
A partition located on the floor behind the front
seats protects the driver and front passengers
against the risk of load movement.
A movable flap in this partition can be removed
to allow long items to be loaded.
A protective cover is supplied with the vehicle to
enable long items to be carried safely.
Removing the flap
► While holding the flap with one hand, turn the
control at the top of the flap with the other hand
to release it.
►
Lower the flap to remove it from its housing.
► Stow it behind the driver ’s seat, turning the
control at the top of the flap to secure it.
Refitting the flap
► Tilt the flap, with the yellow hinges pointing
downwards.
►
Insert the hinges into their housing then press
down fully (to avoid vibrations).
►
With one hand lift the flap to close it, then
with the other hand turn the control at the top of
the flap to secure it.
Positioning the protective
cover
Whenever the backrest of the outer seat
is folded down and the partition flap is
open, the protective cover must be installed.
Page 54 of 260

52
Ease of use and comfort
No passengers must be allowed to sit in
the central seat if the backrest of the
right-hand outer seat is lowered and the
partition flap is open.
When loading long objects, take care to
install the protective cover correctly.
Read the following procedure carefully.
►
Fold
down the outer passenger seat backrest.
► Install the protective cover by fastening its
4 snap hooks to the 4 anchor points on the
partition.
► Pull out the head restraint rods from the
folded backrest, leaving two notches visible.
►
Load the desired objects.
The maximum load permitted on the folded backrest is 100 kg.
► Place the strap of the cover around the head
restraint.
►
T
ighten the strap using the adjustable section
in order to correctly retain the items that have
been loaded inside the cover.
The protective cover may be left in place after use.
Regularly check the condition of the
protective cover.
When signs of wear and tear appear, contact
a PEUGEOT dealer to have it replaced by a
protective cover that meets the specifications
and qualities required by PEUGEOT and your
vehicle.
Crew cab
A movable partition that can be placed behind
the first or second row of seats protects the
driver and passengers against the risk of load
movement.
A hatch in the partition can be opened to allow
long items to be carried.
A protective cover is supplied with the vehicle to
enable long items to be carried safely.
Moving the partition
Moving the partition forwards
► Fold the backrests of the row 2 seats and
check that they are properly folded. If necessary,
adjust the position of the row 1 seats (moving
them forwards).
► Release the upper latches A and B.
► Check that the latches C and D are retracted.
► Slide the partition forwards.
► Lock the lower latches C and D and then
check that the locating pins are correctly
engaged in their housings.
► Lock the upper latches A and B.
Moving the partition backwards
► Release the upper latches A and B.
► Release the lower latches C and D.
► Slide the partition backwards.
► Lock the upper latches A and B.
► Return the backrests of the row 2 seats to
their positions.
Page 55 of 260

53
Ease of use and comfort
3Moving the partition
Moving the partition forwards
► Fold the backrests of the row 2 seats and
check that they are properly folded. If necessary ,
adjust the position of the row 1 seats (moving
them forwards).
►
Release the upper latches A
and B.
►
Check that the latches
C and D are retracted.
►
Slide the partition forwards.
►
Lock the lower latches C
and D and then
check that the locating pins are correctly
engaged in their housings.
►
Lock the upper latches A
and B.
Moving the partition backwards
► Release the upper latchesA and B.
► Release the lower latches C
and D.
►
Slide the partition backwards.
►
Lock the upper latches A
and B.
►
Return the backrests of the row 2 seats to
their positions.
The upper stops may be adjusted if: – excessive force is needed to operate
the upper latches A
and B.
–
there is noise while driving, caused by
excessive play
.
When the partition is locked behind the
row 2 or row 1 seats, an engagement
noise tells you that the upper latches are
closed.
A visible mark and a coloured mark show the
position of the latches.
The partition must not be moved with the latches extended - risk of scratches or
damage to the plastic trims!
The partition must never be removed to convert the vehicle from a commercial
vehicle to a passenger vehicle.
This would pose a risk to the safety of users
due to the absence of a child lock on the
tailgate (mandatory on passenger vehicles).
Opening/closing the hatch
► Open/close the hatch using the latch.
► Use the stay to keep it in the open position.
Always close the hatch and raise the backrest of the outer passenger seat(s)
(depending on the position of the partition)
when you are not carrying a long load.
Avoid placing loads on the hatch sill bar. Whenever possible, place loads on the
folded-down seat backrests.
Page 56 of 260

54
Ease of use and comfort
Positioning the protective
cover
The protective cover must be installed whenever the backrest of the outer seat
is folded down and the partition hatch is open.
In row 1, no passengers must be allowed
to sit in the outer seat if the backrest of
the outer seat located behind them in row 2 is
lowered and the hatch is open.
In row 2, no passengers must be allowed to
sit in the central seat if the backrest of the
outer seat is lowered and the hatch is open.
When loading long objects, take care to
install the protective cover correctly.
►
Fold the backrest of the outer passenger
seat(s) (depending on the position of the
partition).
For more information on the Rear bench seat,
and especially on folding the backrests, refer to
the corresponding section.
For more information on the T
wo-seat front
bench seat, and especially the retracted position
of the outer seat, refer to the corresponding
section.
► Install the protective cover by fastening its
4 snap hooks to the 4 anchor points on the
partition.
► Pull out the head restraint rods from
the folded backrest(s) of the outer seat(s)
(depending on the position of the partition),
leaving 2 notches visible.
►
Load the desired objects.
Avoid placing heavy loads on the folded-down backrest of row 1.
Whenever possible, place heavy loads on the
floor.
The maximum load permitted on each of the
folded backrests of row 2 is 80
kg.
It is normal for surplus protective cover to
be visible when the partition is positioned
behind row 1.
►
T
idy this surplus protective cover in the
space under the glove box.
► Position the strap(s) around the head
restraint(s) (depending on the position of the
partition).
► Tighten the strap(s) using the adjustable
section in order to correctly retain the items that
have been loaded inside the cover.
The protective cover may be left in place after use.
Regularly check the condition of the
protective cover.
When signs of wear and tear appear, contact
a PEUGEOT dealer to have it replaced by a
protective cover that meets the specifications
and qualities required by PEUGEOT and your
vehicle.
Heating and Ventilation
Advice
Using the ventilation and air
conditioning system
► To ensure that air is distributed evenly,
keep the external air intake grilles at the base
of the windscreen, the nozzles, the vents, the
air outlets and the air extractor in the boot
free from obstructions.
► Do not cover the sunshine sensor located
on the dashboard; this sensor is used to
 1
1 2
2 3
3 4
4 5
5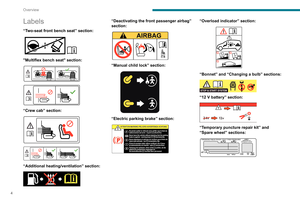 6
6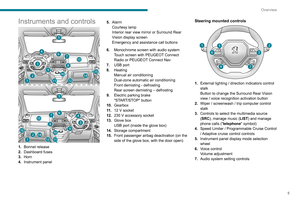 7
7 8
8 9
9 10
10 11
11 12
12 13
13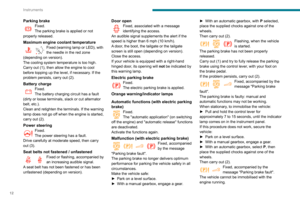 14
14 15
15 16
16 17
17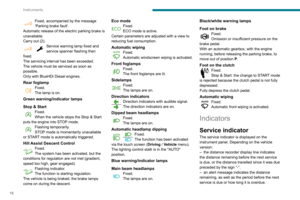 18
18 19
19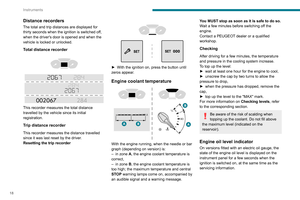 20
20 21
21 22
22 23
23 24
24 25
25 26
26 27
27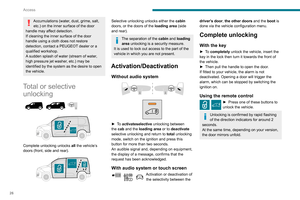 28
28 29
29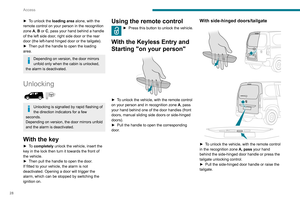 30
30 31
31 32
32 33
33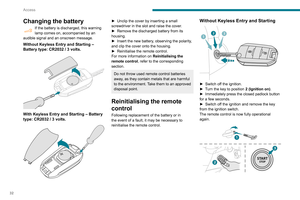 34
34 35
35 36
36 37
37 38
38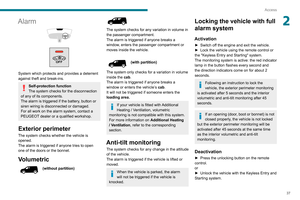 39
39 40
40 41
41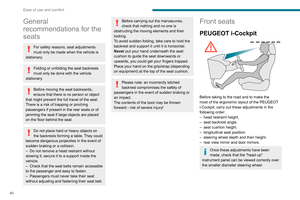 42
42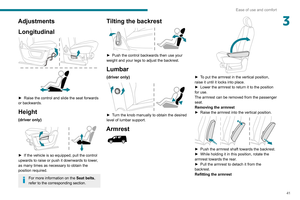 43
43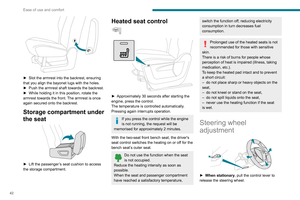 44
44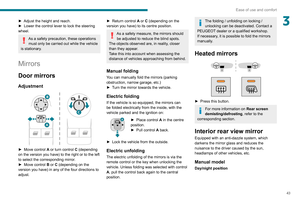 45
45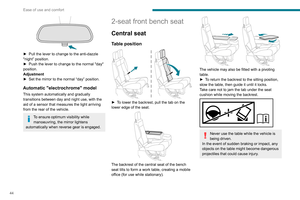 46
46 47
47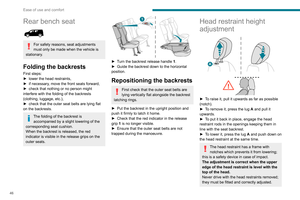 48
48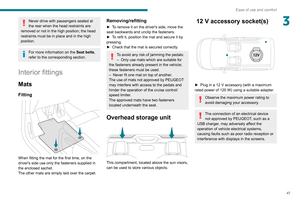 49
49 50
50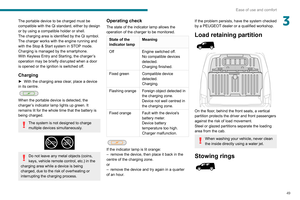 51
51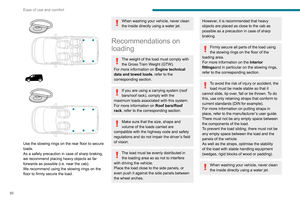 52
52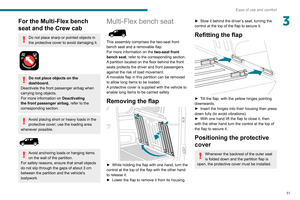 53
53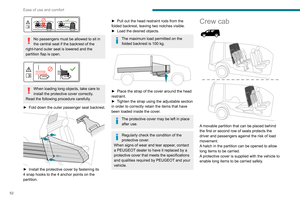 54
54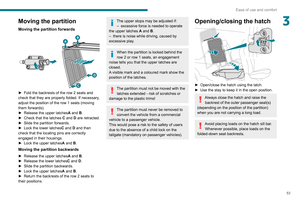 55
55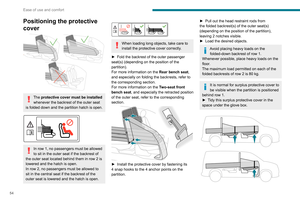 56
56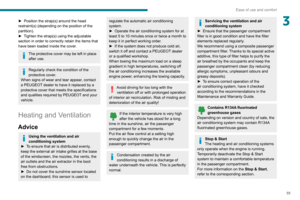 57
57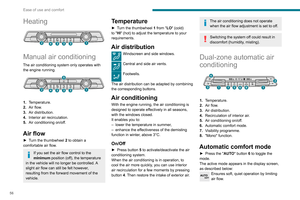 58
58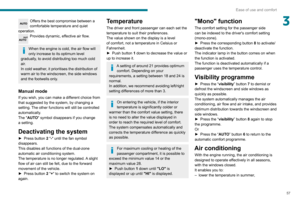 59
59 60
60 61
61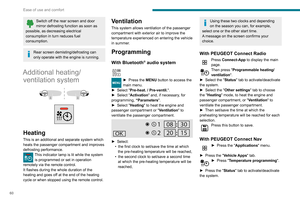 62
62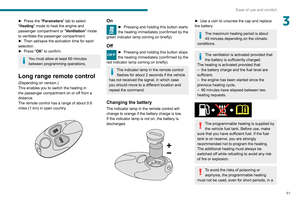 63
63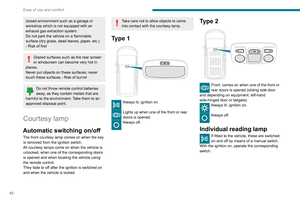 64
64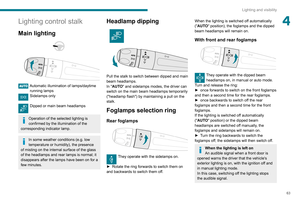 65
65 66
66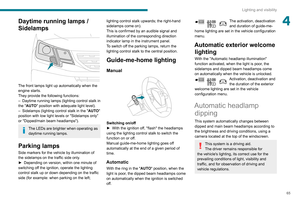 67
67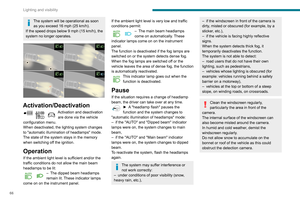 68
68 69
69 70
70 71
71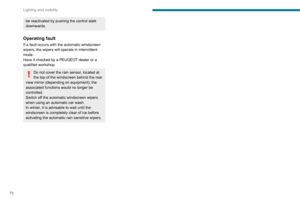 72
72 73
73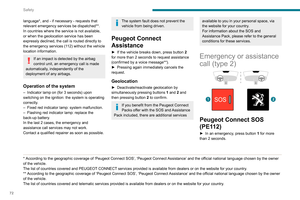 74
74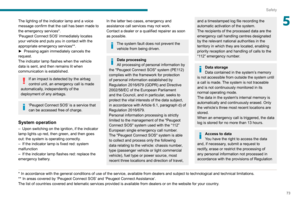 75
75 76
76 77
77 78
78 79
79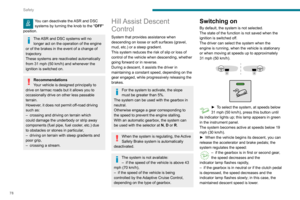 80
80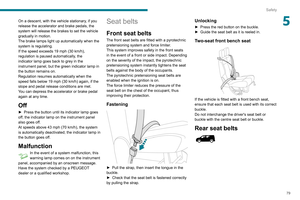 81
81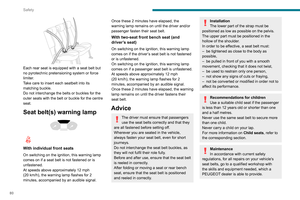 82
82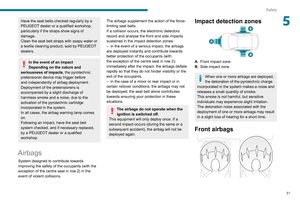 83
83 84
84 85
85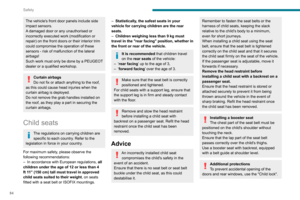 86
86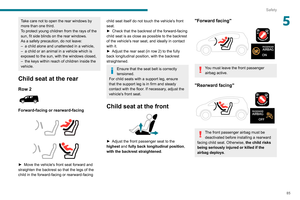 87
87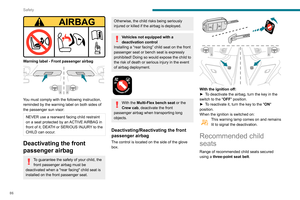 88
88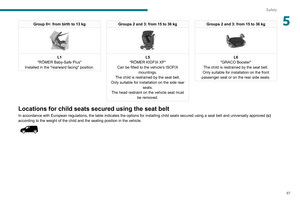 89
89 90
90 91
91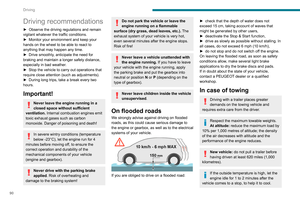 92
92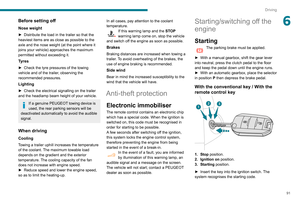 93
93 94
94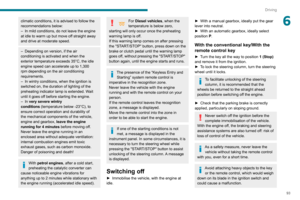 95
95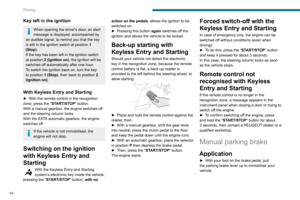 96
96 97
97 98
98 99
99 100
100 101
101 102
102 103
103 104
104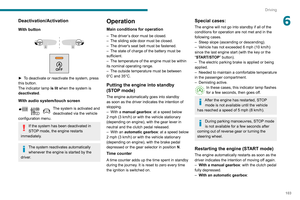 105
105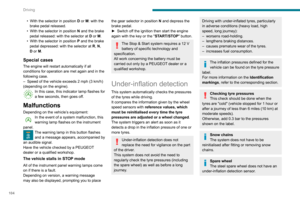 106
106 107
107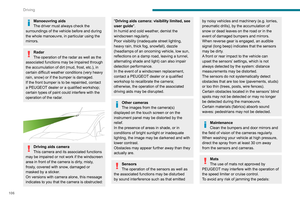 108
108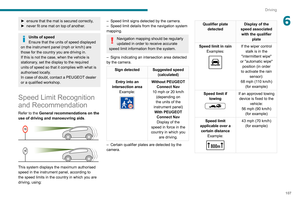 109
109 110
110 111
111 112
112 113
113 114
114 115
115 116
116 117
117 118
118 119
119 120
120 121
121 122
122 123
123 124
124 125
125 126
126 127
127 128
128 129
129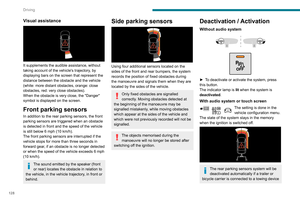 130
130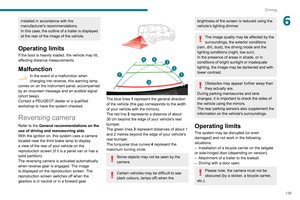 131
131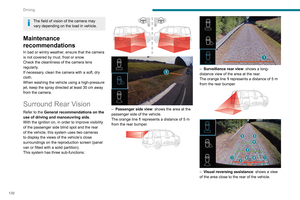 132
132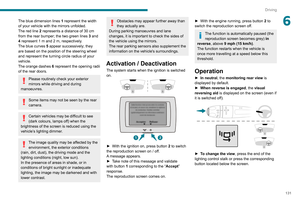 133
133 134
134 135
135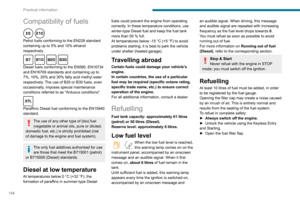 136
136 137
137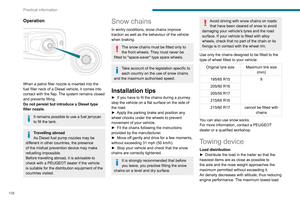 138
138 139
139 140
140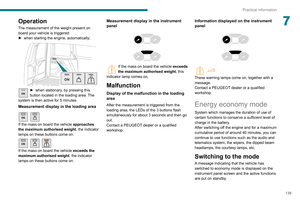 141
141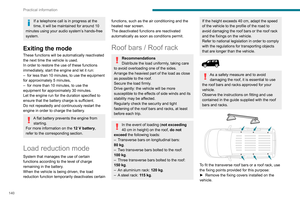 142
142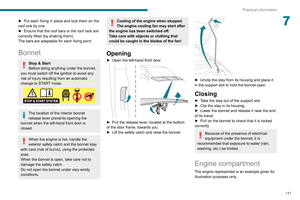 143
143 144
144 145
145 146
146 147
147 148
148 149
149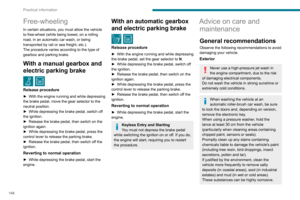 150
150 151
151 152
152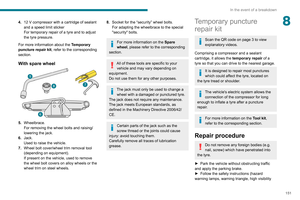 153
153 154
154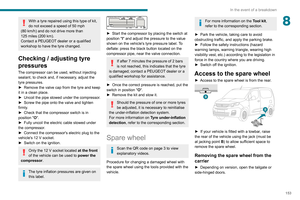 155
155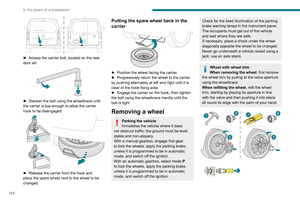 156
156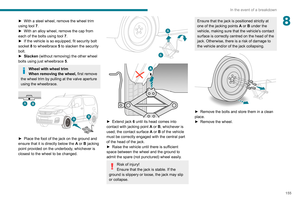 157
157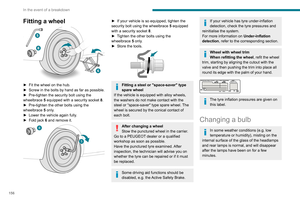 158
158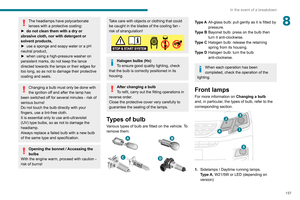 159
159 160
160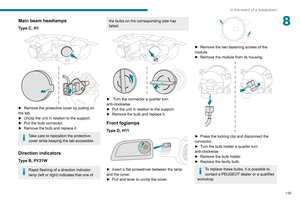 161
161 162
162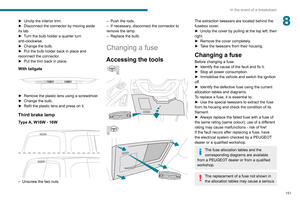 163
163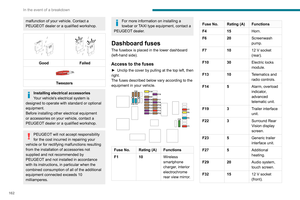 164
164 165
165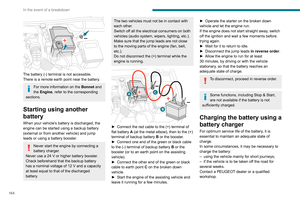 166
166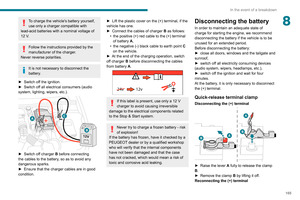 167
167 168
168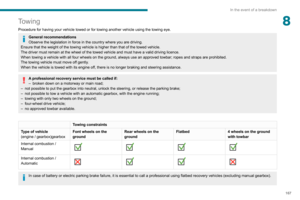 169
169 170
170 171
171 172
172 173
173 174
174 175
175 176
176 177
177 178
178 179
179 180
180 181
181 182
182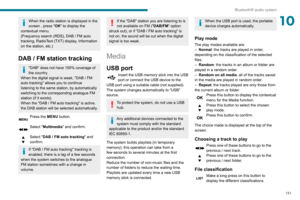 183
183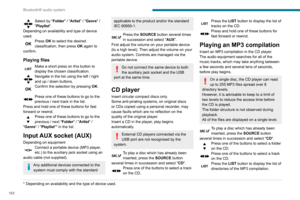 184
184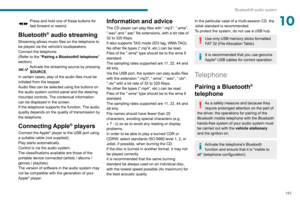 185
185 186
186 187
187 188
188 189
189 190
190 191
191 192
192 193
193 194
194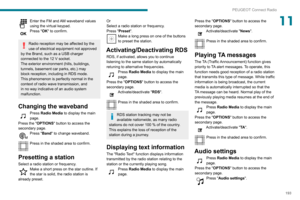 195
195 196
196 197
197 198
198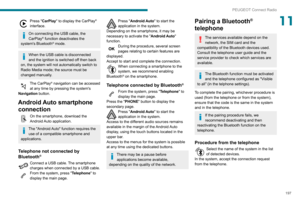 199
199 200
200 201
201 202
202 203
203 204
204 205
205 206
206 207
207 208
208 209
209 210
210 211
211 212
212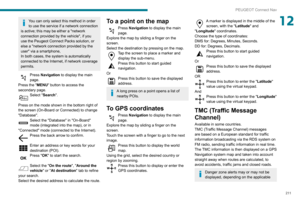 213
213 214
214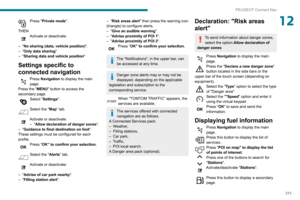 215
215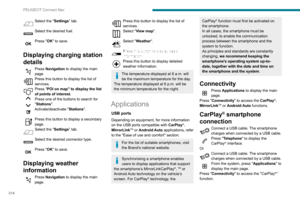 216
216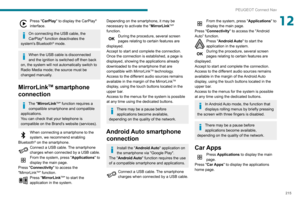 217
217 218
218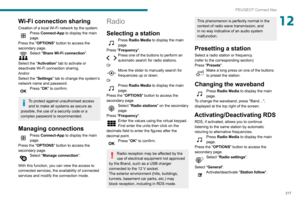 219
219 220
220 221
221 222
222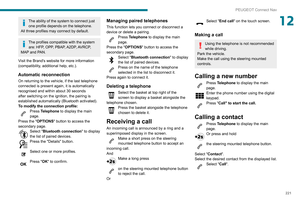 223
223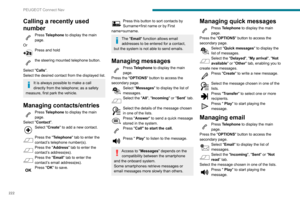 224
224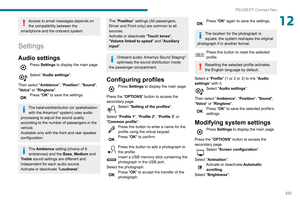 225
225 226
226 227
227 228
228 229
229 230
230 231
231 232
232 233
233 234
234 235
235 236
236 237
237 238
238 239
239 240
240 241
241 242
242 243
243 244
244 245
245 246
246 247
247 248
248 249
249 250
250 251
251 252
252 253
253 254
254 255
255 256
256 257
257 258
258 259
259