2020 PEUGEOT 5008 tow
[x] Cancel search: towPage 65 of 308
63
Ease of use and comfort
3Air conditioning on / off
The air conditioning is designed to operate
effectively in all seasons, with the windows
closed.
It is used to:
–
lower the temperature in summer;
–
increase the effectiveness of the demisting in
winter
, above 3°C.
►
Press button
5 to activate / deactivate the air
conditioning system.
When the system is activated, the indicator lamp
of the button comes on.
The air conditioning does not operate when the air flow is deactivated.
To obtain cool air more quickly, use
recirculation of the interior air for a few
moments. Then return to the intake of exterior
air.
Switching off the air conditioning may result in
some discomfort (humidity, misting).
Maximum air conditioning
This function automatically adjusts the
temperature setting to the lowest possible, the
air distribution towards the central and side air
vents, the air flow to maximum and activates
interior air recirculation.
►
Press button
6 to activate / deactivate the
function (the indicator lamp will come on/switch
off). Once the function is deactivated, the system
returns to the previous settings.
Mono-zone / Dual-zone
The passenger temperature setting can be linked
to the driver's setting (mono-zone function).
It is available in the secondary page by pressing
the "OPTIONS
” button.
►
Press button
13 to activate the "MONO"
function; its status is displayed as " ON".
The function is automatically deactivated if the
passenger uses their temperature adjustment
buttons (dual-zone function).
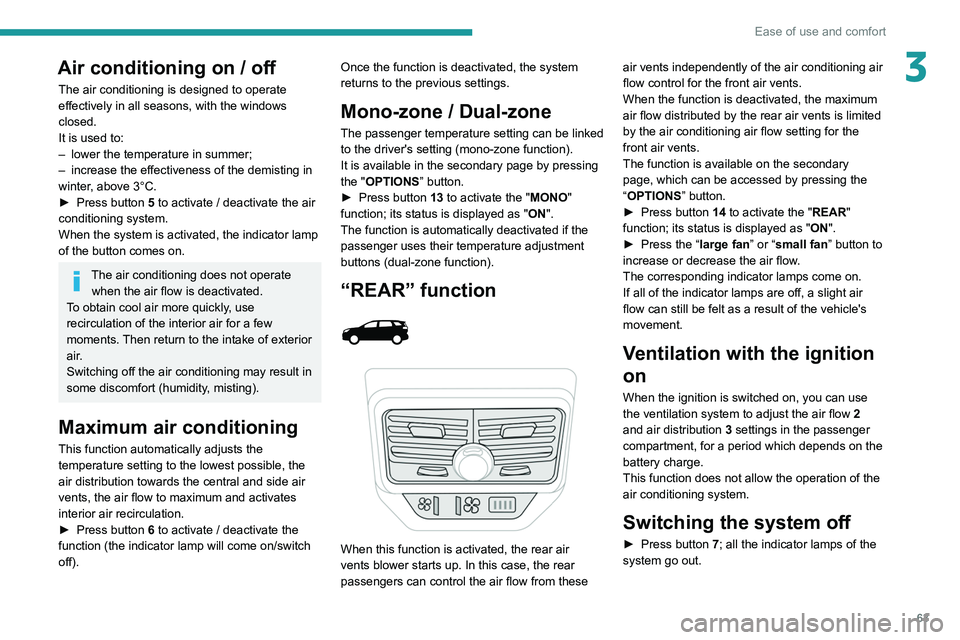
“REAR” function
When this function is activated, the rear air
vents blower starts up. In this case, the rear
passengers can control the air flow from these air vents independently of the air conditioning air
flow control for the front air vents.
When the function is deactivated, the maximum
air flow distributed by the rear air vents is limited
by the air conditioning air flow setting for the
front air vents.
The function is available on the secondary
page, which can be accessed by pressing the
“OPTIONS
” button.
►
Press button
14 to activate the "REAR"
function; its status is displayed as " ON".
►
Press the “
large fan” or “small fan” button to
increase or decrease the air flow.
The corresponding indicator lamps come on.
If all of the indicator lamps are off, a slight air
flow can still be felt as a result of the vehicle's
movement.
Ventilation with the ignition
on
When the ignition is switched on, you can use
the ventilation system to adjust the air flow 2
and air distribution 3 settings in the passenger
compartment, for a period which depends on the
battery charge.
This function does not allow the operation of the
air conditioning system.
Switching the system off
► Press button 7; all the indicator lamps of the
system go out.
Page 66 of 308
64
Ease of use and comfort
This action deactivates all functions of the air
conditioning system.
The temperature is no longer regulated. A slight
flow of air can still be felt, due to the forward
movement of the vehicle.
Interior air recirculation
The intake of exterior air prevents the formation
of mist on the windscreen and side windows.
Recirculating the interior air isolates the
passenger compartment from outside odours
and fumes and allows the desired passenger
compartment temperature to be achieved more
rapidly.
► Press this button to activate/deactivate
the function (confirmed by the
illumination/extinction of the indicator lamp).
The function is activated automatically when reverse gear is engaged.
Front demisting
- defrosting
With manual air
conditioning
► Adjust the temperature to maximum (red).
► Adjust the air flow to maximum; all of the
orange indicator lamps come on.
► Adjust the air distribution to the "Windscreen"
position; its associated orange indicator lamp
comes on.
►
Check that the recirculation of interior air is
deactivated; its indicator lamp must be off.
►
Switch on the air conditioning by pressing the
"
A/C" button; its orange indicator lamp comes
on.
With Stop & Start, when these
functions - demisting, air conditioning
and air flow - are activated, STOP mode is
not available.
With semi-automatic/
automatic air conditioning
Automatic Visibility programme
This mode allows the windscreen and side
windows to be demisted or defrosted as quickly
as possible.
► Press this button to activate/deactivate
the mode (confirmed by the illumination/
extinction of the
indicator lamp).
The programme automatically manages the air
conditioning (depending on version), air flow
and air intake, and provides optimum distribution
towards the windscreen and side windows.
It is possible to manually change the air flow
without deactivating the automatic Visibility
programme.
With Stop & Start, when demisting has
been activated, STOP mode is not
available.
In wintry conditions, remove all snow or
ice on the windscreen near the camera
before moving off.
Otherwise, the operation of the equipment
associated with the camera may be affected.
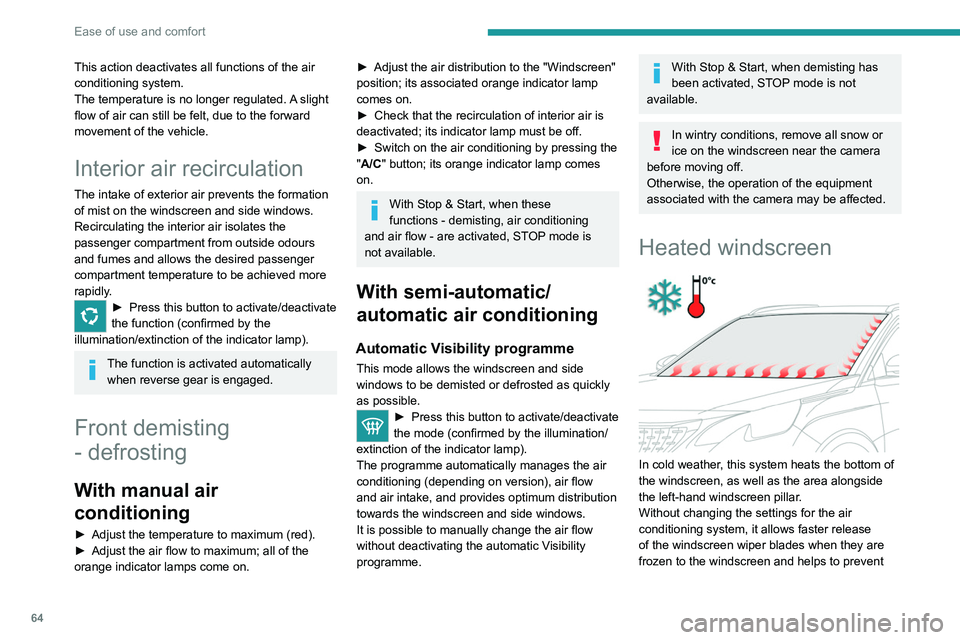
Heated windscreen
In cold weather, this system heats the bottom of
the windscreen, as well as the area alongside
the left-hand windscreen pillar.
Without changing the settings for the air
conditioning system, it allows faster release
of the windscreen wiper blades when they are
frozen to the windscreen and helps to prevent
the accumulation of snow resulting from the
operation of the windscreen wipers.
On/Off
► With the engine running, press this button to
activate/deactivate the function (confirmed by an
indicator lamp).
The function is activated when the exterior
temperature drops below 0°C. It is deactivated
automatically when the engine is switched off.
Rear screen demisting/
defrosting
Demisting/defrosting only operates with the
engine running.
Depending on version, this also applies to the
door mirrors.
► Press this button to activate/deactivate
the function (confirmed by the
illumination/extinction of the indicator lamp).
Demisting/defrosting switches off automatically
to prevent an excessive consumption of
electrical current.
Page 74 of 308
72
Ease of use and comfort
Side blinds
Fitted to the second row windows, they protect
the passenger compartment from the sun's rays.
►
Pull the central tab to unroll the blind.
►
Position the blind's clip on the hook.
Always guide the blind slowly, using the tab, while raising or lowering it.
Storage boxes
Depending on version, the storage boxes are
fitted in the floor, at the foot of the side seats on
the second row.
On the left-hand side, it may also contain the
temporary puncture repair kit.
►
T
o open them, lift the cover by the notch.
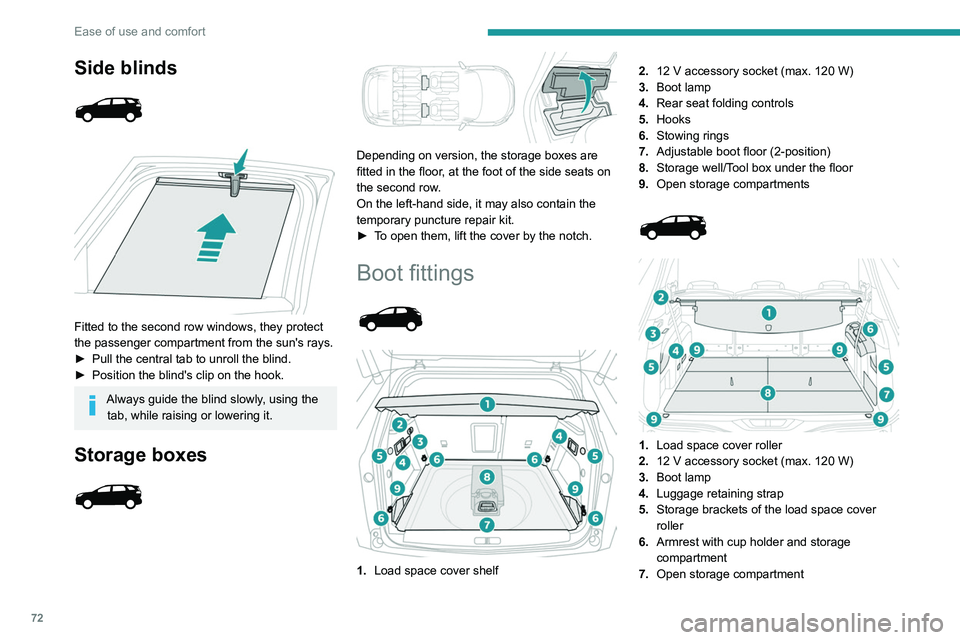
Boot fittings
1. Load space cover shelf 2.
12 V accessory socket (max. 120 W)
3. Boot lamp
4. Rear seat folding controls
5. Hooks
6. Stowing rings
7. Adjustable boot floor (2-position)
8. Storage well/Tool box under the floor
9. Open storage compartments
1. Load space cover roller
2. 12 V accessory socket (max. 120 W)
3. Boot lamp
4. Luggage retaining strap
5. Storage brackets of the load space cover
roller
6. Armrest with cup holder and storage
compartment
7. Open storage compartment
8.Concertina panels
9. Stowing rings
The stowing rings are designed to secure
luggage using different types of retaining
nets.
These retaining nets are available as an
option or as an accessory.
For more information, contact a PEUGEOT
dealer.
For information on installing the High load
retaining net , refer to the corresponding
section.
Load space cover shelf
It consists of two sections:
– a fixed section with an open storage space.
Page 75 of 308
73
Ease of use and comfort
38.Concertina panels
9. Stowing rings
The stowing rings are designed to secure
luggage using different types of retaining
nets.
These retaining nets are available as an
option or as an accessory.
For more information, contact a PEUGEOT
dealer.
For information on installing the
High load
retaining net , refer to the corresponding
section.
Load space cover shelf
It consists of two sections:
– a fixed section with an open storage space.
– a movable section which rises when the boot
is opened, with an open storage space.
To remove the load space cover shelf:
► Unhook the two cords.
►
Raise the movable section slightly
, then
unclip it on each side.
►
Unclip the fixed section on each side, then
take out the load space cover shelf.
The load space cover shelf can be stowed under
the boot floor
.
In the event of sudden deceleration,
objects placed on the load space cover
shelf can turn into projectiles.
Load space cover roller
In the 5-seat configuration, it is installed behind
the second row seats, with the third row seats
stored folded away.
In the 7-seat configuration, it is stored behind the
third row seats.
In the event of sudden deceleration,
objects placed on the load space cover
roller can turn into projectiles.
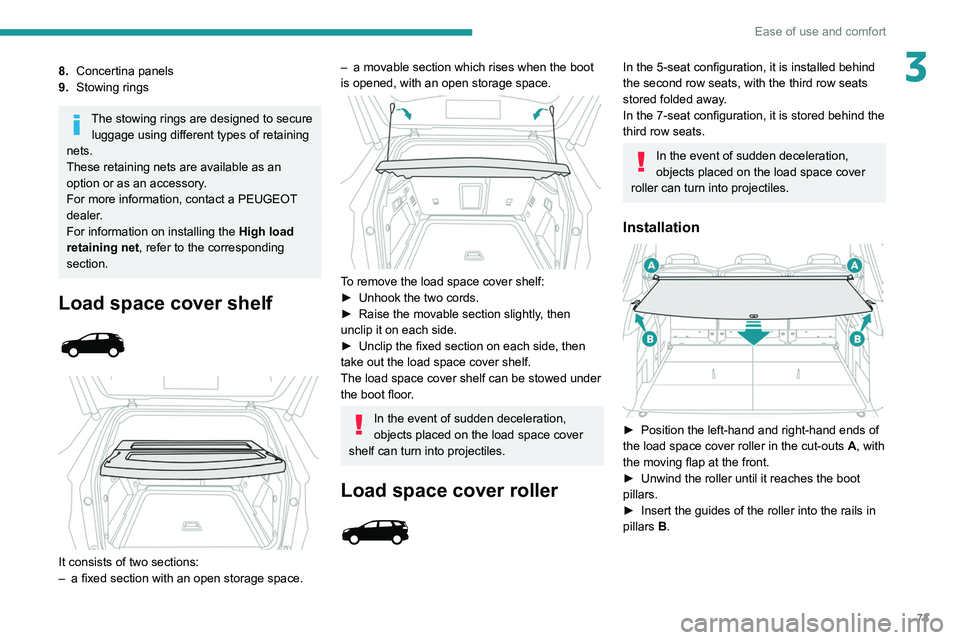
Installation
► Position the left-hand and right-hand ends of
the load space cover roller in the cut-outs A , with
the moving flap at the front.
►
Unwind the roller until it reaches the boot
pillars.
►
Insert the guides of the roller into the rails in
pillars B
.
Page 78 of 308
76
Ease of use and comfort
Behind the rear seats
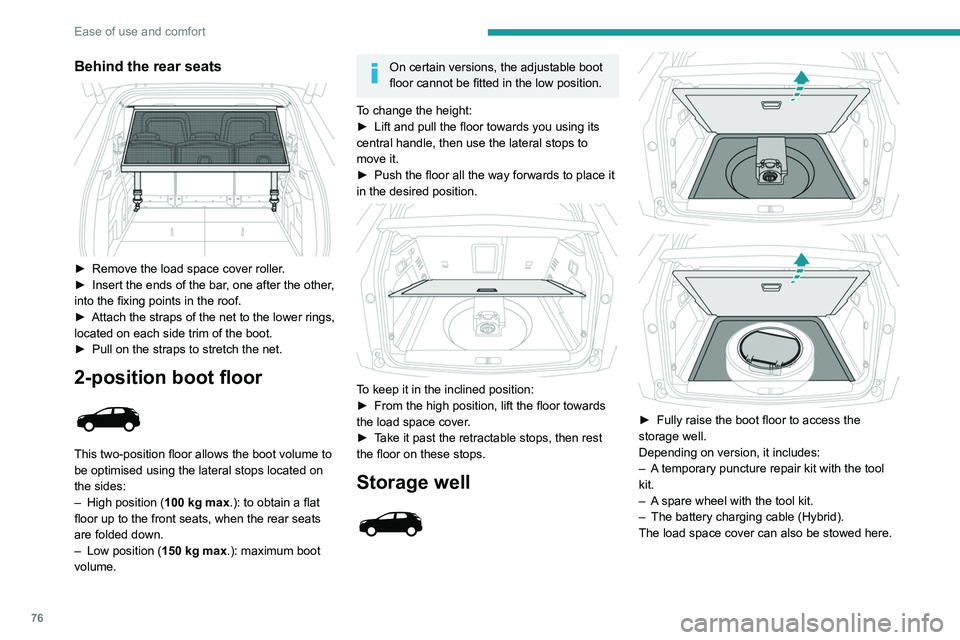
► Remove the load space cover roller.
► Insert the ends of the bar , one after the other,
into the fixing points in the roof.
►
Attach the straps of the net to the lower rings,
located on each side trim of the boot.
►
Pull on the straps to stretch the net.
2-position boot floor
This two-position floor allows the boot volume to
be optimised using the lateral stops located on
the sides:
–
High position ( 100
kg max.): to obtain a flat
floor up to the front seats, when the rear seats
are folded down.
–
Low position ( 150
kg max.): maximum boot
volume.
On certain versions, the adjustable boot
floor cannot be fitted in the low position.
To change the height:
►
Lift and pull the floor towards you using its
central handle, then use the lateral stops to
move it.
►
Push the floor all the way forwards to place it
in the desired position.
To keep it in the inclined position:
► From the high position, lift the floor towards
the load space cover
.
►
T
ake it past the retractable stops, then rest
the floor on these stops.
Storage well
► Fully raise the boot floor to access the
storage well.
Depending on version, it includes:
–
A
temporary puncture repair kit with the tool
kit.
–
A
spare wheel with the tool kit.
–
The battery charging cable (Hybrid).
The load space cover can also be stowed here.
12 V accessory socket
► To connect a 12 V accessory (maximum
power: 120 W), lift the cover and plug in a
suitable adaptor.
► Switch on the ignition.
The connection of an electrical device
not approved by PEUGEOT, such as a
USB charger, may adversely affect the
operation of vehicle electrical systems,
causing faults such as poor radio reception or
interference with displays in the screens.
Boot lamp
It comes on automatically when the boot is
opened and goes off automatically when the
boot is closed.
The lighting time varies according to the
circumstances:
– When the ignition is off, approximately 10
minutes.
– In energy saving mode, approximately 30
seconds.
– With the engine running, unlimited.
Page 82 of 308
80
Lighting and visibility
Headlamp beam height
adjustment
Manual adjustment of the
halogen headlamps
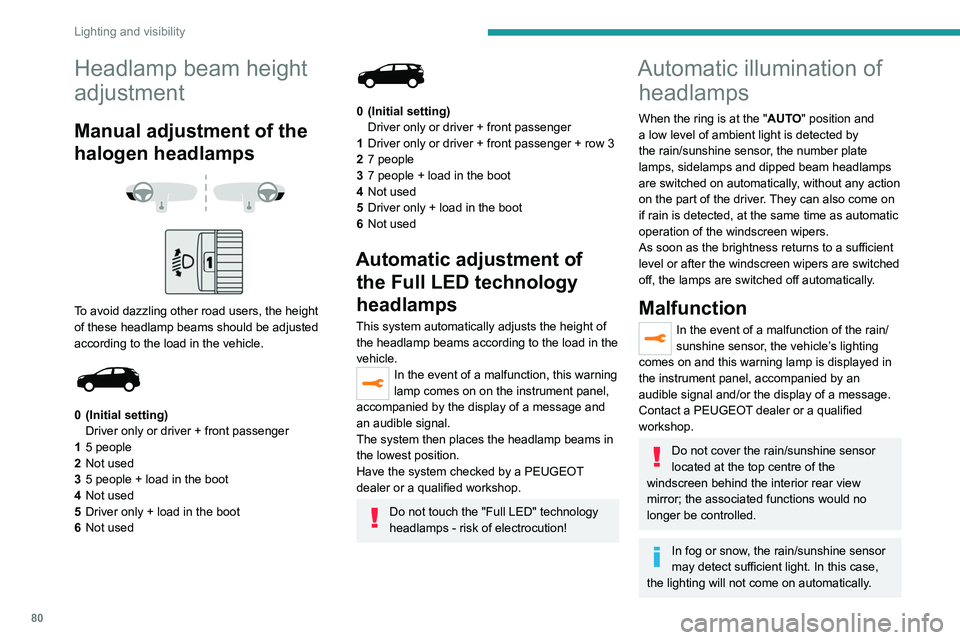
To avoid dazzling other road users, the height
of these headlamp beams should be adjusted
according to the load in the vehicle.
0 (Initial setting) Driver only or driver + front passenger
1 5 people
2 Not used
3 5 people + load in the boot
4 Not used
5 Driver only + load in the boot
6 Not used
0 (Initial setting)
Driver only or driver + front passenger
1 Driver only or driver + front passenger + row 3
2 7 people
3 7 people + load in the boot
4 Not used
5 Driver only + load in the boot
6 Not used
Automatic adjustment of
the Full LED technology
headlamps
This system automatically adjusts the height of
the headlamp beams according to the load in the
vehicle.
In the event of a malfunction, this warning
lamp comes on on the instrument panel,
accompanied by the display of a message and
an audible signal.
The system then places the headlamp beams in
the lowest position.
Have the system checked by a PEUGEOT
dealer or a qualified workshop.
Do not touch the "Full LED" technology
headlamps - risk of electrocution!
Automatic illumination of headlamps
When the ring is at the "AUTO" position and
a low level of ambient light is detected by
the rain/sunshine sensor
, the number plate
lamps,
sidelamps and dipped beam headlamps
are switched on automatically, without any action
on the part of the driver. They can also come on
if rain is detected, at the same time as automatic
operation of the windscreen wipers.
As soon as the brightness returns to a sufficient
level or after the windscreen wipers are switched
off, the lamps are switched off automatically.
Malfunction
In the event of a malfunction of the rain/
sunshine sensor, the vehicle’s lighting
comes on and this warning lamp is displayed in
the instrument panel, accompanied by an
audible signal and/or the display of a message.
Contact a PEUGEOT dealer or a qualified
workshop.
Do not cover the rain/sunshine sensor
located at the top centre of the
windscreen behind the interior rear view
mirror; the associated functions would no
longer be controlled.
In fog or snow, the rain/sunshine sensor
may detect sufficient light. In this case,
the lighting will not come on automatically.
Guide-me-home and
welcome lighting
Guide-me-home lighting
Automatic
With the ring in the "AUTO" position, when the
light is poor, the dipped beam headlamps come
on automatically when the ignition is switched
off.
You can activate/deactivate this function and adjust the guide-me-
home lighting duration in the vehicle
configuration menu.
Manual
► With the ignition off, pull the lighting control
stalk toward you ("headlamp flash") to activate/
deactivate the function.
Manual guide-me-home lighting goes off
automatically after a period of time.
Page 83 of 308
81
Lighting and visibility
4Guide-me-home and
welcome lighting
Guide-me-home lighting
Automatic
With the ring in the "AUTO" position, when the
light is poor, the dipped beam headlamps come
on automatically when the ignition is switched
off.
You can activate/deactivate this function and adjust the guide-me-
home lighting duration in the vehicle
configuration menu.
Manual
► With the ignition off, pull the lighting control
stalk toward you ("headlamp flash") to activate/
deactivate the function.
Manual guide-me-home lighting goes off
automatically after a period of time. For versions without "Automatic illumination
of lamps", the manual guide-me-home lighting
switches off automatically after 30 seconds.
For versions with "Automatic illumination of
lamps", the period of operation of the manual
guide-me-home lighting is the same as that set
for the automatic guide-me-home lighting.
Welcome lighting
When the vehicle is unlocked in low light
conditions and the "Automatic illumination of
headlamps" function is activated, this system
automatically switches on:
–
On the outside, sidelamps, dipped beam
headlamps and door mirror spotlamps.
–
Inside, courtesy lamps and footwell lighting.
Activation / deactivation and adjustment of the duration of the
welcome lighting are set via the vehicle
configuration menu.
Door mirror spotlamps
These spotlamps facilitate access to the vehicle
by lighting the ground near the front doors.
When the front courtesy lamp switch is in
this position, the spotlamps come on
automatically:
–
when the vehicle is unlocked.
–
when a door is opened.
–
when a request to locate the vehicle is
received from the remote control.
Whatever the position of the front courtesy lamp
switch, they also come on with the welcome
lighting and guide-me-home lighting functions.
They go off automatically after 30 seconds.
Automatic headlamp dipping
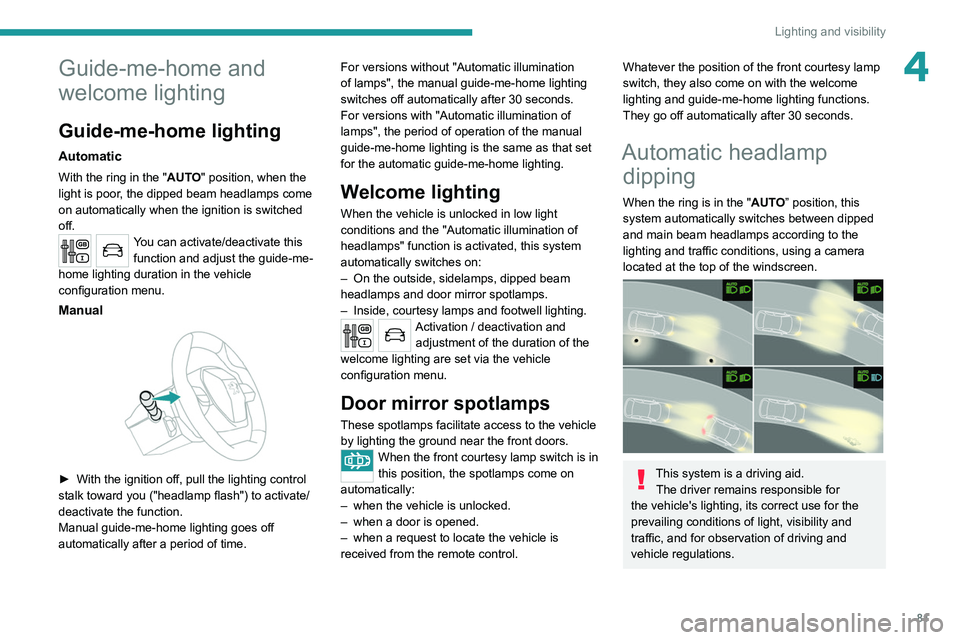
When the ring is in the "AUTO” position, this
system automatically switches between dipped
and main beam headlamps according to the
lighting and traffic conditions, using a camera
located at the top of the windscreen.
This system is a driving aid.
The driver remains responsible for
the vehicle's lighting, its correct use for the
prevailing conditions of light, visibility and
traffic, and for observation of driving and
vehicle regulations.
Page 85 of 308
83
Lighting and visibility
4
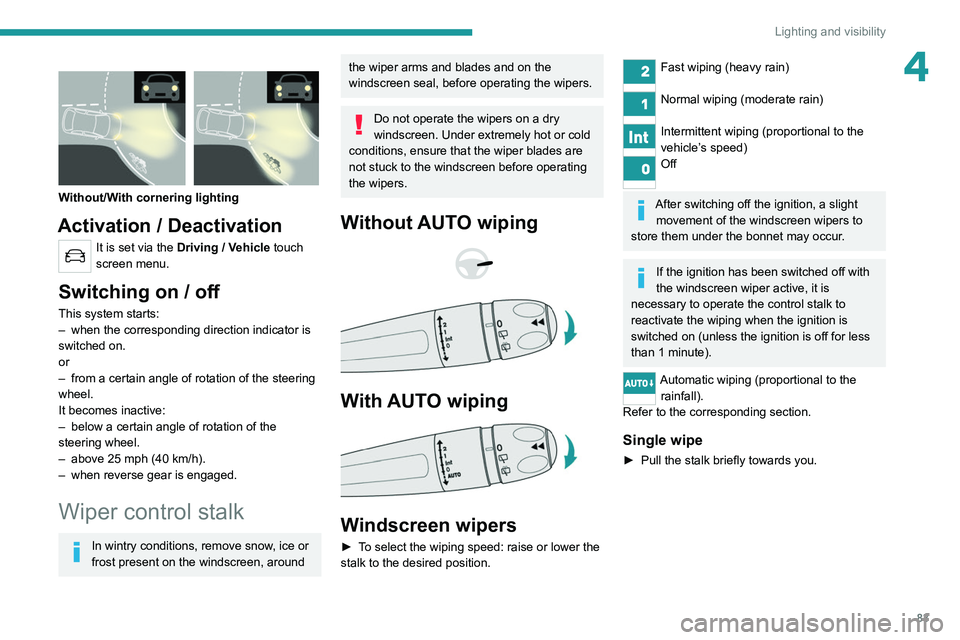
Without/With cornering lighting
Activation / Deactivation
It is set via the Driving / Vehicle touch
screen menu.
Switching on / off
This system starts:
– when the corresponding direction indicator is
switched on.
or
–
from a certain angle of rotation of the steering
wheel.
It becomes inactive:
–
below a certain angle of rotation of the
steering wheel.
–
above 25 mph (40
km/h).
–
when reverse gear is engaged.
Wiper control stalk
In wintry conditions, remove snow, ice or
frost present on the windscreen, around
the wiper arms and blades and on the
windscreen seal, before operating the wipers.
Do not operate the wipers on a dry
windscreen. Under extremely hot or cold
conditions, ensure that the wiper blades are
not stuck to the windscreen before operating
the wipers.
Without AUTO wiping
With AUTO wiping
Windscreen wipers
► To select the wiping speed: raise or lower the
stalk to the desired position.
Fast wiping (heavy rain)
Normal wiping (moderate rain)
Intermittent wiping (proportional to the
vehicle’s speed)
Off
After switching off the ignition, a slight movement of the windscreen wipers to
store them under the bonnet may occur.
If the ignition has been switched off with
the windscreen wiper active, it is
necessary to operate the control stalk to
reactivate the wiping when the ignition is
switched on (unless the ignition is off for less
than 1
minute).
Automatic wiping (proportional to the rainfall).
Refer to the corresponding section.
Single wipe
► Pull the stalk briefly towards you.