2020 PEUGEOT 5008 steering
[x] Cancel search: steeringPage 36 of 308
34
Access
For more information on Reinitialising the
remote control, refer to the corresponding
section.
Do not throw remote control batteries
away, as they contain metals that are
harmful to the environment. Take them to an
approved disposal point.
Reinitialising the remote
control
Following replacement of the battery or in
the event of a fault, it may be necessary to
reinitialise the remote control.
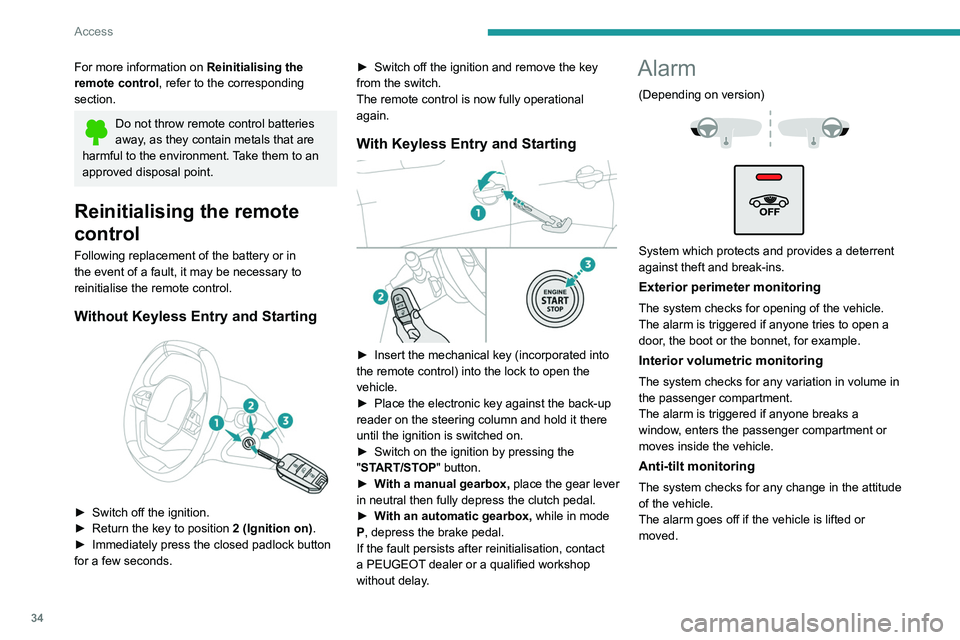
Without Keyless Entry and Starting
► Switch off the ignition.
► Return the key to position 2 (Ignition on).
►
Immediately press the closed padlock button
for a few seconds. ►
Switch off the ignition and remove the key
from the switch.
The remote control is now fully operational
again.
With Keyless Entry and Starting
► Insert the mechanical key (incorporated into
the remote control) into the lock to open the
vehicle.
►
Place the electronic key against the back-up
reader on the steering column and hold it there
until the ignition is switched on.
►
Switch on the ignition by pressing the
"
START/STOP" button.
►
W
ith a manual gearbox, place the gear lever
in neutral then fully depress the clutch pedal.
►
W
ith an automatic gearbox, while in mode
P, depress the brake pedal.
If the fault persists after reinitialisation, contact
a PEUGEOT dealer or a qualified workshop
without delay.
Alarm
(Depending on version)
System which protects and provides a deterrent
against theft and break-ins.
Exterior perimeter monitoring
The system checks for opening of the vehicle.
The alarm is triggered if anyone tries to open a
door, the boot or the bonnet, for example.
Interior volumetric monitoring
The system checks for any variation in volume in
the passenger compartment.
The alarm is triggered if anyone breaks a
window, enters the passenger compartment or
moves inside the vehicle.
Anti-tilt monitoring
The system checks for any change in the attitude
of the vehicle.
The alarm goes off if the vehicle is lifted or
moved.
When the vehicle is parked, the alarm
will not be triggered if the vehicle is
knocked.
Self-protection function
The system checks for the putting out of service
of its components.
The alarm is triggered if the battery, the central
control or the siren wiring is put out of service or
damaged.
For all work on the alarm system, contact
a PEUGEOT dealer or a qualified
workshop.
Locking the vehicle with full
alarm system
Activation
► Switch off the ignition and exit the vehicle.
► Lock or deadlock the vehicle using the
remote control or with the “Keyless Entry and
Starting” system.
When the monitoring system is active, the red
indicator lamp in the button flashes once per
second and the direction indicators come on for
about 2 seconds.
The exterior perimeter monitoring is activated
after 5 seconds and the interior volumetric and
anti-tilt monitoring after 45 seconds.
Page 46 of 308

44
Ease of use and comfort
Driving position
Correct seating position
Adopting a good driving position helps improve
your comfort and protection.
It also optimises interior and exterior visibility as
well as access to controls.
Whether or not the vehicle has certain seat
adjustments described in this section depends
on the trim level and country of sale.
Driver’s side
Sit fully back in the seat with your pelvis, back
and shoulders in contact with the seat backrest.
Adjust the seat cushion height so that your eyes
are level with the centre of the windscreen.
The head room (from the roof) should be at least
10 cm.
Adjust the longitudinal position of the seat so
that you can fully depress the pedals with legs
slightly flexed.
The distance between your knees and the
dashboard should be at least 10 cm, for easy
access to the dashboard controls.
Adjust the backrest angle to as vertical a position
as possible; never tilt it more than 25°.
Adjust the head restraint so that its upper edge is
level with the top of your head.
Adjust the length of the seat cushion to support
your thighs.
Adjust the lumbar support so that it conforms to
the shape of your spine.
Adjust the steering wheel so that it is at least 25
cm from your sternum and you can hold it with
your arms slightly bent.
The steering wheel should not hide the
instrument panel.
As a safety precaution, adjust the seats only when the vehicle is stationary.
If your vehicle has electric seats, the
ignition must be on to adjust them.
Passenger’s side
Sit fully back in the seat with your pelvis, back
and shoulders in contact with the seat backrest.
Adjust the longitudinal position of the seat so that
you are at a distance of at least 25 cm from the
dashboard.
Adjust the head restraint so that its upper edge is
level with the top of your head.
Before moving off
Adjust the interior and exterior door mirrors to
reduce blind spots.
Fasten your seat belt: place the diagonal belt in
the middle of your shoulder and adjust the lap
belt so that it is tightened across your pelvis.
Ensure that all passengers have fastened their
seat belts correctly.
If your vehicle has electric door mirrors,
the ignition must be on to adjust them.
When driving
Maintain a good driving position and hold the
steering wheel with both hands at the 'quarter to
three' position, so that you can easily and quickly
reach the controls behind and near the steering
wheel.
Never adjust the seats or steering wheel
when driving.
Always keep your feet on the floor.
Front seats
Before moving the seat backwards,
ensure that there is no person or object
that might prevent the full travel of the seat.
There is a risk of trapping or pinching
passengers if present in the rear seats or of
jamming the seat if large objects are placed
on the floor behind the seat.
Page 47 of 308
45
Ease of use and comfort
3When driving
Maintain a good driving position and hold the
steering wheel with both hands at the 'quarter to
three' position, so that you can easily and quickly
reach the controls behind and near the steering
wheel.
Never adjust the seats or steering wheel
when driving.
Always keep your feet on the floor.
Front seats
Before moving the seat backwards,
ensure that there is no person or object
that might prevent the full travel of the seat.
There is a risk of trapping or pinching
passengers if present in the rear seats or of
jamming the seat if large objects are placed
on the floor behind the seat.
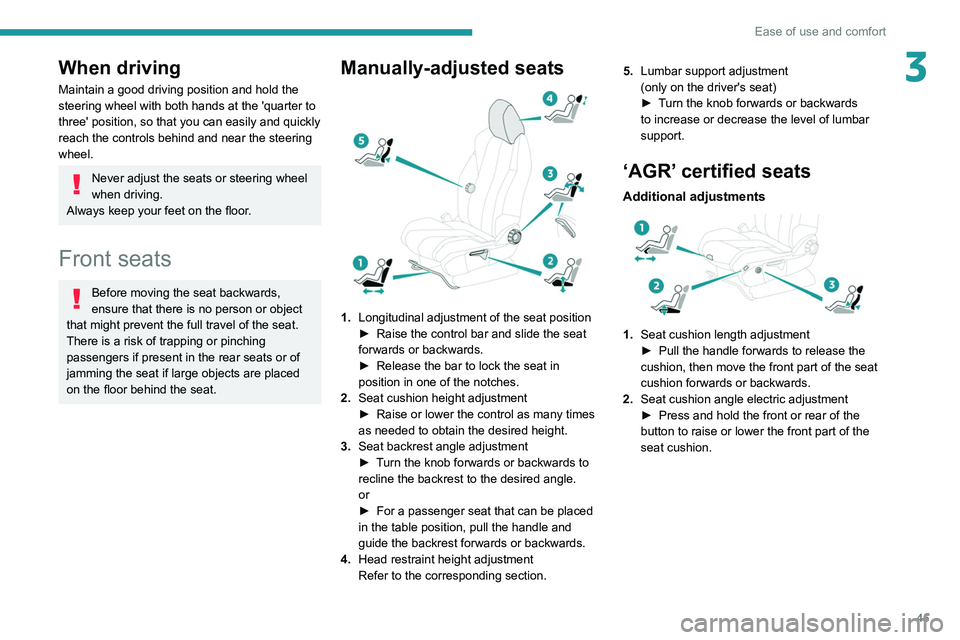
Manually-adjusted seats
1. Longitudinal adjustment of the seat position
►
Raise the control bar and slide the seat
forwards or backwards.
►
Release the bar to lock the seat in
position in one of the notches.
2. Seat cushion height adjustment
►
Raise or lower the control as many times
as needed to obtain the desired height.
3. Seat backrest angle adjustment
►
T
urn the knob forwards or backwards to
recline the backrest to the desired angle.
or
►
For a passenger seat that can be placed
in the table position, pull the handle and
guide the backrest forwards or backwards.
4. Head restraint height adjustment
Refer to the corresponding section. 5.
Lumbar support adjustment
(only on the driver's seat)
►
T
urn the knob forwards or backwards
to increase or decrease the level of lumbar
support.
‘AGR’ certified seats
Additional adjustments
1. Seat cushion length adjustment
►
Pull the handle forwards to release the
cushion, then move the front part of the seat
cushion forwards or backwards.
2. Seat cushion angle electric adjustment
►
Press and hold the front or rear of the
button to raise or lower the front part of the
seat cushion.
Page 50 of 308
48
Ease of use and comfort
► Enter the vehicle and switch the ignition on.
► Adjust your seat and the door mirrors.
►
Press button
M, then press button 1 or 2
within 4 seconds.
An audible signal confirms the memorisation.
Memorising a new position cancels the previous
position.
Recalling a stored position
Ignition on or engine running
► Press button 1 or 2 to recall the
corresponding position.
An audible signal sounds when the adjustment
is finished.
You can interrupt the current movement by
pressing button M, 1 or 2 or by using one of the
seat adjustment controls.
A stored position cannot be recalled while
driving.
Recalling stored positions is deactivated 45
seconds after switching off the ignition.
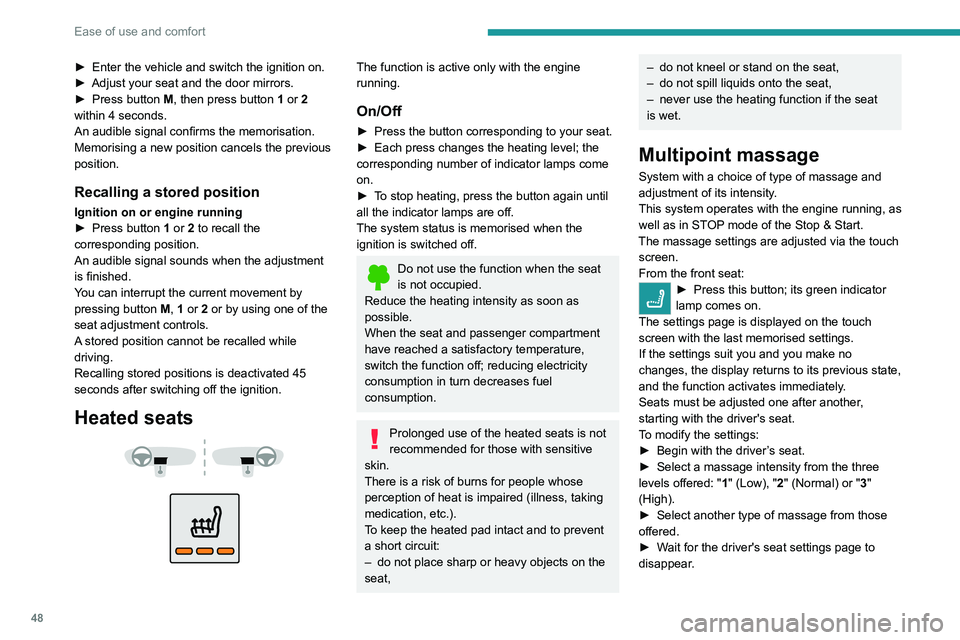
Heated seats
The function is active only with the engine
running.
On/Off
► Press the button corresponding to your seat.
► Each press changes the heating level; the
corresponding number of indicator lamps come
on.
►
T
o stop heating, press the button again until
all the indicator lamps are off.
The system status is memorised when the
ignition is switched off.
Do not use the function when the seat
is not occupied.
Reduce the heating intensity as soon as
possible.
When the seat and passenger compartment
have reached a satisfactory temperature,
switch the function off; reducing electricity
consumption in turn decreases fuel
consumption.
Prolonged use of the heated seats is not
recommended for those with sensitive
skin.
There is a risk of burns for people whose
perception of heat is impaired (illness, taking
medication, etc.).
To keep the heated pad intact and to prevent
a short circuit:
–
do not place sharp or heavy objects on the
seat,
– do not kneel or stand on the seat,
– do not spill liquids onto the seat,
–
never use the heating function if the seat
is wet.
Multipoint massage
System with a choice of type of massage and
adjustment of its intensity.
This system operates with the engine running, as
well as in STOP mode of the
Stop & Start.
The massage settings are adjusted via the touch screen.
From the front seat:
► Press this button; its green indicator
lamp comes on.
The settings page is displayed on the touch
screen with the last memorised settings.
If the settings suit you and you make no
changes, the display returns to its previous state,
and the function activates immediately
.
Seats must be adjusted one after another,
starting with the driver's seat.
To modify the settings:
►
Begin with the driver
’s seat.
►
Select a massage intensity from the three
levels offered: " 1
" (Low), "2" (Normal) or "3"
(High).
►
Select another type of massage from those
offered.
►
W
ait for the driver's seat settings page to
disappear.
► Next, proceed with the passenger's seat in
the same way.
The changes are applied immediately.
Once activated, the system starts a one hour
massage cycle, made up of sequences of 6
minutes of massage followed by 3 minutes at
rest.
The system automatically stops at the end of the
cycle; the indicator lamp for the button goes off.
Steering wheel
adjustment
► When stationary, pull the control to release
the steering wheel.
► Adjust the height and reach to suit your
driving position.
► Push the control lever to lock the steering
wheel.
As a safety measure, these adjustments must only be carried out with the vehicle
stationary.
Page 51 of 308
49
Ease of use and comfort
3► Next, proceed with the passenger's seat in
the same way .
The changes are applied immediately.
Once activated, the system starts a one hour
massage cycle, made up of sequences of 6
minutes of massage followed by 3 minutes at
rest.
The system automatically stops at the end of the
cycle; the indicator lamp for the button goes off.
Steering wheel
adjustment
► When stationary , pull the control to release
the steering wheel.
►
Adjust the height and reach to suit your
driving position.
►
Push the control lever to lock the steering
wheel.
As a safety measure, these adjustments must only be carried out with the vehicle
stationary.
Mirrors
Door mirrors
As a safety measure, the mirrors should be adjusted to reduce the "blind spots".
The objects that you see in the mirrors are
in fact closer than they appear. Take this
into account in order to correctly judge the
distance of vehicles approaching from behind.
Demisting/Defrosting
If the vehicle is so equipped, demisting/
defrosting of the heated door mirrors is
performed when the heated rear screen is
switched on.
For more information on Rear screen
demisting/defrosting , refer to the
corresponding section.
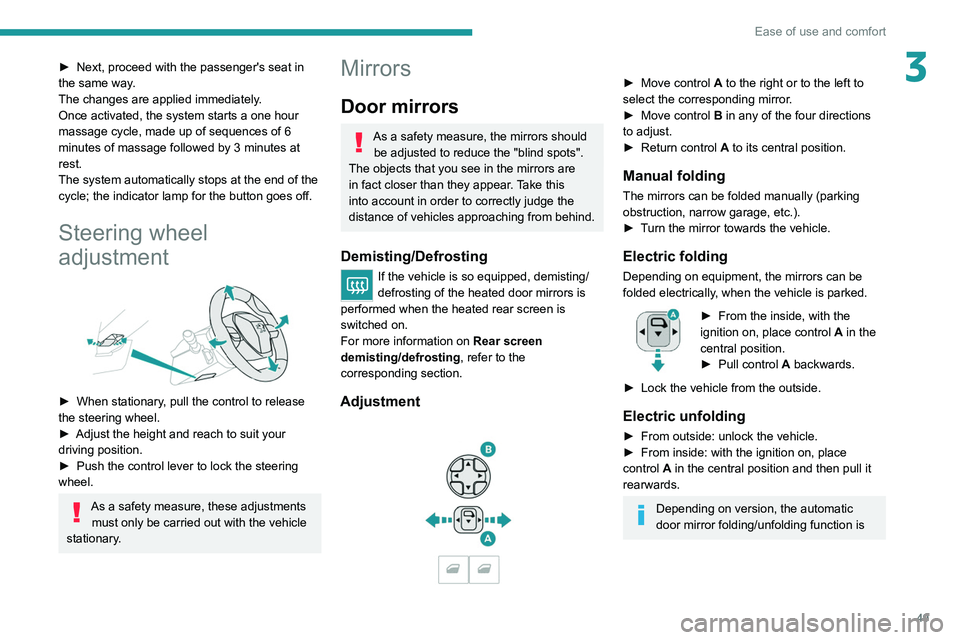
Adjustment
► Move control A to the right or to the left to
select the corresponding mirror.
►
Move control
B in any of the four directions
to adjust.
►
Return control A
to its central position.
Manual folding
The mirrors can be folded manually (parking
obstruction, narrow garage, etc.).
►
T
urn the mirror towards the vehicle.
Electric folding
Depending on equipment, the mirrors can be
folded electrically, when the vehicle is parked.
► From the inside, with the
ignition on, place control A
in the
central position.
►
Pull control A
backwards.
►
Lock the vehicle from the outside.
Electric unfolding
► From outside: unlock the vehicle.
► From inside: with the ignition on, place
control
A in the central position and then pull it
rearwards.
Depending on version, the automatic
door mirror folding/unfolding function is
Page 68 of 308
66
Ease of use and comfort
sequences are performed without the vehicle
being used, the programming will be deactivated.
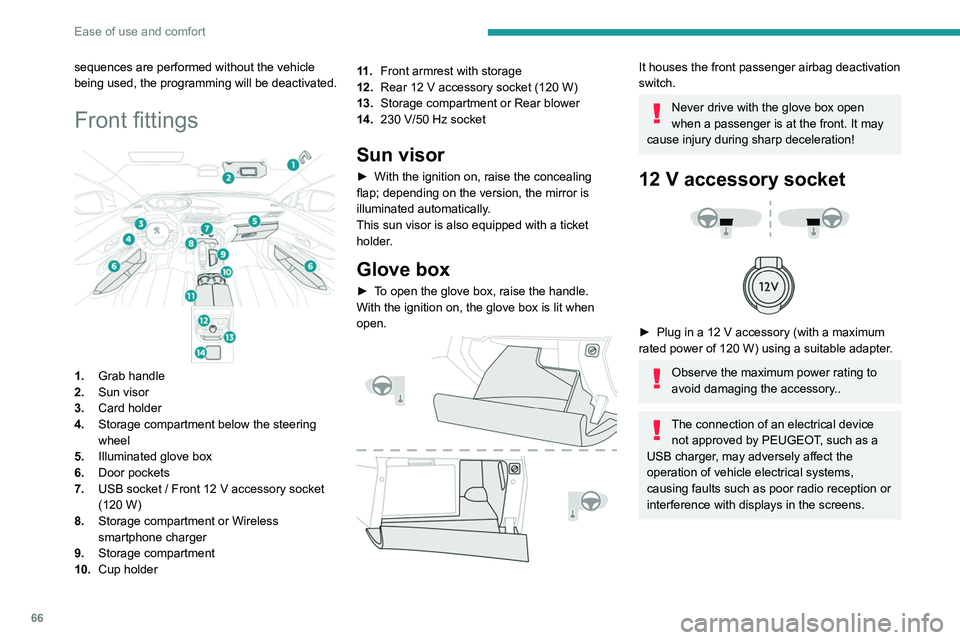
Front fittings
1.Grab handle
2. Sun visor
3. Card holder
4. Storage compartment below the steering
wheel
5. Illuminated glove box
6. Door pockets
7. USB socket
/ Front 12 V accessory socket
(120
W)
8. Storage compartment or Wireless
smartphone charger
9. Storage compartment
10. Cup holder 11 .
Front armrest with storage
12. Rear 12 V accessory socket (120 W)
13. Storage compartment or Rear blower
14. 230 V/50 Hz socket
Sun visor
► With the ignition on, raise the concealing
flap; depending on the version, the mirror is
illuminated automatically
.
This sun visor is also equipped with a ticket
holder.
Glove box
► To open the glove box, raise the handle.
With the ignition on, the glove box is lit when
open.
It houses the front passenger airbag deactivation
switch.
Never drive with the glove box open
when a passenger is at the front. It may
cause injury during sharp deceleration!
12 V accessory socket
► Plug in a 12 V accessory (with a maximum
rated power of 120 W) using a suitable adapter.
Observe the maximum power rating to
avoid damaging the accessory..
The connection of an electrical device not approved by PEUGEOT, such as a
USB charger, may adversely affect the
operation of vehicle electrical systems,
causing faults such as poor radio reception or
interference with displays in the screens.
USB socket
It allows the connection of a portable device or a
USB memory stick.
It reads audio files that are sent to your audio
system and played via the vehicle's speakers.
These files can be managed using the steering-
mounted controls or those on the touch screen.
Depending on version, the
USB port located on the
centre console also allows a smartphone to be
connected by MirrorLink
TM, Android Auto® or
CarPlay®, so that certain smartphone
applications can be used on the touch screen.
To achieve the best results, it is necessary to
use a cable made or approved by the device
manufacturer.
These applications can be managed using the
steering mounted controls or those of the audio
system.
Page 69 of 308
67
Ease of use and comfort
3USB socket
It allows the connection of a portable device or a
USB memory stick.
It reads audio files that are sent to your audio
system and played via the vehicle's speakers.
These files can be managed using the steering-
mounted controls or those on the touch screen.
Depending on version, the
USB port located on the
centre console also allows a smartphone to be
connected by MirrorLink
TM, Android Auto® or
CarPlay®, so that certain smartphone
applications can be used on the touch screen.
To achieve the best results, it is necessary to
use a cable made or approved by the device
manufacturer.
These applications can be managed using the
steering mounted controls or those of the audio
system.
When the USB port is used, the portable
device charges automatically.
A message is displayed if the power drawn
by the portable device exceeds the current
supplied by the vehicle.
For more information on how to use this
equipment, refer to the Audio equipment
and telematics section .
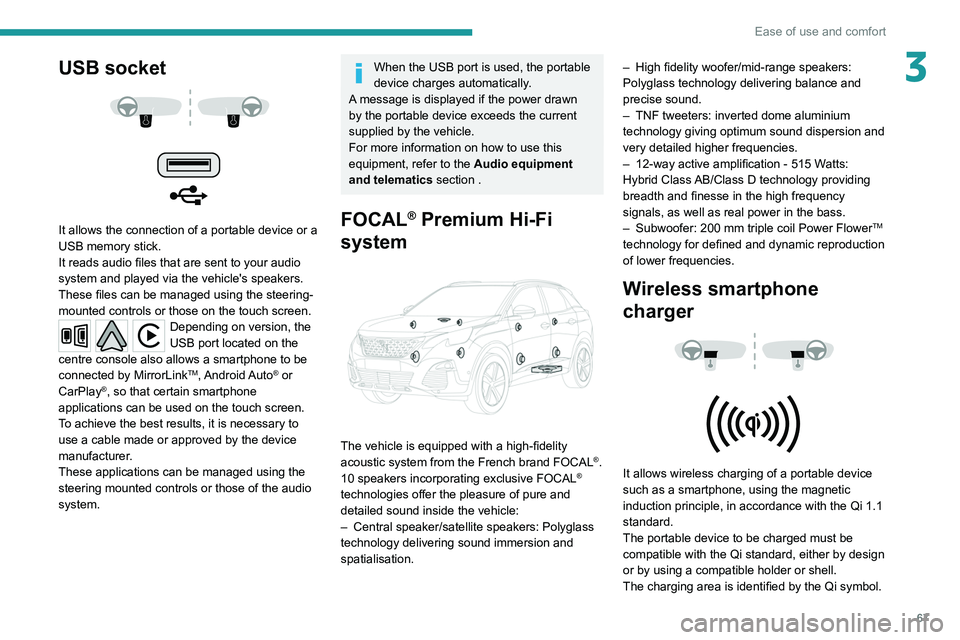
FOCAL® Premium Hi-Fi
system
The vehicle is equipped with a high-fidelity
acoustic system from the French brand FOCAL®.
10 speakers incorporating exclusive FOCAL®
technologies offer the pleasure of pure and
detailed sound inside the vehicle:
–
Central speaker/satellite speakers: Polyglass
technology delivering sound immersion and
spatialisation. –
High fidelity woofer/mid-range speakers:
Polyglass technology delivering balance and
precise sound.
–
TNF tweeters: inverted dome aluminium
technology giving optimum sound dispersion and
very detailed higher frequencies.
–
12-way active amplification - 515 W
atts:
Hybrid Class AB/Class D technology providing
breadth and finesse in the high frequency
signals, as well as real power in the bass.
–
Subwoofer: 200
mm triple coil Power Flower
TM
technology for defined and dynamic reproduction
of lower frequencies.
Wireless smartphone
charger
It allows wireless charging of a portable device
such as a smartphone, using the magnetic
induction principle, in accordance with the Qi 1.1
standard.
The portable device to be charged must be
compatible with the Qi standard, either by design
or by using a compatible holder or shell.
The charging area is identified by the Qi symbol.
Page 84 of 308
82
Lighting and visibility
The system becomes operational when the vehicle exceeds 16 mph (25 km/h).
When the speed falls below 9 mph (15 km/h),
the function is no longer operational.
Activation/Deactivation
It is set via the Driving / Vehicle touch
screen menu.
The state of the system stays in the memory
when switching off the ignition.
Operation
If the ambient light level is sufficient and/or the
traffic conditions do not allow the main beam
headlamps to be lit:
– The dipped beam head lamps
remain lit. These indicator lamps
come on on the instrument panel.
If the ambient light level is very low and traffic
conditions permit:
– The main beam headla mps
come on automatically. These
indicator lamps come on on the instrument
panel.
The function is deactivated if the fog lamps are
switched on or the system detects dense fog.
When the fog lamps are switched off or the
vehicle leaves the area of dense fog, the function
is automatically reactivated.
This indicator lamp goes out when the function is deactivated.
Pause
If the situation requires a change of headlamp
beam, the driver can take over at any time.
►
A
"headlamp flash" pauses the function:
•
if the "AUT
O" and "Dipped beam" indicator
lamps were on, the system changes to main
beam,
•
if the "AUT
O" and "Main beam" indicator
lamps were on, the system changes to
dipped beam.
To reactivate the system, flash the headlamps
again.
The system may be disrupted or not work correctly:
–
When visibility conditions are poor
(snowfall, heavy rain, etc.).
–
If the windscreen in front of the camera is
dirty
, misted or obscured (for example, by a
sticker).
–
If the vehicle is facing highly reflective
signs.
When the system detects thick fog, it
temporarily deactivates the function.
The system is not able to detect:
–
Road users that do not have their own
lighting, such as pedestrians.
–
V
ehicles whose lighting is obscured (for
example, vehicles driving behind a safety
barrier on a motorway).
–
V
ehicles at the top or bottom of a steep
slope, on winding roads, on crossroads.
Clean the windscreen regularly,
particularly the area in front of the
camera.
The internal surface of the windscreen can
also become misted around the camera.
In humid and cold weather, demist the
windscreen regularly.
Do not allow snow to accumulate on the
bonnet or roof of the vehicle as this could
obstruct the detection camera.
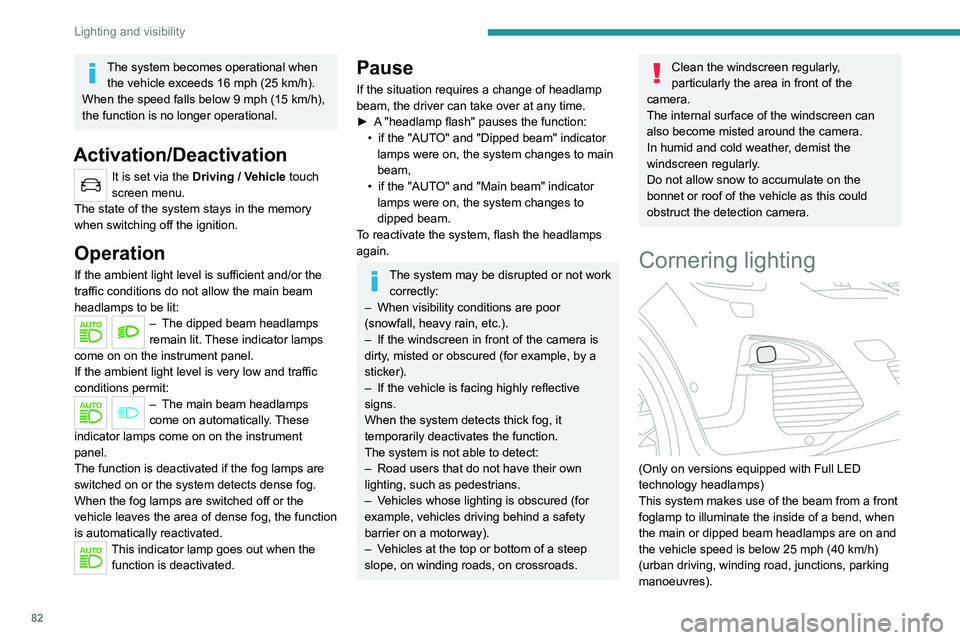
Cornering lighting
(Only on versions equipped with Full LED
technology headlamps)
This system makes use of the beam from a front
foglamp to illuminate the inside of a bend, when
the main or dipped beam headlamps are on and
the vehicle speed is below 25 mph (40
km/h)
(urban driving, winding road, junctions, parking
manoeuvres).
Without/With cornering lighting
Activation / Deactivation
It is set via the Driving / Vehicle touch
screen menu.
Switching on / off
This system starts:
– when the corresponding direction indicator is
switched on.
or
– from a certain angle of rotation of the steering
wheel.
It becomes inactive:
– below a certain angle of rotation of the
steering wheel.
– above 25 mph (40 km/h).
– when reverse gear is engaged.
Wiper control stalk
In wintry conditions, remove snow, ice or
frost present on the windscreen, around