2020 PEUGEOT 3008 park assist
[x] Cancel search: park assistPage 4 of 308

2
Contents
■
Overview
■
Eco-driving
1Instruments
Digital instrument panels 9
Warning and indicator lamps 11
Indicators 17
Manual test 20
Distance recorders 20
Lighting dimmer 21
Trip computer 22
Monochrome screen C 23
Touch screen 24
Remote features (Hybrid) 27
2Access
Remote control / Key 28
Keyless Entry and Starting 30
Central locking 32
Back-up procedures 32
Alarm 34
Doors 36
Boot 36
Hands-free tailgate 37
Electric windows 41
Panoramic sunroof 42
3Ease of use and comfort
Driving position 44
Front seats 45
Steering wheel adjustment 49
Mirrors 49
Rear bench seat 51
Rear seats 52
Seat modularity 57
Heating and Ventilation 58
Manual air conditioning 59
Semi-automatic mono-zone air conditioning 59
Dual-zone automatic air conditioning 61
Front demisting - defrosting 64
Heated windscreen 64
Rear screen demisting/defrosting 65
Thermal pre-conditioning (Hybrid) 65
Front fittings 66
Courtesy lamps 69
Interior ambience lighting 70
Rear fittings 70
Boot fittings 72
4Lighting and visibility
Exterior lighting control stalk 78
Direction indicators 79
Headlamp beam height adjustment 80
Automatic illumination of headlamps 80
Guide-me-home and welcome lighting 81
Automatic headlamp dipping 81
Cornering lighting 82
Wiper control stalk 83
Changing a wiper blade 85
Automatic wipers 85
5Safety
General safety recommendations 87
Hazard warning lamps 87
Horn 88
Pedestrian horn
(Hybrid) 88
Emergency or assistance call 88
Electronic stability control (ESC) 90
Advanced Grip Control 92
Hill Assist Descent Control 93
Seat belts 94
Airbags 97
Child seats 100
Deactivating the front passenger airbag 102
ISOFIX child seats 105
i-Size child seats 11 0
Child lock 11 2
6Driving
Driving recommendations 11 3
Starting / Switching off the engine
with the key
11 4
Starting / Switching off the engine
with Keyless Entry and Starting
11 6
Starting hybrid vehicles 11 6
Electric parking brake 11 8
6-speed manual gearbox 120
Automatic gearbox 121
Electric automatic gearbox (Hybrid) 124
Hill start assist 125
Dynamic pack 125
Driving modes 126
Gear efficiency indicator 127
Stop & Start 127
Under-inflation detection 129
Driving and manoeuvring aids -
General recommendations
130
Memorising speeds 132
Speed Limit Recognition and
Recommendation
132
Speed limiter 135
Cruise control 137
Drive Assist Plus 139
Adaptive Cruise Control 139
Page 5 of 308

3
Contents
bit.ly/helpPSA
Lane positioning assist 143
Active Safety Brake with Distance Alert and
Intelligent emergency braking assistance
146
Distraction detection 149
Lane Departure Warning System 150
Active Lane Keeping Assistance 150
Blind Spot Monitoring System 154
Active Blind Spot Monitoring System 155
Parking sensors 155
Visiopark 1 - Visiopark 2 157
Park Assist 161
7Practical information
Compatibility of fuels 166
Refuelling 166
Misfuel prevention (Diesel) 167
Hybrid system 167
Charging the traction battery (Hybrid) 171
Towing device 173
Towing device with quickly detachable
towball
174
Roof bars 176
Snow chains 177
Very cold climate screen 178
Energy economy mode 179
Bonnet 179
Engine compartment 180
Checking levels 181
Checks 183
AdBlue® (BlueHDi) 185
Free-wheeling 187
Advice on care and maintenance 187
8In the event of a breakdown
Warning triangle 190
Running out of fuel (Diesel) 190
Tool kit 191
Temporary puncture repair kit 193
Spare wheel 196
Changing a bulb 201
Changing a fuse 205
12
V battery 210
Accessory batteries (Hybrid) 213
Towing the vehicle 215
9Technical data
Engine technical data and towed loads 219
Petrol engines 220
Diesel engines 222
Hybrid engines 225
Dimensions 226
Identification markings 227
10Bluetooth® audio system
First steps 228
Steering mounted controls 229
Menus 229
Radio 230
DAB (Digital Audio Broadcasting) radio 231
Media 232
Telephone 234
Frequently asked questions 237
11PEUGEOT Connect Radio
First steps 240
Steering mounted controls 241
Menus 242
Applications 243
Radio 243
DAB (Digital Audio Broadcasting) radio 245
Media 245
Telephone 247
Settings 250
Frequently asked questions 252
12PEUGEOT Connect Nav
First steps 254
Steering mounted controls 255
Menus 255
Voice commands 257
Navigation 260
Connected navigation 263
Applications 265
Radio 268
DAB (Digital Audio Broadcasting) radio 269
Media 270
Telephone 271
Settings 274
Frequently asked questions 275
■
Alphabetical index
Access to additional videos
Page 6 of 308

4
Overview
Instruments and controls
These illustrations and descriptions are provided
for information. The presence and location of
some elements vary depending on the version
or trim level.
1.Sunroof and blind controls
Front courtesy/map reading lamps
Warning lamp display for seat belts and front
passenger airbag
Emergency call/Assistance call
2. Interior rear view mirror/Driving in ELECTRIC
mode indicator LED
3. Head-up digital display
4. Fusebox
5. Bonnet release
6. Door mirror and electric window control panel
7. Front passenger airbag
8. Glove box
Deactivation of the front passenger airbag
1.Monochrome screen with Bluetooth audio
system
or
Touch screen with PEUGEOT Connect Radio
or PEUGEOT Connect Nav 2.
12 V socket/USB socket
Wireless smartphone charger
3. Advanced Grip Control
Driving mode selector
Hill Assist Descent Control
4. Key ignition switch
or
"START/STOP” button
5. Gearbox control
“SPORT" button
6. Electric parking brake
Steering-mounted controls
1.External lighting controls/Direction indicators
2. Wiper controls/Screenwash/Trip computer
3. Automatic gearbox control paddles
Page 17 of 308

15
Instruments
1Dynamic stability control (DSC)/Anti-slip
regulation (ASR)
Fixed.
The system is deactivated.
The DSC/ASR system is reactivated
automatically when the vehicle is restarted, and
from around 31 mph (50
km/h).
Below 31
mph (50 km/h), it can be reactivated
manually.
Flashing.
The DSC/ASR adjustment is activated if
there is a loss of grip or trajectory.
Fixed.
The DSC/ASR system has a fault.
Carry out (3).
Emergency brake malfunction (with
electric parking brake)
Fixed, accompanied by the
message "Parking brake fault".
Emergency braking does not deliver optimal
performance.
If automatic release is not available, use manual
release or carry out (3).
Hill start assistFixed, accompanied by the
message "Anti roll-back system
fault".
The system has a fault.
Carry out (3).
Lane Departure Warning SystemFlashing, accompanied by an audible
signal.
A lane marking has been crossed on the left or
right.
Turn the steering wheel in the opposite direction
to return to the correct trajectory.
Fixed, accompanied by the display of a
message.
The system has a fault.
Stay alert and drive carefully, then carry out (3).
Active Lane Keeping AssistanceFixed.
The system has been automatically
deactivated or placed on standby.
Flashing.
You are about to cross a broken
lane marking without operating the direction
indicators.
The system is activated, then corrects the
trajectory on the side of the lane marking
detected.
Fixed, accompanied by the display
of a message and an audible
signal.
The system has a fault.
Carry out (3).
Lane positioning assistFixed, accompanied by the
Service warning lamp.
The system has a fault.
Carry out (3).
AirbagsFixed.
One of the airbags or seat belt
pretensioners is faulty.
Carry out (3).
Front passenger airbag (ON)Fixed.
The front passenger airbag is activated.
The control is in the "ON" position.
In this case, do NOT install a "rearward
facing" child seat on the front passenger seat
- Risk of serious injury!
Front passenger airbag (OFF)Fixed.
The front passenger airbag is deactivated.
The control is in the "OFF" position.
A "rearward facing" child seat can be installed,
unless there is a fault with the airbags (Airbags
warning lamp on).
Under-inflationFixed.
The pressure in one or more tyres is too
low.
Check the pressure of the tyres as soon as
possible.
Reinitialise the detection system after adjusting
the pressure.
Under-inflation warning lamp
flashing then fixed and Service
warning lamp fixed.
The tyre pressure monitoring system is faulty.
Under-inflation detection is no longer monitored.
Page 26 of 308

24
Instruments
For more information on the "Multimedia"
application, refer to the "Audio equipment and
telematics" section.
"Telephone" menu
With the audio system switched on, this
menu allows you to make a call, view the
calls log or the various telephone directories.
For more information on the "Telephone"
application, refer to the "Audio equipment and
telematics" section.
"Connections" menu
With the audio system on, this menu
allows a Bluetooth device (telephone,
media player) to be paired and the connection
mode
to be defined (hands-free, playing audio
files).
For more information on the "Connections"
application, refer to the "Audio equipment and
telematics" section.
"Personalisation-
configuration" menu
This menu gives access to the following functions:
– "Define
the vehicle parameters",
–
"Choice of language",
–
"Display configuration".
Defining the vehicle parameters
This menu allows the activation or deactivation
of the following equipment, depending on
version:
–
"Access to the vehicle" :
•
"Plip action".
For more information on the Remote control
,
and in particular the selective unlocking of the
driver's door, refer to the "Access" section.
–
"Comfort"
:
• “Rear
wipe in reverse gear".
• “Parking
assistance".
•
"Fatigue Detection System".
For more information on the
W
iper control
stalk,
refer to the “Lighting and visibility” section.
For more information on the
Parking sensors
or the Fatigue detection system, refer to the
“Driving”
section.
–
"Driving assistance" :
•
"Auto. emergency braking" (Active Safety
Brake).
•
"Speed recommendation" (Road signs
recognition).
•
"Tyre inflation" (Tyre under-inflation
detection).
For more information on the
Active Safety
Brake ,
the Road signs recognition or the
Tyre
under-inflation detection ,
refer to the “Driving”
section.
Choice of language
This menu allows selection of the language used
by the screen and the instrument panel.
Display configuration
This menu gives access to the following settings:
– "Choice of units",
–
"Date and time adjustment",
–
"Display parameters",
–
"Brightness".
Adjusting the date and time
► Press
the "7" or "8" button to display the
"Display
configuration" menu, then press
OK
.
► Press
the "5" or "6" button to select the
"Date and time adjustment" button, then press
OK.
► Press
the "7" or "8" button to select the
setting
to modify. Confirm by pressing
OK
, then
modify
the setting and confirm again to save the
modification.
►
Adjust the settings one by one, confirming
with the
OK button.
► Press
the "5" or "6" button, then the OK
button to select the OK
box and confirm or the
Back button to cancel.
As a safety measure, the driver must only
carry out operations that require
sustained attention when stationary.
Touch screen
This system gives access to the following elements:
–
Permanent display of the time and the exterior
temperature (a blue warning lamp appears if
there is a risk of ice).
Page 27 of 308

25
Instruments
1– Vehicle functions and equipment setting
menus.
–
Audio system and telephone controls and
display of related information.
–
Display of visual manoeuvring aid functions
(visual parking sensor information, Park
Assist,
etc.).
–
Internet services and display of
related
information.
–
Navigation system controls and
display
of related information (depending on
version).
For safety reasons, always stop the
vehicle before performing operations
that require sustained attention.
Some functions are not accessible while
driving.
Recommendations
This screen is of the capacitive type.
Do not use pointed objects on the touch screen.
Do not touch the touch screen with wet hands.
Use a soft, clean cloth to clean the touch screen.
* The TomTom Traffic logo displayed on the map confirms the availability of connected navigation services. For more information, refer to the connected
navigation section.
**
Depend
ing on equipment.
Principles
► Use the buttons arranged below the touch
screen for access to the menus, then press the
virtual buttons on the touch screen.
Some menus may display across two pages:
press the "
OPTIONS" button to access the
second page.
After a few moments with no action on the second page, the first page is
displayed automatically.
To deactivate/activate a function, select " OFF"
or "ON".
Settings for a function
Access to additional information on the function
Confirm
Return to the previous page or confirm
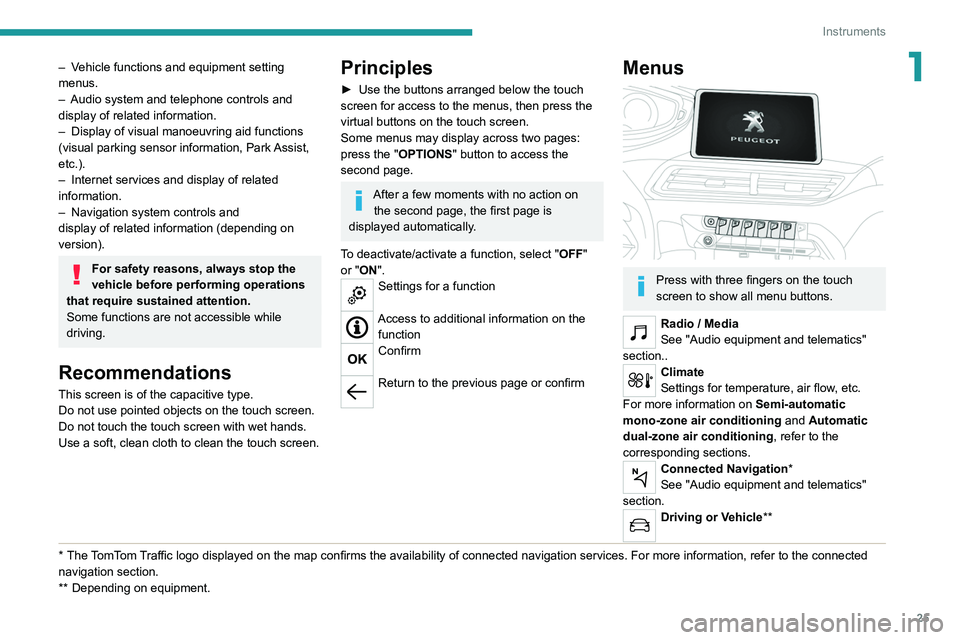
Menus
Press with three fingers on the touch
screen to show all menu buttons.
Radio / Media
See "Audio equipment and telematics"
section..
Climate
Settings for temperature, air flow, etc.
For more information on Semi-automatic
mono-zone air conditioning and Automatic
dual-zone air conditioning , refer to the
corresponding sections.
Connected Navigation*
See "Audio equipment and telematics"
section.
Driving or Vehicle**
Page 52 of 308

50
Ease of use and comfort
configured via the Driving / Vehicle touch
screen menu.
Otherwise, this setting can be carried out at a
PEUGEOT dealer or a qualified workshop.
Automatic tilting in reverse gear
Depending on version, this function allows to
automatically tilt the mirrors downwards to assist
with parking manoeuvres in reverse gear.
With the engine running, on engaging reverse
gear, the mirror glasses tilt downwards.
They return to their initial position:
–
A
few seconds after coming out of reverse
gear.
–
Once the vehicle speed exceeds 6 mph
(10
km/h).
–
When the engine is switched off.
This function is set via the Driving/Vehicle touch screen menu.
Interior rear view mirror
Manual model
Day/night position
► Pull the lever to change to the anti-dazzle
"night” position.
►
Push the lever to change to the normal "day"
position.
Adjustment
►
Set the mirror to the normal “day” position.
Automatic "electrochrome" model
This system automatically and progressively
transitions between day and night modes, using
a sensor that measures the light entering from
the rear of the vehicle.
To ensure optimum visibility during your manoeuvres, the mirror lightens
automatically when reverse gear is engaged.
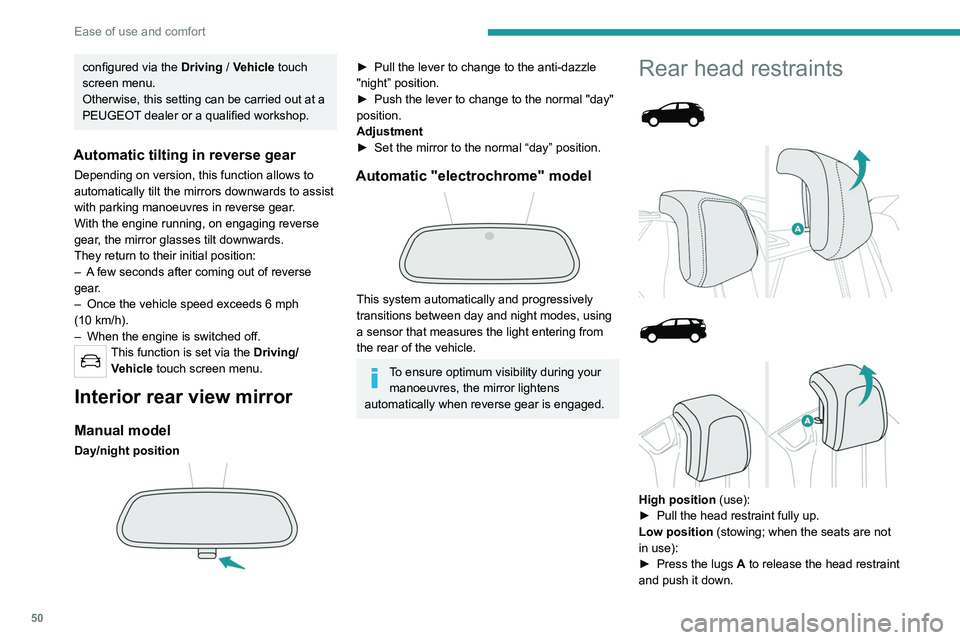
Rear head restraints
High position (use):
► Pull the head restraint fully up.
Low position (stowing; when the seats are not
in use):
►
Press the lugs
A to release the head restraint
and push it down.
The rear head restraints can be removed.
Removing a head restraint
► Pull the head restraint fully up.
► Press the lugs A to release the head restraint
and remove it completely.
► Store the head restraint.
Refitting a head restraint
► Insert the head restraint rods into the guides
in the corresponding seat backrest.
► Push the head restraint down as far as it will
go.
► Press the lugs A to release the head restraint
and push it down.
Never drive with passengers seated at
the rear when the head restraints are
removed; the head restraints should be in
place and in the high position.
The head restraint for the central seat and those for the side seats
are not interchangeable.
Rear bench seat
Bench seat with fixed cushions and split folding
backrests (2/3-1/3) to adapt the boot load space.
Page 117 of 308

11 5
Driving
6Once the state of charge of the battery drops to
the reserve level, the system switches to energy
economy mode : the power supply is cut off
automatically to preserve the remaining battery
charge.
Starting the engine
With the parking brake applied:
► With a manual gearbox, place the gear lever
in neutral then fully depress the clutch pedal.
►
With an
automatic gearbox, place the gear
selector in mode N or P then fully depress the
brake pedal.
►
Insert the key into the ignition switch; the
system recognises the code.
►
Unlock
the steering column by simultaneously
turning the steering wheel and the key.
In certain cases, you may have to apply
significant force to move the steering
wheel (wheels on full lock, for example).
►
With a
petrol engine , operate the starter
motor by turning the key to position 3 without
pressing the accelerator pedal, until the engine
starts. Once the engine starts, release the key.
With petrol engines , after a cold start,
preheating the catalytic converter can
cause
noticeable engine vibrations for
anything up to 2 minutes while stationary with
the engine running (accelerated idle speed).
► With a Diesel engine, turn the key to position
2, ignition on, to operate the engine preheating
system.
Wait until this warning lamp goes off in the
instrument panel, then operate the starter
motor by turning the key to position 3 without
pressing the accelerator pedal, until the engine
starts. Once the engine starts, release the key.
In wintry conditions, the warning lamp
may stay on for a longer period. When
the engine is hot, the warning lamp does not
come on.
If the engine does not start straight away,
switch off the ignition. Wait a few
seconds before operating the starter motor
again. If the engine does not start after a few
attempts, do not keep trying - risk of
damaging the starter motor and the engine.
Contact a PEUGEOT dealer or a qualified
workshop.
In mild conditions, do not leave the
engine at idle to warm up but move off
straight away and drive at moderate speed.
Switching off the engine
► Immobilise the vehicle.
► With the engine at idle, turn the key to
position 1
.
►
Remove the key from the ignition switch.
► To lock the steering column, turn the steering
wheel until it locks.
To facilitate unlocking of the steering column, it is recommended that the
wheels be returned to the straight ahead
position before switching off the engine.
Never switch off the ignition before the
complete immobilisation of the vehicle.
With the engine off, the braking and steering
assistance systems are also cut off - risk of
loss of control of the vehicle!
Check that the parking brake is correctly
applied, particularly on sloping ground.
When leaving the vehicle, keep the key in
your possession and lock the vehicle.
Energy economy mode
After the engine has stopped (position 1. Stop),
for a maximum combined duration of about thirty
minutes, you can still use functions such as the
audio and telematics system, courtesy lamps,
windscreen wipers, dipped beam headlamps,
etc.
For more information on Energy
economy mode, refer to the
corresponding section.