2020 PEUGEOT 3008 high beam
[x] Cancel search: high beamPage 18 of 308

16
Instruments
Check the tyre pressures as soon as possible
and carry out (3).
Stop & StartFixed, accompanied by the display of a
message.
The Stop & Start system has been deactivated
manually.
The engine will not switch off at the next traffic
stop.
Fixed.
The Stop & Start system has been
deactivated automatically.
The engine will not switch off at the next traffic
stop, if the exterior temperature is:
–
below 0°C.
–
above +35°C.
Flashing then fixed, accompanied by a
message.
The system has a fault.
Carry out (3).
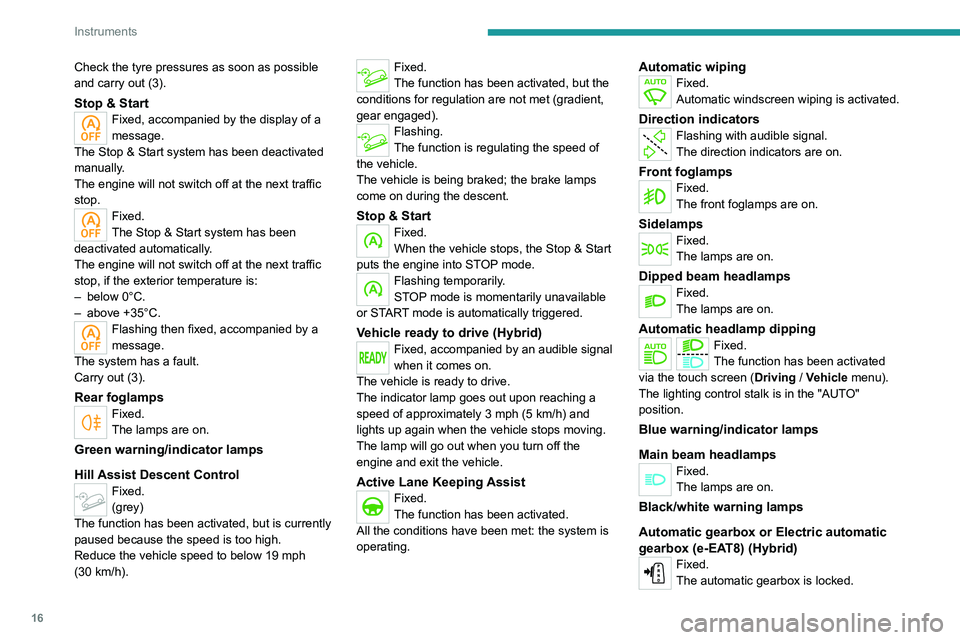
Rear foglampsFixed.
The lamps are on.
Green warning/indicator lamps
Hill Assist Descent Control
Fixed.
(grey)
The function has been activated, but is currently
paused because the speed is too high.
Reduce the vehicle speed to below 19 mph
(30
km/h).
Fixed.
The function has been activated, but the
conditions for regulation are not met (gradient,
gear engaged).
Flashing.
The function is regulating the speed of
the vehicle.
The vehicle is being braked; the brake lamps
come on during the descent.
Stop & StartFixed.
When the vehicle stops, the Stop & Start
puts the engine into STOP mode.
Flashing temporarily.
STOP mode is momentarily unavailable
or START mode is automatically triggered.
Vehicle ready to drive (Hybrid)Fixed, accompanied by an audible signal
when it comes on.
The vehicle is ready to drive.
The indicator lamp goes out upon reaching a
speed of approximately 3 mph (5
km/h) and
lights up again when the vehicle stops moving.
The lamp will go out when you turn off the
engine and exit the vehicle.
Active Lane Keeping AssistFixed.
The function has been activated.
All the conditions have been met: the system is
operating.
Automatic wipingFixed.
Automatic windscreen wiping is activated.
Direction indicatorsFlashing with audible signal.
The direction indicators are on.
Front foglampsFixed.
The front foglamps are on.
SidelampsFixed.
The lamps are on.
Dipped beam headlampsFixed.
The lamps are on.
Automatic headlamp dippingFixed.
The function has been activated
via the touch screen (Driving
/ Vehicle menu).
The lighting control stalk is in the "AUTO"
position.
Blue warning/indicator lamps
Main beam headlamps
Fixed.
The lamps are on.
Black/white warning lamps
Automatic gearbox or Electric automatic
gearbox (e-EAT8) (Hybrid)
Fixed.
The automatic gearbox is locked.
Page 31 of 308

29
Access
2Selective unlocking and opening of
the tailgate
By default, selective unlocking of the tailgate
is deactivated and its motorised operation is
activated.
► Press and hold this button to unlock
the boot and trigger the motorised
opening of the tailgate.
The doors and fuel filler flap remain locked.
If selective unlocking of the tailgate is
deactivated, pressing the button unlocks
the whole vehicle.
If motorised operation of the tailgate is
deactivated, pressing the button releases
the tailgate.
To lock the vehicle, it is necessary to close
the tailgate again.
Locking the vehicle
Normal locking
► Press the locking button.
The locking, and the activation of the alarm
depending on version, is confirmed by the
lighting of the direction indicators.
Depending on version, the door mirrors fold.
An access (door or boot) that is not properly closed prevents locking of the
vehicle. However, if the vehicle has an alarm,
it will be activated after 45
seconds.
If the vehicle is unlocked and there is no
action at the doors or boot, the vehicle will
automatically lock itself again after about
30
seconds. If the vehicle has an alarm, it will
also be reactivated automatically.
Deadlocking
► Press the locking button again within
5 seconds to deadlock the vehicle (confirmed by
the temporary lighting of the direction indicators).
Deadlocking renders the interior door
controls inoperative. It also deactivates
the central locking button.
The horn remains operational.
Never leave anyone inside the vehicle
when it is deadlocked.
Closing the windows
Holding the locking button pressed for
more than 3 seconds closes the windows.
When closing the windows, ensure that
no person or object could prevent their
correct closure.
To leave the windows partly open on versions
with alarm, you must first deactivate the
interior volumetric alarm protection.
For more information on the Alarm, refer to
the corresponding section.
Locating the vehicle
This function helps you to spot your vehicle from
a distance, with the vehicle locked:
–
The direction indicators flash for approximately
10 seconds.
–
The door mirror spotlamps come on.
–
The courtesy lamps come on.
► Press this button.
Remote lighting of the
lamps
Availability of this function depends on version.► Press this button. The sidelamps,
dipped beam headlamps, number plate
lamps and door mirror spotlamps come on for 30
seconds.
Pressing again before the end of the timed
period switches off the lamps immediately.
Advice
Remote control
The remote control is a sensitive, high-
frequency device; avoid handling it in your
pocket, due to the risk of unintentionally
unlocking the vehicle.
Avoid pressing the remote control buttons
while out of range of the vehicle, due to
Page 80 of 308

78
Lighting and visibility
Exterior lighting control
stalk
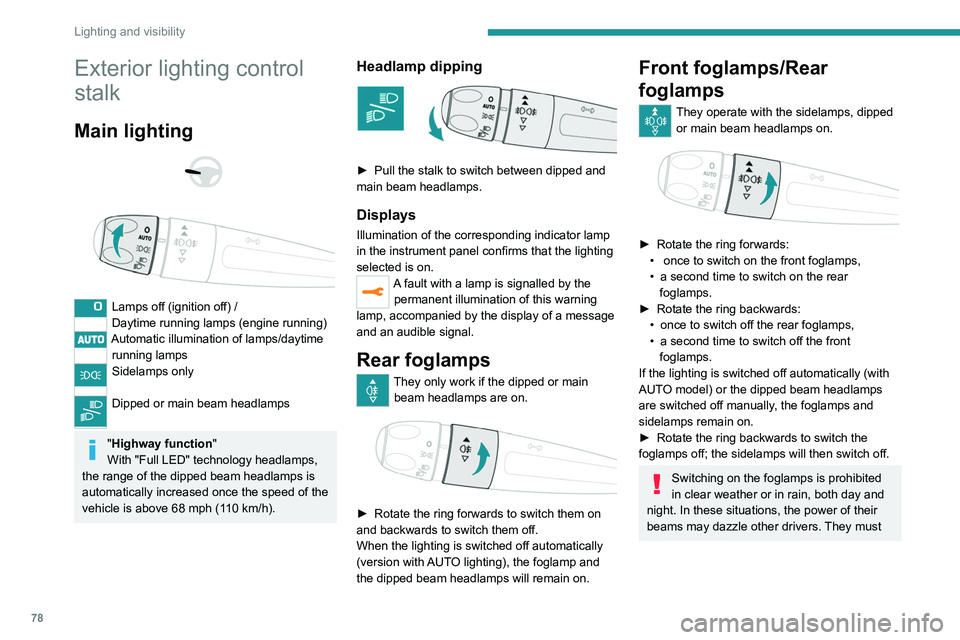
Main lighting
Lamps off (ignition off) /
Daytime running lamps (engine running)
Automatic illumination of lamps/daytime running lamps
Sidelamps only
Dipped or main beam headlamps
"Highway function "
With "Full LED" technology headlamps,
the range of the dipped beam headlamps is
automatically increased once the speed of the
vehicle is above 68 mph (110
km/h).
Headlamp dipping
► Pull the stalk to switch between dipped and
main beam headlamps.
Displays
Illumination of the corresponding indicator lamp
in the instrument panel confirms that the lighting
selected is on.
A fault with a lamp is signalled by the permanent illumination of this warning
lamp, accompanied by the display of a message
and an audible signal.
Rear foglamps
They only work if the dipped or main beam headlamps are on.
► Rotate the ring forwards to switch them on
and backwards to switch them off.
When the lighting is switched off automatically
(version with
AUTO lighting), the foglamp and
the dipped beam headlamps will remain on.
Front foglamps/Rear
foglamps
They operate with the sidelamps, dipped or main beam headlamps on.
► Rotate the ring forwards:
• once to switch on the front foglamps,
•
a second time to switch on the rear
foglamps.
►
Rotate
the ring backwards:
•
once to switch off the rear foglamps,
•
a second time to switch off the front
foglamps.
If the lighting is switched off automatically (with
AUT
O model) or the dipped beam headlamps
are switched off manually, the foglamps and
sidelamps remain on.
►
Rotate the ring backwards to switch the
foglamps off; the sidelamps will then switch off.
Switching on the foglamps is prohibited
in clear weather or in rain, both day and
night. In these situations, the power of their
beams may dazzle other drivers. They must
only be used in fog or falling snow (rules may
vary depending on country).
Do not forget to switch off the foglamps when
they are no longer necessary.
Switching off of the lamps when the
ignition is switched off
When the ignition is switched off, all of the
lamps turn off immediately, except for dipped
beam headlamps if automatic guide-me-home
lighting is activated.
Switching on the lamps after
switching off the ignition
If the driver's door is opened, a temporary
audible signal warns the driver that the lamps
are on.
In some weather conditions (e.g. low
temperature or humidity), misting on the
internal surface of the glass of the headlamps
and rear lamps is normal, and will disappear
after the lamps have been on for a few
minutes.
Never look too closely at the luminous
beam of Full LED headlamps: risk of
serious eye injury!
Travelling abroad
Vehicles equipped with halogen
headlamps:
Page 84 of 308

82
Lighting and visibility
The system becomes operational when the vehicle exceeds 16 mph (25 km/h).
When the speed falls below 9 mph (15 km/h),
the function is no longer operational.
Activation/Deactivation
It is set via the Driving / Vehicle touch
screen menu.
The state of the system stays in the memory
when switching off the ignition.
Operation
If the ambient light level is sufficient and/or the
traffic conditions do not allow the main beam
headlamps to be lit:
– The dipped beam head lamps
remain lit. These indicator lamps
come on on the instrument panel.
If the ambient light level is very low and traffic
conditions permit:
– The main beam headla mps
come on automatically. These
indicator lamps come on on the instrument
panel.
The function is deactivated if the fog lamps are
switched on or the system detects dense fog.
When the fog lamps are switched off or the
vehicle leaves the area of dense fog, the function
is automatically reactivated.
This indicator lamp goes out when the function is deactivated.
Pause
If the situation requires a change of headlamp
beam, the driver can take over at any time.
►
A
"headlamp flash" pauses the function:
•
if the "AUT
O" and "Dipped beam" indicator
lamps were on, the system changes to main
beam,
•
if the "AUT
O" and "Main beam" indicator
lamps were on, the system changes to
dipped beam.
To reactivate the system, flash the headlamps
again.
The system may be disrupted or not work correctly:
–
When visibility conditions are poor
(snowfall, heavy rain, etc.).
–
If the windscreen in front of the camera is
dirty
, misted or obscured (for example, by a
sticker).
–
If the vehicle is facing highly reflective
signs.
When the system detects thick fog, it
temporarily deactivates the function.
The system is not able to detect:
–
Road users that do not have their own
lighting, such as pedestrians.
–
V
ehicles whose lighting is obscured (for
example, vehicles driving behind a safety
barrier on a motorway).
–
V
ehicles at the top or bottom of a steep
slope, on winding roads, on crossroads.
Clean the windscreen regularly,
particularly the area in front of the
camera.
The internal surface of the windscreen can
also become misted around the camera.
In humid and cold weather, demist the
windscreen regularly.
Do not allow snow to accumulate on the
bonnet or roof of the vehicle as this could
obstruct the detection camera.
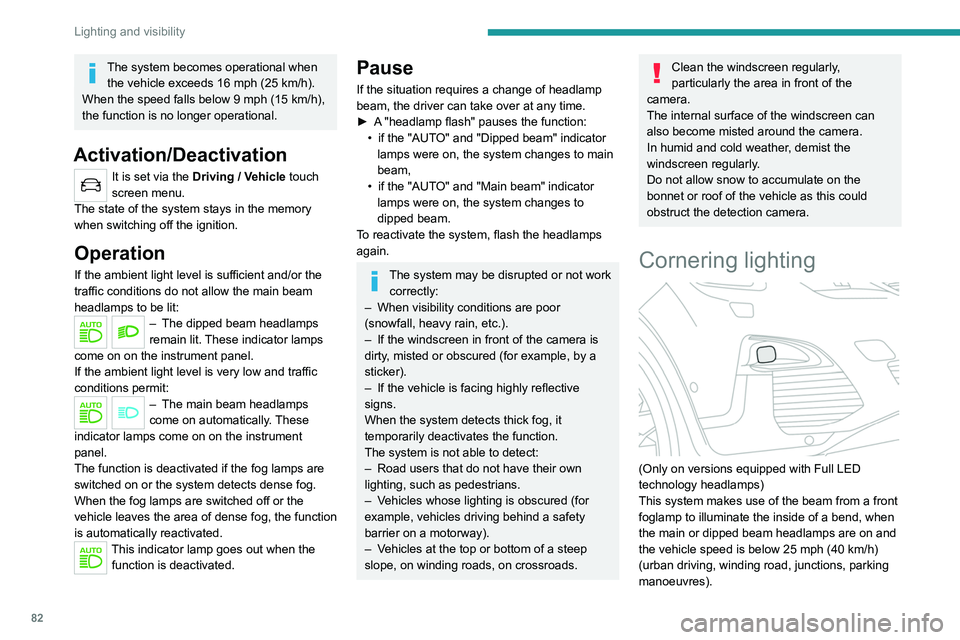
Cornering lighting
(Only on versions equipped with Full LED
technology headlamps)
This system makes use of the beam from a front
foglamp to illuminate the inside of a bend, when
the main or dipped beam headlamps are on and
the vehicle speed is below 25 mph (40
km/h)
(urban driving, winding road, junctions, parking
manoeuvres).
Without/With cornering lighting
Activation / Deactivation
It is set via the Driving / Vehicle touch
screen menu.
Switching on / off
This system starts:
– when the corresponding direction indicator is
switched on.
or
– from a certain angle of rotation of the steering
wheel.
It becomes inactive:
– below a certain angle of rotation of the
steering wheel.
– above 25 mph (40 km/h).
– when reverse gear is engaged.
Wiper control stalk
In wintry conditions, remove snow, ice or
frost present on the windscreen, around
Page 116 of 308

11 4
Driving
Once the state of charge of the battery drops to
the reserve level, the system switches to energy
economy mode : the power supply is cut off
automatically to preserve the remaining battery
charge.
Starting the engine
With the parking brake applied:
► With a manual gearbox, place the gear lever
in neutral then fully depress the clutch pedal.
► With an automatic gearbox, place the gear
selector in mode N or P then fully depress the
brake pedal.
► Insert the key into the ignition switch; the
system recognises the code.
► Unlock the steering column by simultaneously
turning the steering wheel and the key.
In certain cases, you may have to apply
significant force to move the steering
wheel (wheels on full lock, for example).
► With a petrol engine , operate the starter
motor by turning the key to position 3 without
pressing the accelerator pedal, until the engine
starts. Once the engine starts, release the key.
With petrol engines , after a cold start,
preheating the catalytic converter can
cause noticeable engine vibrations for
anything up to 2 minutes while stationary with
the engine running (accelerated idle speed).
If the outside temperature is high, let the
engine idle for 1 to 2 minutes after the
vehicle comes to a stop, to help it to cool.
Before setting off
Nose weight
► Distribute the load in the trailer so that the
heaviest items are as close as possible to the
axle and the nose weight (at the point where it
joins your vehicle) approaches the maximum
permitted without exceeding it.
Tyres
► Check the tyre pressures of the towing
vehicle and of the trailer , observing the
recommended pressures.
Lighting
► Check the electrical signalling on the trailer
and the headlamp beam height of your vehicle.
If a genuine PEUGEOT towing device is
used, the rear parking sensors will be
deactivated automatically to avoid the audible
signal.
When driving
Cooling
Towing a trailer uphill causes the coolant
temperature to increase. The maximum towable
load depends on the gradient and the exterior temperature. The fan’s cooling capacity does not
increase with engine speed.
►
Reduce speed and lower the engine speed to
limit heating up.
In all cases, pay attention to the coolant
temperature.
If this warning lamp and the STOP
warning lamp come on, stop the
vehicle and switch off the engine as soon as
possible.
Brakes
Braking distances are increased when towing a
trailer. To avoid overheating the brakes, the use
of engine braking is recommended.
Side wind
Bear in mind that the vehicle will be more
susceptible to wind when towing.
Anti-theft protection
Electronic immobiliser
The keys include an electronic engine
immobiliser system, whose secret code must be
recognised in order for starting to be possible.
If the system malfunctions, indicated by the
display of a message, the engine will not start.
Contact a PEUGEOT dealer.
Starting / Switching off the
engine with the key
Key ignition switch
It has 3 positions:
– 1. Stop: inserting and removing the key ,
steering column locked.
–
2. Ignition : steering column unlocked, ignition
on, Diesel preheating, engine running.
–
3. Starting
.
Avoid attaching heavy objects to the key or the remote control. It would weigh
down on its shaft in the ignition switch and
could cause a malfunction.
Ignition on position
It allows the use of the vehicle's electric
equipment or portable devices to be charged.
Page 212 of 308

210
In the event of a breakdown
Version 2 (Eco)
Fuse N°Rating (A)Functions
F16 25 AFront foglamps.
F18 10 ARight-hand main beam headlamp.
F19 10 ALeft-hand main beam headlamp.
12 V battery
Procedure for starting the engine using another
battery or charging a discharged battery.
Lead-acid starter batteries
These batteries contain harmful
substances (sulphuric acid and lead).
They must be disposed of in accordance
with regulations and must never under any
circumstances be discarded with household
waste.
Take used remote control batteries and
vehicle batteries to a special collection point.
Protect your eyes and face before
handling the battery.
All operations on the battery must be carried
out in a well ventilated area and away from
naked flames and sources of sparks, to avoid
any risk of explosion or fire.
Wash your hands afterwards.
Access to the battery
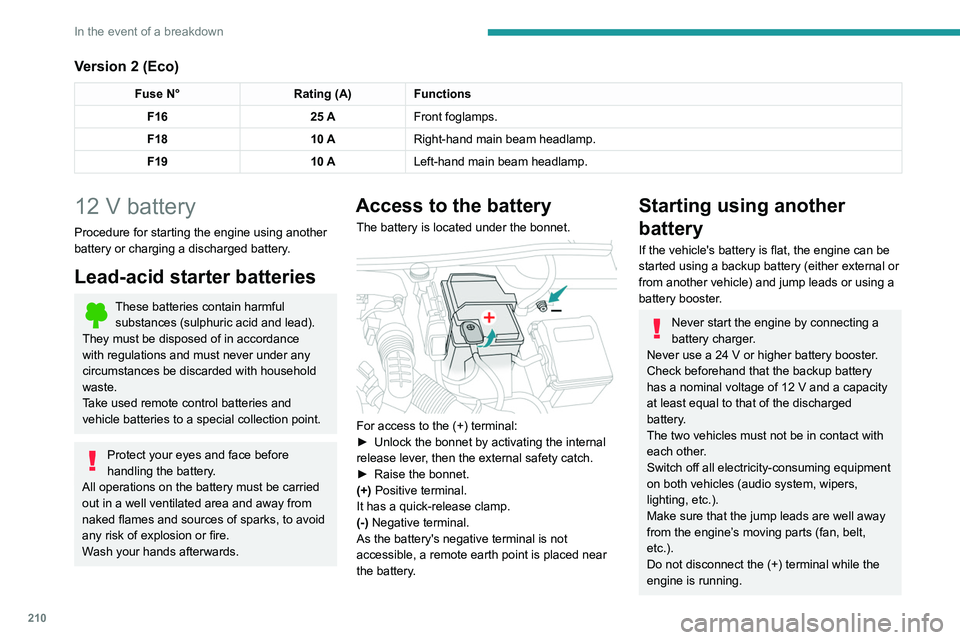
The battery is located under the bonnet.
For access to the (+) terminal:
► Unlock the bonnet by activating the internal
release lever
, then the external safety catch.
►
Raise the bonnet.
(+)
Positive terminal.
It has a quick-release clamp.
(-) Negative terminal.
As the battery's negative terminal is not
accessible, a remote earth point is placed near
the battery.
Starting using another
battery
If the vehicle's battery is flat, the engine can be
started using a backup battery (either external or
from another vehicle) and jump leads or using a
battery booster.
Never start the engine by connecting a
battery charger.
Never use a 24
V or higher battery booster.
Check beforehand that the backup battery
has a nominal voltage of 12
V and a capacity
at least equal to that of the discharged
battery.
The two vehicles must not be in contact with
each other.
Switch off all electricity-consuming equipment
on both vehicles (audio system, wipers,
lighting, etc.).
Make sure that the jump leads are well away
from the engine’s moving parts (fan, belt,
etc.).
Do not disconnect the (+) terminal while the
engine is running.