2020 NISSAN MURANO interior lights
[x] Cancel search: interior lightsPage 109 of 518

Storage ........................................2-55
Front-door pockets ......................... 2-55
Console side pockets .......................2-55
Seatback pockets ........................... 2-55
Storagetrays................................ 2-56
Glovebox ................................... 2-57
Console box ................................. 2-57
Overhead sunglasses storage ...............2-58
Cup holders ................................. 2-58
Cargo area storage bin ......................2-60
Luggage hooks ............................. 2-60
Roofrack.................................... 2-61
Windows ....................................... 2-62
Power windows ............................. 2-62
Power moonroof (if so equipped) ...............2-64
........................ 2-64
Interior lights ................................... 2-67Console light
................................ 2-67
Map lights ................................... 2-68
Personal lights .............................. 2-68
Luggage compartment light ................2-68
HomeLink® Universal Transceiver
(if so equipped) ................................. 2-68
Programming HomeLink® ...................2-69
Programming HomeLink® for Canadian
customers and gate openers ...............2-70
Operating the HomeLink® Universal
Transceiver .................................. 2-71
Programming trouble-diagnosis ............2-71
Clearing the programmed information ......2-72
Reprogramming a single HomeLink®
button ...................................... 2-72
If your vehicle is stolen ......................2-72
Page 150 of 518

When the vehicle speed lowers to less than
approximately 16 mph (25 km/h), the head-
light uses the low beam.
To turn off the High Beam Assist system,
turn the headlight switch to the
posi-
tion or select the low beam position by
placing the lever in the neutral position.
Ambient image sensor maintenance
The ambient image sensorO1for the High
Beam Assist system is located in front of
the inside mirror. To maintain the proper
operation of the high beam assist system
and prevent a system malfunction, be sure
to observe the following:
• Always keep the windshield clean.
• Do not attach a sticker (including trans- parent material) or install an accessory
near the ambient image sensor.
• Do not strike or damage the areas around the ambient image sensor. Do
not touch the sensor lens that is located
on the ambient image sensor. If the ambient image sensor is damaged
due to an accident, it is recommended that
you visit a NISSAN dealer.
Battery saver system
The battery saver system automatically
turns off the following lights af ter a period
of time when the ignition switch is placed in
the OFF position and the doors are closed:
• Headlights, when the headlight switch is
in the
orposition
• Interior lights, when lef t in the ON position
Af ter the headlights automatically turn off
with the headlight switch in the
orposition, the headlights will illuminate
again if the headlight switch is moved to
the OFF position and then turned to the
orposition.
CAUTION
Even though the battery saver feature
automatically turns off the headlights
af ter a period of time, you should turn
the headlight switch to the OFF posi-
tion when the engine is not running to
avoid discharging the vehicle battery.
LSD2712
2-42Instruments and controls
Page 175 of 518

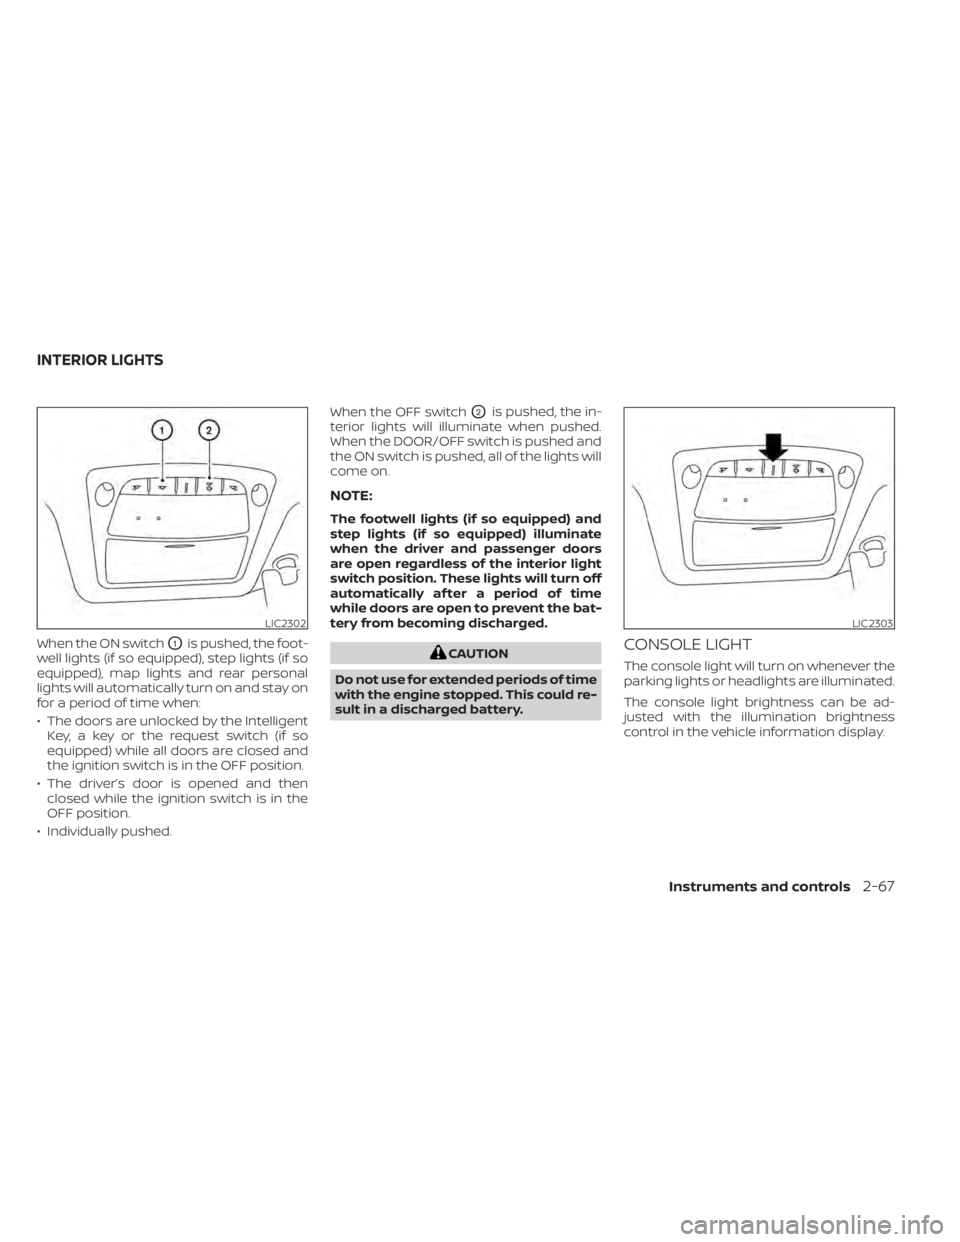
When the ON switchO1is pushed, the foot-
well lights (if so equipped), step lights (if so
equipped), map lights and rear personal
lights will automatically turn on and stay on
for a period of time when:
• The doors are unlocked by the Intelligent Key, a key or the request switch (if so
equipped) while all doors are closed and
the ignition switch is in the OFF position.
• The driver’s door is opened and then closed while the ignition switch is in the
OFF position.
• Individually pushed. When the OFF switch
O2is pushed, the in-
terior lights will illuminate when pushed.
When the DOOR/OFF switch is pushed and
the ON switch is pushed, all of the lights will
come on.
NOTE:
The footwell lights (if so equipped) and
step lights (if so equipped) illuminate
when the driver and passenger doors
are open regardless of the interior light
switch position. These lights will turn off
automatically af ter a period of time
while doors are open to prevent the bat-
tery from becoming discharged.
CAUTION
Do not use for extended periods of time
with the engine stopped. This could re-
sult in a discharged battery.CONSOLE LIGHT
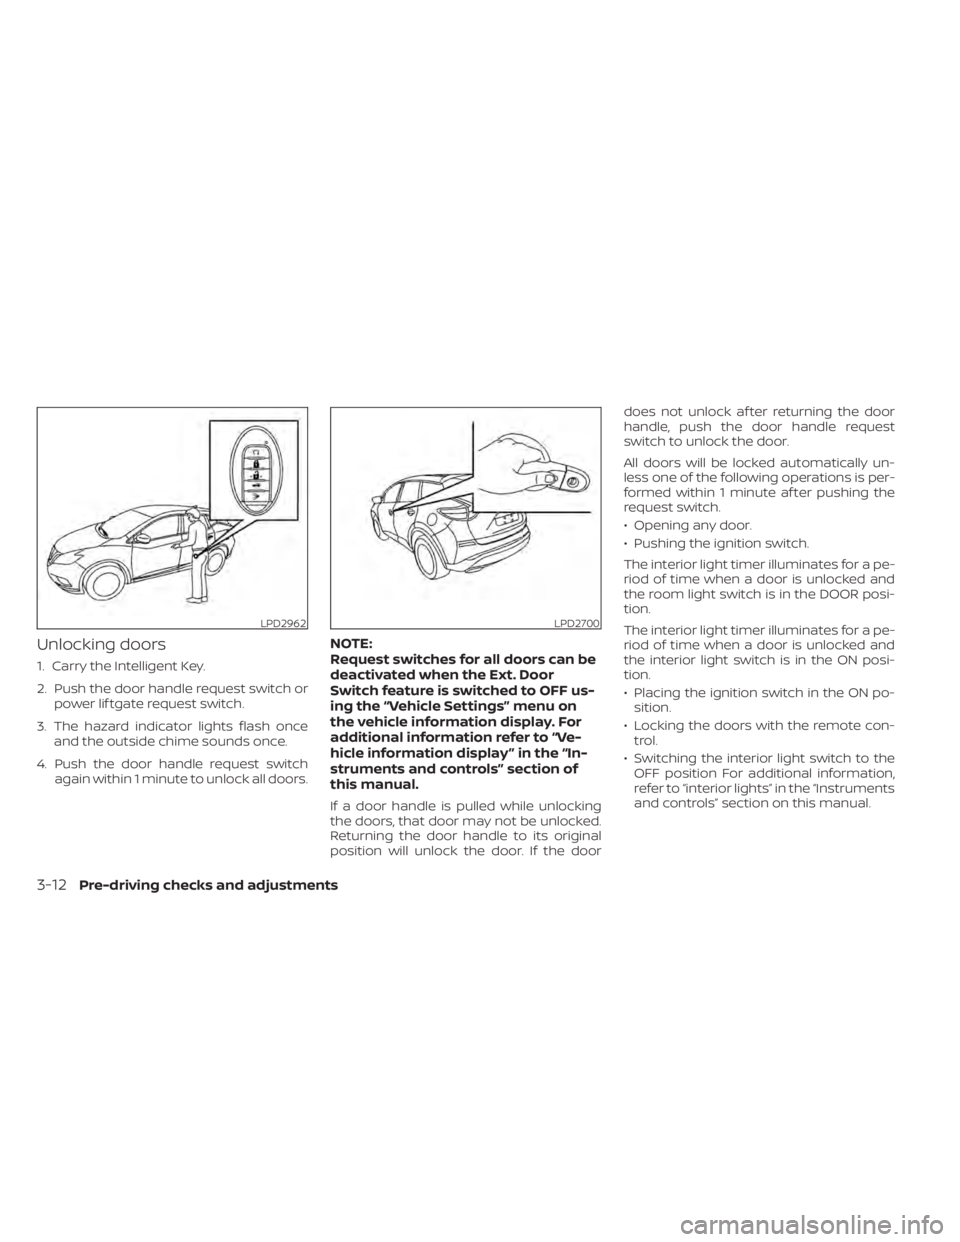
The console light will turn on whenever the
parking lights or headlights are illuminated.
The console light brightness can be ad-
justed with the illumination brightness
control in the vehicle information display.
LIC2302LIC2303
INTERIOR LIGHTS
Instruments and controls2-67
Page 194 of 518

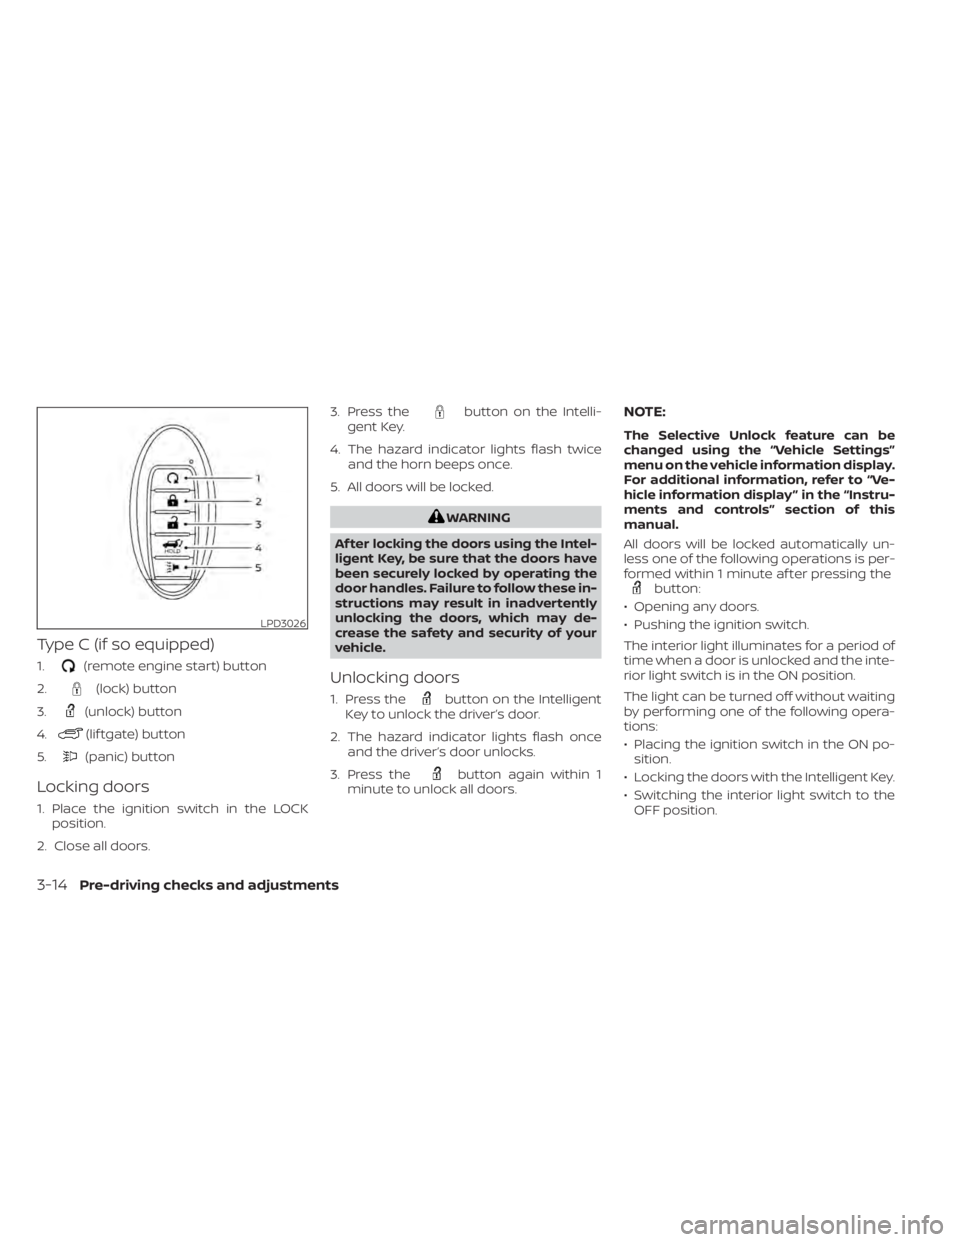
Unlocking doors
1. Carry the Intelligent Key.
2. Push the door handle request switch orpower lif tgate request switch.
3. The hazard indicator lights flash once and the outside chime sounds once.
4. Push the door handle request switch again within 1 minute to unlock all doors.
NOTE:
Request switches for all doors can be
deactivated when the Ext. Door
Switch feature is switched to OFF us-
ing the “Vehicle Settings” menu on
the vehicle information display. For
additional information refer to “Ve-
hicle information display ” in the “In-
struments and controls” section of
this manual.
If a door handle is pulled while unlocking
the doors, that door may not be unlocked.
Returning the door handle to its original
position will unlock the door. If the door does not unlock af ter returning the door
handle, push the door handle request
switch to unlock the door.
All doors will be locked automatically un-
less one of the following operations is per-
formed within 1 minute af ter pushing the
request switch.
• Opening any door.
• Pushing the ignition switch.
The interior light timer illuminates for a pe-
riod of time when a door is unlocked and
the room light switch is in the DOOR posi-
tion.
The interior light timer illuminates for a pe-
riod of time when a door is unlocked and
the interior light switch is in the ON posi-
tion.
• Placing the ignition switch in the ON po-
sition.
• Locking the doors with the remote con- trol.
• Switching the interior light switch to the OFF position For additional information,
refer to “interior lights” in the “Instruments
and controls” section on this manual.
LPD2962LPD2700
3-12Pre-driving checks and adjustments
Page 196 of 518

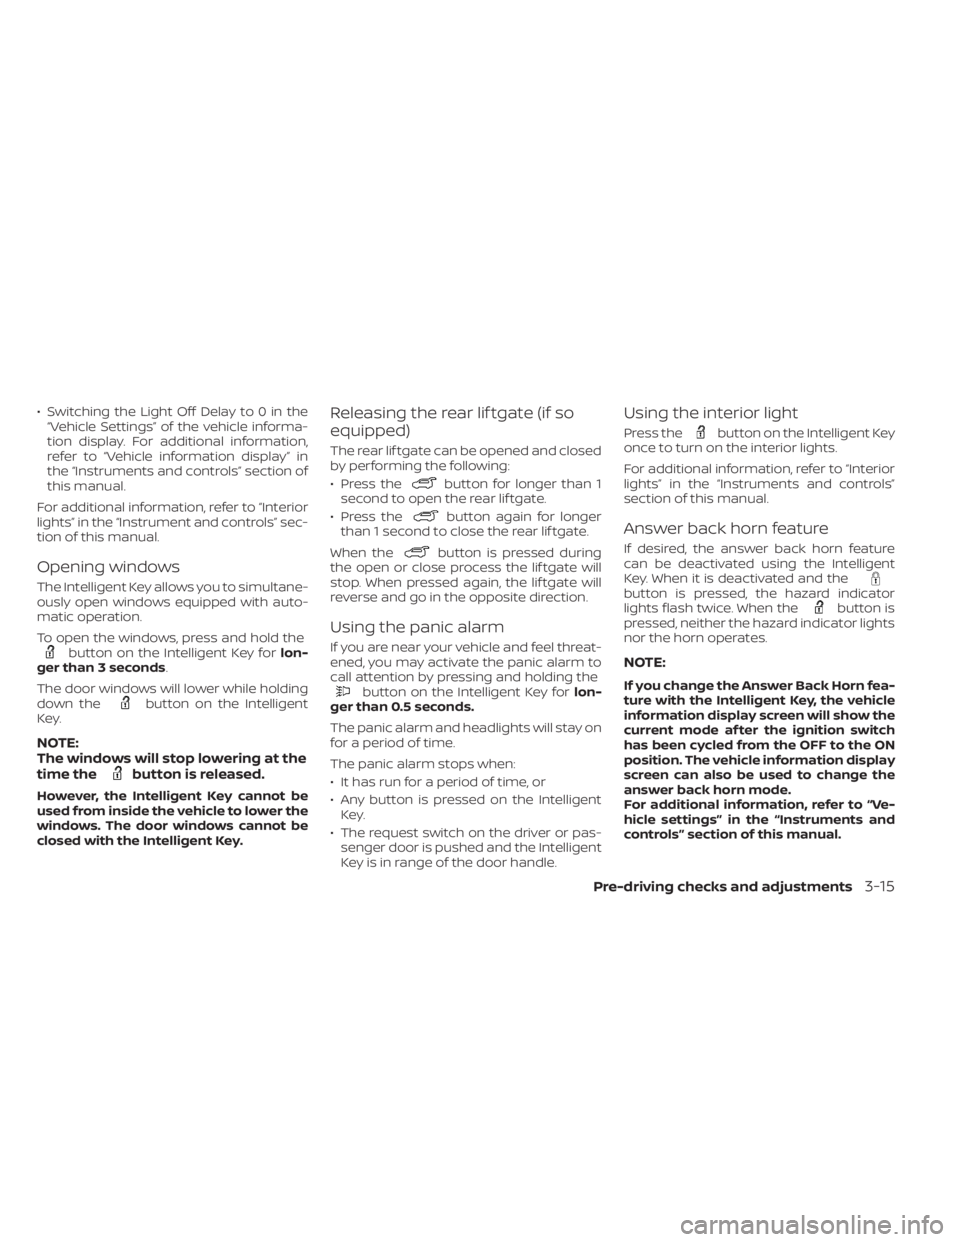
Type C (if so equipped)
1.(remote engine start) button
2.
(lock) button
3.
(unlock) button
4.
(lif tgate) button
5.
(panic) button
Locking doors
1. Place the ignition switch in the LOCK position.
2. Close all doors. 3. Press the
button on the Intelli-
gent Key.
4. The hazard indicator lights flash twice and the horn beeps once.
5. All doors will be locked.
WARNING
Af ter locking the doors using the Intel-
ligent Key, be sure that the doors have
been securely locked by operating the
door handles. Failure to follow these in-
structions may result in inadvertently
unlocking the doors, which may de-
crease the safety and security of your
vehicle.
Unlocking doors
1. Press thebutton on the Intelligent
Key to unlock the driver’s door.
2. The hazard indicator lights flash once and the driver’s door unlocks.
3. Press the
button again within 1
minute to unlock all doors.
NOTE:
The Selective Unlock feature can be
changed using the “Vehicle Settings”
menu on the vehicle information display.
For additional information, refer to “Ve-
hicle information display ” in the “Instru-
ments and controls” section of this
manual.
All doors will be locked automatically un-
less one of the following operations is per-
formed within 1 minute af ter pressing the
button:
• Opening any doors.
• Pushing the ignition switch.
The interior light illuminates for a period of
time when a door is unlocked and the inte-
rior light switch is in the ON position.
The light can be turned off without waiting
by performing one of the following opera-
tions:
• Placing the ignition switch in the ON po- sition.
• Locking the doors with the Intelligent Key.
• Switching the interior light switch to the OFF position.
LPD3026
3-14Pre-driving checks and adjustments
Page 197 of 518

• Switching the Light Off Delay to 0 in the“Vehicle Settings” of the vehicle informa-
tion display. For additional information,
refer to “Vehicle information display” in
the “Instruments and controls” section of
this manual.
For additional information, refer to “Interior
lights” in the “Instrument and controls” sec-
tion of this manual.
Opening windows
The Intelligent Key allows you to simultane-
ously open windows equipped with auto-
matic operation.
To open the windows, press and hold the
button on the Intelligent Key for lon-
ger than 3 seconds.
The door windows will lower while holding
down the
button on the Intelligent
Key.
NOTE:
The windows will stop lowering at the
time the
button is released.
However, the Intelligent Key cannot be
used from inside the vehicle to lower the
windows. The door windows cannot be
closed with the Intelligent Key.
Releasing the rear lif tgate (if so
equipped)
The rear lif tgate can be opened and closed
by performing the following:
• Press the
button for longer than 1
second to open the rear lif tgate.
• Press the
button again for longer
than 1 second to close the rear lif tgate.
When the
button is pressed during
the open or close process the lif tgate will
stop. When pressed again, the lif tgate will
reverse and go in the opposite direction.
Using the panic alarm
If you are near your vehicle and feel threat-
ened, you may activate the panic alarm to
call attention by pressing and holding the
button on the Intelligent Key for lon-
ger than 0.5 seconds.
The panic alarm and headlights will stay on
for a period of time.
The panic alarm stops when:
• It has run for a period of time, or
• Any button is pressed on the Intelligent Key.
• The request switch on the driver or pas- senger door is pushed and the Intelligent
Key is in range of the door handle.
Using the interior light
Press thebutton on the Intelligent Key
once to turn on the interior lights.
For additional information, refer to “Interior
lights” in the “Instruments and controls”
section of this manual.
Answer back horn feature
If desired, the answer back horn feature
can be deactivated using the Intelligent
Key. When it is deactivated and the
button is pressed, the hazard indicator
lights flash twice. When thebutton is
pressed, neither the hazard indicator lights
nor the horn operates.
NOTE:
If you change the Answer Back Horn fea-
ture with the Intelligent Key, the vehicle
information display screen will show the
current mode af ter the ignition switch
has been cycled from the OFF to the ON
position. The vehicle information display
screen can also be used to change the
answer back horn mode.
For additional information, refer to “Ve-
hicle settings” in the “Instruments and
controls” section of this manual.
Pre-driving checks and adjustments3-15
Page 419 of 518

8 Do-it-yourself
Maintenance precautions.......................8-2
Engine compartment check locations ...........8-3
Engine cooling system ..........................8-4
Checking engine coolant level ................8-5
Changing engine coolant ....................8-5
Engine oil .......................................8-6
Checking engine oil level .....................8-6
Changing engine oil and oil filter ..............8-6
Continuously Variable Transmission (CVT)
fluid ............................................ 8-10
Power Steering Fluid (PSF) .......................8-11
Brake fluid ....................................... 8-11
Windshield-washer fluid ........................8-12
Windshield-washer fluid reservoir ...........8-12
Battery......................................... 8-13
Jump starting ............................... 8-14
Drive belt ....................................... 8-15
Spark plugs .................................... 8-15
Replacing spark plugs ....................... 8-15
Air cleaner ..................................... 8-16In-cabin microfilter
.......................... 8-16
Windshield wiper blades ........................8-17
Cleaning .................................... 8-17
Replacing ................................... 8-17
Brakes ......................................... 8-18
Fuses .......................................... 8-19
Engine compartment ....................... 8-19
Passenger compartment ...................8-21
Battery replacement ........................... 8-22
NISSAN Intelligent Key® ......................8-22
Lights .......................................... 8-24
Headlights .................................. 8-24
Fog lights (if so equipped) ...................8-24
Exterior and interior lights ...................8-25
Wheels and tires ............................... 8-27
Tire pressure ................................ 8-27
Tire labeling ................................. 8-30
Types of tires ................................
8-33
Tir
e chains .................................. 8-34
Changing wheels and tires ..................8-35
Page 443 of 518

EXTERIOR AND INTERIOR LIGHTS
ItemWattage (W)Bulb No.
Headlight assembly* High ——
Low ——
Tu r n ——
Side marker ——
Park/Daytime running ——
Front fog lights (if so equipped)* ——
Door mirror turn signal light* ——
Map light* ——
Courtesy light* ——
Personal light* ——
Vanity mirror light* 1.8—
Glove box light* 1.4—
Cargo light* 5—
High-mounted stop light* ——
Rear combination light* Tail/Stop ——
Tu r n ——
Rear side marker ——
Backup (reversing) light assembly* Backup ——
Tail/Stop ——
License plate light* 5W5W
* It is recommended that you visit a NISSAN dealer for assistance.
Always check with the Parts Department at
a NISSAN dealer for the latest parts infor-
mation.
Do-it-yourself8-25