2020 NISSAN MURANO tire pressure
[x] Cancel search: tire pressurePage 485 of 518

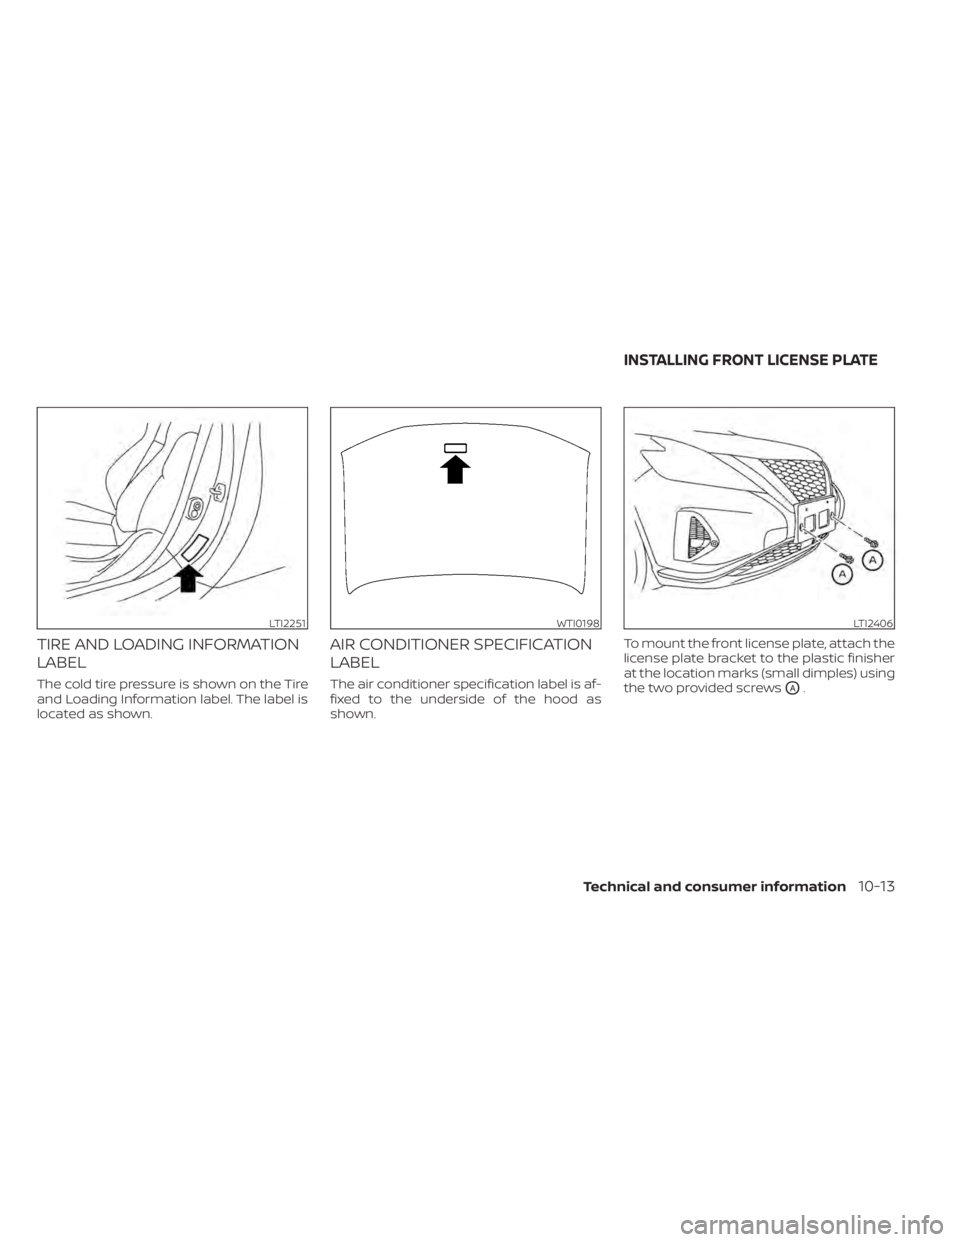
TIRE AND LOADING INFORMATION
LABEL
The cold tire pressure is shown on the Tire
and Loading Information label. The label is
located as shown.
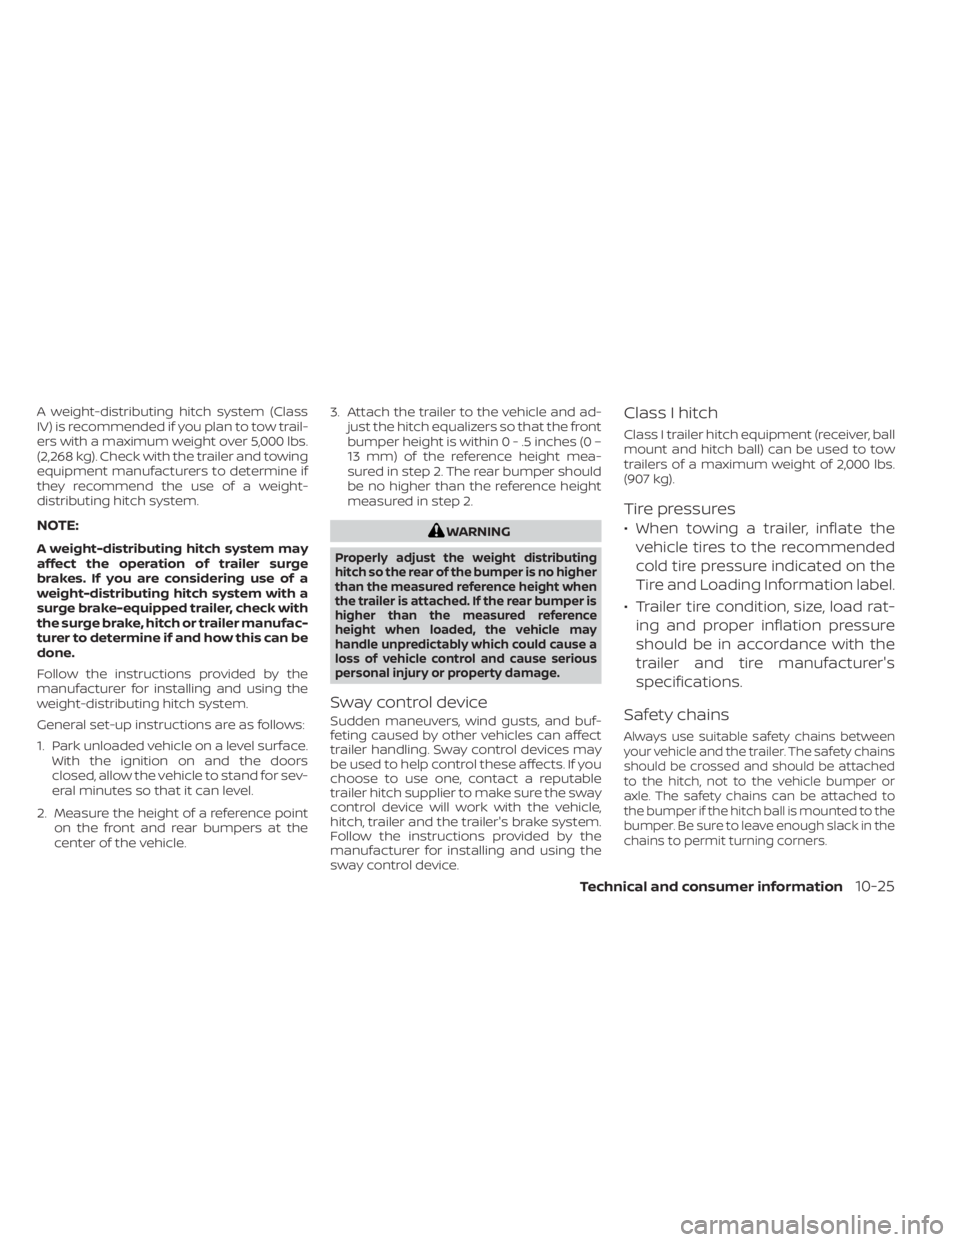
AIR CONDITIONER SPECIFICATION
LABEL
The air conditioner specification label is af-
fixed to the underside of the hood as
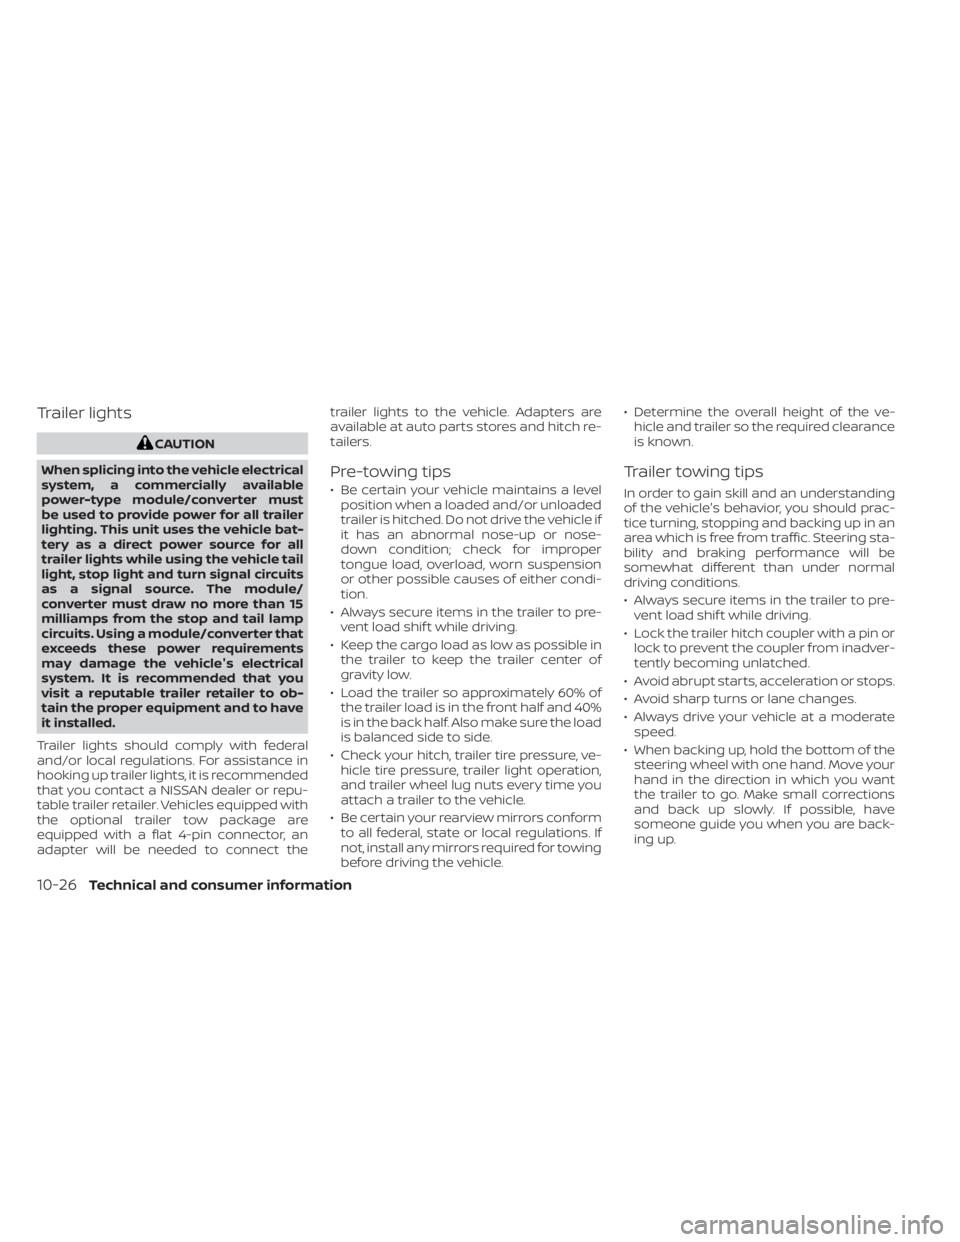
shown.To mount the front license plate, attach the
license plate bracket to the plastic finisher
at the location marks (small dimples) using
the two provided screwsOA.
LTI2251WTI0198LTI2406
INSTALLING FRONT LICENSE PLATE
Technical and consumer information10-13
Page 489 of 518

5. Determine the combined weightof luggage and cargo being
loaded on the vehicle. That weight
may not safely exceed the avail-
able cargo and luggage load ca-
pacity calculated in step 4.
6. If your vehicle will be towing a trailer, load from your trailer will be
transferred to your vehicle. Con-
sult this manual to determine
how this reduces the available
cargo and luggage load capacity
of your vehicle.
Before driving a loaded vehicle, con-
firm that you do not exceed the GVWR
or the GAWR for your vehicle. For ad-
ditional information, refer to “Mea-
surement of weights” in this section.
Also check tires for proper inflation
pressures. For additional informa-
tion, refer to “Tire and Loading Infor-
mation label” in the “Do-it-yourself ”
section of this manual.
SECURING THE LOAD
There are luggage hooks located in the
cargo area as shown. The hooks can be
used to secure cargo with ropes or other
types of straps.
When securing items using luggage
hooks located on the side finisher do not
apply a load over more than 6.5 lbs. (29 N)
to a single hook.
The luggage hooks that are located on
the floor should have loads less than 110
lbs. (490 N) to a single hook.
WARNING
• Properly secure all cargo with ropes
or straps to help prevent it from slid-
ing or shif ting. Do not place cargo
higher than the seatbacks. In a sud-
den stop or collision, unsecured
cargo could cause personal injury.
• The child restraint top tether strap
may be damaged by contact with
items in the cargo area. Secure any
items in the cargo area. Your child
could be seriously injured or killed in
a collision if the top tether strap is
damaged.
• Do not load your vehicle any heavier
than the GVWR or the maximum front
and rear GAWRs. If you do, parts of
your vehicle can break, tire damage
could occur, or it can change the way
your vehicle handles. This could re-
sult in loss of control and cause per-
sonal injury.
LTI2113
Cargo area luggage hooks
Technical and consumer information10-17
Page 497 of 518

A weight-distributing hitch system (Class
IV) is recommended if you plan to tow trail-
ers with a maximum weight over 5,000 lbs.
(2,268 kg). Check with the trailer and towing
equipment manufacturers to determine if
they recommend the use of a weight-
distributing hitch system.
NOTE:
A weight-distributing hitch system may
affect the operation of trailer surge
brakes. If you are considering use of a
weight-distributing hitch system with a
surge brake-equipped trailer, check with
the surge brake, hitch or trailer manufac-
turer to determine if and how this can be
done.
Follow the instructions provided by the
manufacturer for installing and using the
weight-distributing hitch system.
General set-up instructions are as follows:
1. Park unloaded vehicle on a level surface.With the ignition on and the doors
closed, allow the vehicle to stand for sev-
eral minutes so that it can level.
2. Measure the height of a reference point on the front and rear bumpers at the
center of the vehicle. 3. Attach the trailer to the vehicle and ad-
just the hitch equalizers so that the front
bumper height is within0-.5inches (0 –
13 mm) of the reference height mea-
sured in step 2. The rear bumper should
be no higher than the reference height
measured in step 2.
WARNING
Properly adjust the weight distributing
hitch so the rear of the bumper is no higher
than the measured reference height when
the trailer is attached. If the rear bumper is
higher than the measured reference
height when loaded, the vehicle may
handle unpredictably which could cause a
loss of vehicle control and cause serious
personal injury or property damage.
Sway control device
Sudden maneuvers, wind gusts, and buf-
feting caused by other vehicles can affect
trailer handling. Sway control devices may
be used to help control these affects. If you
choose to use one, contact a reputable
trailer hitch supplier to make sure the sway
control device will work with the vehicle,
hitch, trailer and the trailer's brake system.
Follow the instructions provided by the
manufacturer for installing and using the
sway control device.
Class I hitch
Class I trailer hitch equipment (receiver, ball
mount and hitch ball) can be used to tow
trailers of a maximum weight of 2,000 lbs.
(907 kg).
Tire pressures
• When towing a trailer, inflate the
vehicle tires to the recommended
cold tire pressure indicated on the
Tire and Loading Information label.
• Trailer tire condition, size, load rat- ing and proper inflation pressure
should be in accordance with the
trailer and tire manufacturer's
specifications.
Safety chains
Always use suitable safety chains between
your vehicle and the trailer. The safety chains
should be crossed and should be attached
to the hitch, not to the vehicle bumper or
axle. The safety chains can be attached to
the bumper if the hitch ball is mounted to the
bumper. Be sure to leave enough slack in the
chains to permit turning corners.
Technical and consumer information10-25
Page 498 of 518

Trailer lights
CAUTION
When splicing into the vehicle electrical
system, a commercially available
power-type module/converter must
be used to provide power for all trailer
lighting. This unit uses the vehicle bat-
tery as a direct power source for all
trailer lights while using the vehicle tail
light, stop light and turn signal circuits
as a signal source. The module/
converter must draw no more than 15
milliamps from the stop and tail lamp
circuits. Using a module/converter that
exceeds these power requirements
may damage the vehicle's electrical
system. It is recommended that you
visit a reputable trailer retailer to ob-
tain the proper equipment and to have
it installed.
Trailer lights should comply with federal
and/or local regulations. For assistance in
hooking up trailer lights, it is recommended
that you contact a NISSAN dealer or repu-
table trailer retailer. Vehicles equipped with
the optional trailer tow package are
equipped with a flat 4-pin connector, an
adapter will be needed to connect the trailer lights to the vehicle. Adapters are
available at auto parts stores and hitch re-
tailers.
Pre-towing tips
• Be certain your vehicle maintains a level
position when a loaded and/or unloaded
trailer is hitched. Do not drive the vehicle if
it has an abnormal nose-up or nose-
down condition; check for improper
tongue load, overload, worn suspension
or other possible causes of either condi-
tion.
• Always secure items in the trailer to pre- vent load shif t while driving.
• Keep the cargo load as low as possible in the trailer to keep the trailer center of
gravity low.
• Load the trailer so approximately 60% of the trailer load is in the front half and 40%
is in the back half. Also make sure the load
is balanced side to side.
• Check your hitch, trailer tire pressure, ve- hicle tire pressure, trailer light operation,
and trailer wheel lug nuts every time you
attach a trailer to the vehicle.
• Be certain your rearview mirrors conform to all federal, state or local regulations. If
not, install any mirrors required for towing
before driving the vehicle. • Determine the overall height of the ve-
hicle and trailer so the required clearance
is known.
Trailer towing tips
In order to gain skill and an understanding
of the vehicle's behavior, you should prac-
tice turning, stopping and backing up in an
area which is free from traffic. Steering sta-
bility and braking performance will be
somewhat different than under normal
driving conditions.
• Always secure items in the trailer to pre-vent load shif t while driving.
• Lock the trailer hitch coupler with a pin or lock to prevent the coupler from inadver-
tently becoming unlatched.
• Avoid abrupt starts, acceleration or stops.
• Avoid sharp turns or lane changes.
• Always drive your vehicle at a moderate speed.
• When backing up, hold the bottom of the steering wheel with one hand. Move your
hand in the direction in which you want
the trailer to go. Make small corrections
and back up slowly. If possible, have
someone guide you when you are back-
ing up.
10-26Technical and consumer information
Page 507 of 518

11 Index
A
Air bag (See supplemental restraint
system).....................1-49Air bag system
Front (See supplemental front impact air
bag system)
................1-56Air bag warning labels............1-69Air bag warning light.........1-70,2-13Air bag warning light,
supplemental..............1-70,2-13Air cleaner...................8-16Air cleaner housing filter..........8-16Air conditionerAir conditioner operation........4-29Air conditioner specification label. .10-13Air conditioner system refrigerant
recommendations............10-8Air conditioner system refrigerant and oil
recommendations............10-8Heater and air conditioner (automatic)
(if so equipped)..............4-28Heater and air conditioner controls.4-29Servicing air conditioner.........4-31Alarm system (See vehicle security
system).................... .2-33All-Wheel Drive............5-124, 6-13Anchor point locations...........1-32Antenna................... .4-32Anti-lock brake warning light........2-9Anti-lock Braking System (ABS).....5-129
Antifreeze...................5-137Armrests.................... .1-6Autolight switch...............2-39Automatic
Automatic drive
positioner
..........3-38, 3-39, 3-40Automatic power window switch. . .2-63Automatic anti-glare inside mirror. . . .3-35Automatic door locks.............3-7Automatic drive
positioner............3-38, 3-39, 3-40Automatic Emergency Braking
(AEB).................. .2-9, 5-89Automatic Emergency Braking (AEB) with
Pedestrian Detection............5-96AWD...................5- 124, 6-13
B
Battery.................5-137, 8-13Charge warning light...........2-10Battery replacement............8-22Key fob...................8-22NISSAN Intelligent Key®.........8-22Before starting the engine.........5-16Belt (See drive belt)..............8-15Blind Spot Warning (BSW).........5-38Booster seats.................1-44Brake
Anti-lock Braking System (ABS). . . .5-129
Brake fluid..................8-11Brake light (See stop light).......8-25Brake system...............5-129Brake warning light............2-10Brake wear indicators.......2-16,8-18Self-adjusting brakes...........8-18Brake Assist..................5-131Brake fluid...................8-11Brake system................5-129Brakes.....................8-18Break-in schedule..............5-123Brightness controlInstrument panel.............2-43Bulb check/instrument panel........2-9Bulb replacement..............8-25
C
C.M.V.S.S. certification label........10-12Capacities and recommended
fuel/lubricants................10-2Car phone or CB radio...........4-32Cargo (See vehicle loading
information)................ .10-14Cargo area storage bin...........2-60Check tire pressure.............2-28Child restraint with top tether strap. . .1-32Child restraints.......1-25,1-26,1-27,1-29LATCH (Lower Anchors and Tethers for
CHildren) System.............1-29
Page 508 of 518

Precautions on child
restraints............1-34, 1-40, 1-45Top tether strap anchor point
locations...................1-32Child safety rear door lock..........3-7Cleaning exterior and interior......7-2,7-4Cold weather driving............5-137Console box..................2-57Console light..................2-67Continuously Variable Transmission
(CVT).......................5-18Continuously Variable Transmission (CVT)
fluid......................8-10Driving with Continuously Variable
Transmission (CVT)............5-18Controls
Heater and air conditioner controls. .4-29CoolantCapacities and recommended
fuel/lubricants
...............10-2Changing engine coolant.........8-5Checking engine coolant level......8-5Engine coolant temperature gauge. . .2-6Corrosion protection..............7-7Cruise control................ .5-57Cup holders................. .2-58
D
Daytime running light system
(Canada only).................2-43Daytime Running Lights (DRL) system. .2-43
Defroster switch
Rear window and outside mirror defroster
switch
................... .2-38Dimensions and weights..........10-10Dimmer switch for instrument panel. . .2-43Door locks....................3-5Drive belt....................8-15Drive positioner, Automatic. .3-38, 3-39, 3-40Driving
Cold weather driving...........5-137Driving with Continuously Variable
Transmission (CVT)............5-18Precautions when starting and
driving................. .5-4, 5-11Driving the vehicle...............5-18Dynamic driver assistance switch.....2-49
E
E-call (SOS) Button..............2-51Economy - fuel................5-124Emergency engine shutoff.......5-15,6-2Emission control information label. . . .10-12Emission control system warranty. . . .10-30Engine
Before starting the engine........5-16Capacities and recommended
fuel/lubricants...............10-2Changing engine coolant.........8-5Changing engine oil............8-6Changing engine oil filter.........8-6Checking engine coolant level......8-5Checking engine oil level.........8-6
Engine compartment check
locations.................. .8-3Engine coolant temperature gauge. . .2-6Engine cooling system...........8-4Engine oil...................8-6Engine oil and oil filter
recommendation.............10-7Engine oil pressure warning light. . . .2-10Engine oil viscosity.............10-7Engine serial number..........10-12Engine specifications...........10-9Starting the engine............5-17Engine coolant temperature gauge. . . .2-6Event Data recorders............10-32Exhaust gas (Carbon monoxide)......5-4Explanation of maintenance items.....9-2Explanation of scheduled maintenance
items...................... .9-5Extended storage switch..........2-54Eyeglass case.................2-58
F
F.M.V.S.S. certification label.........10-12Flashers (See hazard warning flasher
switch)......................6-2Flat tire.................. .6-3, 6-4Floor mat positioning aid...........7-6Fluid
Brake fluid..................8-11Capacities and recommended
fuel/lubricants...............10-2
11-2Index
Page 510 of 518

Interior light..................2-67ISOFIX child restraints.............1-29
J
Jump starting..............6-9, 8-14
K
Key.........................3-2Key fob battery replacement........8-22Keyless entry
With Intelligent Key system
(See Intelligent Key system)
.......3-13KeysNISSAN Intelligent Key®........3-2,3-7NISSAN Vehicle Immobilizer System
keys..................... .3-4
L
Label
Tire and Loading Information label. .10-13LabelsAir conditioner specification label. . .10-13C.M.V.S.S. certification label.......10-12Emission control information label. .10-12Engine serial number..........10-12F.M.V.S.S. certification label........10-12Tire and Loading Information label. .10-13Vehicle identification number (VIN). .10-11
Vehicle identification number (VIN)
plate.................... .10-11Warning labels (for SRS)..........1-69Lane Departure Warning (LDW).......5-27LATCH (Lower Anchors and Tethers for
CHildren) System...............1-29License plate
Installing the license plate........10-13Lif tgate.....................3-22Lif tgate release................3-27LightAir bag warning light........1-70,2-13Brake light (See stop light)........8-25Bulb check/instrument panel......2-9Bulb replacement.............8-25Charge warning light...........2-10Console light................2-67Exterior and Interior lights........8-25Fog light switch..............2-44Fog lights..................8-24Headlight and turn signal switch. . . .2-38Headlight control switch.........2-38Headlights..................8-24Interior light................ .2-67Light bulbs.................8-24Low tire pressure warning light.....2-11Low windshield-washer fluid warning
light......................2-27Personal lights...............2-68Security indicator light..........2-15Spotlights (See map light)........2-68Warning/indicator lights and audible
reminders.................. .2-9Lights......................8-24
Map lights..................2-68Lock
Child safety rear door lock.........3-7Door locks................. .3-5Fuel-filler door lock opener lever. . . .3-29Lif tgate release...............3-27Power door locks..............3-6Loose fuel cap warning...........2-28Low fuel warning light.........2-12,2-27Low tire pressure warning light.......2-11Low windshield-washer fluid warning
light........................2-27Luggage (See vehicle loading
information)..................10-14Luggage hook.................2-60Luggage rack (see roof rack)........2-61
M
Maintenance
General maintenance...........9-2Inside the vehicle..............9-3Maintenance precautions.........8-2Outside the vehicle.............9-2Seat belt maintenance..........1-24Under the hood and vehicle.......9-4Maintenance log................9-11Maintenance requirements..........9-2Maintenance schedules............9-7Maintenance under severe operation
conditions....................9-10Malfunction indicator light..........2-14Manual front seat adjustment........1-3
11-4Index
Page 513 of 518

Instrument brightness control.....2-43Power door lock switch..........3-6Rear window and outside mirror defroster
switch....................2-38Rear window wiper and washer
switches...................2-37Turn signal switch.............2-43
T
Tachometer...................2-5Temperature gauge
Engine coolant temperature gauge. . .2-6Thef t (NISSAN Vehicle Immobilizer System),
engine start...............2-34, 5-16Three-way catalyst...............5-4TireFlat tire................. .6-3, 6-4Spare tire...............6-5, 8-38Tire and Loading Information label. .10-13Tire chains.................8-34Tire pressure................8-27Tire rotation.................8-35Types of tires................8-33Uniform tire quality grading......10-29Wheel/tire size...............10-10Wheels and tires..........8-27,10-10Tire pressure
Low tire pressure warning light.....2-11Tire Pressure Monitoring System
(TPMS)...................... .5-5Top tether strap child restraint.......1-32
Towing
4-wheel drive models...........6-14Flat towing................ .10-28Tow truck towing..............6-12Towing load/specification.......10-23Trailer towing...............10-19Towing a trailer................10-19Traffic Sign Recognition (TSR)........5-24Transceiver
HomeLink® Universal
Transceiver
. . . .2-68, 2-69, 2-70, 2-71, 2-72TransmissionContinuously Variable Transmission (CVT)
fluid
......................8-10Driving with Continuously Variable
Transmission (CVT)............5-18Travel (See registering a vehicle in another
country).................... .10-11Trip odometer..................2-5Turn signal switch...............2-43
U
Uniform tire quality grading........10-29USB/iPod® Charging Ports.........4-32
V
Vanity mirror..................3-34Vehicle dimensions and weights.....10-10Vehicle Dynamic Control (VDC) OFF
switch..................... .2-50
Vehicle Dynamic Control (VDC)
system.....................5-131Vehicle identification.............10-11Vehicle identification number (VIN). . . .10-11Vehicle identification number (VIN)
(Chassis number)...............10-11Vehicle identification number (VIN)
plate...................... .10-11Vehicle immobilizer system.....2-34, 5-16Vehicle loading information........10-14Vehicle recovery.............6-14,6-15Vehicle security system...........2-33Vehicle security system (NISSAN VehicleImmobilizer System), engine start. .2-34, 5-16Vents......................4-26Visors......................3-34
W
Warning
Air bag warning light........1-70,2-13Anti-lock brake warning light.......2-9Battery charge warning light......2-10Brake warning light............2-10Engine oil pressure warning light. . . .2-10Hazard warning flasher switch......6-2Loose fuel cap warning..........2-28Low fuel warning light.......2-12,2-27Low tire pressure warning light.....2-11Low windshield-washer fluid warning
light......................2-27Seat belt warning light.......1-16,2-13
Index11-7