2020 MERCEDES-BENZ GLS SUV low oil pressure
[x] Cancel search: low oil pressurePage 365 of 549
#
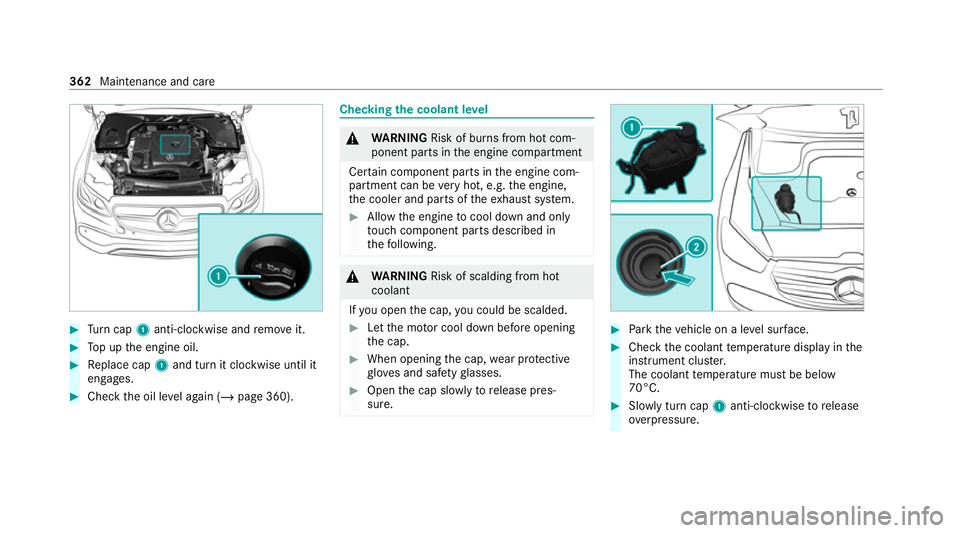
Turn cap 1anti-clockwise and remo veit. #
Top up the engine oil. #
Replace cap 1and turn it clockwise until it
engages. #
Check the oil le vel again (/ page 360). Checking
the coolant le vel &
WARNING Risk of bu rns from hot com‐
ponent parts in the engine compartment
Cer tain component parts in the engine com‐
partment can be very hot, e.g. the engine,
th e cooler and parts of theex haust sy stem. #
Allow the engine tocool down and only
to uch co mponent parts described in
th efo llowing. &
WARNING Risk of scalding from hot
coolant
If yo u open the cap, you could be scalded. #
Let the mo tor cool down before opening
th e cap. #
When opening the cap, wear pr otective
gl ove s and saf etygl asses. #
Open the cap slowly torelease pres‐
sure. #
Park theve hicle on a le vel sur face. #
Check the coolant temp erature display in the
instrument clus ter.
The coolant temp erature must be below
70°C. #
Slowly turn cap 1anti-clockwise torelease
ove rpressure. 362
Maintenance and care
Page 369 of 549
R
the air conditioning sy stem is set tofresh air
mode.
R Parking Assist PARKTRONIC is reset tothe
pr ev iously selec ted setting.
R the windo wsand the sliding sunroof remain
closed.
R Mercedes-Maybach vehicles: theru nning
boards remain retracted.
R vehicles with 360° Camera: the front
image is deactivated at speeds abo ve
18 km/h.
R vehicles with AIRMATIC: theve hicle is low‐
ered tothe pr eviously set chassis le vel.
R vehicles with E- ACTIVE BODY CONT ROL:
th eve hicle is lo weredto the pr eviously set
ch assis le vel. Ac
tivating/deactivating automatic car wash
mode Requ
irements:
R theve hicle is stationar y.
R the engine is running. Multimedia sy
stem:
4 © 5
Settings 5
Quick access
Ac tivating automatic car wash mode #
Select Car wash mode . #
Select Start.
If one of the settings cann otbe selected, this is
displa yedby a% behind there spective set‐
ting.
% For an overview of the settings made when
activating automatic car wash mode
(/ page 364).
Deactivating automatic car wash mode #
Select Stop.
The automatic car wash settings are reset.
% The automatic car wash mode is automati‐
cally deactivated as soon as a speed of
20 km/h is exceeded. Information on using a high-p
ressure cleaner &
WARNING Risk of an accident when
using high-pressure cleane rswith round-
spray nozzles
The wate r jet can cause extern ally invisible
damage.
Components damaged in this wa y may unex‐
pec tedly fail. #
Do not use a high-pressure cleaner with
round-spr aynozzles. #
Have damaged tyres or chassis parts
re placed immediatel y. To
avo id damage to yourvehicle, obser vethefo l‐
lowing when using a high-pressure cleaner:
R theke y is at a minimum dis tance of 3 m
aw ay from theve hicle. Otherwise theta ilgate
could open unin tentional ly.
R maintain a dis tance of at least 30 cm tothe
ve hicle.
R vehicles with deco rative foil: parts of your
ve hicle are co vered with a decorative foil. 366
Maintenance and care
Page 370 of 549
Maintain a dis
tance of at least 70 cm
between thefo il-c ove red parts of theve hicle
and the nozzle of the high-pressure cleaner.
Mo vethe high-pressure cleaner nozzle
around whilst cleaning. The waterte mp era‐
ture of the high-pressure cleaner must not
ex ceed 60°C.
R obser vethe information on the cor rect dis‐
ta nce in the implement manufacturer's oper‐
ating instructions.
R do not direct the nozzle of the high-pressure
cleaner directly at sensitive parts, e.g. tyres,
ga ps, elect rical components, batteries, light
sou rces and ventilation slits. Wa
shing theve hicle byhand *
NO
TEEngine dama gedue towater
ingress #
Take care not topoint thewate r jet
directly towa rdsth e air inlet grille below
th e bonn et. obser
vethe legal requ irements, e.g. in a number
of countries, washing byhand is only permitted
in specially designated wash ba ys. #
Use a mild cleaning agent, e.g. car shampoo. #
Washtheve hicle with luk ewarmwate r using
a soft car sponge. When doing so, do not
ex pose theve hicle todirect sunlight. #
Carefully hose theve hicle off with water and
dry using a chamois.
% Obse rveth e no tes on the care of car parts
(/ page 369). Note
s on paint work/matt finish paint work
care Obse
rveth e no tes on cleaning and care toavo id
damaging the paintwork and inter fering wi th the
driver assis tance sy stems.
Pa int
R Insect remains: soak with insect remo ver and
ri nse off the treated areas af terw ards.
R Bird droppings: soak with water and rinse off
af te rw ards. R
Tree resin, oils, fuels and greases: remo veby
ru bbing gently wi tha clo thsoaked in petro‐
leum ether or lighter fluid.
R Coolant and brake fluid: remo vewith a damp
clo thand clean water.
R Tarst ains: use tar remo ver.
R Wax: use silicone remo ver.
R Do not attach sticke rs,fi lms or similar mate‐
ri als. On ly havefilm attached tothe bumper
at a qualified specialist workshop.
R Remo vedirt immediatel y,where possible.
Matt finish
R Only use care products appr ovedfor
Mercedes-Benz.
R Do not attach sticke rs,fi lms or similar mate‐
ri als. On lyha ve film attached tothe bumper
at a qualified specialist workshop.
R Do not polish theve hicle and light-alloy
wheels.
R Only use car washes that cor respond tothe
latest engineering standards. Main
tenance and care 367
Page 373 of 549
acidic alloy wheel cleaners
toremo vebrake
dust. The aluminium trim inserts could other‐
wise be damaged.
Re versing camera and 360° Camera
R open the camera co ver with the multimedia
sy stem (/ page 283).
R use clean water and a soft clo thtoclean the
came ralens.
R do not use a high-pressure cleaner.
Ta ilpipes
R clean with a cleaning agent recommended
fo r Mercedes-Benz, especial lyin the winter
and af terwa shing theve hicle.
R do not use acidic cleaning agents.
Tr ailer hitch
R obse rveth e no tes on care in the trailer hitch
manufacturer's operating instructions.
R do not clean the ball neck with a high-pres‐
sure cleaner or solvent.
R remo vetraces of rust on the ball, e.g. with a
wire brush.
R remo vedirt with a lint-free clo th.R
afte r cleaning, lightly oil or grease the ball
head.
% Before using trailers with anti- torsional cou‐
pling, obser vethe manufacturer's operating
instructions. Note
s on care of the interior &
WARNING Risk of inju ryfrom pla stic
parts breaking off af terth e use of sol‐
ve nt-based care products
Ca reand cleaning products con taining sol‐
ve nts can cause su rfaces in the cockpit to
become porous. When the airbags are
deplo yed, plastic parts may break away. #
Do not use any care or cleaning prod‐
ucts containing sol vents toclean the
cockpit. &
WARNING Risk of inju ryor death from
bleached seat belts
Bleaching or dyeing seat belts can se verely
we aken them. This can,
forex ample, cause seat belts to
te ar or fail in an accident. #
Never blea chor dye seat belts. To
avo id damage totheve hicle, obser vethefo l‐
lowing no tes on cleaning and care:
Seat belts R clean with luk ewarmand soapy water.
R do not use chemical cleaning agents.
R do not dry byheating them toove r 80°C or
ex posing them todirect sunlight.
Display
R switch off the display and let it cool down.
R clean the sur face carefully wi tha mic rofibre
clo thand a suitable display care product
(TF T-LC D).
R do not use any other agents.
Plastic trim R clean with a damp microfibre clo th.
R for heavy soiling: use a cleaner recommen‐
ded for Mercedes-Benz. 37 0
Maintenance and care
Page 409 of 549
*
NO
TEDama getothre ading from dirt on
wheel bolts #
Do not place wheel bolts in sand or on
a dirty sur face. #
Comp lete ly unscr ewthe wheel bolts. #
Remo vethe wheel. Fi
tting a new wheel Re
quirements:
R The wheel is remo ved (/ page 405).
* NO
TEMercedes-AMG vehicles #
Obser vethe no tes in the Supplement.
Yo u could otherwise failto recognise
dangers. &
WARNING Risk of accident from losing a
wheel
Oiled or greased wheel bolts can cause the
wheel bolts tocome loose, as too can dam‐
aged wheel bolts or wheel hub thre ads. #
Never oil or grease theth re ads. #
Intheeve nt of dama getotheth re ads,
con tact a qualified specialist workshop
immediatel y. #
Have the damaged wheel bolts or dam‐
aged hub thre ads replaced. #
Do not continue driving. #
Obser vethe information on thech oice of
tyres (/ page 397).
Fo r tyres with a specified direction of rotation,
an ar row on the side wall of the tyre indicates
th e cor rect di rection of rotation. Obse rvethe
direction of rotation when fitting. &
WARNING Risk of inju ryfrom tightening
wheel bolts and nuts
If yo u tighten the wheel bolts or wheel nuts
when theve hicle is raised, the jack could tip. #
Only tighten wheel bolts or wheel nuts
when theve hicle is on the ground. #
Obser vethe instructions and saf ety no tes on
"Changing a wheel" (/ page 397). #
For saf etyre asons, on lyuse wheel bolts
which ha vebeen appr ovedby Mercedes-
Benz and forth e wheel in question. #
Tighten the wheel bolts evenly in a diagonal
pattern in the order indicated until they are
fi nger-tight. #
Ifth e collapsible emer gency spa rewheel has
been fitted, infla tethe collapsible emer gency
spa rewheel (/ page411). #
Lowe rth eve hicle (/ page 406). Lo
weri ngtheve hicle af ter a wheel change Re
quirements:
R The new wheel has been fitted
(/ page 406).
Obse rveth e information on tyre pressure
(/ page 394). #
Place thera tchet ring spanner onto the he xa‐
gon nut of the jack so that the lettering "AB"
is visible. 406
Wheels and tyres
Page 517 of 549
¯
AdBlue sy stem fault Emer‐
ge ncy op. in XXX miles See Owner's
Manual.................................................. 487
¯ AdBlue sy stem fault Engine
st art not possible................................. .488
¯ AdBlue sy stem fault See Own‐
er's Manual .......................................... .487
5 Add 1 litre engine oil when
next refuelling....................................... 488
é ATTENTION ASSIST inoperative ....460
é ATTENTION ASSIS T:Take a
break!....................................................4 60
: Automatic driving lights inoper‐
ative...................................................... 439
Á Change key bat teries .................... 437
J Check brake fluid le vel................. 459
# Check brake pads See Owner's
Manual.................................................. 459
ï Check trailer hitch lo ck................ 443
h Check tyre(s)............................... .483 !
Clean the fuel filter ...................... 452
Á Compressor is cooling ..................473
ÿ Coolant Stop vehicle Switch
engine off..............................................4 51
_ Currently una vailable Camera
view restricted....................................... 469
ç Currently unavailable Radar
sensors dirty.........................................4 68
! currently una vailable See Own‐
er's Manual ............................................ 474
÷ currently una vailable See Own‐
er's Manual ............................................ 475
5 Engine oil le vel cannot be
measured .............................................. 490
5 Engine oil le velRe duce oil le vel.... 489
5 Engine oil le velSt op vehicle
Switch engine off.................................. 489
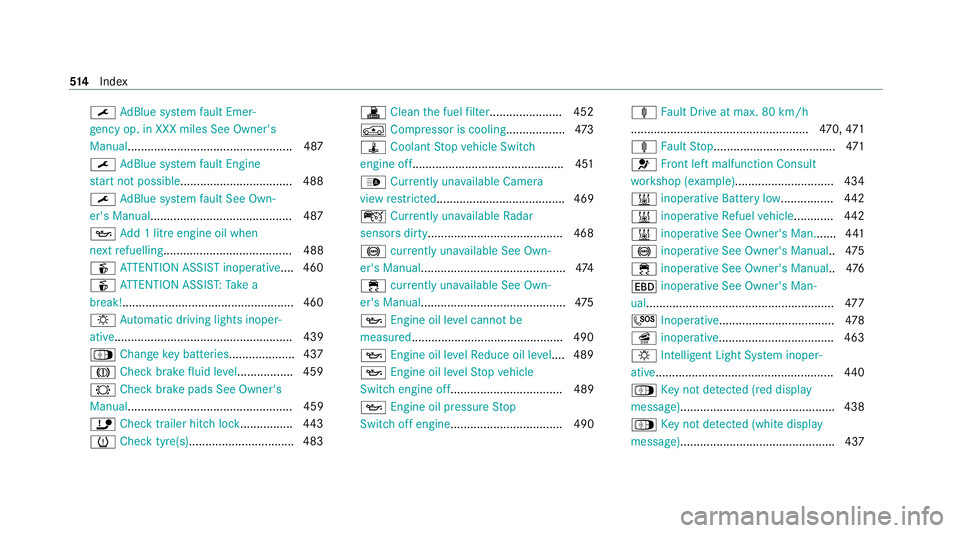
5 Engine oil pressure Stop
Switch off engine.................................. 490 ä
Fault Drive at max. 80 km/h
...................................................... 470, 471
ä Fault Stop.....................................4 71
6 Front left malfunction Consult
wo rkshop (e xample).............................. 434
& inoperative Battery low................ 442
& inoperative Refuel vehicle ............ 442
& inoperative See Owner's Man....... 441
! inoperative See Owner's Manual ..475
÷ inoperative See Owner's Manual ..476
T inoperative See Owner's Man‐
ual......................................................... 477
G Inoperative................................... 478
î inoperative................................... 463
: Intelligent Light Sy stem inoper‐
ative...................................................... 440
Á Key not de tected (red displ ay
messa ge)............................................... 438
Á Key not de tected (white displ ay
messa ge)............................................... 437 514
Index