2020 MERCEDES-BENZ GLS SUV brake
[x] Cancel search: brakePage 298 of 549
%
The maximum articulation angle depends on
th e length of the trailer. This is calculated by
th e sy stem bydriving theve hicle forw ards,
including cornering. Before the length of the
trailer has been calculated, the maximum
articulation angle is appr oximately 23°. The
longer the trailer is, the higher the maximum
articulation angle (max. appr oximately 60°).
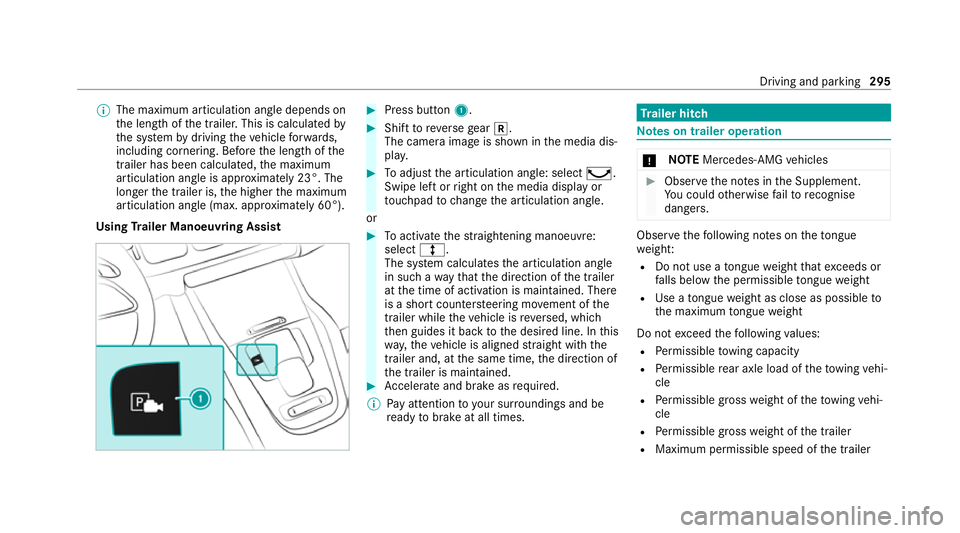
Using Trailer Manoeuvring Assist #
Press button 1. #
Shift toreve rsege ar k.
The camera image is shown in the media dis‐
pla y. #
Toadjust the articulation angle: select ¸.
Swipe left or right on the media display or
to uchpad tochange the articulation angle.
or #
Toactivate thest ra ightening manoeuvre:
select º.
The sy stem calculates the articulation angle
in such a wayth at the direction of the trailer
at the time of activation is maintained. There
is a short counter steering mo vement of the
trailer while theve hicle is reve rsed, which
th en guides it back tothe desired line. In this
wa y,theve hicle is aligned stra ight with the
trailer and, at the same time, the direction of
th e trailer is maintained. #
Accelerate and brake as requ ired.
% Pay attention toyour sur roundings and be
re ady tobrake at all times. Tr
ailer hitch Note
s on trailer operation *
NO
TEMercedes-AMG vehicles #
Obser vethe no tes in the Supplement.
Yo u could otherwise failto recognise
dangers. Obser
vethefo llowing no tes on theto ngue
we ight:
R Do not use a tongue weight that exceeds or
fa lls below the permissible tongue weight
R Use a tongue weight as close as possible to
th e maximum tongue weight
Do not exceed thefo llowing values:
R Perm issible towing capacity
R Perm issible rear axle load of theto wing vehi‐
cle
R Perm issible gross weight of theto wing vehi‐
cle
R Perm issible grossweight of the trailer
R Maximum permissible speed of the trailer Driving and parking
295
Page 302 of 549
R
Blind Spot Assi stor Active Blind Spot Assi st
R Drive AwayAssi st
R Cross Traf fic Alert
R Reversing camera
R 360° camera
R AIRMATIC
R E-AC TIVE BODY CONTROL
Coupling up a trailer
* NO
TEDama getothest ar ter battery due
to full dischar ge Charging
the trailer battery using the po wer
supply of the trailer can damage thest ar ter
batter y. #
Do not use theve hicle's po wer supply
to charge the trailer batter y. #
Remo vethe co ver cap from the ball head and
st ore it in a safe place. #
Position the trailer on a le vel sur face behind
th eve hicle and couple it up totheve hicle. #
Open the soc ket cap. #
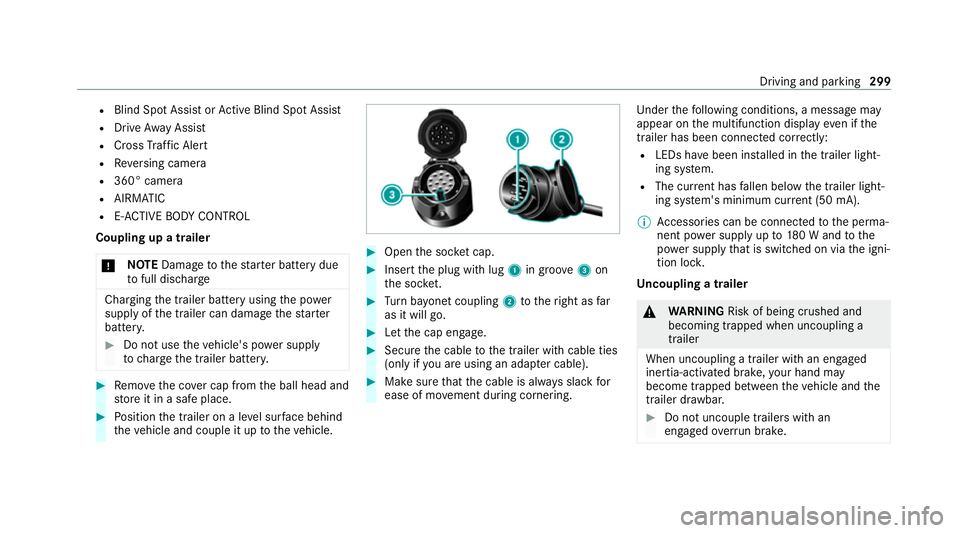
Inse rtthe plug with lug 1in groo ve3 on
th e soc ket. #
Turn bayonet coupling 2totheright as far
as it will go. #
Let the cap engage. #
Secure the cable tothe trailer with cable ties
(only if you are using an adap ter cable). #
Make sure that the cable is alw ays slack for
ease of mo vement during cornering. Under
thefo llowing conditions, a message may
appear on the multifunction display even if the
trailer has been connected cor rectly:
R LEDs ha vebeen ins talled in the trailer light‐
ing sy stem.
R The cur rent has fallen below the trailer light‐
ing sy stem's minimum cur rent (50 mA).
% Accessories can be connected tothe perma‐
nent po wer supp lyup to180 W and tothe
po we r supp lythat is swit ched on via the igni‐
tion loc k.
Un coupling a trailer &
WARNING Risk of being crushed and
becoming trapped when uncoupling a
trailer
When uncoupling a trailer wi than engaged
ine rtia-activated brake, your hand may
become trapped between theve hicle and the
trailer dr awbar. #
Do not uncouple trailers with an
engaged overrun brake. Driving and pa
rking 299
Page 303 of 549
*
NO
TEDama gewhen uncoupling in a
st ate of overrun Uncou
pling in a state of overru n can dama ge
th eve hicle. #
Do not uncouple trailers with an
engaged overrun brake. &
WARNING Risk of becoming trapped
when disconnecting the trailer cable
Ve hicles with le vel control sy stem: The
ve hicle may lo wer when the trailer cable is
disconnected.
This could result in you or other people
becoming trapped if your or their limbs are
between theve hicle body and the tyres or
underneath theve hicle. #
Make sure that nobody is unde rneath
th eve hicle or in the immediate vicinity
of the wheel ar ches when you discon‐
nect the trailer cable. *
NO
TEDama getothere ar bumper from
ins talling adap ter cables or adapte r plugs The
following parts could be damaged when
swiveling the ball neck fully electrically:
R Bumper
R Adapter cable
R Adapter plug #
Alw aysre mo vethe adap ter cable or
adapte r plug before swive lingthe ball
neck fully electrically. #
Secure the trailer against rolling away. #
Disconnect the electrical connection
between theve hicle and the trailer. #
Uncouple the trailer. #
Place the co ver cap on the ball head. Bicycle
rackfunction &
WARNING Risk of an accident when
using the bicycle rack incor rectly
The bicycle rack may become de tach ed from
th eve hicle in thefo llowing cases:
R the permissible load capacity of the
trailer hitch is exceeded.
R the bicycle rack is used incor rectl y.
R the bicycle rack is secured tothe ball
neck beneath the ball head.
Obser vethefo llowing foryo ur ow n sa fety
and that of other road users:
R always adhere tothe permissible load
capacity of the trailer hitch.
R only use the bicycle rack totranspo rt
bicycles.
R always mount the bicycle rack properly by
attaching tothe ball head and the ball
neck guide pin, if possible. 300
Driving and parking
Page 311 of 549
R
Navigation #
Onthe cor responding menu, use the left-
hand Touch Control toscroll tothe end of the
list. #
Press the left-hand Touch Control.
The selected menu will be displ ayed full-
screen. Overview of what is shown on
the multi‐
function display
Displa yson the multifunction display
u Active Parking Assist (/ page 289)
é Parking Assist PARKTRONIC deacti vated
( / page 287)
î DSR (/ page244)
h Cruise control (/ page 233)
È Limi
ter (/ page 234)
ç Active Dis tance Assi stDISTRONIC
(/ page 236)
ê Active Brake Assi st (/ page 248)
à Active Steering Assist (/ page246) ¬
Active Stop-and-Go Assist (/ page243)
à Ac
tive Lane Keeping Assist (/ page 260)
è ECO
start/ stop function (/ page197)
ë HOLD fu
nction (/ page 230)
_ Ad
aptive Highbeam Assist Plus
(/ page 161)
ð Maximum permissible speed exceeded
(for cer tain countries only)
Ve hicles with Speed Limit Assis t:de tected
instructions and traf fic signs (/ page 253).
Ve hicles with Traf fic Sign Assis t:de tected
instructions and traf fic signs (/ page 255).
Fo r an overview of the indicator and warning
lamps, see (/ page 490). Head-up display
Fu
nction of the head-up display *
NO
TEMercedes-AMG vehicles #
Obser vethe no tes in the Supplement.
Yo u could otherwise failto recognise
dangers. The head-up displ
ayprojects thefo llowing infor‐
mation into the driver's field of vision abo vethe
cockpit, forex ample:
R The vehicle speed
R Information from the navigation sy stem
R Information from the driving sy stems and
driving saf ety sy stems
R Some warning messages
Depending on theve hicle's equipment, dif fere nt
content can be shown in theth re e areas of the
head-up display (/ page 309).308
Instrument display and on-board computer
Page 325 of 549
Re
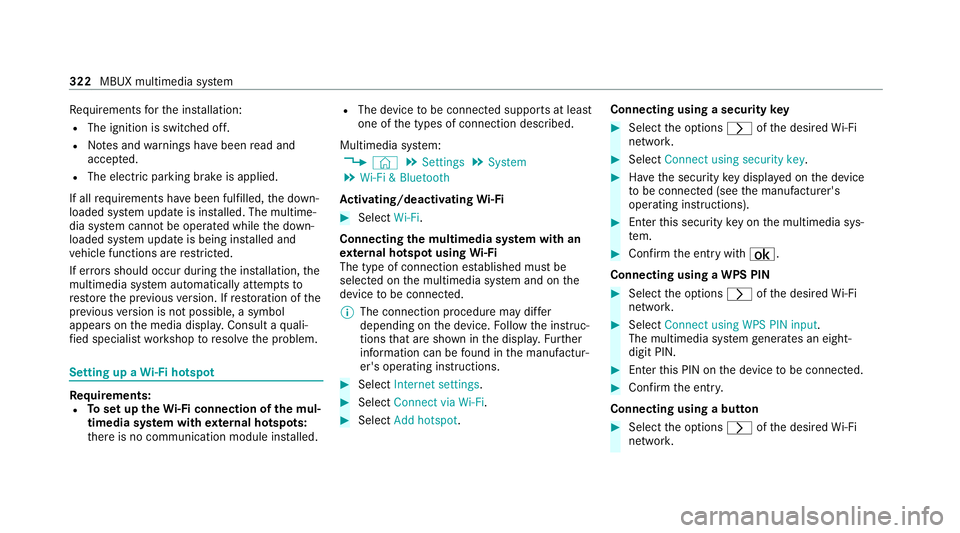
quirements forth e ins tallation:
R The ignition is switched off.
R Notes and warnings ha vebeen read and
accep ted.
R The elect ric pa rking brake is applied.
If all requirements ha vebeen fulfilled, the down‐
loaded sy stem update is ins talled. The multime‐
dia sy stem cann otbe operated while the down‐
loaded sy stem update is being ins talled and
ve hicle functions are restricted.
If er rors should occur during the ins tallation, the
multimedia sy stem automatically attem ptsto
re store the pr evious version. If restoration of the
pr ev ious version is not possible, a symbol
appears on the media displa y.Consult a quali‐
fi ed specialist workshop toresolve the problem. Setting up a
Wi-Fi hotspot Requ
irements:
R Toset up theWi -Fi connection of the mul‐
timedia sy stem with extern al hotspots:
th ere is no communication module ins talled. R
The device tobe connec ted supports at least
one of the types of connection described.
Multimedia sy stem:
4 © 5
Settings 5
System
5 Wi-Fi & Bluetooth
Ac tivating/deactivating Wi-Fi #
Select Wi-Fi.
Connecting the multimedia sy stem with an
ex tern al hotspot using Wi-Fi
The type of connection es tablished must be
selected on the multimedia sy stem and on the
device tobe connec ted.
% The connection procedure may dif fer
depending on the device. Follow the instruc‐
tions that are shown in the displa y.Fu rther
information can be found in the manufactur‐
er's operating instructions. #
Select Internet settings . #
Select Connect via Wi-Fi. #
Select Add hotspot. Connecting using a security
key #
Select the options rofthe desired Wi-Fi
networ k. #
Select Connect using security key . #
Have the security key displa yed on the device
to be connec ted (see the manufacturer's
operating instructions). #
Ente rth is security key on the multimedia sys‐
te m. #
Confirm the entry with¡.
Connecting using a WPS PIN #
Select the options rofthe desired Wi-Fi
networ k. #
Select Connect using WPS PIN input .
The multimedia sy stem generates an eight-
digit PIN. #
Enter this PIN on the device tobe connec ted. #
Confirm the entry.
Connecting using a but ton #
Select the options rofthe desired Wi-Fi
networ k. 322
MBUX multimedia sy stem
Page 367 of 549
Ke
eping the air-water duct free #
Keep the area between the bonn etand the
windscreen free of deposits, e.g. ice, sn ow
and lea ves. Cleaning and care
Information on
washing theve hicle in a car
wa sh &
WARNING Risk of an accident due to
re duced braking po wer af terwa shing the
ve hicle
Braking ef ficiency is reduced af terwa shing
th eve hicle. #
Afterth eve hicle has been washed,
brake carefully while paying attention to
th e traf fic conditions until braking
po we r has been fully restored. *
NO
TEDama gefrom auto matic braking If one of
thefo llowing functions is switched
on, theve hicle brakes automatically in cer‐
ta in situations:
R Active Brake Assi st
R Active Dis tance Assi stDISTRONIC
R HOLD function
R Active Parking Assist
To avo id damage totheve hicle, deactivate
th ese sy stems in thefo llowing or similar sit‐
uations: #
during towing #
in a car wash *
NO
TEDama gedue tounsuitable car
wa sh #
Before driving into a car wash make
sure that the car wash is suitable for
th eve hicle dimensions. #
Ensure there is suf ficient ground clear‐
ance between the underbody and the
guide rails of the car wash. #
Ensure that the clearance width of the
car wash, in particular the width of the
guide rails, is suf ficient. To
avo id damage to yourvehicle when using a
car wash, ensure thefo llowing beforehand:
R Active Dis tance Assi stDISTRONIC is deacti‐
va ted.
R the HOLD function is switched off.
R the 360° Camera or there ve rsing camera is
switched off.
R the side windo wsand sliding sun roof are
comple tely closed.
R the outside mir rors are folded in.
R the blo werfo rth eve ntilation/heating is
switched off.
R the windscreen wiper switch is in position
g. 364
Maintenance and care
Page 370 of 549
Maintain a dis
tance of at least 70 cm
between thefo il-c ove red parts of theve hicle
and the nozzle of the high-pressure cleaner.
Mo vethe high-pressure cleaner nozzle
around whilst cleaning. The waterte mp era‐
ture of the high-pressure cleaner must not
ex ceed 60°C.
R obser vethe information on the cor rect dis‐
ta nce in the implement manufacturer's oper‐
ating instructions.
R do not direct the nozzle of the high-pressure
cleaner directly at sensitive parts, e.g. tyres,
ga ps, elect rical components, batteries, light
sou rces and ventilation slits. Wa
shing theve hicle byhand *
NO
TEEngine dama gedue towater
ingress #
Take care not topoint thewate r jet
directly towa rdsth e air inlet grille below
th e bonn et. obser
vethe legal requ irements, e.g. in a number
of countries, washing byhand is only permitted
in specially designated wash ba ys. #
Use a mild cleaning agent, e.g. car shampoo. #
Washtheve hicle with luk ewarmwate r using
a soft car sponge. When doing so, do not
ex pose theve hicle todirect sunlight. #
Carefully hose theve hicle off with water and
dry using a chamois.
% Obse rveth e no tes on the care of car parts
(/ page 369). Note
s on paint work/matt finish paint work
care Obse
rveth e no tes on cleaning and care toavo id
damaging the paintwork and inter fering wi th the
driver assis tance sy stems.
Pa int
R Insect remains: soak with insect remo ver and
ri nse off the treated areas af terw ards.
R Bird droppings: soak with water and rinse off
af te rw ards. R
Tree resin, oils, fuels and greases: remo veby
ru bbing gently wi tha clo thsoaked in petro‐
leum ether or lighter fluid.
R Coolant and brake fluid: remo vewith a damp
clo thand clean water.
R Tarst ains: use tar remo ver.
R Wax: use silicone remo ver.
R Do not attach sticke rs,fi lms or similar mate‐
ri als. On ly havefilm attached tothe bumper
at a qualified specialist workshop.
R Remo vedirt immediatel y,where possible.
Matt finish
R Only use care products appr ovedfor
Mercedes-Benz.
R Do not attach sticke rs,fi lms or similar mate‐
ri als. On lyha ve film attached tothe bumper
at a qualified specialist workshop.
R Do not polish theve hicle and light-alloy
wheels.
R Only use car washes that cor respond tothe
latest engineering standards. Main
tenance and care 367
Page 372 of 549
Note
s on care of car parts &
WARNING Risk of entrapment if the
windscreen wipers are swit ched on while
th e windscreen is being cleaned
If th e windscreen wipers are set in motion
while you are cleaning the windscreen or
wiper blades, you can be trapped bythe
wiper arm. #
Alw ays switch off the windscreen wip‐
ers and the ignition before cleaning the
windscreen or wiper blades. &
WARNING Risk of bu rns from theta il‐
pipe and tailpipe trims
The exhaust tailpipe and tailpipe trims can
become very hot. If you come into contact
with these parts of theve hicle, you could
burn yourself. #
Alw ays be particular lycareful around
th eta ilpipe and theta ilpipe trims and
supervise children especially closely in
th is area. #
Allow vehicle parts tocool down before
to uching them. To
avo id damage totheve hicle, obser vethe
no tes on cleaning and care of thefo llowing vehi‐
cle parts:
Wheels and rims
R use wate r and acid-free alloy wheel cleaners.
R do not use acidic alloy wheel cleaners to
re mo vebrake dust. This could damage wheel
bolts and brake components.
R to av oid cor rosion of the brake discs and
brakepads, drive theve hicle for a few
minutes af ter cleaning before parking it. The
brake discs and brakepads warm up and dry
out.
Wi ndo ws
R clean the windo wsinside and outside with a
damp clo thand with a cleaning agent recom‐
mended for Mercedes-Benz.
R do not use dry clo ths or abrasive or solvent-
based cleaning agents toclean the inside of
windo ws. Wi
per blades
R movethe wiper arms into there placement
position (/ page166).
R with the wiper arms folded out, clean the
wiper blades with a damp clo th.
R do not clean the wiper blades too of ten.
Ex terior lighting
R clean the lenses with a wet sponge and mild
cleaning agent, e.g. car sha mpoo.
R only use cleaning agents or cleaning clo ths
th at are suitable for plast ic lenses.
Sensors
R clean the sensors in the front and rear bump‐
ers with a soft clo thand car shampoo
(/ page 224).
R when using a high-pressure cleaner, main tain
a minimum dis tance of 30 cm.
Ru nning boards
R use wate r and acid-free cleaning agents.
R do not clean the aluminium trim insert of the
ru nning board wi thalkaline or acidic cleaning
agents such as wheel cleaners. Do not use Main
tenance and care 369