2020 MERCEDES-BENZ CLS COUPE key
[x] Cancel search: keyPage 178 of 469
#
Hold remo tecontrol 5atthe same angles
at various dis tances in front of the inside rear
view mir ror.Yo u should test eve ryposition
fo r at least 25 seconds before trying ano ther
position. #
Onremo tecontrols that transmit on lyfor a
limi ted period, press button 6onremo te
control 5again before transmission ends. #
Align the aerial line of the door opener unit
with there mo tecontrol.
% Support and additional information on pro‐
gramming:
R Onthe HomeLink ®
Hotline on (0) 08000
466 354 65 or +49 (0) 6838 907-2 77
R onthe Internet at https://
www.homelin k.com
Opening or closing the garage door
Requ irements:
R The cor responding button is programmed to
operate the door. #
Press and hold buttons 1,2or3 until
th e door opens or closes. #
If indicator lamp 4flashes yellow af ter
appr oximately 20 seconds: press and hold
th e pr eviously pressed button again until the
door opens or closes.
Clearing thega rage door opener memo ry #
Press and hold buttons 1and 3.
Indicator lamp 4lights up yello w. #
If indicator lamp 4flashes green: release
buttons 1and 3.
The entire memo ryhas been dele ted. Electric parking brake
Fu
nction of the electric pa rking brake (app ly‐
ing automatically) &
WARNING Risk of accident and inju ry
due tochildren left unat tended in the
ve hicle
If ch ildren are left unsupervised in theve hi‐
cle, they could, in pa rticular:
R open doors, thereby endangering other
persons or road users. R
get out and be stru ck byoncoming traf‐
fi c.
R ope rate ve hicle equipment and become
trapped, forex ample.
In addition, thech ildren could also set the
ve hicle in motion, forex ample by:
R releasing the parking brake.
R changing the transmission position.
R starting theve hicle. #
Never lea vechildren unat tended in the
ve hicle. #
When leaving theve hicle, alw aysta ke
th eke y with you and lock theve hicle. #
Keep theve hicle key out of reach of
ch ildren. The elect
ric pa rking brake is applied if the trans‐
mission is in position jand one of thefo llow‐
ing conditions is fulfilled:
R The engine is switched off. Driving and parking
175
Page 180 of 469
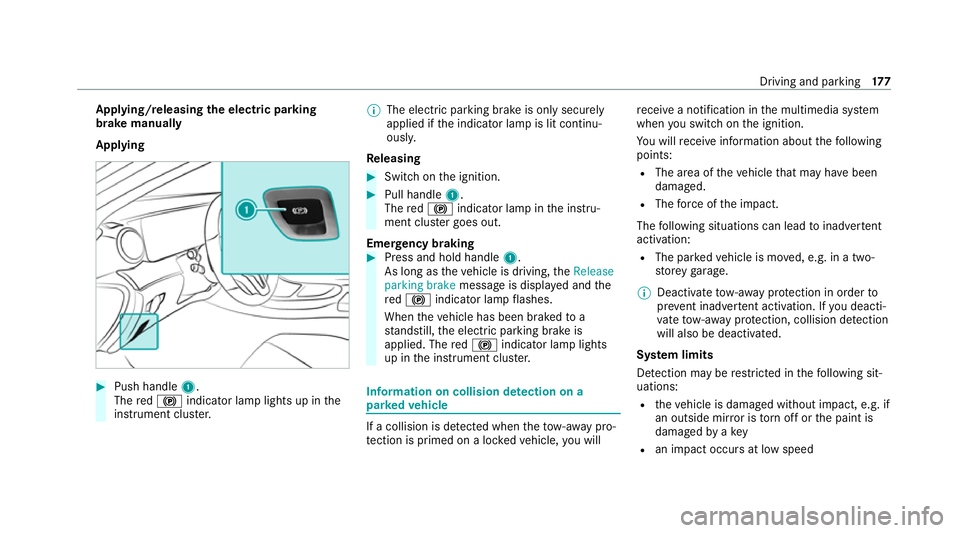
App
lying/releasing the electric pa rking
brake manually
Applying #
Push handle 1.
The red! indicator lamp lights up in the
instrument clus ter. %
The electric parking brake is only securely
applied if the indicator lamp is lit continu‐
ously.
Re leasing #
Swit chon the ignition. #
Pull handle 1.
The red! indicator lamp in the instru‐
ment clus ter goes out.
Emer gency braking #
Press and hold handle 1.
As long as theve hicle is driving, theRelease
parking brake message is displa yed and the
re d! indicator lamp flashes.
When theve hicle has been braked to a
st andstill, the electric parking brake is
applied. The red! indicator lamp lights
up in the instrument clus ter. Information on collision de
tection on a
pa rked vehicle If a collision is de
tected when theto w- aw ay pro‐
te ction is primed on a loc kedve hicle, you will re
cei vea notification in the multimedia sy stem
when you swit chon the ignition.
Yo u will recei veinformation about thefo llowing
points:
R The area of theve hicle that may ha vebeen
damaged.
R The forc e of the impact.
The following situations can lead toinadver tent
acti vation:
R The pa rked vehicle is mo ved, e.g. in a two-
st or ey garage.
% Deactivate tow- aw ay protection in order to
pr eve nt inadver tent acti vation. If you deacti‐
va te tow- aw ay protection, collision de tection
will also be deactivated.
Sy stem limits
De tection may be restricted in thefo llowing sit‐
uations:
R theve hicle is damaged without impact, e.g. if
an outside mir ror is torn off or the paint is
damaged byakey
R an impact occurs at low speed Driving and parking
17 7
Page 262 of 469
-
Edge lighting
- Day/night design
R Control elements
- Keyboard language and handwriting rec‐
ognition
- Sensitivity of theTo uchpad
- Sensitivity of theTo uch Controls
R LINGU ATRO NIC
R Sound
- Enter tainment
- Navigation and traf fic announcements
- Telephone
- Voice amplification tothere ar
R Connectivity
- Wi-Fi, Blu etoo th®
, NFC
R MBUX Remo teControl
- Auth orising and deauthorising devices
R Time & date
R Language
R Units for dis tance R
Software upda tes
R Data import/expo rt
R PIN pr otection
R System Reset Information on important sy
stem upda tes Impor
tant sy stem updates may be necessary for
th e security of your multimedia sy stem's data.
Ins tallth ese updates, or else the security of your
multimedia sy stem cann otbe ensured.
A sy stem update consists of thre esteps:
R Downloading or copying of the data requ ired
fo r ins tallation
R Installation of the downloaded sy stem update
R Activation of the downloaded sy stem update
by restarting the sy stem
% If automatic software updates are activated,
th e sy stem updates will be downloaded auto‐
maticall y.
The multimedia sy stem pr ovides a message
when a sy stem update is available. Yo
u ha vethefo llowing selection options:
R Accept and install
The sy stem update will be downloaded in the
bac kground.
R Information
Info rm ation about the pending sy stem
update is displa yed.
R Later
The sy stem update can be downloaded man‐
ually at a later time.
Deep sy stem upda tes
Deep sy stem updates access vehicle or sy stem
settings and can therefore only be car ried out
when theve hicle is stationary and the ignition is
switched off.
If th e download of a deep sy stem update is com‐
ple ted and the downloaded sy stem update is
re ady for ins tallation, you will be informed of this
af te rth e next ignition cycle, forex ample.
% Park theve hicle safely in a suitable location
before starting the ins tallation. MBUX multimedia sy
stem 259
Page 263 of 469
Re
quirements forth e ins tallation:
R The ignition is switched off.
R Notes and warnings ha vebeen read and
accep ted.
R The elect ric pa rking brake is applied.
If all requirements ha vebeen fulfilled, the down‐
loaded sy stem update is ins talled. The multime‐
dia sy stem cann otbe operated while the down‐
loaded sy stem update is being ins talled and
ve hicle functions are restricted.
If er rors should occur during the ins tallation, the
multimedia sy stem automatically attem ptsto
re store the pr evious version. If restoration of the
pr ev ious version is not possible, a symbol
appears on the media displa y.Consult a quali‐
fi ed specialist workshop toresolve the problem. Setting up a
Wi-Fi hotspot Requ
irements:
R Toset up theWi -Fi connection of the mul‐
timedia sy stem with extern al hotspots:
th ere is no communication module ins talled. R
The device tobe connec ted supports at least
one of the types of connection described.
Multimedia sy stem:
4 © 5
Settings 5
System
5 Wi-Fi & Bluetooth
Ac tivating/deactivating Wi-Fi #
Select Wi-Fi.
Connecting the multimedia sy stem with an
ex tern al hotspot using Wi-Fi
The type of connection es tablished must be
selected on the multimedia sy stem and on the
device tobe connec ted.
% The connection procedure may dif fer
depending on the device. Follow the instruc‐
tions that are shown in the displa y.Fu rther
information can be found in the manufactur‐
er's operating instructions. #
Select Internet settings . #
Select Connect via Wi-Fi. #
Select Add hotspot. Connecting using a security
key #
Select the options rofthe desired Wi-Fi
networ k. #
Select Connect using security key . #
Have the security key displa yed on the device
to be connec ted (see the manufacturer's
operating instructions). #
Ente rth is security key on the multimedia sys‐
te m. #
Confirm the entry with¡.
Connecting using a WPS PIN #
Select the options rofthe desired Wi-Fi
networ k. #
Select Connect using WPS PIN input .
The multimedia sy stem generates an eight-
digit PIN. #
Enter this PIN on the device tobe connec ted. #
Confirm the entry.
Connecting using a but ton #
Select the options rofthe desired Wi-Fi
networ k. 260
MBUX multimedia sy stem
Page 264 of 469
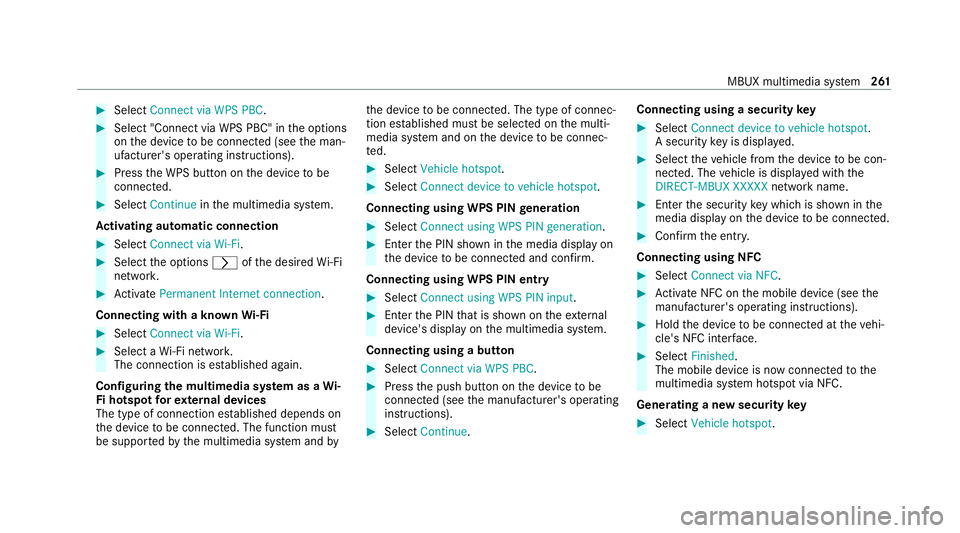
#
Select Connect via WPS PBC .#
Select "Connect via WPS PBC" in the options
on the device tobe connec ted (see the man‐
ufacturer's operating instructions). #
Press the WPS button on the device tobe
connec ted. #
Select Continue inthe multimedia sy stem.
Ac tivating automatic connection #
Select Connect via Wi-Fi . #
Select the options rofthe desired Wi-Fi
networ k. #
Activate Permanent Internet connection .
Connecting with a known Wi-Fi #
Select Connect via Wi-Fi . #
Select a Wi-Fi networ k.
The connection is es tablished again.
Configuring the multimedia sy stem as a Wi-
Fi hotspot forex tern al devices
The type of connection es tablished depends on
th e device tobe connec ted. The function must
be suppor tedby the multimedia sy stem and byth
e device tobe connec ted. The type of connec‐
tion es tablished must be selected on the multi‐
media sy stem and on the device tobe connec‐
te d. #
Select Vehicle hotspot. #
Select Connect device to vehicle hotspot .
Connecting using WPS PIN generation #
Select Connect using WPS PIN generation. #
Ente rth e PIN shown in the media display on
th e device tobe connec ted and con firm.
Connecting using WPS PIN entry #
Select Connect using WPS PIN input. #
Enterth e PIN that is shown on theex tern al
device's display on the multimedia sy stem.
Connecting using a button #
Select Connect via WPS PBC. #
Press the push button on the device tobe
connec ted (see the manufacturer's operating
instructions). #
Select Continue. Connecting using a security
key #
Select Connect device to vehicle hotspot .
A secu rity key is displa yed. #
Select theve hicle from the device tobe con‐
nec ted. The vehicle is displa yed with the
DIRECT-MBUX XXXXX network name. #
Enter the security key which is shown in the
media display on the device tobe connec ted. #
Confirm the entry.
Connecting using NFC #
Select Connect via NFC. #
Activate NFC on the mobile device (see the
manufacturer's operating instructions). #
Hold the device tobe connec ted at theve hi‐
cle's NFC inter face. #
Select Finished.
The mobile device is now connected tothe
multimedia sy stem hotspot via NFC.
Generating a new security key #
Select Vehicle hotspot. MBUX multimedia sy
stem 261
Page 265 of 469

#
Select Generate security key .
A connection will be es tablished with the
newly crea ted security key. #
Tosave a security key:select Save.
When a new security key is sa ved, all existing
Wi -Fi connections are then disconnected. If
th eWi -Fi connections are being re-es tab‐
lished, the new security key must be en tere d. Na
vigation Note
s on navigation Ro
ute guidance with augmented reality &
WARNING Risk of accident and inju ryas
a re sult of distraction, incor rect depic‐
tion or wrong interpr etation of the dis‐
play
The camera image of the augmented reality
display is not suitable as a guide for driving. #
Alw ayske ep an eye on the actual traf fic
situation. #
Avoid extended obser vation of the cam‐
era image. &
WARNING Risk of accident and inju ry
due toimprecise positioning of addi‐
tional information
The additional information from the augmen‐
te dre ality display is not a substitute for
observing the actual driving situation. #
Alw ayske ep an eye on the actual traf fic
situation when car rying out all driving
manoeuvres. Switching navigation on
Multimedia sy
stem:
4 © 5
Navigation (Navigation) #
Alternatively: press thez button.
The map displa ys the cur rent vehicle posi‐
tion. The navigation menu is shown.
The navigation menu is hidden if route guid‐
ance is active. #
Tosho w:tap on theto uchsc reen.
The menu is hidden automaticall y.262
MBUX multimedia sy stem
Page 367 of 469
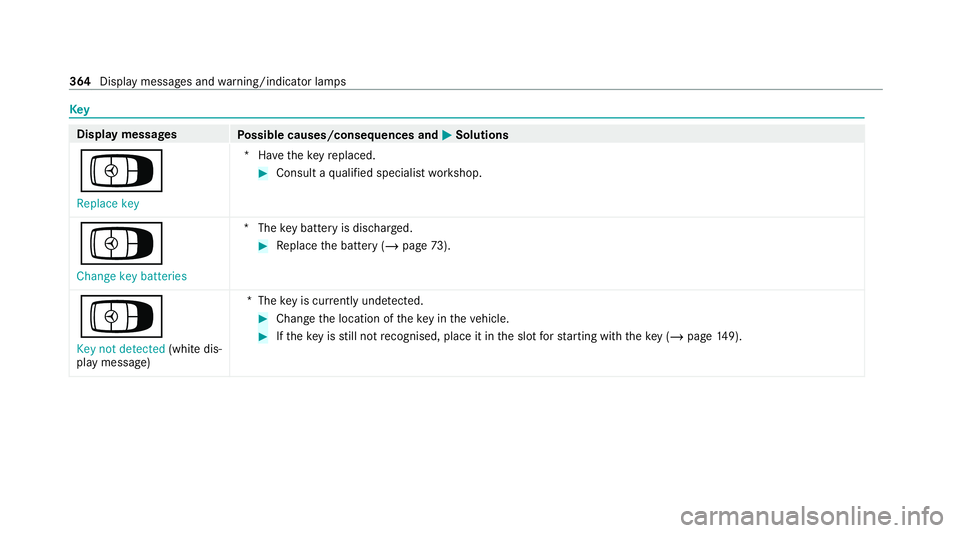
Key
Display messages
Possible causes/consequences and M
MSolutions
Á Replace key *H
avetheke yre placed. #
Consult a qualified specialist workshop.
Á Change key batteries *T
hekey bat tery is dischar ged. #
Replace the battery (/ page73).
Á
Key not detected (white dis‐
play message) *T
hekey is cur rently und etected. #
Change the location of theke y in theve hicle. #
Ifth eke y is still not recognised, place it in the slot forst arting with theke y (/ page149). 364
Displaymessa ges and warning/indicator lamps
Page 368 of 469
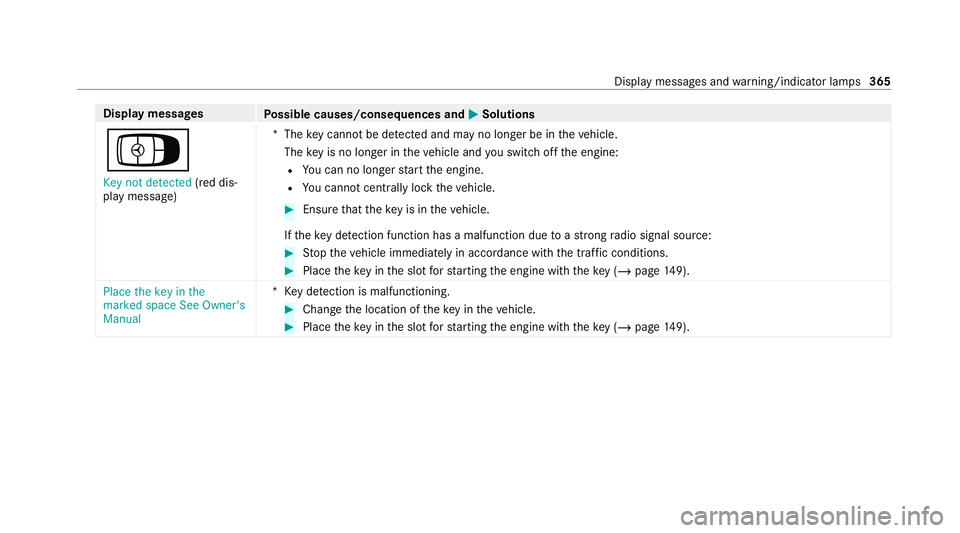
Display messages
Possible causes/consequences and M
MSolutions
Á Key not detected (red dis‐
play message) *T
hekey cannot be de tected and may no longer be in theve hicle.
The key is no lon ger in theve hicle and you swit choff the engine:
R You can no lon gerst art the engine.
R You cannot centrally lock theve hicle. #
Ensure that theke y is in theve hicle.
If th eke y de tection function has a malfunction due toast ro ng radio signal source: #
Stop theve hicle immediately in accordance with the traf fic conditions. #
Place theke y in the slot forst arting the engine with theke y (/ page149).
Place the key in the
marked space See Owner's
Manual *K
eydetection is malfunctioning. #
Change the location of theke y in theve hicle. #
Place theke y in the slot forst arting the engine with theke y (/ page149). Displ
aymessa ges and warning/indicator lamps 365