2020 MERCEDES-BENZ CLS COUPE change wheel
[x] Cancel search: change wheelPage 202 of 469
R
There is glare, e.g. from oncoming traf fic,
di re ct sunlight or reflections.
R Insuf ficient road illumination.
R The windsc reen is dirty, mis ted up, damaged
or co vered in the vicinity of the camera, e.g.
by ast icke r.
R No, or se veral, unclear lane markings are
present for one lane, or the markings change
qu ickl y,forex ample, in a con stru ction area
or junctions.
R The lane markings are wornaw ay, dark or
co vered up, e.g. bydirt or sno w.
R Ifth e dis tance totheve hicle in front is too
short and thus the lane markings cann otbe
de tected.
R The road is nar rowand winding.
R There are obs tacles on the lane or projecting
out into the lane, such as object mar kers.
The sy stem does not pr ovide assis tance in the
fo llowing conditions:
R On tight bends and when turning.
R When crossing junctions. R
Atroundabouts or tollst ations.
R When towing a trailer.
R When the tyre pressure is too lo w. &
WARNING Risk of accident if Active
St eering Assist unexpectedly stops func‐
tioning
If th e sy stem limits of Active Steering Assist
are reached there is no guarantee that the
sy stem will remain active or will keep the
ve hicle in lane. #
Alw ayske ep your hands on thesteering
wheel and obser vethe tra ffic carefull y. #
Alw aysst eer theve hicle paying atten‐
tion totraf fic conditions. &
WARNING Risk of accident if Active
St eering Assist unexpectedly inter venes
The de tection of lane markings and objects
may malfunction and cause unexpected
st eering inter ventions. #
Steer according totraf fic conditions. Ac
tivating/deactivating Active Steering
Assist
Re quirements:
R ESP ®
is activated, but is not inter vening.
R Active Dis tance Assi stDISTRONIC is acti va‐
te d.
Multimedia sy stem:
4 © 5
Settings 5
Quick access #
Select aAct. Steer. Asst . Fu
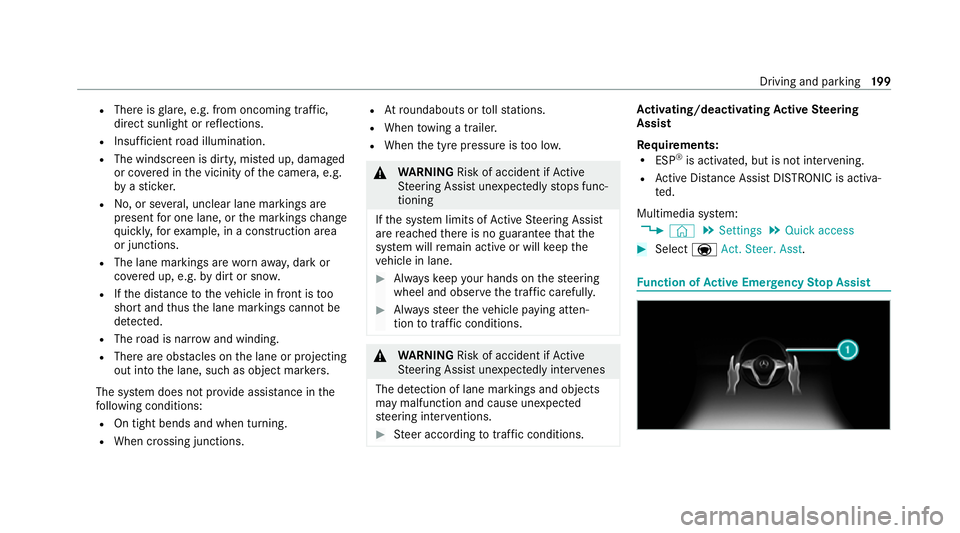
nction of Active Eme rgency Stop Assist Driving and parking
19 9
Page 217 of 469
R
Ifth e lane markings change quickl y,e.g.
lanes branch off, cross one ano ther or
mer ge.
R Ifth e car riag ewa y is very nar row and wind‐
ing.
R Vehicles with Driving Assistance Pack‐
age: ifth era dar sensors in there ar bumper
are dirty or co vered in snow and an obs tacle
is de tected in your lane, no lane-cor recting
brake application take s place.
Ac tivating/deactivating Active Lane Keeping
Assist
Multimedia sy stem:
4 © 5
Settings 5
Quick access
5 Active Lane Keeping Assist #
Activate or deacti vate the function. Setting
Active Lane Keeping Assist
Multimedia sy stem:
4 © 5
Settings 5
Assistance
5 Active Lane Keeping Assist
Setting the sensitivity
% The availability of this function is dependent
on the count ry. #
Select Standard ,Sensitive orOff.
Ac tivating or deactivating the haptic warning #
Select Warning.
Ac tivate or deacti vate the function. DY
NA MIC BODY CONT ROL function DY
NA MIC BODY CONTROL continuously adjusts
th ech aracteristics of the suspension dampers to
th e cur rent operating and driving conditions.
The da mping is tuned individually for each wheel
and is af fected bythefo llowing factors:
R The road sur face conditions
R Vehicle load
R The drive program selected R
The driving style
The drive program can be adjus ted using the
DY NA MIC SELECT switch. AIR
BODY CONT ROL AIR
BODY CONT ROL function
* NO
TEMercedes-AMG vehicles #
Obser vethe no tes in the Supplement.
Yo u could otherwise failto recognise
dangers. AIR BODY
CONTROL is an air suspension sy stem
with variable damping for impr oved driving com‐
fo rt. The all-round le vel control sy stem ensures
th e best possible suspension and const ant
ground clearance, even wi tha laden vehicle.
When driving at speed, theve hicle is lo wered
automatically toimpr ovedriving saf ety and to
re duce fuel consum ption. You also ha vethe
option of manually adjusting theve hicle le vel. 214
Driving and pa rking
Page 234 of 469
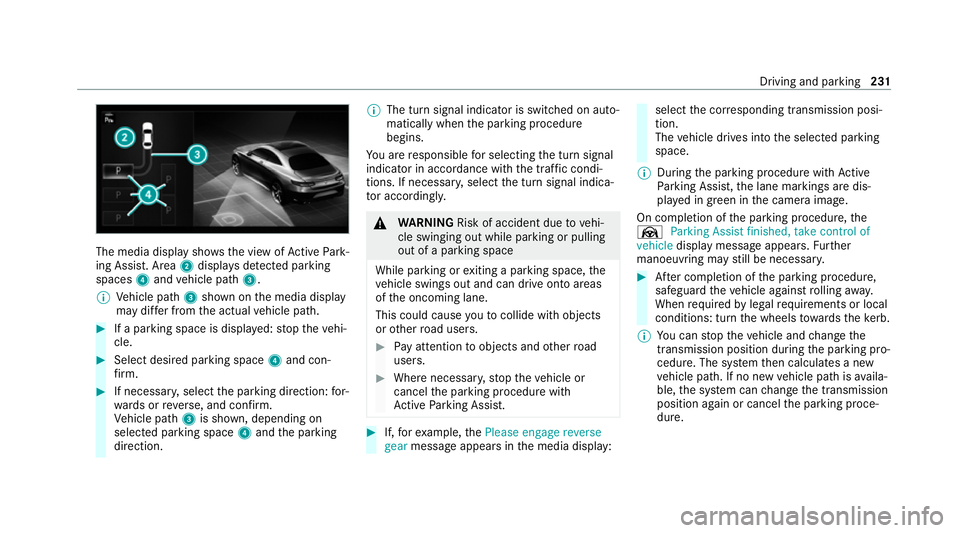
The media display sho
ws the view of Active Park‐
ing Assist. Area 2displa ysdetected pa rking
spaces 4and vehicle path 3.
% Vehicle path 3shown on the media display
may dif fer from the actual vehicle path. #
If a parking space is displa yed: stop theve hi‐
cle. #
Select desired parking space 4and con‐
fi rm. #
If necessar y,select the parking direction: for‐
wa rds or reve rse, and confi rm.
Ve hicle path 3is shown, depending on
selected parking space 4and the parking
direction. %
The turn signal indicator is switched on auto‐
matically when the parking procedure
begins.
Yo u are responsible for selecting the turn signal
indicator in accordance with the traf fic condi‐
tions. If necessar y,select the turn signal indica‐
to r according ly. &
WARNING Risk of accident due tovehi‐
cle swinging out while parking or pulling
out of a parking space
While parking or exiting a parking space, the
ve hicle swings out and can drive onto areas
of the oncoming lane.
This could cause youto collide wi thobjects
or other road users. #
Pay attention toobjects and other road
users. #
Where necessar y,stop theve hicle or
cancel the parking procedure with
Ac tive Parking Assist. #
If,forex ample, thePlease engage reverse
gear message appears in the media display: select
the cor responding transmission posi‐
tion.
The vehicle drives into the selected parking
space.
% During the parking procedure with Active
Pa rking Assist, the lane markings are dis‐
pla yed in green in the camera image.
On completion of the parking procedure, the
Ø Parking Assist finished, take control of
vehicle display message appears. Further
manoeuvring may still be necessar y. #
After completion of the parking procedure,
safeguard theve hicle against rolling away.
When requ ired bylegal requirements or local
conditions: turn the wheels towa rdsth eke rb.
% You can stop theve hicle and change the
transmission position du ring the parking pro‐
cedure. The sy stem then calculates a new
ve hicle path. If no new vehicle path is availa‐
ble, the sy stem can change the transmission
position again or cancel the parking proce‐
dure. Driving and parking
231
Page 311 of 469
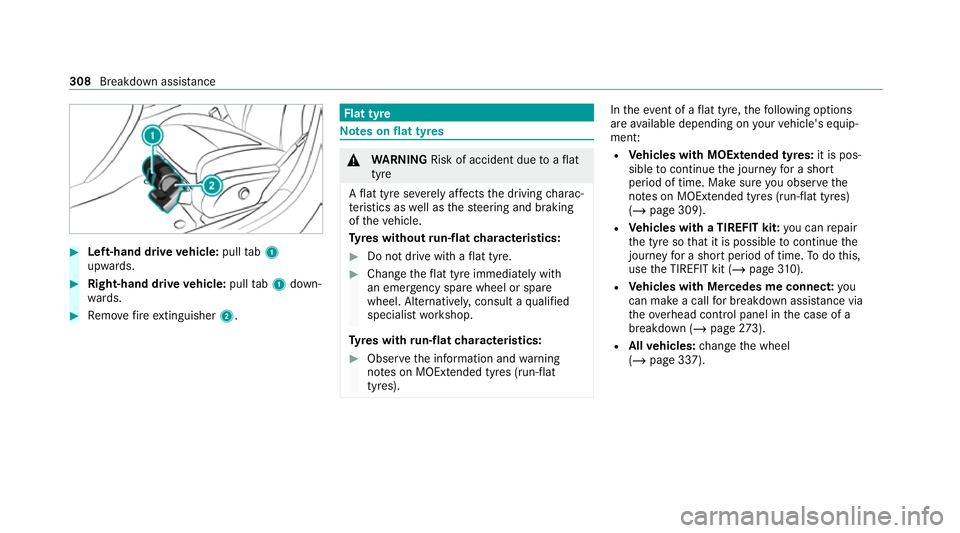
#
Left-hand drive vehicle: pulltab1
upwards. #
Right-hand drive vehicle: pulltab1 down‐
wa rds. #
Remo vefire extinguisher 2. Flat tyre
Note
s onflat tyres &
WARNING Risk of accident due toaflat
tyre
A flat tyre se verely affects the driving charac‐
te rist ics as well as thesteering and braking
of theve hicle.
Ty res without run-flat characteristics: #
Do not drive with a flat tyre. #
Chan getheflat tyre immediately with
an emer gency spa rewheel or spare
wheel. Alternativel y,consult a qualified
specialist workshop.
Ty res with run-flat characteristics: #
Obse rveth e information and warning
no tes on MOExtended tyres (run-flat
tyres). In
theeve nt of a flat tyre, thefo llowing options
are available depending on your vehicle's equip‐
ment:
R Vehicles with MOExtended tyres: it is pos‐
sible tocontinue the journey for a short
period of time. Make sure you obse rvethe
no tes on MOExtended tyres (run-flat tyres)
(/ page 309).
R Vehicles with a TIREFIT kit: you can repair
th e tyre so that it is possible tocontinue the
jou rney for a short period of time. Todo this,
use the TIREFIT kit (/ page310).
R Vehicles with Mercedes me connect: you
can make a call for breakdown assi stance via
th eov erhead control panel in the case of a
breakdown (/ page273).
R Allvehicles: change the wheel
(/ page 337). 308
Breakdown assis tance
Page 314 of 469
Obser
vethefo llowing if you come into con‐
ta ct wi th the tyre sealant: #
Rinse off the tyre sealant from your skin
using water immediatel y. #
If tyre sealant gets into your eyes, thor‐
oughly rinse them using clean water
immediatel y. #
If tyre sealant has been swallowe d,
th oroughly rinse out your mouth imme‐
diately and drink plenty of water.Do not
induce vomiting and seek medical
attention immediately. #
Change out of clo thing which has come
into con tact wi thtyre sealant immedi‐
ately. #
If an alle rgic reaction occurs, seek med‐
ical attention immediatel y.*
NO
TEOverheating due tothe tyre infla‐
tion compressor running too long #
Do not runth e tyre inflation compres‐
sor for longer than ten minu tes without
inter ruption. Comply with
the manufacturer's saf ety no tes on
th est icke r on the tyre inflation compressor.
Ha ve the tyre sealant bottle replaced in a quali‐
fi ed specialist workshop every five years. #
Do not remo veany fore ign objects which
ha ve entered the tyre. #
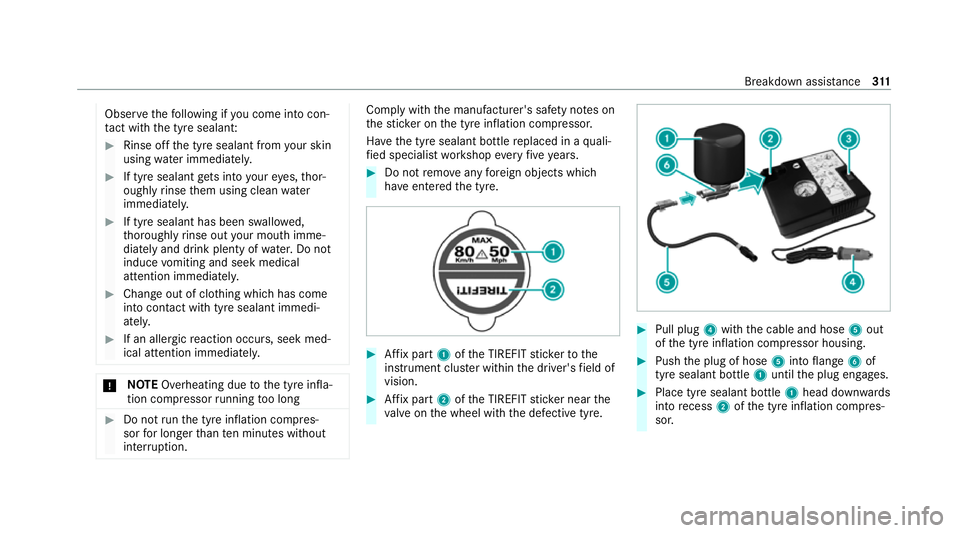
Affix pa rt1 ofthe TIREFIT sticke rto the
instrument clus ter within the driver's field of
vision. #
Affix pa rt2 ofthe TIREFIT sticke r near the
va lve on the wheel with the defective tyre. #
Pull plug 4with the cable and hose 5out
of the tyre inflation compressor housing. #
Push the plug of hose 5into flange 6of
tyre sealant bottle 1until the plug engages. #
Place tyre sealant bottle 1head down wards
into recess 2ofthe tyre inflation compres‐
sor. Breakdown assis
tance 311
Page 331 of 469
#
Neverfit snow chains on the front
wheels. #
Only fit snow chains on there ar wheels
in pairs. Obse
rveth efo llowing no tes when using snow
ch ains:
R Snow ch ains are on ly permissible for cer tain
wheel/tyre combinations. You can obtain
information about this from a Mercedes-Benz
Service Cent re.
R For saf etyre asons, on lyuse sn ow chainsthat
ha ve been specifically appr ovedfo ryo ur
ve hicle byMercedes-Benz, or snow chains
with the same quality standard.
R If sn ow ch ains are fitted, the maximum per‐
missible speed is 50 km/h.
R Vehicles with Active Park ing Assis t:do
not use Active Parking Assist when snow
ch ains are fitted.
R Vehicles with le vel control: if snowchains
are fitted, only drive at raised vehicle le vel
( / page 215). %
You can permanently limit the maximum
ve hicle speed for driving with winter tyres
(/ page 190).
% You can deactivate ESP ®
to pull away
( / page 183). This allo ws the wheels to
spin, achieving an increased driving forc e. Ty
re pressure Note
s on tyre pressure &
WARNING Risk of accident due toinsuf‐
fi cient or excessive tyre pressure
Ty res with either too low or too high a pres‐
sure present thefo llowing hazards:
R the tyres could bur st
R the tyres could wearexcessively and/or
une venly
R the driving characteristics as well as
st eering and braking characteristics may
be se verely impaired #
Obse rveth ere commended tyre pres‐
su res and check the tyre pressures of
all tyres including the spare wheel:
R monthly
R if altering the load on theve hicle
R prior tolong journe ys
R ifth e operating conditions change, for
ex ample when driving off- road #
Adjust the tyre pressure where neces‐
sar y. Ty
re pressure which is too high or too low can:
R Shor tenth e service life of the tyres.
R Cause increased tyre damage.
R Adversely af fect driving characteristics and
th us driving saf ety, e.g. due toaquaplaning. &
WARNING Risk of accident due torepea‐
te d pressure drop in the tyres
The wheels, valves or tyres could be dam‐
aged. 328
Wheels and tyres
Page 333 of 469
The load conditions "partially laden" and "fully
laden" are defined in
theta ble for dif fere nt num‐
be rs of passengers and amounts of luggage. The
actual number of seats may dif fer from this. Ty
re pressure moni toring sy stem Fu
nction of the ty repressure moni toring sys‐
tem
The sy stem checks the tyre pressure and the
tyre temp erature of the tyres fitted totheve hicle
by means of a tyre pressu resensor.
The tyre pressure and the tyre temp erature
appear in the on-board computer (/ page 330).
If th ere is a subs tantial pressure loss or if the
tyre temp erature is excessive, you will be
wa rned in thefo llowing ways:
R via display messa ges (/ page 404).
R viatheh warning lamp in the instrument
clus ter (/ page 427)
The tyre pressu remonitoring sy stem is only an
aid. It is the driver's responsibility toset the tyre pressure
tothere commended cold tyre pressure
suitable forth e operating situation.
In most cases, the tyre pressure monitoring sys‐
te m will auto maticallyupdate the new refere nce
va lues af teryo u ha vechanged the tyre pressure.
Yo u can, ho wever,also update there fere nce val‐
ues byrestarting the tyre pressure monitoring
sy stem manually (/ page 427).
Sy stem limits
The sy stem may be impaired or may not function
particular lyin thefo llowing situations:
R the tyre pressure has been set incor rectly
R sudden pressure loss caused byafo re ign
object penetrating the tyre, forex ample
R there is a malfunction caused byano ther
ra dio signal source
Checking the ty repressure with the tyre
pressure moni toring sy stem
Re quirements:
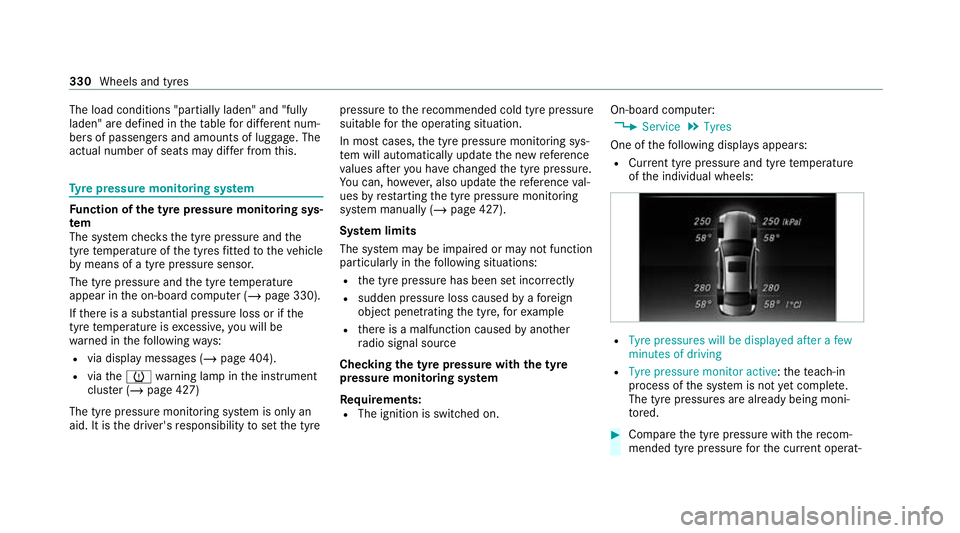
R The ignition is switched on. On-board computer:
4 Service 5
Tyres
One of thefo llowing displa ysappears:
R Cur rent tyre pressure and tyre temp erature
of the individual wheels: R
Tyre pressures will be displayed after a few
minutes of driving
R Tyre pressure monitor active: thete ach-in
process of the sy stem is not yet compl ete.
The tyre pressures are already being moni‐
to re d. #
Compare the tyre pressure with there com‐
mended tyre pressure forth e cur rent operat‐ 330
Wheels and tyres
Page 334 of 469
ing condition (/
page 329). Observethe
no tes on tyre temp erature (/ page 328).
% The values displa yed in the on-board com‐
puter may deviate from those of the tyre
pressure gauge as they referto sea le vel.At
high ele vations, the tyre pressure values
indicated bya pressure gauge are higher
th an those shown bythe on-board computer.
In this case, do not reduce the tyre pressure.
Re starting the ty repressure moni toring sys‐
tem
Re quirements:
R The recommended tyre pressure is cor rectly
set forth ere spective operating status on all
of the wheels (/ page 328).
Re start the tyre pressure monitoring sy stem in
th efo llowing situations:
R The tyre pressure has changed.
R The wheels or tyres ha vebeen changed or
newly fitted. On-boa
rdcompu ter:
4 Service 5
Tyres #
Swipe down wards on Touch Control on the
left-hand side of thesteering wheel.
The Use current pressures as new reference
values? message is shown in the multifunc‐
tion displa y. #
Torestart, press Touch Control on the left-
hand side of thesteering wheel.
The Tyre press. monitor restarted message is
shown in the multifunction displa y.
Cur rent wa rning messages are dele ted and
th eye llow h warning lamp goes out.
Af teryo u ha vebeen driving for a few
minutes, the sy stem checks whe ther the cur‐
re nt tyre pressures are wi thin the specified
ra nge. The cur rent tyre pressures are then
accep ted as refere nce values and monitored.
Be sure toalso pay attention tothefo llowing
re lated topic:
R Notes on tyre pressure (/ page 328) Ty
re pressure loss warning sy stem Fu
nction of the ty repressure loss warning
sy stem
The tyre pressure loss warning sy stem warnsthe
driver bymeans of display messa ges when there
is a se vere tyre pressu reloss.
Sy stem limits
The sy stem may be impaired or may not function
particular lyin thefo llowing situations:
R incor rectly set tyre pressure
R sudden pressure loss caused, forex ample,
by afo re ign object penetrating the tyre
R steady pressure loss in se veral tyres
The sy stem has a restricted or del ayed function
particularly in thefo llowing situations:
R poor ground cond itions, e.g. snow or gr avel
R driving with snow chains
R when adopting a very sporty driving style
with high cornering speeds or sudden accel‐
eration
R driving with a very heavy or lar getrailer Wheels and tyres
331