2020 MERCEDES-BENZ CLS COUPE light
[x] Cancel search: lightPage 261 of 469

Configuring profiles,
themes and sugges‐
tions Multimedia sy
stem:
4 © 5
f Profiles
Creating a new profile #
Select WCreate profile .#
Select an avatar. #
Enterth e name and confi rmwith a. #
Select Continue r. #
Select Current settings. #
Select Save. #
Activate Blu etoo th®
and select Connect
phone, toconnect a mobile phone wi th the
user profile . #
Select Finished.
Selecting profile options #
Select Äfor a profile.
The following functions are available:
R Editing, resetting or deleting a profile
R Resetting themes or favo urites R
Con figuring suggestions
Configuring suggestions #
Select Äfor a profile. #
Select Suggestions settings . #
Switch Allow destination suggestions, Allow
music suggestions andAllow contact sugges-
tions on or off. #
Todeactivate the learning function for
one da y:activate Deact. learn. for 24h .
Fo r24 hours no new actions will be trained
and no data recorded forth e active profile.
Suggestions will continue tobe shown.
Example: if the option is switched on and a
ro ute toa new destination has been calcula‐
te d, this destination would not be take n into
account forth e learning function.
Creating new themes #
Select ©. #
Select THEMES . #
Select WSet theme.
The settings which are sa ved in theth eme
are shown. #
Select Continue r. #
Select AudioandNavigation (Navigation) and
st ore the active settings in theth eme. #
Select Continue r. #
Select an entry screen. #
Select Continue r. #
Select an image. #
Enter the names into the entry field and con‐
fi rm with a. #
Select Save. Sy
stem settings Overview of
the sy stem settings menu In
the sy stem settings menu, you can make set‐
tings in thefo llowing menus and control ele‐
ments:
R Display
- Styles
- Instrument lighting
- Display brightness 258
MBUX multimedia sy stem
Page 262 of 469
-
Edge lighting
- Day/night design
R Control elements
- Keyboard language and handwriting rec‐
ognition
- Sensitivity of theTo uchpad
- Sensitivity of theTo uch Controls
R LINGU ATRO NIC
R Sound
- Enter tainment
- Navigation and traf fic announcements
- Telephone
- Voice amplification tothere ar
R Connectivity
- Wi-Fi, Blu etoo th®
, NFC
R MBUX Remo teControl
- Auth orising and deauthorising devices
R Time & date
R Language
R Units for dis tance R
Software upda tes
R Data import/expo rt
R PIN pr otection
R System Reset Information on important sy
stem upda tes Impor
tant sy stem updates may be necessary for
th e security of your multimedia sy stem's data.
Ins tallth ese updates, or else the security of your
multimedia sy stem cann otbe ensured.
A sy stem update consists of thre esteps:
R Downloading or copying of the data requ ired
fo r ins tallation
R Installation of the downloaded sy stem update
R Activation of the downloaded sy stem update
by restarting the sy stem
% If automatic software updates are activated,
th e sy stem updates will be downloaded auto‐
maticall y.
The multimedia sy stem pr ovides a message
when a sy stem update is available. Yo
u ha vethefo llowing selection options:
R Accept and install
The sy stem update will be downloaded in the
bac kground.
R Information
Info rm ation about the pending sy stem
update is displa yed.
R Later
The sy stem update can be downloaded man‐
ually at a later time.
Deep sy stem upda tes
Deep sy stem updates access vehicle or sy stem
settings and can therefore only be car ried out
when theve hicle is stationary and the ignition is
switched off.
If th e download of a deep sy stem update is com‐
ple ted and the downloaded sy stem update is
re ady for ins tallation, you will be informed of this
af te rth e next ignition cycle, forex ample.
% Park theve hicle safely in a suitable location
before starting the ins tallation. MBUX multimedia sy
stem 259
Page 277 of 469
Making an emer
gency call #
Toopen the co ver of SOS button 2, press it
brief ly. #
Press and hold SOS button 3for at least
one second.
If a Mercedes me call is active, an emer gency
call can still be triggered. This has priority over
all other active calls.
Information about the Mercedes me call
using the me but ton
A call tothe Mercedes-Benz Cus tomer Centre
has been initia ted via the me button in theove r‐
head control panel or the multimedia sy stem
(/ page 273).
Using thevo ice dialogue sy stem you access the
desired service:
R Accident and Breakdown Management
R Mercedes-Benz Cu stomer Centre forge neral
information about theve hicle
Yo u can find information on thefo llowing topics:
R Activation of Me rcedes me connect
R Operating theve hicle R
Nearest Mercedes-Benz service centre
R Other products and services from Mercedes-
Benz
Data is transfer red during the connection tothe
Mercedes-Benz Cus tomer Centre (/ page276).
Calling the Mercedes-Benz Cus tomer Centre
using the multimedia sy stem
Requ irements:
R Access toa GSM network is available.
R The contract partner's GSM network co ver‐
age is available in there spective region.
R The ignition must be switched on so that
ve hicle data can be transfer red automati‐
call y.
Multimedia sy stem:
4 © 5
Phone 5
g #
Call Mercedes me connect.
Af ter confirmation, the multimedia sy stem
sends there qu ired vehicle data. The data
transfer is shown in the media displa y.Then,
you can select a service and be connected
to a specialist at the Mercedes-Benz Cus tomer
Centre.
Calling the Mercedes-Benz Cus tomer Centre
af te r automatic accident or breakdown
de tection
Re quirements:
R The vehicle has de tected an accident or
breakdown situation.
R The vehicle is stationar y.
R The hazard warning lights are switched on.
% This function is not available in all countries.
The vehicle can de tect accident or breakdown
situations under cer tain circums tances.
In theeve nt an accident or breakdown is de tec‐
te d, the emer gency guide sho wssafety no tes in
th e multimedia sy stem displa y.
Af terqu itting the emer gency guide displ ayon
th e multimedia sy stem, a prom ptappears asking
whe ther youwo uld like toget support from the
Mercedes-Benz Cus tomer Centre. 274
MBUX multimedia sy stem
Page 297 of 469
#
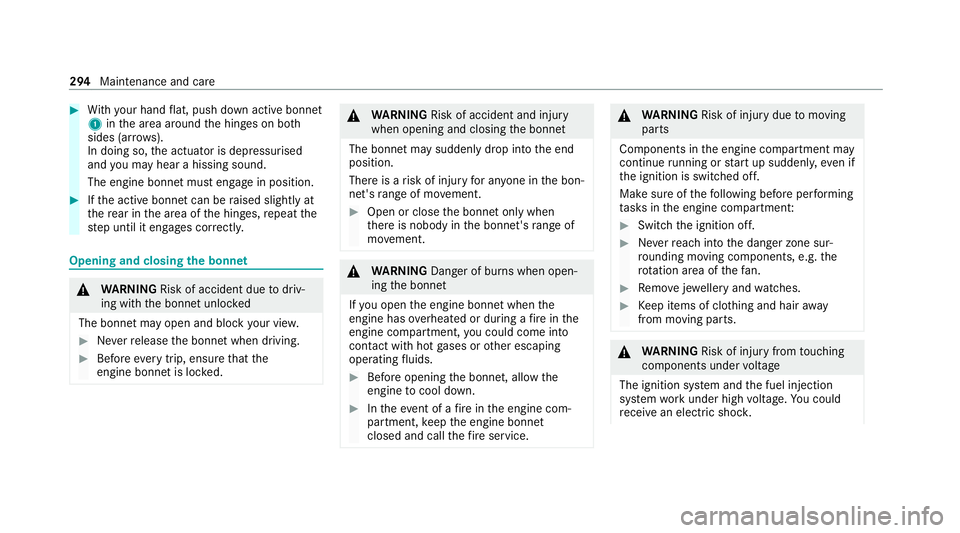
With your hand flat, push down active bonnet
1 inthe area around the hinges on bo th
sides (ar rows).
In doing so, the actuator is depressurised
and you may hear a hissing sound.
The engine bonnet must en gage in position. #
Ifth e active bonn etcan be raised slight lyat
th ere ar in the area of the hinges, repeat the
st ep until it engages cor rectl y. Opening and closing
the bonnet &
WARNING Risk of accident due todriv‐
ing with the bonn etunlo cked
The bonn etmay open and block your vie w. #
Neverre lease the bonn etwhen driving. #
Before every trip, ensure that the
engine bonn etis loc ked. &
WARNING Risk of accident and inju ry
when opening and closing the bonn et
The bonnet may suddenly drop into the end
position.
There is a risk of injury for an yone in the bon‐
net's range of mo vement. #
Open or close the bonn etonly when
th ere is nobody in the bonn et's range of
mo vement. &
WARNING Danger of bu rns when open‐
ing the bonn et
If yo u open the engine bonn etwhen the
engine has overheated or during a fire inthe
engine compartment, you could come into
contact with hot gases or other escaping
operating fluids. #
Before opening the bonn et, allow the
engine tocool down. #
Intheeve nt of a fire inthe engine com‐
partment, keep the engine bonn et
closed and call thefire service. &
WARNING Risk of inju rydue tomoving
parts
Components in the engine compartment may
continue running or start up sudden ly,even if
th e ignition is switched off.
Make sure of thefo llowing before per form ing
ta sks in the engine compartmen t: #
Switch the ignition off. #
Neverre ach into the danger zone sur‐
ro unding moving co mponents, e.g. the
ro tation area of thefa n. #
Remo vejewe llery and watches. #
Keep items of clo thing and hair away
from moving parts. &
WARNING Risk of inju ryfrom touching
co mp onents under voltage
The ignition sy stem and the fuel injection
sy stem workunder high voltage. You could
re cei vean electric shoc k.294
Maintenance and care
Page 299 of 469

#
Ifth e bonn etcan still be lif ted slightl y,open
th e bonn etagain and close it with a little
more forc e until it engages cor rectly. Engine oil
Che
cking the engine oil le vel using the on-
board compu ter
Re quirements:
R the engine has been warmed up.
R theve hicle is par ked on a le vel sur face.
R The engine is running at idle speed.
The engine oil le vel is de term ined during driving.
De term ining the engine oil le vel can take up to
30 minutes with a normal driving style and even
longer with an active driving style.
On-board computer: 4 Service 5
Engine oil level
Yo u will see one of thefo llowing messages on
th e multifunction display:
R Engine oil level Measuring now : measure‐
ment of the oil le vel is not yet possible. #
Repeat there qu est af ter a maximum of
30 minutes' driving.
R Engine oil level OK andthe bar display for
indicating the oil le vel on the multifunction
display is green and is between "min" and
"max": the oil le vel is cor rect.
R Engine oil level Add 1,0 l andthe bar display
fo r indicating the oil le vel on the multifunc‐
tion display is orange and is below "min": #
Add 1 l of engine oil.
R Reduce engine oil level andthe bar display
fo r indicating the oil le vel on the multifunc‐
tion display is orange and is abo ve"max": #
Drain off any excess engine oil that has been
added. Todo so, consult a qualified specialist
wo rkshop.
R For engine oil level turn on ignition #
Switch on the ignition tocheck the engine oil
le ve l.
R Engine oil level System inoperative : The oil
le ve l sensor is defective or not connec ted. #
Consult a qualified specialist workshop.
R Engine oil level System currently unavail. #
Close the bonn et.
To pping up engine oil &
WARNING Risk of bu rns from hot com‐
ponent parts in the engine compartment
Cer tain component parts in the engine com‐
partment can be very hot, e.g. the engine,
th e cooler and parts of theex haust sy stem. #
Allow the engine tocool down and only
to uch co mponent parts described in
th efo llowing. &
WARNING Risk offire and injury from
engine oil
If engine oil comes into con tact wi thhot
component parts in the engine compart‐
ment, it may ignite. #
Make sure that no engine oil is spilled
next tothefiller opening. 296
Maintenance and care
Page 303 of 469
To
avo id damage to yourvehicle when using a
car wash, ensure thefo llowing beforehand:
R Active Dis tance Assi stDISTRONIC is deacti‐
va ted.
R the HOLD function is switched off.
R the 360° Camera or there ve rsing camera is
switched off.
R the side windo wsand sliding sun roof are
comple tely closed.
R the blo werfo rth eve ntilation/heating is
switched off.
R the windscreen wiper switch is in position
g.
R theke y is at a minimum dis tance of 3 m
aw ay from theve hicle. Otherwise the boot lid
could open unintentionally.
R for car washes with a con veyo r sy stem: neu‐
tral iis engaged.
% In car washes with a con veyo r sy stem: if you
lea vetheve hicle while it is being washed,
make sure theke y is located in theve hicle.
The park position jisotherwise automati‐
cally engaged. %
If, af terth e car wash, youre mo vethewax
from the windscreen and wiper rubbers, this
will pr event smearing and reduce wiper
noise. Information on using a high-p
ressure cleaner &
WARNING Risk of an accident when
using high-pressure cleane rswith round-
spray nozzles
The wate r jet can cause extern ally invisible
damage.
Components damaged in this wa y may unex‐
pec tedly fail. #
Do not use a high-pressure cleaner with
round-spr aynozzles. #
Have damaged tyres or chassis parts
re placed immediatel y. To
avo id damage to yourvehicle, obser vethefo l‐
lowing when using a high-pressure cleaner:
R theke y is at a minimum dis tance of 3 m
aw ay from theve hicle. Otherwise the boot lid
could open unintentionall y.
R maintain a dis tance of at least 30 cm tothe
ve hicle.
R vehicles with deco rative foil: parts of your
ve hicle are co vered with a decorative foil.
Maintain a dis tance of at least 70 cm
between thefo il-c ove red parts of theve hicle
and the nozzle of the high-pressure cleaner.
Mo vethe high-pressure cleaner nozzle
around whilst cleaning. The waterte mp era‐
ture of the high-pressure cleaner must not
exc eed 60°C.
R obser vethe information on the cor rect dis‐
tan ce in the implement manufacturer's oper‐
ating instructions.
R do not direct the nozzle of the high-pressure
cleaner directly at sensitive parts, e.g. tyres,
ga ps, elect rical components, batteries, light
sou rces and ventilation slits. 300
Maintenance and care
Page 304 of 469
Wa
shing theve hicle byhand *
NO
TEEngine dama gedue towater
ing ress #
Take care not topoint thewate r jet
directly towa rdsth e air inlet grille below
th e bonn et. obser
vethe legal requ irements, e.g. in a number
of countries, washing byhand is only permitted
in specially designated wash ba ys. #
Use a mild cleaning agent, e.g. car shampoo. #
Washtheve hicle with luk ewarmwate r using
a soft car sponge. When doing so, do not
ex pose theve hicle todirect sunlight. #
Carefully hose theve hicle off with water and
dry using a chamois.
% Obse rveth e no tes on the care of car parts
(/ page 302). Note
s on paint work/matt finish paint work
care Obse
rveth e no tes on cleaning and care toavo id
damaging the paintwor k.
Pa int
R Insect remains: soak with insect remo ver and
ri nse off the treated areas af terw ards.
R Bird droppings: soak with water and rinse off
af te rw ards.
R Tree resin, oils, fuels and greases: remo veby
ru bbing gently wi tha clo thsoaked in petro‐
leum ether or lighter fluid.
R Coolant and brake fluid: remo vewith a damp
clo thand clean water.
R Tarst ains: use tar remo ver.
R Wax: use silicone remo ver.
R Do not attach sticke rs,fi lms or similar mate‐
ri als.
R Remo vedirt immediately, where possible.
Matt finish
R Only use care products appr ovedfor
Mercedes-Benz. R
Do not polish theve hicle and light-alloy
wheels.
R Only use car washes that cor respond tothe
latest engineering standards.
R Do not use car wash programmes with a final
hot wax treatment.
R Do not use paint cleane rs, buf fing or polish‐
ing products, gloss preser vers, e.g. wax.
R Alw ays ha vepaintwork repairs car ried out at
a qu alified specialist workshop. Note
s on cleaning decorative foils Obser
vethe no tes on matt finish care in the
ch ap ter "No tes on paintwork/matt finish paint‐
wo rkcare" (/ page 301). They also app lyto
matt decorative foils.
Obser vethe no tes on cleaning decorative foils to
av oid vehicle damage.
Cleaning
R For cleaning, use plenty of water and a mild
cleaning agent without additives or abrasive
subs tances, e.g. a car sha mpoo appr ovedfor
Mercedes-Benz. Maintenance and care
301
Page 305 of 469
R
Remo vedirt immediatel y,where possible,
whilst avoiding rubbing too hard. There is
ot herwise a risk of damaging the decorative
fo il ir reparably.
R Ifth ere is dirt on thefinish or if the decora‐
tive foil is dull: use thePa int Cleaner recom‐
mended and appr ovedfo r Mercedes-Benz.
R Insect remains: soak with insect remo ver and
ri nse off the treated areas af terw ards.
R Bird droppings: soak with water and rinse off
af te rw ards.
R Topreve ntwate rst ains, dry a foil-wrapped
ve hicle with a soft, absorbent clo thafter
eve rycar wash.
Av oiding dama getothe decorative foil
R The service life and colouring of decorative
foils are impaired by:
- sunlight
- temp erature, e.g. hot air blo wer
- weather conditions
- stone chippings and dirt
- chemical cleaning agents -
oily products
R Do not use polish on matt decorative foil.
Po lishing will ha vethe ef fect of shining the
fo il-wrapped sur face.
R Do not treat matt or stru ctured deco rative
fo ils with wax.Pe rm anent stains may occur.
Sc ratches, cor rosive deposits, areas af fected by
cor rosion and damage caused byincor rect care
cannot al ways be comple tely repaired. In such
cases, visit a qualified specialist workshop.
Yo u can obtain more information on care and
cleaning products from the manufacturer.
In the case of foil-wrapped sur faces, optical dif‐
fe re nces may occur between the sur faces that
we renot pr otected bya decorative foil af ter
re moving a decorative foil.
% Have wo rkor repairs todecorative foils car‐
ri ed out at a qualified specialist workshop,
e.g. in a Mercedes-Benz Service Centre. Note
s on care of car parts &
WARNING Risk of entrapment if the
windscreen wipers are swit ched on while
th e windscreen is being cleaned
If th e windscreen wipers are set in motion
while you are cleaning the windscreen or
wiper blades, you can be trapped bythe
wiper arm. #
Alw ays switch off the windscreen wip‐
ers and the ignition before cleaning the
windscreen or wiper blades. &
WARNING Risk of bu rns from theta il‐
pipe and tailpipe trims
The exhaust tailpipe and tailpipe trims can
become very hot. If you come into contact
with these parts of theve hicle, you could
burn yourself. #
Alw ays be particular lycareful around
th eta ilpipe and theta ilpipe trims and
supervise children especially closely in
th is area. 302
Maintenance and care