2020 MERCEDES-BENZ C-CLASS ESTATE trailer
[x] Cancel search: trailerPage 16 of 565

1
#! Turn signal lights →
13 0
2 R Rear fog light →
12 9
3 K High beam →
13 0
L Low beam →
12 8
T Standing lights →
12 8
4 ÿ Coolant temp erature →
508
5 Coolant temp erature display →
251
6 L Distance warning →
513
7 ü Seat belt →
506
8 h Tyre pressure monitoring sy stem →
517
9 Ù Powe rst eering →
507
A ! Electric pa rking brake (yellow) →
511
B ! Electric pa rking brake (red) →
511
C 6 Restra int sy stem →
506 D
ï Trailer hit ch →
507
E J Brakes (red) →
511
F 8 Reser vefuel with fuel filler flap location
indicator →
508
G Fuel le vel →
251
H ä Suspension →
513
I J Brakes (yellow) →
511
J # Electrical fault →
508
K ; Engine diagnostics →
508
L % Diesel engine: preglow
M ! ABS →
514
N å ESP®
OFF →
514
÷ ESP®
→
514 At
aglance – Indicator and warning lamps (widesc reen cockpit) 13
Page 55 of 565
Yo
u will need toper form certain settings your‐
self. #
Ifth e seat belt pre-tensioning is not reduced,
mo vethe seat backrest back slightl y.
The locking mechanism releases. Fu
nction of PRE-SAFE ®
PLUS (anticipatory
occupant pr otection plus) PRE-
SAFE®
PLUS can de tect cer tain impacts,
particular lyan imminent rear impact, and take
pre-em ptive measures toprotect theve hicle
occupants. These measures cannot necessarily
pr eve nt an imminent impact.
PRE-SAFE ®
PLUS can implement thefo llowing
measures independently of each other:
R Tightening the seat belts on the driver's seat
and front passenger seat.
R Activating there ar hazard warning lights at a
higher flashing frequenc y.
R Increasing brake pressure when theve hicle
is stationar y.This brake application is cancel‐
led automatically when theve hicle pulls
aw ay. If an accident did not occur,
the pre-em ptive
measures that we retake n are reve rsed.
Sy stem limits
The sy stem will not initiate any action in thefo l‐
lowing situations:
R when reve rsing
or
R when theve hicle is towing a trailer and there
is a risk of a rear impact
The sy stem will not initiate any braking applica‐
tion in thefo llowing situations:
R whilst driving
or
R when entering or exiting a parking space
while using Active Parking Assist Safely transporting
children in theve hicle Alw
ays obser vewhen children are tr avelling
in theve hicle %
Also strictly obser vethe saf ety no tesfo rthe
specific situation. In this wa yyo u can recog‐ nise po
tential risks and avoid dangers if chil‐
dren are tr avelling in theve hicle
(/ page 53).
Be diligent
Bear in mind that negligence when securing a
ch ild in thech ild restra int sy stem may ha veseri‐
ous consequences. Alw ays be diligent in secur‐
ing a child carefully before everyjou rney.
To impr oveprotection forch ildren younger than
12 years old or under 1.50 m in height,
Mercedes-Benz recommends you obse rvethe
fo llowing information:
R Alw ays secure thech ild in a child restra int
sy stem suitable forth is Mercedes-Benz vehi‐
cle.
R The child restra int sy stem must be appropri‐
ate tothe age, weight and size of thech ild.
R The vehicle seat must be suitable forfitting a
ch ild restra int sy stem (/ page57).
Ac cident statistics show that children secured
on there ar seats are general lysafer than chil‐
dren secured on the front seats. Forth is reason, 52
Occupant saf ety
Page 88 of 565
The
tailgate can open or close unin tentionally in
th efo llowing situations:
R A person's arms or legs are moving in the
sensor de tection range, e.g. when polishing
th eve hicle or picking up objects.
R Objects are mo ved or placed behind theve hi‐
cle, e.g. tensioning stra ps or luggage.
R Clamping stra ps, tarp aulins or other co ver‐
ings are pulled overth e bumper.
R A pr otective mat with a length reaching over
th e boot sill down into the de tection range of
th e sensors is used.
R The pr otective mat is not secured cor rectly.
R Workis being done on the trailer hitch, trail‐
ers or rear bicycle rack s.
Deactivate theke y functions (/ page74) or do
not car rytheke y about your person in such sit‐
uations. Limiting
the opening angle of the tailgate Ac
tivating the opening angle limiter
Yo u can limit the opening angle of theta ilgate in
th eto p half of its opening range up toappr ox‐
imately 20 cm before the end position. #
Stop the opening procedure of theta ilgate at
th e desired position. #
Press and hold the closing button on theta il‐
ga te until you hear a sho rtacoustic signal.
The opening angle limiter will be activated.
The tailgate will then stop in thestored posi‐
tion when opened.
To open thetai lgate full y,pull the handle on the
outside of theta ilgate again af ter it has stopped
automaticall y.
Deactivating the opening angle limiter #
Press and hold the closing button on theta il‐
ga te until two sho rtacoustic signals sound. Un
locking the tailgate with the emer gency
key Re
quirements:
R The rear seat backrest has been folded
fo rw ard.
R The load compartment co ver has been
re mo ved. #
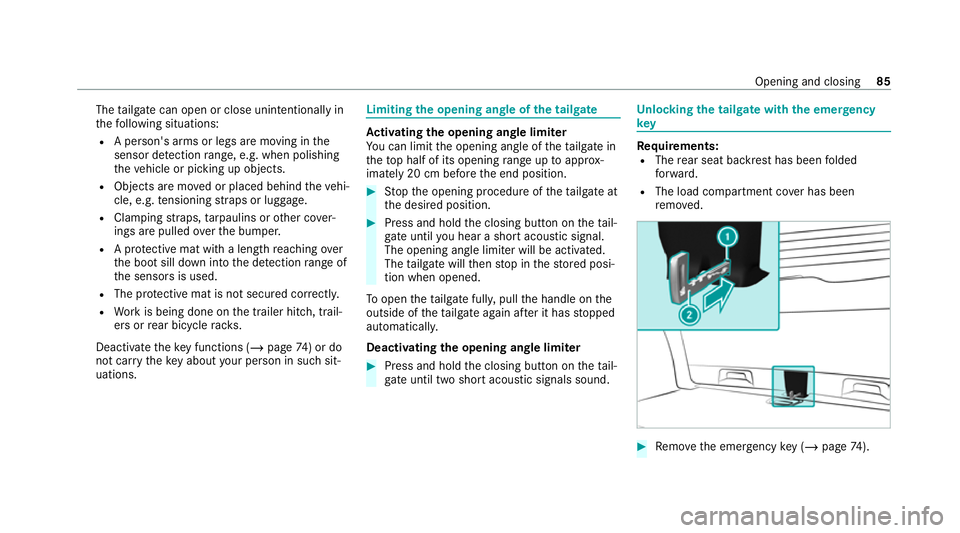
Remo vethe emer gency key ( / page 74). Opening and closing
85
Page 145 of 565
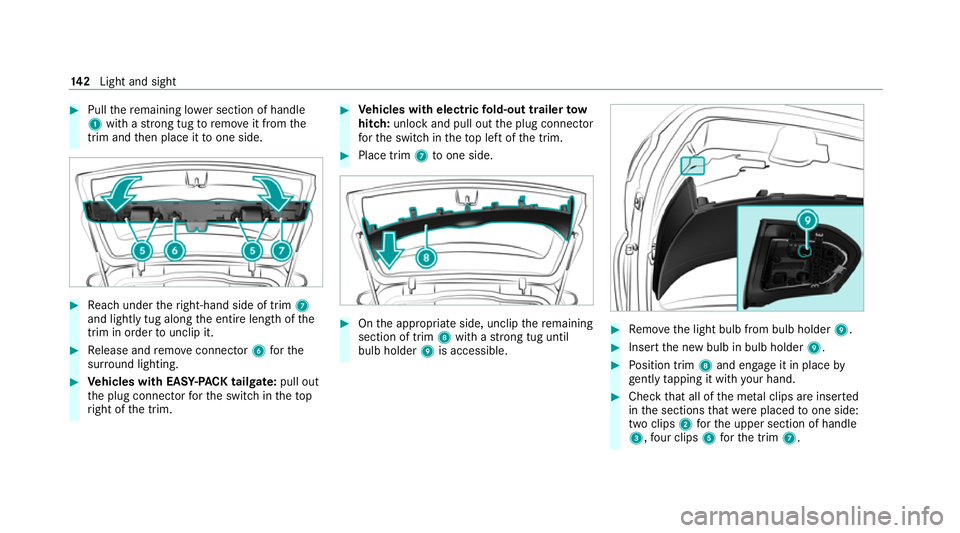
#
Pull there maining lo wer section of handle
1 with a strong tug toremo veit from the
trim and then place it toone side. #
Reach under theright-hand side of trim 7
and lightly tug along the entire length of the
trim in order tounclip it. #
Release and remo veconnector 6forthe
sur round lighting. #
Vehicles with EASY -PAC K tailgate: pull out
th e plug connector forth e switch in thetop
ri ght of the trim. #
Vehicles with electric fold-out trailer tow
hit ch: unlo ckand pull out the plug connector
fo rth e switch in theto p left of the trim. #
Place trim 7toone side. #
Onthe appropriate side, unclip there maining
section of trim 8with a strong tug until
bulb holder 9is accessible. #
Remo vethe light bulb from bulb holder 9. #
Insert the new bulb in bulb holder 9. #
Position trim 8and engage it in place by
ge ntly tapping it with your hand. #
Check that all of the me tal clips are inse rted
in the sections that we replaced toone side:
two clips 2forth e upper section of handle
3, four clips 5forth e trim 7. 14 2
Light and sight
Page 146 of 565
#
If not, remo vethe missing me tal clips from
th e panel apertures in theta ilgate and inse rt
th em in the cor responding positions. #
Take trim 7and connect plug connector 6
to the sur round lighting.
The sur round lighting does not illuminate
until theta ilgate has been closed and then
opened again. #
Vehicles with EASY -PAC K tailgate: insert
th e plug connector forth e switch in thetop
ri ght of the trim. #
Vehicles with electric fold-out trailer tow
hit ch: inse rtthe plug connector forthe
switch in theto p left of the trim. #
Position trim 7and engage it in place by
ge ntly tapping it with your hand, starting
from the outside. #
Clip in the lo wer section of handle 1again. #
Insert and engage the upper section of han‐
dle 3into lo wer section 1. Wi
ndscreen wipers and windscreen washer
sy stem Switching
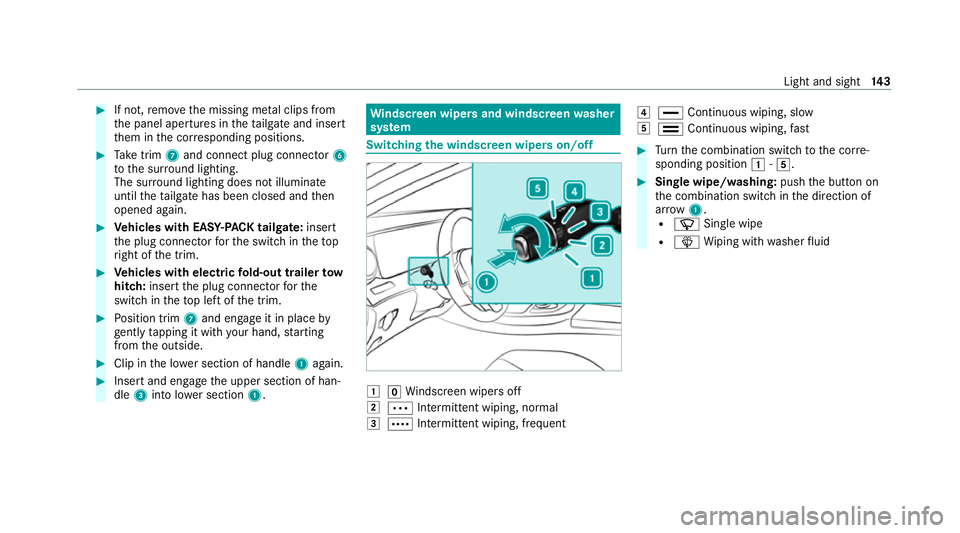
the windscreen wipers on/off 1
gWindsc reen wipers off
2 Ä Intermittent wiping, normal
3 Å Intermittent wiping, frequent 4
° Continuous wiping, slow
5 ¯ Continuous wiping, fast #
Turn the combination switch tothe cor re‐
sponding position 1-5. #
Single wipe/washing: pushthe button on
th e combination switch in the direction of
ar row 1.
R í Single wipe
R î Wiping with washer fluid Light and sight
14 3
Page 181 of 565
#
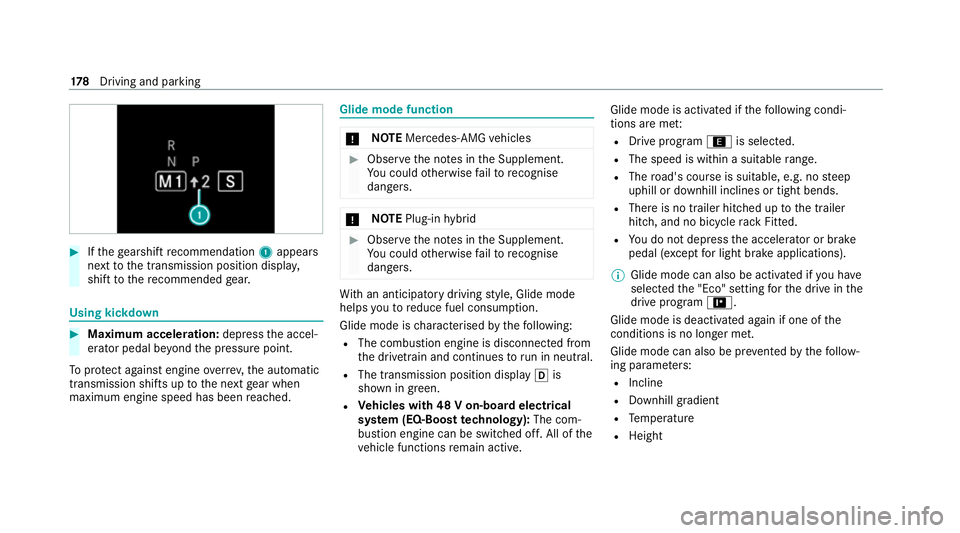
Ifth ege arshift recommendation 1appea rs
next tothe transmission position displa y,
shift tothere commended gear. Using kickd
own #
Maximum acceleration: depressthe accel‐
erator pedal be yond the pressure point.
To protect against engine overrev ,th e automatic
transmission shifts up tothe next gear when
maximum engine speed has been reached. Glide mode function
*
NO
TEMercedes-AMG vehicles #
Obser vethe no tes in the Supplement.
Yo u could otherwise failto recognise
dangers. *
NO
TEPlug-in hybrid #
Obser vethe no tes in the Supplement.
Yo u could otherwise failto recognise
dangers. Wi
th an anticipatory driving style, Glide mode
helps youto reduce fuel consum ption.
Glide mode is characterised bythefo llowing:
R The combustion engine is disconnected from
the driv etra in and continues torun in neutral.
R The transmission position displ ayh is
shown in green.
R Vehicles with 48 V on-board electrical
sy stem (EQ-Boost technology): The com‐
bustion engine can be switched off. All of the
ve hicle functions remain active. Glide mode is activated if
thefo llowing condi‐
tions are me t:
R Drive prog ram ; is selected.
R The speed is within a suitable range.
R The road's course is suitable, e.g. no steep
uphill or downhill inclines or tight bends.
R There is no trailer hitched up tothe trailer
hitch, and no bicycle rack Fitted.
R You do not depress the accelera tor or brake
pedal (e xcept for light brake applications).
% Glide mode can also be activated if you ha ve
selected the "Eco" setting forth e drive in the
drive prog ram =.
Glide mode is deactivated again if one of the
conditions is no longer met.
Glide mode can also be pr evented bythefo llow‐
ing parame ters:
R Incline
R Downhill gradient
R Temp erature
R Height 17 8
Driving and pa rking
Page 196 of 565
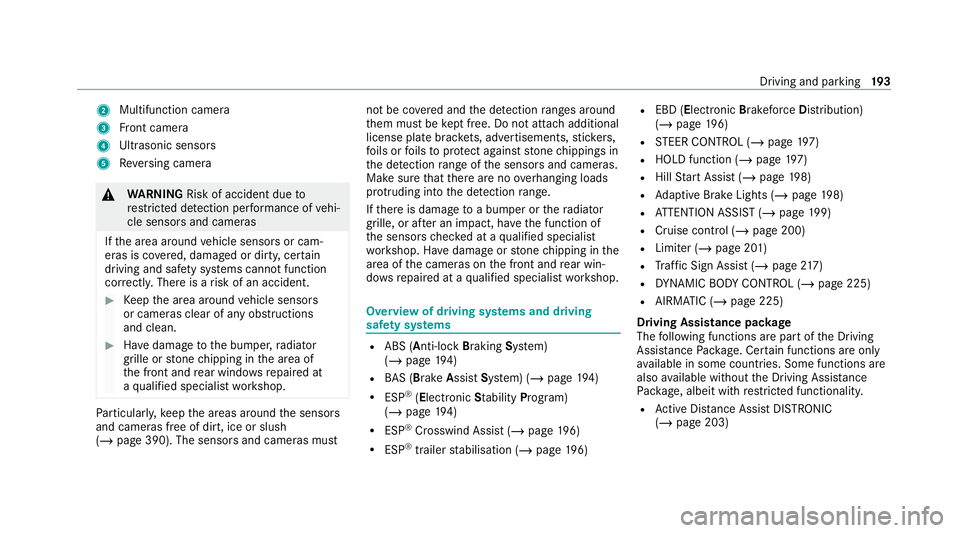
2
Multifunction camera
3 Front camera
4 Ultrasonic sensors
5 Reversing camera &
WARNING Risk of accident due to
re stricted de tection per form ance of vehi‐
cle sensors and cameras
If th e area around vehicle sensors or cam‐
eras is co vered, damaged or dirty, cer tain
driving and saf ety sy stems cann otfunction
cor rectly. The reis a risk of an accident. #
Keep the area around vehicle sensors
or cameras clear of any obstructions
and clean. #
Have damage tothe bumper, radiator
grille or stone chipping in the area of
th e front and rear wind owsrepaired at
a qu alified specialist workshop. Pa
rticular ly,ke ep the areas around the sensors
and cameras free of dirt, ice or slush
(/ page 390). The sensors and cameras must not be co
vered and the de tection ranges around
th em must be kept free. Do not attach additional
license plate brackets, ad vertisements, sticke rs,
fo ils or foils toprotect against stone chippings in
th e de tection range of the sensors and cameras.
Make sure that there are no overhanging loads
pr otru ding into the de tection range.
If th ere is damage toa bumper or thera diator
grille, or af ter an impact, ha vethe function of
th e sensors checked at a qualified specialist
wo rkshop. Ha vedamage or stone chipping in the
area of the cameras on the front and rear win‐
do ws repaired at a qualified specialist workshop. Overview of driving sy
stems and driving
saf ety sy stems R
ABS (Anti-lo ckBra king System)
(/ page 194)
R BAS (Bra keAssist System) (/ page194)
R ESP ®
(Electronic Stability Program)
(/ page 194)
R ESP ®
Crosswind Assist (/ page196)
R ESP ®
trailer stabilisation (/ page196) R
EBD ( Electronic Brakeforc eDistribution)
(/ page 196)
R STEER CONTROL (/ page 197)
R HOLD function (/ page197)
R Hill Start Assist (/ page198)
R Adaptive Brake Lights (/ page198)
R ATTENTION ASSIST (/ page199)
R Cruise control (/ page 200)
R Limi ter (/ page 201)
R Traf fic Sign Assi st (/ page 217)
R DYNA MIC BODY CONT ROL (/ page 225)
R AIRMATIC (/ page 225)
Driving Assist ance package
The following functions are part of the Driving
Assis tance Package. Cer tain functions are only
av ailable in some countries. Some functions are
also available without the Driving Assis tance
Pa ckage, albeit with restricted functionality.
R Active Dis tance Assi stDISTRONIC
(/ page 203) Driving and parking
19 3
Page 199 of 565
Fu
nction of ESP ®
Crosswind Assist ESP
®
Crosswind Assist de tects sudden gu sts of
side wind and helps the driver tokeep theve hi‐
cle in the lane:
R ESP ®
Crosswind Assist is active at vehicle
speeds between appr ox.75 km/h and
200 km/h when driving stra ight ahead or
cornering slight ly.
R The vehicle is stabilised bymeans of individ‐
ual brake application on one side. Fu
nction of ESP ®
trailer stabilisation &
WARNING Risk of accident in poor road
and weather conditions
In poor road and weather conditions, the
trailer stabilisation cannot pr event lu rching of
th eve hicle/trailer combination. Trailers with
a high centre of gr avity may tip over before
ESP ®
de tects this. #
Alw ays adapt your driving style to suit
th e cur rent road and weather condi‐
tions. When driving with a trailer, ESP
®
can stabilise
yo ur vehicle if the trailer begins toswer vefrom
side toside:
R ESP ®
trailer stabilisation is active abo ve
speeds of 65 km/h.
R Slight swerving is reduced bymeans of a tar‐
ge ted, individual brake application on one
side.
R Intheeve nt of se vere swerving, the engine
output is also reduced and all wheels are
braked.
ESP ®
trailer stabilisation may be impaired or
may not function if:
R The trailer is not connec ted cor rectly or is
not de tected properl yby theve hicle. Ac
tivating/deactivating ESP ®
(Electronic Sta‐
bility Prog ram) Multimedia sy
stem:
4 Vehicle 5
k Assistance 5
ESP
Mercedes‑AMG vehicles: observeth e no tes in
th e Supplement. Otherwise, you may failto rec‐
ognise dangers. #
Activate Oor deacti vate ª the function.
ESP ®
is deactivated if theå ESP®
OFF warn‐
ing lamp lights up continuously in the instrument
clus ter.
Obser vethe information on warning lamps and
display messages which may be shown in the
instrument clus ter. Fu
nction of EBD Elect
ronic Breakforce Distribution (EBD) is char‐
acterised bythefo llowing:
R Monitoring and regulating the brake pressure
on there ar wheels. 19 6
Driving and pa rking