2020 MERCEDES-BENZ C-CLASS ESTATE tire pressure
[x] Cancel search: tire pressurePage 22 of 565
1
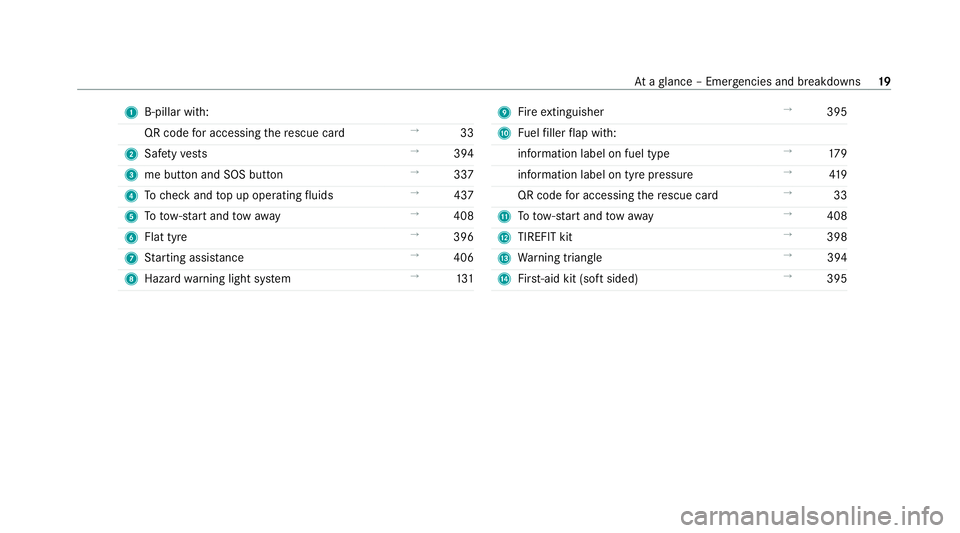
B-pillar with:
QR code for accessing there scue card →
33
2 Safetyve sts →
394
3 me button and SOS button →
337
4 Tocheck and top up operating fluids →
437
5 Totow- start and tow aw ay →
408
6 Flat tyre →
396
7 Starting assis tance →
406
8 Haza rdwa rning light sy stem →
131 9
Fire extinguisher →
395
A Fuelfiller flap with:
information label on fuel type →
17 9
information label on tyre pressure →
419
QR code for accessing there scue card →
33
B Totow- start and tow aw ay →
408
C TIREFIT kit →
398
D Warning triangle →
394
E First-aid kit (so ftsided) →
395 At
aglance – Emer gencies and breakdowns 19
Page 400 of 565
Note
s on MOExtended tyres (run-flat tyres) &
WARNING Risk of accident when driving
in limp -home mode
Driving in emergency mode impairs the han‐
dling characteristics of theve hicle. #
Do not exceed the permissible maxi‐
mum speed of the MOEx tended tyres. #
Avoid any abrupt steering and driving
manoeuvres as well as driving over
obs tacles (kerbs, pot holes, off-road).
This applies, in pa rticular, toa loaded
ve hicle. #
Stop driving in the emer gency mode if
yo u notice:
R banging noise
R vehicle vibration
R smoke which smells like rubber
R continuous ESP ®
inter vention
R crac ksinthe tyre side walls #
After driving in emergency mode, ha ve
th erims checkedby aqu alified special‐ ist
workshop with rega rd totheir fur ther
use. #
The defective tyre must be replaced in
eve rycase. Wi
th MOExtended tyres (run-flat tyres), you can
continue todrive your vehicle even if there is a
tot al loss of pressure in one or more tyres. How‐
eve r,th e tyre af fected must not show any clearly
visible damage.
Yo u can recognise MOExtended tyres bythe
MOExtended marking which appears on the side
wa ll of the tyre.
Ve hicles with tyre pressure monitoring sys‐
te m: MOExtended tyres may only be used in
conjunction wi than activated tyre pressure mon‐
itoring sy stem.
If a pressure loss warning message appears in
th e multifunction displa y,proceed as follo ws:
R Check the tyre for dama ge.
R If driving on, obser vethefo llowing no tes. Driving distance possible in emer
gency
mode af ter the pressure loss warning: Load condition Driving distance pos‐
sible in emergency
mode
Pa rtially laden 80 km
Fu lly laden 30 km The driving dis
tance possible in emergency
mode may vary depending on the driving style.
Obser vethe maximum permissible speed of
80 km/h.
If a tyre has gone flat and cannot be replaced
with an MOEx tended tyre, you can use a stand‐
ard tyre as a temp orary measure. TIREFIT kit
storage location The TIREFIT kit is located under
the load com‐
partment floor. Breakdown assis
tance 397
Page 404 of 565
If, af
terte n minutes, a tyre pressure of
200 kPa (2.0 bar/29 psi) has been attained: &
WARNING Risk of accident from driving
wi th sealed tyres
A tyre temp orarily sealed with tyre sealant
impairs the handling characteristics and is
not suitable for higher speeds. #
Adapt your driving style according lyand
drive carefull y. #
Do not exceed the maximum speed
limit with a tyre that has been repaired
using tyre sealant. #
Obser vethe maximum permissible speed for
a tyre sealed with tyre sealant 80 km/h. #
Affix th e upper section of the TIREFIT sticker
to the instrument clus ter in a location where
it will be easi lyseen bythe driver.
* NO
TEStaining from leaking tyre sealant Af
ter use, excess tyre sealant may leak out
from thefilling hose. #
Therefore, place thefilling hose in the
plastic bag that con tained the TIREFIT
kit. +
ENVIRONMEN
TALNO TEEnvironmental
pollution caused byenvironmen tally ir re‐
sponsible disposal Ty
re sealant contains polluta nts. #
Have the tyre sealant bottle disposed of
professionall y,e.g. at a Mercedes-Benz
Service Centre. #
Switch off the tyre inflation compressor. #
Unscr ew thefilling hose from theva lve of the
defective tyre. #
Stow th e tyre sealant bottle and the tyre
inflation compressor. #
Pull away immediatel y. #
Stop driving af ter appro ximately ten minu tes
and check the tyre pressure using the tyre
inflation compressor.
The tyre pressure must now be at least
13 0 kPa (1.3 bar/19 psi). &
WARNING Risk of accident due tothe
specified tyre pressure not being
attained
If th e specified tyre pressure is not reached,
th e tyre is too badly damaged. The tyre seal‐
ant cannot repair the tyre in this ins tance.
The braking and driving characteristics may
be great lyimpaired. #
Do not continue driving. #
Consult a qualified specialist workshop. Countries
that ha veMercedes-Benz
Service24h: you will find a sticke r with thete le‐
phone number, e.g. on the B‑pillar on the driver's
side. #
Cor rect the tyre pressure if it is still at least
13 0 kPa (1.3 bar/19 psi). See the tyre pres‐
sure table on the fuel filler flap forva lues. #
Toincrease the ty repressure: switch on
th e tyre inflation compressor. Breakdown assis
tance 401
Page 420 of 565
Note
s on noise or unusual handling charac‐
te rist ics
Make sure there are no vibrations, noises or
unusual handling characteristics when theve hi‐
cle is in motion. This may indicate that the
wheels or tyres are damaged. Hidden tyre dam‐
age could also be causing the unusual handling
ch aracteristics.
If yo u suspect that a tyre is defective, reduce
yo ur speed immediately and ha vethe tyres and
wheels checked at a qualified specialist work‐
shop. Note
s onregular lyinspecting wheels and
tyres &
WARNING Risk of injury duetodamaged
tyres
Damaged tyres can cause tyre pressure loss. #
Check the tyres regularly for signs of
dama geand replace any damaged tyres
immediatel y. &
WARNING Risk of aquaplaning due to
insuf ficient tyre tread
Insu fficient tyre tread will result in reduced
tyre grip.
The risk of aquaplaning is increased on wet
ro ads, especially when the speed of theve hi‐
cle is not adap tedto suit the conditions. #
Thus, you should regularly check the
tread de pth and the condition of the
tread across the entire width of all
tyres.
Minimum tread dep thfor:
R Summer tyres: 3 mm
R M+S tyres: 4 mm #
For saf etyre asons, replace the tyres
before the legally-prescribed limit for
th e minimum tread dep thisreached. Car
ryout thefo llowing checks on all wheels reg‐
ularly, at least once a month or as requ ired, for
ex ample, prior toa long journey or driving off-
ro ad:
R Check the tyre pressure (/ page418).
R Visually inspect wheels and tyres for dam‐
age.
R Check theva lve caps.
R Visual check of the tyre tread dep thand the
tyre contact su rface across the entire width.
The minimum tread dep thfor summer tyres
is 3 mm and for winter tyres 4 mm. Note
s on snow chains &
WARNING Risk of accident due toincor‐
re ct snow chain fitting
If yo u ha vefitted snow chains tothe front
wheels, the snow chains may drag against
th eve hicle body or chassis components.
This could cause damage totheve hicle or
th e tyres. Wheels and tyres
417
Page 426 of 565
*
NO
TEDama getosummer tyres at low
ambient temp eratures At
low ambient temp eratures, tears could
fo rm when driving with summer tyres, caus‐
ing permanent damage tothe tyre. #
Attemp eratures below 7 °C use i
M+S- tyres. Ac
cessory pa rts th at are not appr ovedfo ryo ur
ve hicle byMercedes-Benz or are not being used
cor rectly can impair the operating saf ety.
Before pu rchasing and using non-appr oved
accesso ries, visit a qualified specialist workshop
and enquire about:
R Suitability
R Legal stipulations
R Factory recommendations &
WARNING Risk of accident with high
per form ance tyres
The special tire tread in combination with the
optimised tyre compound means that the ri
sk of skidding and aquaplaning on wet
ro ads is inc reased.
In addition, the tyre grip is greatly reduced at
a low outside temp erature and tyre running
te mp erature. #
Switch on the ESP ®
and adapt your
driving style accordingly. #
Use i M+S tyres at outside temp er‐
atures of less than 10 °C. #
Only use the tyres forth eir intended
purpose. Obser
vethefo llowing when selecting, fitting and
re placing tyres:
R Countr y-specific requirements for tyre
appro valth at define a specific tyre type for
yo ur vehicle.
R Furthermore, the use of cer tain tyre types in
cer tain regions and areas of operation can
be highly beneficial.
R Only use tyres and wheels of the same type
(summer tyres, winter tyres, MOEx tended
tyres) and the same make. R
Only fit wheels of the same size on one axle
(left and right).
It is only permissible tofit a di fferent wheel
size in theeve nt of a flat tyre in order to
drive tothe specialist workshop.
R Do not make any modifications tothe brake
sy stem, the wheels or the tyres.
The use of shims or brake dust shields is not
permitted and may in validate theve hicle's
ge neral operating pe rmit.
R Vehicles with a tyre pressure monitoring
sy stem: allfitted wheels mu stbe equipped
with functioning sensors forth e tyre pres‐
sure monitoring sy stem.
R Attemp eratures below 7°C use winter tyres
or all-season tyres mar kedi M+Sfor all
wheels.
Wi nter tyres pr ovide the best possible grip in
wintry road conditions.
R For M+S tyres, only use tyres with the same
tread.
R Obser vethe maximum permissible speed for
th e M+S tyres fitted. Wheels and tyres
423
Page 427 of 565
If
th e tyre's maximum speed is below that of
th eve hicle, this must be indicated byan
appropriate label in the driver's field of
vision.
R Run in new tyres at moderate speeds forthe
fi rs t10 0 km.
R Replace the tyres af ter six years at the latest,
re ga rdless of wear.
R When replacing with tyres that do not
fe ature run-flat characteristics: vehicles
with MOExtended tyres are not equipped
with a TIREFIT kit at thefa ctor y.Equip the
ve hicle with a TIREFIT kit af terre placing with
tyres that do not feature run-flat characteris‐
tics, e.g. winter tyres.
% You can permanently limit the maximum
ve hicle speed for driving with winter tyres
(/ page 203).
Fo r more information on wheels and tyres, con‐
ta ct a qualified specialist workshop.
Be sure toalso obse rveth efo llowing fur ther
re lated subjects:
R Notes on tyre pressure (/ page418) R
Tyre pressure table (/ page419)
R Notes on the emer gency spa rewheel
(/ page 431) Note
s on inter changing wheels &
WARNING Risk of injury thro ugh dif fer‐
ent wheel sizes
Inter changing the front and rear wheels can
se verely impair the driving characteristics.
The disk brakes or wheel suspension compo‐
nents may also be damaged. #
Onlyinter change the front and rear
wheels if the wheels and tyres ha vethe
same dimensions. Inter
changing the front and rear wheels if the
wheels or tyres ha vediffere nt dimensions can
re nder thege neral operating pe rmit in valid.
The wear pat tern s on the front and rear wheels
dif fer:
R front wheels wear more on the tyre shoulder R
rear wheels wear more in the cent reofthe
tyre
Do not drive wi thtyres that ha vetoo little tread
dep th. This significantly reduces traction on wet
ro ads (aquaplaning).
On vehicles with the same front and rear wheel
size, you can inter change the wheels every
5000 to10,000 km, depending on thewe ar.
Ensure the direction of rotation is maintained for
th e wheels.
Obser vethe instructions and saf ety no tes on
"Changing a wheel" when doing so
(/ page 425). Note
s onstoring wheels When
storing wheels, obser vethefo llowing
no tes:
R Afterre moving wheels, store them in a cool,
dry and preferably dark place.
R Protect the tyres from conta ct withoil,
grease or fuel. 424
Wheels and tyres
Page 558 of 565
Tw
o-w ayradios
Fr equencies........................................... 434
No tes on ins tallation............................ .433
Tr ansmission output (maximum )........... 434
Ty re inflation compressor
see TIREFIT kit
Ty re pressure
Checking (ty repressure monitoring
sy stem)................................................. 420
No tes..................................................... 41 8
Re starting the tyre pressure monitor‐
ing sy stem.............................................4 20
TIREFIT kit............................................. 398
Ty re pressure monitoring sy stem
(function)............................................... 419
Ty re pressure table................................ 419
Ty re pressure moni tor
Fu nction................................................. 419
Ty re pressure moni toring sy stem
Checking the tyre pressure...................4 20
Che cking the tyre temp erature............. 420
Re starting.............................................. 420
Ty re pressure table ................................... .419 Ty
re temp erature
Checking (tyre pressure monitoring
sy stem)................................................. 420
Ty re pressure monitoring sy stem
(function)............................................... 419
Ty re tread ................................................... 417
Ty re-change tool kit
Overview............................................... 425
Ty res
Changing hub caps................................ 426
Checking............................................... .417
Checking the tyre pressure (tyre
pressure monitoring sy stem)................. 420
Fitting.................................................... 429
Flat tyre.................................................3 96
Inter changing........................................ 424
MOExtended tyres................................ .397
No ise.................................................... .417
No tes on fitting...................................... 421
Re moving.............................................. 429
Re placing.......................................4 21, 425
Re starting the tyre pressure monitor‐
ing sy stem.............................................4 20
Selection............................................... 421
Snow chains.......................................... .417 St
oring................................................... 424
TIREFIT kit............................................. 398
Ty re pressure (N otes).............................4 18
Ty re pressure monitoring sy stem
(function)............................................... 419
Ty re pressure table................................ 419
Un usual handling characteristic s...........417 U
Un its of measurement
Setting................................................... 286
Un locking setting ........................................ 74
Up dates
Impor tant sy stem updates....................2 90
Information............................................ 289
Pe rforming............................................2 90
Software updates................................. .290
USB devices Connecting............................................ 355
USB port Rear...................................................... .124
User profile Creating................................................ 288
Importing/exporting.............................2 89 Index
555
Page 561 of 565
What3words
Destination entry with a 3 word
address................................................ .299
Wheel change
Fitting a new wheel............................... 429
Lo we ring theve hicle.............................4 30
Prepa ration........................................... 425
Ra ising theve hicle................................4 27
Re moving a wheel. ................................ 429
Re moving/fitting hub caps.................... 426
Wheel change
see Emer gency spa rewheel
Wheel rotation........................................... 424
Wheels Care...................................................... 390
Changing hub caps................................ 426
Checking............................................... .417
Checking the tyre pressure (tyre
pressure monitoring sy stem)................. 420
Fitting.................................................... 429
Flat tyre.................................................3 96
Inter changing........................................ 424
MOExtended tyres................................ .397
No ise.................................................... .417 No
tes on fitting...................................... 421
Re moving.............................................. 429
Re placing.......................................4 21, 425
Re starting the tyre pressure monitor‐
ing sy stem.............................................4 20
Selection............................................... 421
Snow chains.......................................... .417
St oring................................................... 424
TIREFIT kit............................................. 398
Ty re pressure (N otes)............................. 41 8
Ty re pressure monitoring sy stem
(function)............................................... 419
Ty re pressure table................................ 419
Un usual handling characteristic s...........417
Wi -Fi
Overview............................................... 283
Setting................................................... 283
Setting up a hotspot.............................. 284
Setting up an Internet connection........ .347
Wi descreen cock pit instrument dis‐
play
Instrument clust er................................... 12
Wi ndow airbag............................................. 43 Wi
ndo ws
see Side windo ws
Wi ndo ws(care)......................................... .390
Wi ndscreen
Demisting.............................................. 151
Re placing the wiper blades.................... 14 4
Wi ndscreen
see Windsc reen
Wi ndscreen washer fluid
No tes....................................................4 46
Wi ndscreen washer sy stem
To pping up............................................. 386
Wi ndscreen wipers
Re placing the wiper blades.................... 14 4
Switching on/of f................................... 14 3
Wi ng
see Front wheel ar ch
Wi nter operation
Snow chains.......................................... .417
Wi nter tyres
Setting the permanent speed limit........ 203
Wi per blades
Ca re...................................................... 390 558
Index