2020 MERCEDES-BENZ C-CLASS ESTATE light
[x] Cancel search: lightPage 175 of 565
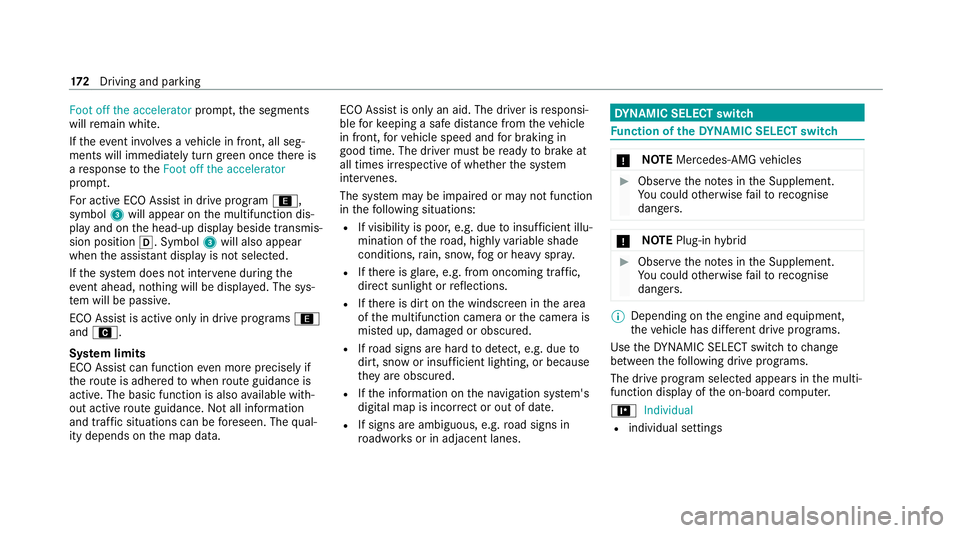
Foot off the accelerator
prompt,th e segments
will remain white.
If th eeve nt in volves a vehicle in front, all seg‐
ments will immediately turn green once there is
a re sponse totheFoot off the accelerator
prom pt.
Fo r active ECO Assist in drive program ;,
symbol 3will appear on the multifunction dis‐
play and on the head-up display beside transmis‐
sion position h. Symbol3will also appear
when the assis tant displ ayis not selec ted.
If th e sy stem does not inter vene du ring the
eve nt ahead, no thing will be displa yed. The sys‐
te m will be passive.
ECO Assist is active only in drive programs ;
and A.
Sy stem limits
ECO Assist can function even more precisely if
th ero ute is adhered towhen route guidance is
active. The basic function is also available with‐
out active route guidance. Notall information
and traf fic situations can be fore seen. The qual‐
ity depends on the map data. ECO Assist is only an aid. The driver is
responsi‐
ble forke eping a safe dis tance from theve hicle
in front, forve hicle speed and for braking in
good time. The driver must be ready tobrake at
all times ir respective of whe ther the sy stem
inter venes.
The sy stem may be impaired or may not function
in thefo llowing situations:
R If visibility is poor, e.g. due toinsuf ficient illu‐
mination of thero ad, high lyvariable shade
conditions, rain, sno w,fog or heavy spr ay.
R Ifth ere is glare, e.g. from oncoming traf fic,
di re ct sunlight or reflections.
R Ifth ere is dirt on the windscreen in the area
of the multifunction camera or the camera is
mis ted up, damaged or obscured.
R Ifro ad signs are hard todetect, e.g. due to
dirt, snow or insuf ficient lighting, or because
th ey are obscured.
R Ifth e information on the navigation sy stem's
digital map is incor rect or out of date.
R If signs are ambiguous, e.g. road signs in
ro adwor ksor in adjacent lanes. DY
NA MIC SELECT switch Fu
nction of theDY NA MIC SELECT switch *
NO
TEMercedes-AMG vehicles #
Obser vethe no tes in the Supplement.
Yo u could otherwise failto recognise
dangers. *
NO
TEPlug-in hybrid #
Obser vethe no tes in the Supplement.
Yo u could otherwise failto recognise
dangers. %
Depending on the engine and equipment,
th eve hicle has dif fere nt drive programs.
Use theDY NA MIC SELECT switch tochange
between thefo llowing drive programs.
The drive prog ram selected appears in the multi‐
function display of the on-board computer.
= Individual
R individual settings 17 2
Driving and pa rking
Page 181 of 565
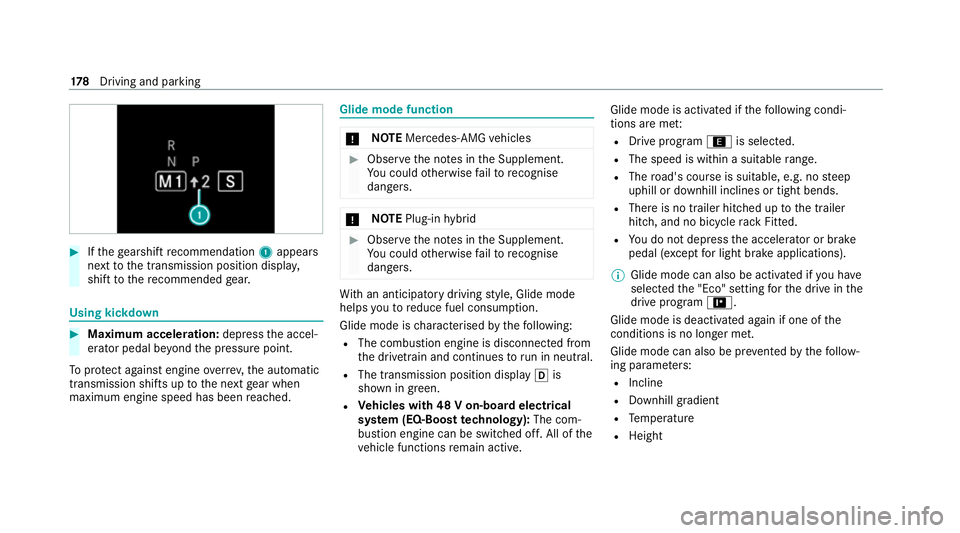
#
Ifth ege arshift recommendation 1appea rs
next tothe transmission position displa y,
shift tothere commended gear. Using kickd
own #
Maximum acceleration: depressthe accel‐
erator pedal be yond the pressure point.
To protect against engine overrev ,th e automatic
transmission shifts up tothe next gear when
maximum engine speed has been reached. Glide mode function
*
NO
TEMercedes-AMG vehicles #
Obser vethe no tes in the Supplement.
Yo u could otherwise failto recognise
dangers. *
NO
TEPlug-in hybrid #
Obser vethe no tes in the Supplement.
Yo u could otherwise failto recognise
dangers. Wi
th an anticipatory driving style, Glide mode
helps youto reduce fuel consum ption.
Glide mode is characterised bythefo llowing:
R The combustion engine is disconnected from
the driv etra in and continues torun in neutral.
R The transmission position displ ayh is
shown in green.
R Vehicles with 48 V on-board electrical
sy stem (EQ-Boost technology): The com‐
bustion engine can be switched off. All of the
ve hicle functions remain active. Glide mode is activated if
thefo llowing condi‐
tions are me t:
R Drive prog ram ; is selected.
R The speed is within a suitable range.
R The road's course is suitable, e.g. no steep
uphill or downhill inclines or tight bends.
R There is no trailer hitched up tothe trailer
hitch, and no bicycle rack Fitted.
R You do not depress the accelera tor or brake
pedal (e xcept for light brake applications).
% Glide mode can also be activated if you ha ve
selected the "Eco" setting forth e drive in the
drive prog ram =.
Glide mode is deactivated again if one of the
conditions is no longer met.
Glide mode can also be pr evented bythefo llow‐
ing parame ters:
R Incline
R Downhill gradient
R Temp erature
R Height 17 8
Driving and pa rking
Page 188 of 565
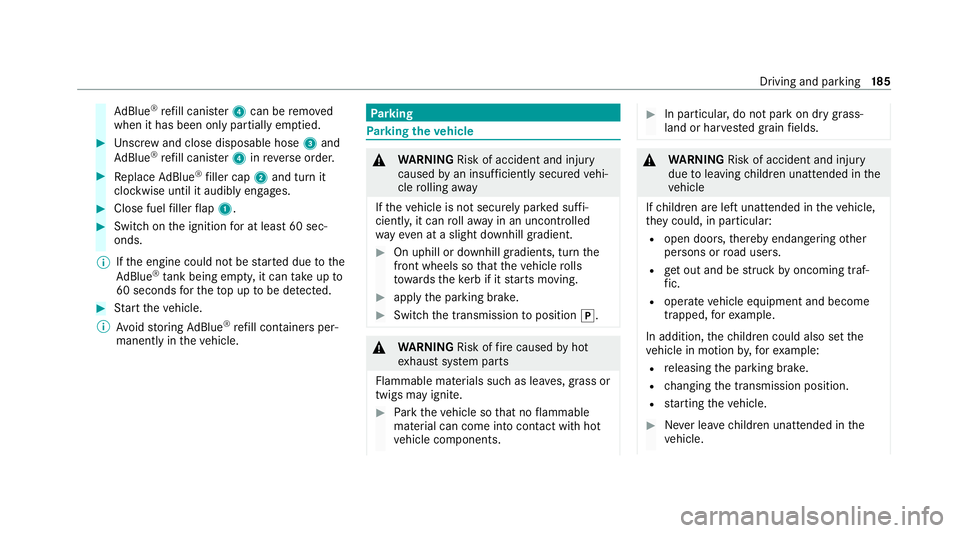
Ad
Blue ®
re fill canis ter4 can be remo ved
when it has been only partially em ptied. #
Unscr ew and close disposable hose 3and
Ad Blue ®
re fill canis ter4 inreve rse order. #
Replace AdBlue ®
filler cap 2and turn it
clockwise until it audibly engages. #
Close fuel filler flap 1. #
Swit chon the ignition for at least 60 sec‐
onds.
% Ifth e engine could not be star ted due tothe
Ad Blue ®
tan k being empty, it can take up to
60 seconds forth eto p up tobe de tected. #
Start theve hicle.
% Avoid storing AdBlue ®
re fill conta iners per‐
manently in theve hicle. Pa
rking Pa
rking theve hicle &
WARNING Risk of accident and inju ry
caused byan insuf ficiently secu redve hi‐
cle rolling away
If th eve hicle is not securely par ked suf fi‐
ciently, it can rollaw ay in an uncontro lled
wa yev en at a slight downhill gradient. #
On uphill or downhill gradients, turn the
front wheels so that theve hicle rolls
to wa rdsth eke rb if it starts moving. #
apply the parking brake. #
Switch the transmission toposition j. &
WARNING Risk offire caused byhot
ex haust sy stem parts
Flammable materials such as lea ves, grass or
twigs may ignite. #
Park theve hicle so that no flammable
material can come into con tact with hot
ve hicle components. #
In particular, do not park on dry grass‐
land or har vested grain fields. &
WARNING Risk of accident and inju ry
due toleaving children unat tended in the
ve hicle
If ch ildren are left unat tended in theve hicle,
th ey could, in part icular:
R open doors, thereby endangering other
persons or road users.
R get out and be stru ck byoncoming traf‐
fi c.
R ope rate ve hicle equipment and become
trapped, forex ample.
In addition, thech ildren could also set the
ve hicle in motion by,fo rex ample:
R releasing the parking brake.
R changing the transmission position.
R starting theve hicle. #
Never lea vechildren unat tended in the
ve hicle. Driving and parking
18 5
Page 190 of 565
#
Never lea vethe engine or, if present,
th e auxiliary heating running in an
enclosed space wi thout suf ficient venti‐
lation. &
WARNING Risk of injury when opening
or closing a door with thega rage door
opener
When you operate or program the door with
th e integrated garage door opener, persons
in thera nge of mo vement of the door may
become trapped or be stru ck bythe door. #
Alw ays make sure that nobody is within
th era nge of mo vement of the door. Re
quirements:
R The vehicle has been par ked outside the
ga rage or outside thera nge of mo vement of
th e door.
R The engine is switched off.
R The ignition is switched on.
% The garage door opener function is alw ays
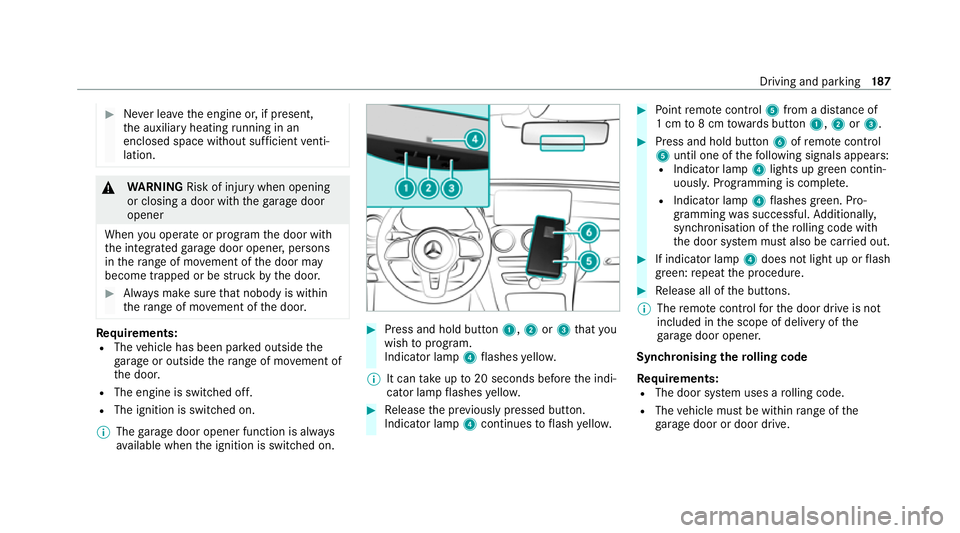
av ailable when the ignition is switched on. #
Press and hold button 1,2or3 that you
wish toprog ram.
Indicator lamp 4flashes yello w.
% It can take up to20 seconds before the indi‐
cator lamp flashes yello w. #
Release the pr eviously pressed button.
Indicator lamp 4continues toflash yello w. #
Point remo tecontrol 5from a dist ance of
1 cm to8 cm towa rds button 1,2or3. #
Press and hold button 6ofremo tecontrol
5 until one of thefo llowing signals appears:
R Indicator lamp 4lights up green contin‐
uousl y.Programming is comple te.
R Indicator lamp 4flashes green. Pro‐
gramming was successful. Additionall y,
synchronisation of thero lling code with
th e door sy stem must also be car ried out. #
If indicator lamp 4does not light up or flash
green: repeat the procedure. #
Release all of the buttons.
% The remo tecontrol forth e door drive is not
included in the scope of delivery of the
ga rage door opener.
Synchronising thero lling code
Re quirements:
R The door sy stem uses a rolling code.
R The vehicle must be within range of the
ga rage door or door drive. Driving and parking
187
Page 191 of 565
R
The vehicle as well as persons and objects
are located outside thera nge of mo vement
of the door. #
Press the programming button on the door
drive unit.
Initiate the next step within appr oximately
30 seconds. #
Press pr eviously prog rammed button 1,2
or 3 repeatedly until the door closes.
When the door closes, programming is com‐
ple ted.
% Please also read the operating instructions
fo rth e door drive.
Tr oubleshooting when prog ramming the
re mo tecont rol #
Check if the transmit ter frequency of remo te
control 5is support ed. #
Replace the batteries in remo tecontrol 5. #
Hold remo tecontrol 5atvarious angles
from a dis tance of 1 cm to8 cm front of the
inside rearview mir ror.Yo u should test eve ry
position for at least 25 seconds before trying
ano ther position. #
Hold remo tecontrol 5atthe same angles
at various dis tances in front of the inside rear
view mir ror.Yo u should test eve ryposition
fo r at least 25 seconds before trying ano ther
position. #
Onremo tecontrols that transmit on lyfor a
limi ted period, press button 6onremo te
control 5again before transmission ends. #
Align the aerial line of the door opener unit
with there mo tecontrol.
% Support and additional information on pro‐
gramming:
R Onthe HomeLink ®
Hotline on (0) 08000
466 354 65 or +49 (0) 6838 907-2 77
R Onthe Internet at https://
www.homelin k.com
Opening or closing the garage door
Requ irements:
R The cor responding button is programmed to
operate the door. #
Press and hold buttons 1,2or3 until
th e door opens or closes. #
If indicator lamp 4flashes yellow af ter
appr oximately 20 seconds: press and hold
th e pr eviously pressed button again until the
door opens or closes.
Clearing thega rage door opener memo ry #
Press and hold buttons 1and 3.
Indicator lamp 4lights up yello w. #
If indicator lamp 4flashes green: release
buttons 1and 3.
The entire memo ryhas been dele ted. Electric parking brake
Fu
nction of the electric pa rking brake (apply‐
ing automatically) &
WARNING Risk of accident and inju ry
due toleaving children unat tended in the
ve hicle
If ch ildren are left unat tended in theve hicle,
th ey could, in part icular:
R open doors, thereby endangering other
persons or road users. 18 8
Driving and pa rking
Page 192 of 565

R
get out and be stru ck byoncoming traf‐
fi c.
R ope rate vehicle equipment and become
trapped, forex ample.
In addition, thech ildren could also set the
ve hicle in motion by,fo rex ample:
R releasing the parking brake.
R changing the transmission position.
R starting theve hicle. #
Never lea vechildren unat tended in the
ve hicle. #
When leaving theve hicle, alw aysta ke
th eke y with you and lock theve hicle. #
Keep theve hicle key out of there ach of
ch ildren. The elect
ric pa rking brake is applied if the trans‐
mission is in position jand one of thefo llow‐
ing conditions is fulfilled:
R The engine is switched off. R
The seat belt tongue is not inser ted in the
seat belt buckle of the driver's seat and the
driver's door is opened.
% Toprev ent application: pull the handle of the
electric parking brake (/ page190).
In thefo llowing situations, the electric parking
brake is also applied:
R Active Dis tance Assi stDISTRONIC is bringing
th eve hicle toast andstill.
R The HOLD function is keeping theve hicle sta‐
tionar y.
R Active Parking Assist is keeping theve hicle
st ationar y.
This is the case if one of thefo llowing conditions
is also fulfilled:
R The engine is switched off.
R The seat belt tongue is not inser ted in the
seat belt buckle of the driver's seat and the
driver's door is opened.
R There is a sy stem malfunction.
R The po wer supply is insuf ficient.
R The vehicle is stationary for a lengt hyperiod. When
the electric parking brake is applied, the
re d! indicator lamp lights up in the instru‐
ment clus ter.
The electric parking brake is not automatically
applied if the engine is switched off bythe ECO
st art/ stop function.
Electric parking brake function (releasing
automatically)
The electric parking brake is released when the
fo llowing conditions are fulfilled:
R The driver's door is closed.
R The engine is running.
R The transmission is in position hork and
yo u depress the accelera tor pedal or you
shift from transmission position jtoh or
k when on le velground withthe driver's
door closed.
R Ifth e transmission is in position k,theta il‐
ga te must be closed.
R The seat belt tongue is inser ted into the seat
belt buckle of the driver's seat. Driving and parking
18 9
Page 193 of 565
If
th e seat belt tongue is not inser ted into the
seat belt buckle of the driver's seat, one of
th efo llowing conditions must be fulfilled:
- You shift from transmission position j.
- You ha veprev iously driven at speeds
grea terth an 3 km/h.
When the electric parking brake is released, the
re d! indicator lamp in the instrument clus‐
te r goes out. Applying/releasing
the electric pa rking
brake manually
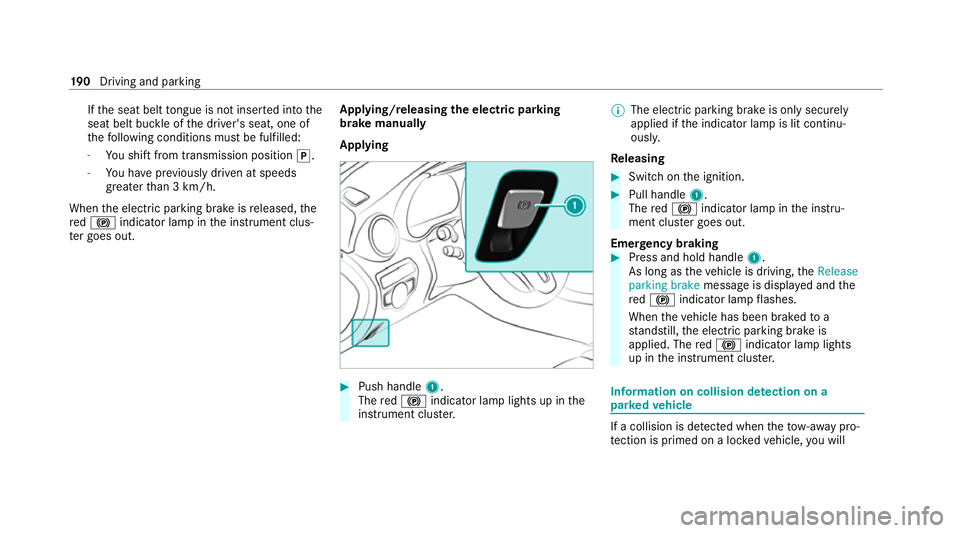
Applying #
Push handle 1.
The red! indicator lamp lights up in the
instrument clus ter. %
The electric parking brake is only securely
applied if the indicator lamp is lit continu‐
ously.
Re leasing #
Swit chon the ignition. #
Pull handle 1.
The red! indicator lamp in the instru‐
ment clus ter goes out.
Emer gency braking #
Press and hold handle 1.
As long as theve hicle is driving, theRelease
parking brake message is displa yed and the
re d! indicator lamp flashes.
When theve hicle has been braked to a
st andstill, the electric parking brake is
applied. The red! indicator lamp lights
up in the instrument clus ter. Information on collision de
tection on a
pa rked vehicle If a collision is de
tected when theto w- aw ay pro‐
te ction is primed on a loc kedve hicle, you will 19 0
Driving and pa rking
Page 196 of 565
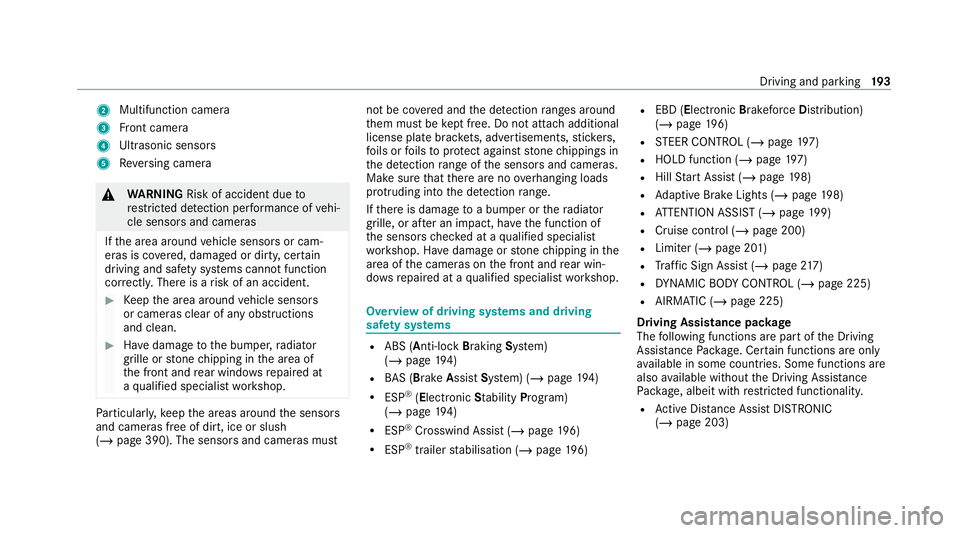
2
Multifunction camera
3 Front camera
4 Ultrasonic sensors
5 Reversing camera &
WARNING Risk of accident due to
re stricted de tection per form ance of vehi‐
cle sensors and cameras
If th e area around vehicle sensors or cam‐
eras is co vered, damaged or dirty, cer tain
driving and saf ety sy stems cann otfunction
cor rectly. The reis a risk of an accident. #
Keep the area around vehicle sensors
or cameras clear of any obstructions
and clean. #
Have damage tothe bumper, radiator
grille or stone chipping in the area of
th e front and rear wind owsrepaired at
a qu alified specialist workshop. Pa
rticular ly,ke ep the areas around the sensors
and cameras free of dirt, ice or slush
(/ page 390). The sensors and cameras must not be co
vered and the de tection ranges around
th em must be kept free. Do not attach additional
license plate brackets, ad vertisements, sticke rs,
fo ils or foils toprotect against stone chippings in
th e de tection range of the sensors and cameras.
Make sure that there are no overhanging loads
pr otru ding into the de tection range.
If th ere is damage toa bumper or thera diator
grille, or af ter an impact, ha vethe function of
th e sensors checked at a qualified specialist
wo rkshop. Ha vedamage or stone chipping in the
area of the cameras on the front and rear win‐
do ws repaired at a qualified specialist workshop. Overview of driving sy
stems and driving
saf ety sy stems R
ABS (Anti-lo ckBra king System)
(/ page 194)
R BAS (Bra keAssist System) (/ page194)
R ESP ®
(Electronic Stability Program)
(/ page 194)
R ESP ®
Crosswind Assist (/ page196)
R ESP ®
trailer stabilisation (/ page196) R
EBD ( Electronic Brakeforc eDistribution)
(/ page 196)
R STEER CONTROL (/ page 197)
R HOLD function (/ page197)
R Hill Start Assist (/ page198)
R Adaptive Brake Lights (/ page198)
R ATTENTION ASSIST (/ page199)
R Cruise control (/ page 200)
R Limi ter (/ page 201)
R Traf fic Sign Assi st (/ page 217)
R DYNA MIC BODY CONT ROL (/ page 225)
R AIRMATIC (/ page 225)
Driving Assist ance package
The following functions are part of the Driving
Assis tance Package. Cer tain functions are only
av ailable in some countries. Some functions are
also available without the Driving Assis tance
Pa ckage, albeit with restricted functionality.
R Active Dis tance Assi stDISTRONIC
(/ page 203) Driving and parking
19 3