2020 MERCEDES-BENZ C-CLASS ESTATE warning light
[x] Cancel search: warning lightPage 165 of 565
#
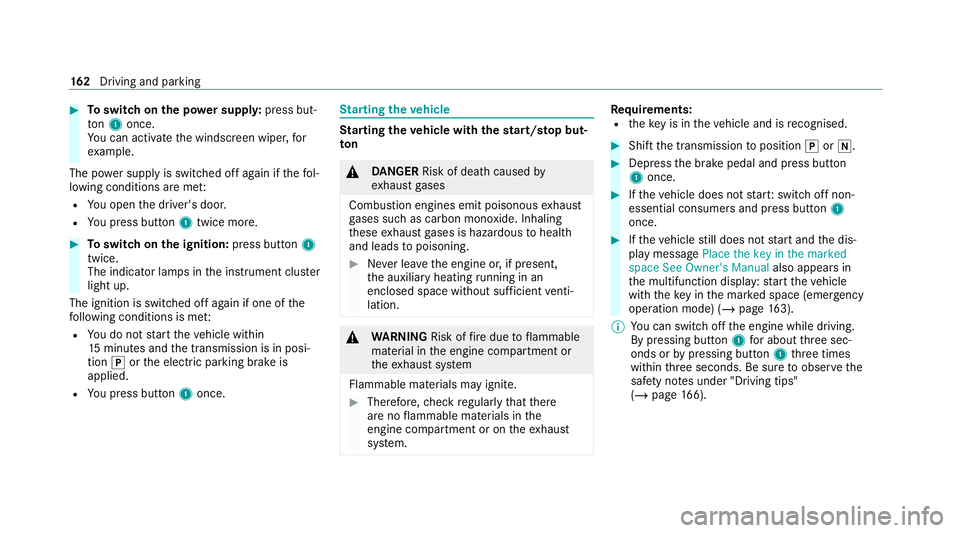
Toswitch on the po wer supp ly:press but‐
to n1 once.
Yo u can activate the windscreen wiper, for
ex ample.
The po wer supp lyis switched off again if thefo l‐
lowing conditions are me t:
R You open the driver's door.
R You press but ton1 twice more. #
Toswitch on the ignition: press button 1
twice.
The indicator lamps in the instrument clus ter
light up.
The ignition is switched off again if one of the
fo llowing conditions is me t:
R You do not start theve hicle within
15 minutes and the transmission is in posi‐
tion jorthe electric parking brake is
applied.
R You press but ton1 once. St
arting theve hicle St
arting theve hicle with thest art/s top but‐
ton &
DANG ER Risk of death caused by
ex haust gases
Combustion engines emit poisonous exhaust
ga ses such as carbon monoxide. Inhaling
th ese exhaust gases is hazardous tohealth
and leads topoisoning. #
Never lea vethe engine or, if present,
th e auxiliary heating running in an
enclosed space wi thout suf ficient venti‐
lation. &
WARNING Risk offire due toflammable
material in the engine compartment or
th eex haust sy stem
Flammable materials may ignite. #
Therefore, check regularly that there
are no flammable materials in the
engine compartment or on theex haust
sy stem. Re
quirements:
R theke y is in theve hicle and is recognised. #
Shift the transmission toposition jori. #
Depress the brake pedal and press button
1 once. #
Ifth eve hicle does not star t:switch off non-
essential consumers and press button 1
once. #
Ifth eve hicle still does not start and the dis‐
play message Place the key in the marked
space See Owner's Manual also appears in
th e multifunction display: start theve hicle
with theke y in the mar ked space (emer gency
operation mode) (/ page 163).
% You can swit choff the engine while driving.
By pressing button 1for about thre e sec‐
onds or bypressing button 1thre e times
within thre e seconds. Be sure toobser vethe
saf ety no tes under "Driving tips"
(/ page 166). 16 2
Driving and pa rking
Page 167 of 565
Ensu
rethefo llowing before starting the engine:
R the legal stipulations in the area where your
ve hicle is par ked allow engine starting via
smartphone.
R it is safe tostart and runth e engine where
yo ur vehicle is par ked.
R The fuel tank is su fficiently full.
St arting theve hicle (Remo teOnline) &
WARNING Risk of crushing or entrap‐
ment due tounin tentional starting of the
engine
Limbs could be crushed or trapped if the
engine is star ted unintentionally during
service or maintenance work. #
Alw ays secure the engine against unin‐
te ntional starting before car rying out
maintenance or repair work. Re
quirements:
R park position jis selected.
R the anti- theft alarm sy stem is not activated.
R the panic alarm is not activated. R
the hazard warning light sy stem is switched
off.
R the bonn etis closed.
R the doors are closed and loc ked.
R the windo wsand sliding sun roof are closed. #
Start theve hicle using the smartphone.
Af tereve ryengine start, the engine runs for
te n minu tes.
Yo u can car ryout a maximum of two consecu‐
tive starting attem pts. Yo u must start theve hicle
once with theke y before trying tostart the
engine again with the smartphone. you can stop
th eve hicle again at any time.
% Further information can be found in the
smartphone app.
Securing the engine against starting before
car rying out maintenance or repair work: #
switch on the hazard warning light sy stem.
or #
unlock the doors.
or #
open a side window or the sliding sunroof. Ru
nning-in no tes To
preser vethe engine during thefirs t15 00 km:
R drive at varying road speeds and engine
speeds.
R do not drive at speeds greater than
14 0 km/h.
R drive theve hicle in drive program A
or ;.
R shift tothe next highest gear at theve ry lat‐
est when the needle reaches the last third
before there d area in there v counter.
R do not shift down a gear manually in order to
brake.
R avoidove rstraining theve hicle, e.g. driving at
full thro ttle.
R do not depress the accelera tor pedal past
th e pressure point (kickdown).
R only increase the engine speed gradually and
accelera tetheve hicle tofull speed af ter
15 00 km. 16 4
Driving and pa rking
Page 188 of 565
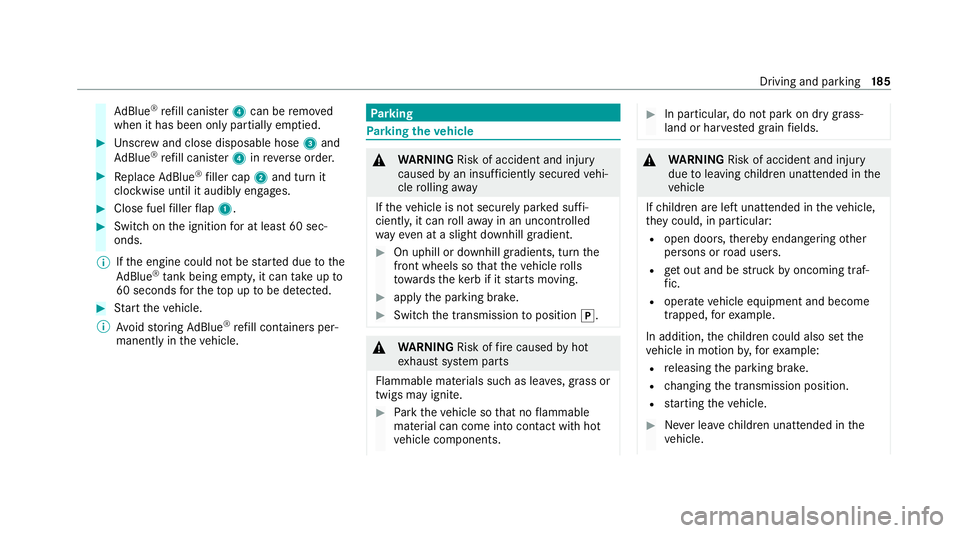
Ad
Blue ®
re fill canis ter4 can be remo ved
when it has been only partially em ptied. #
Unscr ew and close disposable hose 3and
Ad Blue ®
re fill canis ter4 inreve rse order. #
Replace AdBlue ®
filler cap 2and turn it
clockwise until it audibly engages. #
Close fuel filler flap 1. #
Swit chon the ignition for at least 60 sec‐
onds.
% Ifth e engine could not be star ted due tothe
Ad Blue ®
tan k being empty, it can take up to
60 seconds forth eto p up tobe de tected. #
Start theve hicle.
% Avoid storing AdBlue ®
re fill conta iners per‐
manently in theve hicle. Pa
rking Pa
rking theve hicle &
WARNING Risk of accident and inju ry
caused byan insuf ficiently secu redve hi‐
cle rolling away
If th eve hicle is not securely par ked suf fi‐
ciently, it can rollaw ay in an uncontro lled
wa yev en at a slight downhill gradient. #
On uphill or downhill gradients, turn the
front wheels so that theve hicle rolls
to wa rdsth eke rb if it starts moving. #
apply the parking brake. #
Switch the transmission toposition j. &
WARNING Risk offire caused byhot
ex haust sy stem parts
Flammable materials such as lea ves, grass or
twigs may ignite. #
Park theve hicle so that no flammable
material can come into con tact with hot
ve hicle components. #
In particular, do not park on dry grass‐
land or har vested grain fields. &
WARNING Risk of accident and inju ry
due toleaving children unat tended in the
ve hicle
If ch ildren are left unat tended in theve hicle,
th ey could, in part icular:
R open doors, thereby endangering other
persons or road users.
R get out and be stru ck byoncoming traf‐
fi c.
R ope rate ve hicle equipment and become
trapped, forex ample.
In addition, thech ildren could also set the
ve hicle in motion by,fo rex ample:
R releasing the parking brake.
R changing the transmission position.
R starting theve hicle. #
Never lea vechildren unat tended in the
ve hicle. Driving and parking
18 5
Page 190 of 565
#
Never lea vethe engine or, if present,
th e auxiliary heating running in an
enclosed space wi thout suf ficient venti‐
lation. &
WARNING Risk of injury when opening
or closing a door with thega rage door
opener
When you operate or program the door with
th e integrated garage door opener, persons
in thera nge of mo vement of the door may
become trapped or be stru ck bythe door. #
Alw ays make sure that nobody is within
th era nge of mo vement of the door. Re
quirements:
R The vehicle has been par ked outside the
ga rage or outside thera nge of mo vement of
th e door.
R The engine is switched off.
R The ignition is switched on.
% The garage door opener function is alw ays
av ailable when the ignition is switched on. #
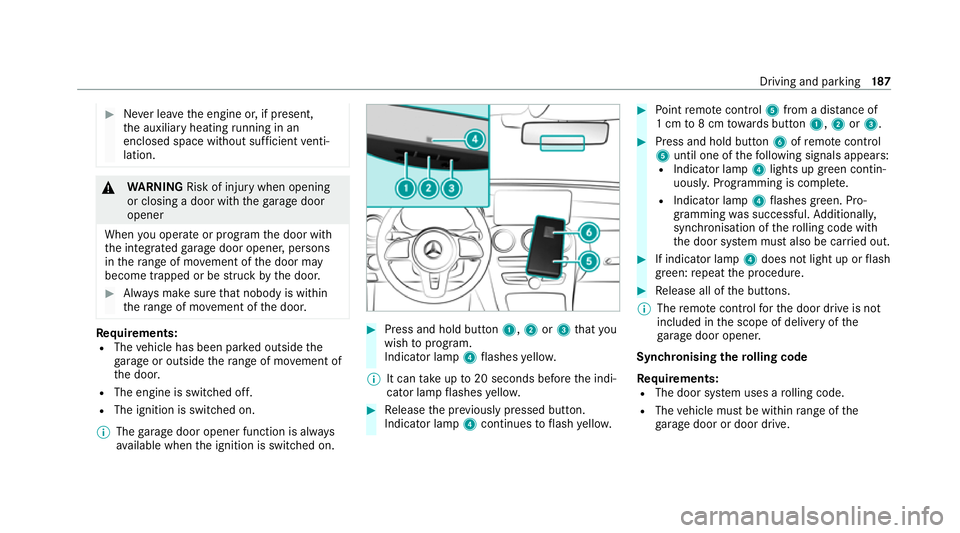
Press and hold button 1,2or3 that you
wish toprog ram.
Indicator lamp 4flashes yello w.
% It can take up to20 seconds before the indi‐
cator lamp flashes yello w. #
Release the pr eviously pressed button.
Indicator lamp 4continues toflash yello w. #
Point remo tecontrol 5from a dist ance of
1 cm to8 cm towa rds button 1,2or3. #
Press and hold button 6ofremo tecontrol
5 until one of thefo llowing signals appears:
R Indicator lamp 4lights up green contin‐
uousl y.Programming is comple te.
R Indicator lamp 4flashes green. Pro‐
gramming was successful. Additionall y,
synchronisation of thero lling code with
th e door sy stem must also be car ried out. #
If indicator lamp 4does not light up or flash
green: repeat the procedure. #
Release all of the buttons.
% The remo tecontrol forth e door drive is not
included in the scope of delivery of the
ga rage door opener.
Synchronising thero lling code
Re quirements:
R The door sy stem uses a rolling code.
R The vehicle must be within range of the
ga rage door or door drive. Driving and parking
187
Page 191 of 565
R
The vehicle as well as persons and objects
are located outside thera nge of mo vement
of the door. #
Press the programming button on the door
drive unit.
Initiate the next step within appr oximately
30 seconds. #
Press pr eviously prog rammed button 1,2
or 3 repeatedly until the door closes.
When the door closes, programming is com‐
ple ted.
% Please also read the operating instructions
fo rth e door drive.
Tr oubleshooting when prog ramming the
re mo tecont rol #
Check if the transmit ter frequency of remo te
control 5is support ed. #
Replace the batteries in remo tecontrol 5. #
Hold remo tecontrol 5atvarious angles
from a dis tance of 1 cm to8 cm front of the
inside rearview mir ror.Yo u should test eve ry
position for at least 25 seconds before trying
ano ther position. #
Hold remo tecontrol 5atthe same angles
at various dis tances in front of the inside rear
view mir ror.Yo u should test eve ryposition
fo r at least 25 seconds before trying ano ther
position. #
Onremo tecontrols that transmit on lyfor a
limi ted period, press button 6onremo te
control 5again before transmission ends. #
Align the aerial line of the door opener unit
with there mo tecontrol.
% Support and additional information on pro‐
gramming:
R Onthe HomeLink ®
Hotline on (0) 08000
466 354 65 or +49 (0) 6838 907-2 77
R Onthe Internet at https://
www.homelin k.com
Opening or closing the garage door
Requ irements:
R The cor responding button is programmed to
operate the door. #
Press and hold buttons 1,2or3 until
th e door opens or closes. #
If indicator lamp 4flashes yellow af ter
appr oximately 20 seconds: press and hold
th e pr eviously pressed button again until the
door opens or closes.
Clearing thega rage door opener memo ry #
Press and hold buttons 1and 3.
Indicator lamp 4lights up yello w. #
If indicator lamp 4flashes green: release
buttons 1and 3.
The entire memo ryhas been dele ted. Electric parking brake
Fu
nction of the electric pa rking brake (apply‐
ing automatically) &
WARNING Risk of accident and inju ry
due toleaving children unat tended in the
ve hicle
If ch ildren are left unat tended in theve hicle,
th ey could, in part icular:
R open doors, thereby endangering other
persons or road users. 18 8
Driving and pa rking
Page 196 of 565
2
Multifunction camera
3 Front camera
4 Ultrasonic sensors
5 Reversing camera &
WARNING Risk of accident due to
re stricted de tection per form ance of vehi‐
cle sensors and cameras
If th e area around vehicle sensors or cam‐
eras is co vered, damaged or dirty, cer tain
driving and saf ety sy stems cann otfunction
cor rectly. The reis a risk of an accident. #
Keep the area around vehicle sensors
or cameras clear of any obstructions
and clean. #
Have damage tothe bumper, radiator
grille or stone chipping in the area of
th e front and rear wind owsrepaired at
a qu alified specialist workshop. Pa
rticular ly,ke ep the areas around the sensors
and cameras free of dirt, ice or slush
(/ page 390). The sensors and cameras must not be co
vered and the de tection ranges around
th em must be kept free. Do not attach additional
license plate brackets, ad vertisements, sticke rs,
fo ils or foils toprotect against stone chippings in
th e de tection range of the sensors and cameras.
Make sure that there are no overhanging loads
pr otru ding into the de tection range.
If th ere is damage toa bumper or thera diator
grille, or af ter an impact, ha vethe function of
th e sensors checked at a qualified specialist
wo rkshop. Ha vedamage or stone chipping in the
area of the cameras on the front and rear win‐
do ws repaired at a qualified specialist workshop. Overview of driving sy
stems and driving
saf ety sy stems R
ABS (Anti-lo ckBra king System)
(/ page 194)
R BAS (Bra keAssist System) (/ page194)
R ESP ®
(Electronic Stability Program)
(/ page 194)
R ESP ®
Crosswind Assist (/ page196)
R ESP ®
trailer stabilisation (/ page196) R
EBD ( Electronic Brakeforc eDistribution)
(/ page 196)
R STEER CONTROL (/ page 197)
R HOLD function (/ page197)
R Hill Start Assist (/ page198)
R Adaptive Brake Lights (/ page198)
R ATTENTION ASSIST (/ page199)
R Cruise control (/ page 200)
R Limi ter (/ page 201)
R Traf fic Sign Assi st (/ page 217)
R DYNA MIC BODY CONT ROL (/ page 225)
R AIRMATIC (/ page 225)
Driving Assist ance package
The following functions are part of the Driving
Assis tance Package. Cer tain functions are only
av ailable in some countries. Some functions are
also available without the Driving Assis tance
Pa ckage, albeit with restricted functionality.
R Active Dis tance Assi stDISTRONIC
(/ page 203) Driving and parking
19 3
Page 198 of 565
ESP
®
can moni tor and impr ovedriving stability
and traction in thefo llowing situations, within
ph ysical limits:
R When pulling away on wet or slippe rycar ria‐
ge wa ys.
R When braking.
If th eve hicle deviates from the direction desired
by the driver, ESP ®
can stabilise theve hicle by
inter vening in thefo llowing ways:
R One or more wheels are braked.
R The engine output is adap ted according to
th e situation.
When ESP ®
is deactivated, theå warning
lamp lights up continuously:
R Driving stability will no lon ger be impr oved.
R The drive wheels could spin.
R ETS/4ETS traction control is still active.
% When ESP ®
is deactivated, you are still assis‐
te dby ESP ®
when braking. When
the÷ warning lamp flashes, one or
se veral wheels has reached its grip limit:
R Adapt your driving style to suit the cur rent
ro ad and weather conditions.
R Do not deactivate ESP ®
.
R Only depress the accelerator pedal as far as
is necessary when pulling away.
Deactivate ESP ®
in thefo llowing situations to
impr ovetraction:
R When using snow chains.
R In deep snow.
R On sand or gr avel.
% Spinning the wheels results in a cutting
action, which enhances traction.
If th e÷ ESP®
wa rning lamp lights up continu‐
ousl y,ESP ®
is not available due toa malfunction.
Obse rveth efo llowing information:
R Warning and indicator lamps (/ page 504)
R Display messages (/ page 451) ETS/4ETS (Electronic
Traction Sy stem)
ETS/4ETS traction control is pa rtof ESP ®
and
makes it possible topull away and accelerate on
a slippe rycar riag ew ay.
ETS/4ETS can impr ovetheve hicle's traction by
inter vening in thefo llowing ways:
R The drive wheels are braked individually if
they spin.
R More drive torque is transferred tothe wheel
or wheels with traction.
Influence of drive prog rams on ESP ®
The drive prog rams enable ESP ®
to adapt todif‐
fe re nt we ather and road conditions as well as
th e driver's prefer red driving style. Depending on
th e selected drive program, the appropriate
ESP ®
mode will be activated. You can select the
drive programs using theDY NA MIC SELECT
switch (/ page173). Driving and parking
19 5
Page 199 of 565
Fu
nction of ESP ®
Crosswind Assist ESP
®
Crosswind Assist de tects sudden gu sts of
side wind and helps the driver tokeep theve hi‐
cle in the lane:
R ESP ®
Crosswind Assist is active at vehicle
speeds between appr ox.75 km/h and
200 km/h when driving stra ight ahead or
cornering slight ly.
R The vehicle is stabilised bymeans of individ‐
ual brake application on one side. Fu
nction of ESP ®
trailer stabilisation &
WARNING Risk of accident in poor road
and weather conditions
In poor road and weather conditions, the
trailer stabilisation cannot pr event lu rching of
th eve hicle/trailer combination. Trailers with
a high centre of gr avity may tip over before
ESP ®
de tects this. #
Alw ays adapt your driving style to suit
th e cur rent road and weather condi‐
tions. When driving with a trailer, ESP
®
can stabilise
yo ur vehicle if the trailer begins toswer vefrom
side toside:
R ESP ®
trailer stabilisation is active abo ve
speeds of 65 km/h.
R Slight swerving is reduced bymeans of a tar‐
ge ted, individual brake application on one
side.
R Intheeve nt of se vere swerving, the engine
output is also reduced and all wheels are
braked.
ESP ®
trailer stabilisation may be impaired or
may not function if:
R The trailer is not connec ted cor rectly or is
not de tected properl yby theve hicle. Ac
tivating/deactivating ESP ®
(Electronic Sta‐
bility Prog ram) Multimedia sy
stem:
4 Vehicle 5
k Assistance 5
ESP
Mercedes‑AMG vehicles: observeth e no tes in
th e Supplement. Otherwise, you may failto rec‐
ognise dangers. #
Activate Oor deacti vate ª the function.
ESP ®
is deactivated if theå ESP®
OFF warn‐
ing lamp lights up continuously in the instrument
clus ter.
Obser vethe information on warning lamps and
display messages which may be shown in the
instrument clus ter. Fu
nction of EBD Elect
ronic Breakforce Distribution (EBD) is char‐
acterised bythefo llowing:
R Monitoring and regulating the brake pressure
on there ar wheels. 19 6
Driving and pa rking