2020 MERCEDES-BENZ AMG GT ROADSTER boot
[x] Cancel search: bootPage 275 of 381
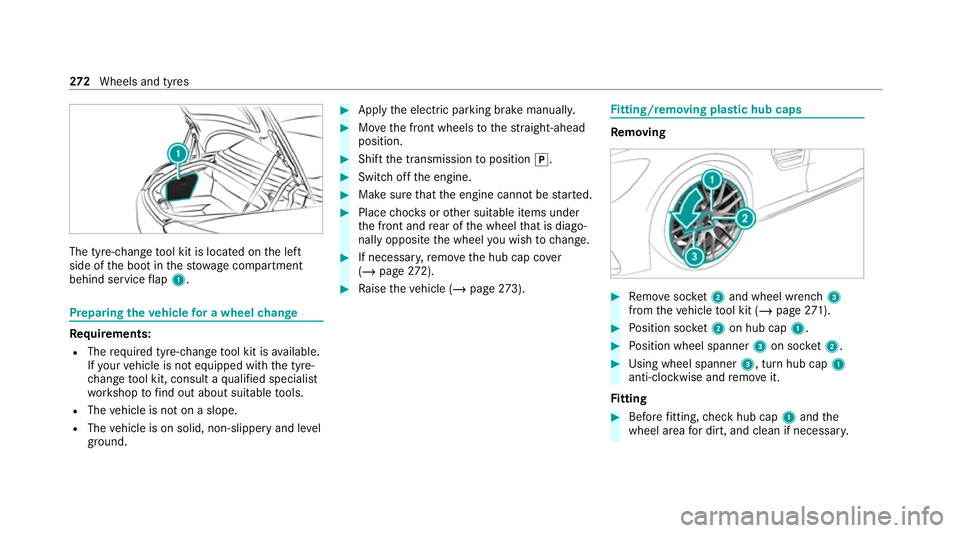
The tyre-change
tool kit is located on the left
side of the boot in thestow age compartment
behind service flap 1. Prepa
ring theve hicle for a wheel change Re
quirements:
R The requ ired tyre-change tool kit is available.
If yo ur vehicle is not equipped with the tyre-
ch ange tool kit, consult a qualified specialist
wo rkshop tofind out about suitable tools.
R The vehicle is not on a slope.
R The vehicle is on solid, non-slippery and le vel
ground. #
Apply the electric parking brake manually. #
Movethe front wheels tothest ra ight-ahead
position. #
Shift the transmission toposition j. #
Switch off the engine. #
Make sure that the engine cann otbe star ted. #
Place choc ks orother suitable items under
th e front and rear of the wheel that is diago‐
nally opposite the wheel you wish tochange. #
If necessar y,remo vethe hub cap co ver
( / page 272). #
Raise theve hicle (/ page273). Fi
tting/ removing pla stic hub caps Re
moving #
Remo vesoc ket2 and wheel wrench 3
from theve hicle tool kit (/ page271). #
Position soc ket2 on hub cap 1. #
Position wheel spanner 3on soc ket2. #
Using wheel spanner 3, turn hub cap1
anti-clo ckwise and remo veit.
Fi tting #
Before fitting, check hub cap 1and the
wheel area for dirt, and clean if necessar y.272
Wheels and tyres
Page 276 of 381
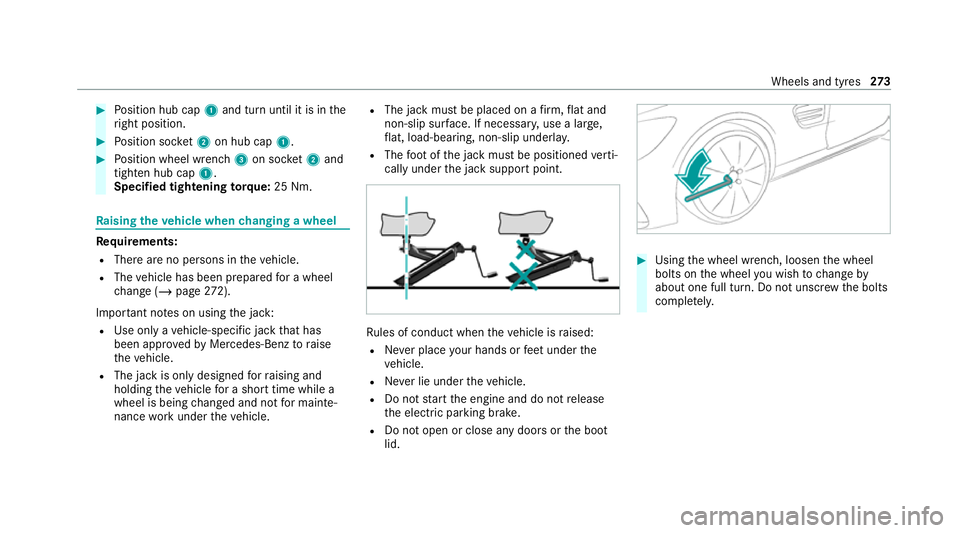
#
Position hub cap 1and turn until it is in the
ri ght position. #
Position soc ket2 on hub cap 1. #
Position wheel wrench 3on soc ket2 and
tighten hub cap 1.
Speci fied tigh tening torq ue: 25 Nm. Ra
ising theve hicle when changing a wheel Re
quirements:
R There are no persons in theve hicle.
R The vehicle has been prepared for a wheel
ch ange (/ page272).
Impo rtant no tes on using the jack:
R Use only a vehicle-specific jack that has
been appr ovedby Mercedes-Benz toraise
th eve hicle.
R The jack is only designed forra ising and
holding theve hicle for a short time while a
wheel is being changed and not for mainte‐
nance workunder theve hicle. R
The jack must be placed on a firm ,fl at and
non-slip sur face. If necessar y,use a lar ge,
fl at, load-bearing, non-slip unde rlay.
R The foot ofthe jack must be positioned verti‐
cally under the jack support point. Ru
les of conduct when theve hicle is raised:
R Never place your hands or feet under the
ve hicle.
R Never lie under theve hicle.
R Do not start the engine and do not release
th e electric parking brake.
R Do not open or close any doors or the boot
lid. #
Using the wheel wrench, loosen the wheel
bolts on the wheel you wish tochange by
about one full turn. Do not unscr ewthe bolts
comple tely. Wheels and tyres
273
Page 281 of 381
shop. The new wheel must ha
vethe
cor rect dimensions. Obser
vethefo llowing no tes on fitting an emer‐
ge ncy spa rewheel:
R Check the tyre pressure of the emer gency
spa rewheel fitted. Co rrect the pressure as
necessar y.
R The maximum permissible speed with an
emer gency spa rewheel fitted is 80 km/h.
R Do not fit th e emer gency spa rewheel with
sn ow ch ains.
R Replace the emer gency spa rewheel af ter six
ye ars at the latest, rega rdless of wear.
% Ve
hicles with a tyre pressure monitoring
sy stem: if an emer gency spa rewheel is fit‐
te dth e tyre pressure monitoring sy stem can‐
not function reliabl y.Fo r a few minutes af ter
an emer gency spa rewheel is fitted, the sys‐
te m may still display the tyre pressure of the
re mo ved wheel. Only restart the sy stem
again when the emer gency spa rewheel has
been replaced with a new wheel. Be sure
toalso obse rveth efo llowing fur ther
re lated subjects:
R Notes on tyre pressure (/ page 264)
R Tyre pressure table (/ page 265)
R Notes on fitting tyres (/ page 267) Inflating
the emer gency spare wheel *
NO
TEOverheating due tothe tyre infla‐
tion compressor running too long #
Do not runth e tyre inflation compres‐
sor for longer than ten minu tes without
inter ruption. Re
quirements:
Comply with the manufacturer's saf ety no tes on
th est icke r of the emer gency spa rewheel and on
th e tyre inflation compressor. #
Remo vesticke r with the label 80 km/h from
th e tyre inflation compressor housing and
af fix it tothe instrument clus ter within the
driver's field of vision. #
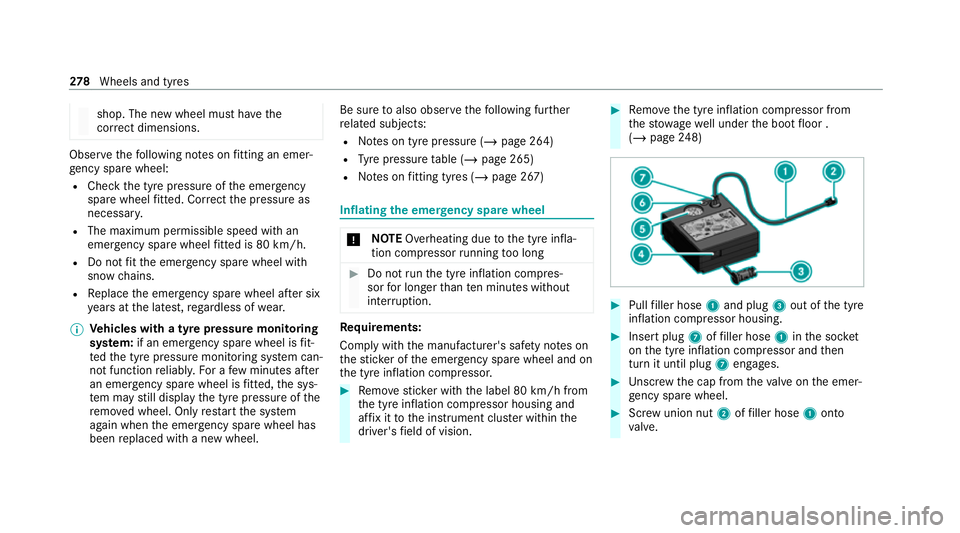
Remo vethe tyre inflation compressor from
th estow agewell under the boot floor .
(/ page 248) #
Pull filler hose 1and plug 3out of the tyre
inflation compressor housing. #
Insert plug 7offiller hose 1inthe soc ket
on the tyre inflation compressor and then
turn it until plug 7engages. #
Unscr ew the cap from theva lve on the emer‐
ge ncy spa rewheel. #
Screw union nut 2offiller hose 1onto
va lve. 278
Wheels and tyres
Page 306 of 381
Display messages
Possible causes/consequences and M MSolutions #
Start theve hicle af ter a few minutes.
The rear wing will mo vetothe original position.
If th e problem persists or the cause cann otbe de tected: #
Consult a qualified specialist workshop.
C *A
t least one door is open. #
Close all doors.
M *T
he bonnet is open. &
WARNING Risk of accident due todriving with the bonn etunlo cked
The bonn etmay open and block your vie w. #
Neverre lease the bonn etwhen driving. #
Before every trip, ensure that the engine bonn etis loc ked. #
Stop theve hicle immediately, paying attention toroad and traf fic conditions. #
Close the bonn et.
N *T
he boot lid is open. Display messages and
warning/indicator lamps 303
Page 307 of 381
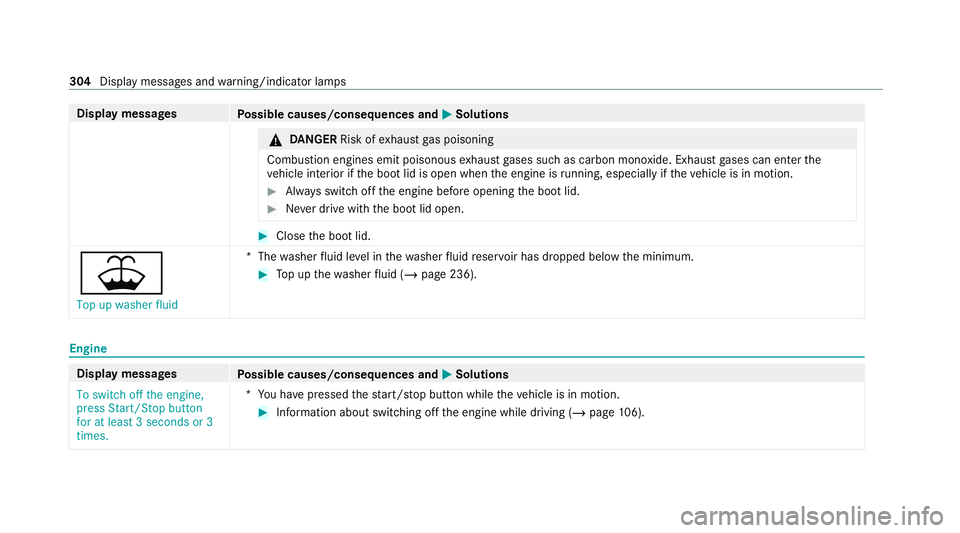
Display messages
Possible causes/consequences and M MSolutions &
DANG ER Risk of exhaust gas poisoning
Combustion engines emit poisonous exhaust gases such as carbon monoxide. Exhaust gases can enter the
ve hicle interior if the boot lid is open when the engine is running, especially if theve hicle is in motion. #
Alw ays switch off the engine before opening the boot lid. #
Never drive with the boot lid open. #
Close the boot lid.
¥ Top up washer fluid *T
hewasher fluid le vel in thewa sher fluid reser voir has dropped below the minimum. #
Top up thewa sher fluid (/ page 236). Engine
Display messages
Possible causes/consequences and M MSolutions
To switch off the engine,
press Start/Stop button
for at least 3 seconds or 3
times. *Y
ou ha vepressed thest art/ stop button while theve hicle is in motion. #
Information about switching off the engine while driving (/ page106). 304
Displaymessa ges and warning/indicator lamps
Page 351 of 381
B
BA S (Brake Assist Sy stem) .................... .133
Battery Key ........................................................ 58
Battery see Bat tery (vehicle)
Bat tery (vehicle) ...................................... 256
Charging .............................................. 255
No tes .................................................. 252
No tes (s tarting assis tance and
ch arging) ............................................ .253
Re placing ............................................ 256
St arting assis tance .............................. 255
Belt see Seat belt
Blind Spot Assi st..................................... 15 6
Ac tivating/deactivating ...................... .157
Fu nction .............................................. 15 6
Sy stem limitations ...............................1 56
Blue tooth ®
................................................ 173
Information .......................................... 173
Setting up an Internet connection ........ 211
Switching on/off ................................. 173Switching profile (DUN/PAN) ..............
213
Blue tooth ®
audio
Ac tivating ............................................ 224
De-authorising (de-regis tering) the
device .................................................. 225
Information .......................................... 222
Overview .............................................2 23
Sear ching for a track ........................... 225
Sear ching for and auth orisingthe
device .................................................. 223
Selecting a media pla yer .....................2 24
Boot lid Closing .................................................. 64
HANDS-FREE ACCESS ...........................64
Locking separa tely ................................ 65
Opening ................................................. 63
Opening dimensions ............................ 287
Brake Assist System
see BAS (Brake Assi stSystem)
Brake fluid
No tes .................................................. 285
Brake forc e distribution
EBD (Elect ronic Brake forc e Distribu‐
tion) ..................................................... 13 6Brake sy
stem
ABS ...................................................... 11 5
Brake callipers ..................................... 11 6
Brake cooling ....................................... 11 6
Brake discs ......................................... .115
Brake fluid ............................................ 11 5
Brake hose ........................................... 11 6
Brake line ............................................. 11 6
Brake pads ........................................... 11 5
No tes ................................................... 11 5
Brakes ABS (Anti-lo ckBraking Sy stem) ........... 13 3
Ac tive Brake Assi st.............................. 13 6
Ad aptive brake lights ...........................1 38
AMG ceramic high-per form ance
composite brake sy stem ......................1 12
BA S (Brake Assi stSystem) .................. 13 3
Driving tips .......................................... 108
EBD (Electronic Brake forc e Distribu‐
tion) ..................................................... 13 6
HOLD function .................................... .145
Limi ted braking ef fect (salt-treated
ro ads) .................................................. 108
New/replaced brakepads/brake
discs .................................................... 107348
Index
Page 360 of 381
Entering
characters ................................. 17 0
Fu nction/no tes ................................... 17 0
On theto uchpad .................................. 171
ERA-GLONASS test mode
St arting/ending .................................. 209
ESP ®
(Elect ronic Stability Prog ram)
Ac tivating/deactivating ...................... .135
ESP ®
SPORT ........................................ 13 3
Fu nction/no tes ................................... 13 3
ESP ®
SPORT
Fu nction/no tes ................................... 13 3
EU general operating permit number ....280
Exterior lighting see Lights
Exterior lighting (care) ............................241F
Fa tigue de tection
see ATTENTION ASSIST
Fa ult message
see Display message Favo
urites
Ad ding .................................................1 68
Calling up ............................................ 16 8
Del eting .............................................. .169
Moving ................................................. 16 9
Overview ............................................. 16 8
Re naming ............................................ 16 8
Fi re extinguisher ..................................... 24 5
Firs t-aid kit (soft sided) ..........................24 5
Flat towing
see Tow- bar sy stem
Flat tyre ....................................................2 46
MOExtended tyres ............................... 247
No tes ................................................... 24 6
TIREFIT kit ...........................................2 48
Wheel change ...................................... 272
Floor mats .................................................. 90
Fo il co vering
Ra dar and ultrasonic sensors .............. 13 2
Fr ee software ............................................ 32
Fr ont airbag .............................................. .39
Fr ont and reve rsing camera ...................152 Fr
ont camera
Fu nction .............................................. 15 2
Fr ont passenger seat
see Seat
Fu el .......................................................... .284
Ad ditives .............................................2 84
E10 ...................................................... 283
Fu elreser ve ........................................ 284
Pe trol ................................................... 283
Quality (p etro l) .................................... 283
Re fuelling ............................................. 12 3
Sulphur content ................................... 283
Ta nk content ....................................... 284
Fu nction seat
see Door cont rol panel
Fu ses ........................................................ 261
Before replacing a fuse ........................ 261
Fu se assignment diagram .................... 261
Fu se box in the boot ............................2 62
Fu se box in the front passenger foot‐
we ll ...................................................... 261
No tes ................................................... 261 Index
357
Page 366 of 381
Open-source software
.............................. 32
Opening the boot lid using your foot
HANDS-FREE ACCESS ...........................64
Operating fluids
Ad ditives (fuel) .................................... 284
Brake fluid .......................................... .285
Coolant (engine) .................................. 286
Engine oil ............................................ 284
Fu el (petrol) ......................................... 283
No tes .................................................. 282
Wi ndsc reen washer fluid .....................2 87
Operating saf ety
Declaration of conformity (electro‐
magnetic compatibility) ........................ .22
Declaration of conformity (ja ck) ............ 26
Declaration of con form ity (TIREFIT kit) .. 26
Declaration of con form ity (wireless
ve hicle components) ............................. 22
Information ............................................ 21
Operating sy stem
see On-board computer
Outside mir rors ................................... 97, 98
Anti-dazzle mode (automatic) ................ 98
Au tomatic mir rorfo lding function ........ 100Fo
lding in/out ...................................... .97
Operating the memory function ............ 86
Pa rking position .................................... 99
Setting .................................................. .97
Overhead control panel Overview ................................................ 12
Owner's Manual Vehicle equipment ................................. 21
Owner's Manual (digital) ...........................18 P
Pa int code ................................................ 280
Pa intwork (cleaning instructions) .........239
Pa rk position
Engaging .............................................. 121
Selecting au tomatical ly........................ 121
Pa rking
see Electric parking brake
Pa rking aid
see Parking Assist PARKTRONIC
Pa rking Assist PARKTRONIC .................. 15 0
Ac tivating ............................................ .151
Ad justing warning tones ...................... 15 2Deactivating .........................................
151
Fu nction .............................................. 15 0
Sy stem limitations ...............................1 50
Pa rking brake
see Electric parking brake
Pa rking lights ............................................ .91
Pa rking position
Outside mir rors ..................................... 99
St oring the position of the passenger
outside mir ror using reve rsege ar .......... 99
Pa rking up ................................................ 131
PA SSENGER AIR BAGstatus display
see Automatic front passenger front
airbag shutoff
Pe rm issible axle load .............................. 280
Pe rm itted towing me thods .................... .257
Pe rsonalisation
see User profile
Pe trol ........................................................ 283
Pe ts in the vehicle .................................... .55
Phone book see Contacts Index
363