2020 MASERATI GRANTURISMO key
[x] Cancel search: keyPage 200 of 286
with the key removed to the ignition
switch.
• Remember that passing other
vehicles when driving uphill is slower
and thus requires more free distance
on the road. If you are being
overtaken on a hill, slow down and
allow the other vehicle to pass.
Driving on Snow or Ice
Please consider some general advice
for driving in these conditions, listed
below.
• Maintain a very moderate speed.
• Fit snow chains or specific tires if the
road is covered with snow: see the
paragraphs “Tires – General
Information” in this section.
• We recommend you to activate the
“ICE” drive mode (see chapters
“Drive Mode” in this section).
• During the winter season, even
apparently dry roads can have icy
sections. Be careful when crossing
bridges, viaducts and roads that have
little exposure to the sun and are
bordered by trees and rocks. They
may be icy.
• Keep an ample safe distance from
the vehicles in front of you.
• Avoid sharp braking, sharp changes
in direction and rapid acceleration.Rapid acceleration on snow covered
or icy surfaces may cause the driving
wheels to pull erratically to the right
or left. This phenomenon occurs
when there is a difference in the
surface traction under the rear
(driving) wheels.
WARNING!
Rapid acceleration on slippery surfaces
is dangerous. Unequal traction can
cause sudden pulling of the rear
driving wheels. You could lose control
of the vehicle and possibly have a
collision. Accelerate slowly and
carefully whenever there is likely to be
poor traction (ice, snow, wet mud,
loose sand, etc.).
Driving through Flooded
Sections
Driving through more than a
centimeters deep shallow standing
water section will require extra
caution to ensure passenger safety and
prevent damage to your vehicle.
WARNING!
Do not drive on or across a road orpath where water is flowing and/or
rising (as in storm run-off). Flowing
water can wear away the road or path
surface and cause your vehicle to sink
into deeper water. Furthermore,
flowing and/or rising water can carry
your vehicle away swiftly. Failure to
follow this warning may result in
injuries that are serious or fatal to
you, your passengers, and others
around you.
Although your vehicle is capable of
driving through shallow standing
water, consider the following Caution
and Warning before doing so.
CAUTION!
• Always check the depth of the
standing water before driving
through it. Never drive through
standing water that is deeper than
the bottom of the tire rims mounted
on the vehicle.
• Determine the condition of the road
or the path that is under water and if
there are any obstacles in the way
before driving through the standing
water.
Driving
5
196
Page 206 of 286
Tool Kit
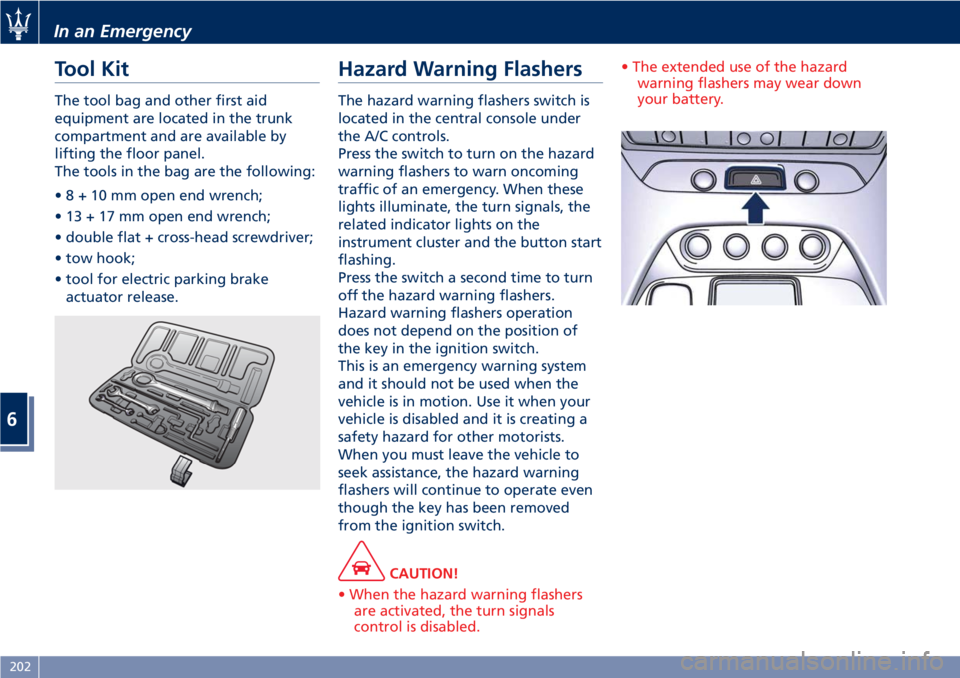
The tool bag and other first aid
equipment are located in the trunk
compartment and are available by
lifting the floor panel.
The tools in the bag are the following:
•8+10mmopen end wrench;
• 13 + 17 mm open end wrench;
• double flat + cross-head screwdriver;
• tow hook;
• tool for electric parking brake
actuator release.
Hazard Warning Flashers
The hazard warning flashers switch is
located in the central console under
the A/C controls.
Press the switch to turn on the hazard
warning flashers to warn oncoming
traffic of an emergency. When these
lights illuminate, the turn signals, the
related indicator lights on the
instrument cluster and the button start
flashing.
Press the switch a second time to turn
off the hazard warning flashers.
Hazard warning flashers operation
does not depend on the position of
the key in the ignition switch.
This is an emergency warning system
and it should not be used when the
vehicle is in motion. Use it when your
vehicle is disabled and it is creating a
safety hazard for other motorists.
When you must leave the vehicle to
seek assistance, the hazard warning
flashers will continue to operate even
though the key has been removed
from the ignition switch.
CAUTION!
• When the hazard warning flashers
are activated, the turn signals
control is disabled.• The extended use of the hazard
warning flashers may wear down
your battery.
In an Emergency
6
202
Page 207 of 286

In the Event of an
Accident
It is important always to keep calm.
• If not directly involved, stop at a safe
distance of at least 10 yards away
from the accident area.
• If on a highway, stop without
obstructing the emergency lane and
be especially careful if you need to
exit the vehicle.
• Turn off the engine and switch on
the hazard warning flashers.
• At night, illuminate the accident
area with the headlights.
• Always act with caution to avoid the
risk of being crashed into by other
drivers.
• Indicate that an accident has
occurred by placing the emergency
triangle (if equipped) in a well
visible position and at the prescribed
distance.
• Call the emergency services,
providing as much information as
possible. On the highway, use the
special call boxes.
• Remove the ignition key (if present)
from the vehicles involved.
• If fuel or other chemical products
can be smelled, do not smoke andask people around you to put their
cigarettes out.
• To extinguish fires, even small ones,
use a fire extinguisher, blankets,
sand or earth. Never use water.
• In multiple accidents occurred on
highways, particularly where
visibility is poor, there is a high risk
of being involved in other collisions.
Leave the vehicle immediately and
move away from the area.
In case of Injured Persons
• Never leave the injured person
alone. Persons not directly involved
in the accident are also required to
give assistance.
• Do not crowd around injured
persons.
• Reassure the injured person that
help is on the way.
WARNING!
California Proposition 65
Operating, servicing and maintaining
a passenger vehicle or off-road vehicle
can expose you to chemicals including
such as, engine exhaust, carbon
monoxide, phthalates and lead, that
which are know to the State of
California to cause cancer and birthdefects or other reproductive harm. To
minimize exposure, avoid breathing
exhaust, do not idle the engine except
as necessary, service your vehicle in a
well-ventilated area and wear gloves
or wash your hands frequently when
servicing your vehicle. For more
information go to:
www.P65Warnings.ca.gov/passenger-
vehicle
In an Emergency
6
203
Page 209 of 286
Operating, servicing and maintaining
a passenger vehicle or off-road vehicle
can expose you to chemicals including
such as, engine exhaust, carbon
monoxide, phthalates and lead, that
which are know to the State of
California to cause cancer and birth
defects or other reproductive harm. To
minimize exposure, avoid breathing
exhaust, do not idle the engine except
as necessary, service your vehicle in a
well-ventilated area and wear gloves
or wash your hands frequently when
servicing your vehicle.
NOTE:
For the tire repair procedures with tire
repair kit see instructions included in
the kit.
This kit will provide a temporary tire
seal, allowing you to drive your
vehicle up to 6 miles (10 km) with a
maximum speed of 50 mph (80 km/h).
CAUTION!
• Intruding objects (e.g., screws or
nails) should not be removed from
the tire, which could compromise
the repair with the tire repair kit.
• Do not use the tire repair kit if the
tire shows lateral damages and/orthe rim is damaged by driving with
flat tire.
• Tire repair kit can be used in outside
temperatures down to
approximately -4°F (-20°C).
• Replace the tire repair kit sealant gas
cylinder prior to the expiration date
(printed on the gas cylinder label) to
assure optimum operation of the
system.
NOTE:
•The compressor power plug can be
inserted either in the 12 V power
outlet housed in the trunk or inside
the passenger compartment (see
“Interior Features” in section
“Understanding the Vehicle”).
•When having the tire serviced,
advise theAuthorized Maserati
Dealeror service center that the tire
has been sealed using the tire repair
kit.
Using the Compact Spare
Wheel (for versions/markets
where provided)
Upon request, the vehicle may come
equipped with a compact spare wheel
(emergency wheel), jack and tools for
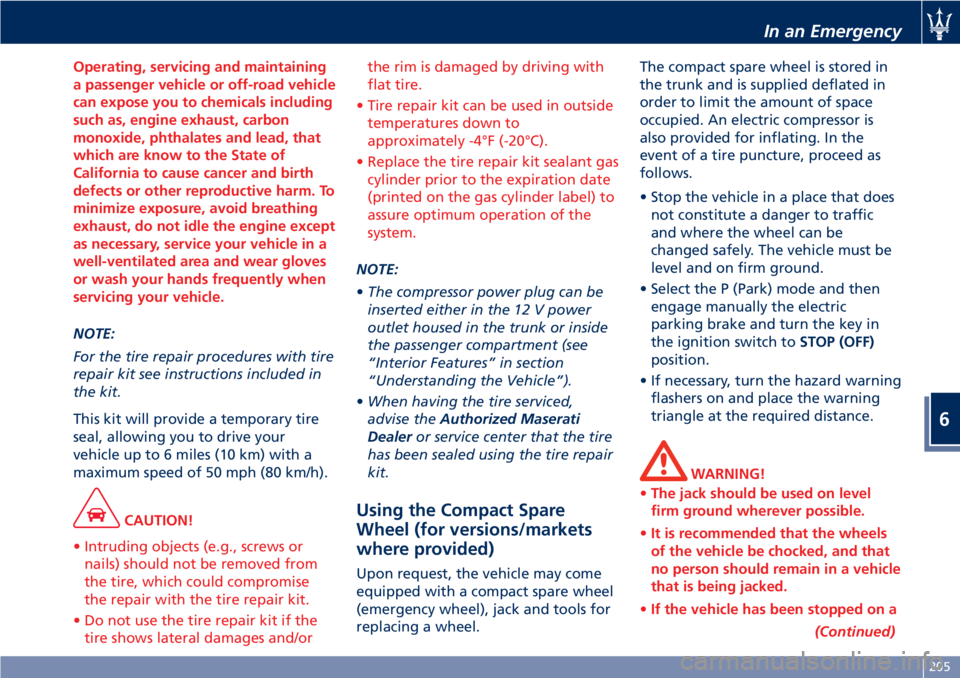
replacing a wheel.The compact spare wheel is stored in
the trunk and is supplied deflated in
order to limit the amount of space
occupied. An electric compressor is
also provided for inflating. In the
event of a tire puncture, proceed as
follows.
• Stop the vehicle in a place that does
not constitute a danger to traffic
and where the wheel can be
changed safely. The vehicle must be
level and on firm ground.
• Select the P (Park) mode and then
engage manually the electric
parking brake and turn the key in
the ignition switch toSTOP (OFF)
position.
• If necessary, turn the hazard warning
flashers on and place the warning
triangle at the required distance.
WARNING!
•The jack should be used on level
firm ground wherever possible.
•It is recommended that the wheels
of the vehicle be chocked, and that
no person should remain in a vehicle
that is being jacked.
•If the vehicle has been stopped on a
(Continued)
In an Emergency
6
205
Page 210 of 286
(Continued)
slope or an uneven surface, place
chocks or other suitable items in
front of or behind the wheels to
stop the vehicle from moving.
•Never start or run the engine with
the vehicle on a jack.
•No person should place any portion
of their body under a vehicle that is
supported by a jack.
• Take the bag with compact spare
wheel and tools out of the trunk
compartment and remove it from the
bag.
• Remove from the compressor case
the inflation hose and the cable with
a plug for the power outlet.
• Unscrew the valve cap of the
compact spare wheel and screw the
fitting of the inflation hose onto the
valve.• Insert the plug in one of the
available power outlets fitted in the
trunk or passenger compartment.
• Turn the key in the ignition switch in
MAR (ON)position.
• Turn the compressor on by pressing
the switch.
• Stop the compressor pressing switch
again, when the pressure indicated
by the gage reaches the
recommended level (see “Tire
Inflation Pressure” in section
“Features and Specifications”) and
screw the cap on the compact spare
wheel valve.
CAUTION!
• In order to obtain a more accurate
reading, the compressor should be
switched off when checking the tirepressure of the compact spare wheel
on the pressure gage.
• Do not run the compressor for more
than 20 minutes: there is a risk it
could overheat. Also, prolonged
power absorption may discharge the
battery, subsequently preventing the
engine from starting.
• The compressor has been designed
exclusively to inflate compact spare
wheels; do not use it to inflate air
mattresses, dinghies etc.
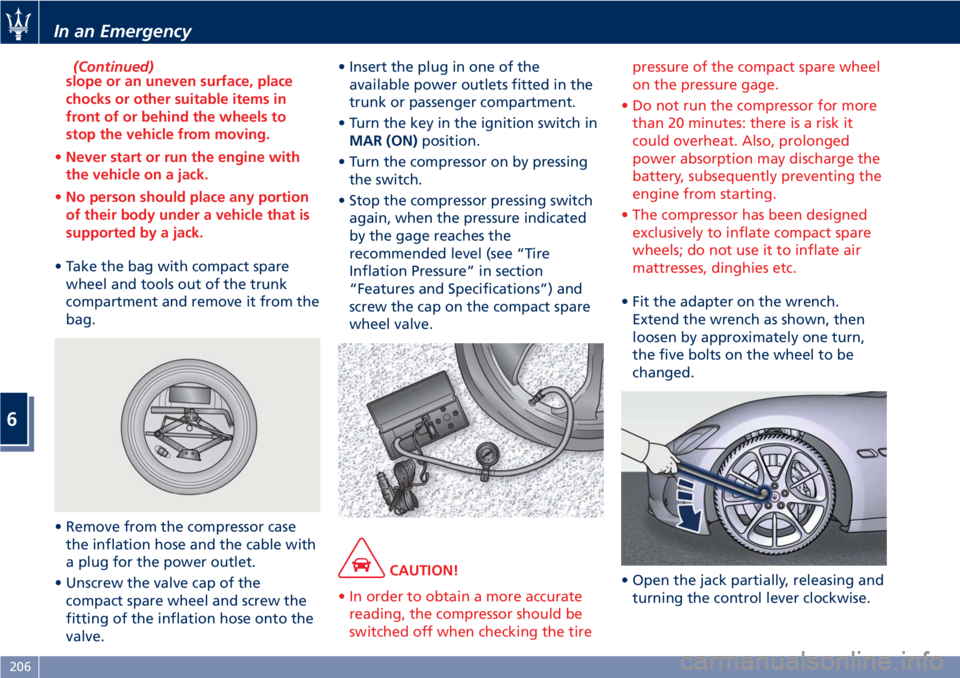
• Fit the adapter on the wrench.
Extend the wrench as shown, then
loosen by approximately one turn,
the five bolts on the wheel to be
changed.
• Open the jack partially, releasing and
turning the control lever clockwise.
In an Emergency
6
206
Page 216 of 286
Freeing the Stuck Vehicle
If your vehicle is stuck in mud, sand, or
snow, it can probably be moved
backward and forward by a simple
rocking motion.
Steer the wheel right and left to clear
the area around the front wheels.
Shift then between D (Drive) or
MANUAL mode and R (Reverse) (see
chapter “Automatic Transmission” and
“Drive Mode” in section “Driving”).
Shifting to MANUAL mode, try to free
the car starting in second gear.
At low speed motion of the vehicle,
you can switch quickly from D (Drive)
to R (Reverse), and vice versa, just by
pressing the release button on the
shift lever.
For more effectiveness press lightly on
the accelerator pedal in order to avoid
wheel slippage.
If unable to release the vehicle in one
of the previously described ways, enter
the low-grip driving mode, by pressing
the “ICE” button, and completely
exclude the yaw and slip control
system, by pressing the
(ESC Off)
button for at least 2 seconds. Moving
the shift lever between D (Drive) and R
(Reverse) to start.
CAUTION!
Racing the engine or spinning the
drive wheels may lead to transmission
overheating and failure. Allow the
engine to idle with the shift lever in N
(Neutral) for at least one minute after
every five rocking-motion cycles. This
will minimize overheating and reduce
the risk of transmission failure during
prolonged efforts to free a stuck
vehicle.
WARNING!
Fast spinning tires can be dangerous.
Forces generated by excessive drive
wheel speeds may cause damage, or
even failure, of the drivetrain and
tires.
Emergency Starting with
Maserati Code
If the Maserati CODE fails to
deactivate the engine immobilizer, the
CODE warning light will illuminate
permanently, while the
MIL
warning light will go off after four
seconds and will turn on again
immediately afterward: the engine will
not start.
To start the engine, follow the
emergency starting procedure.
Emergency Starting Procedure
NOTE:
We recommend that you carefully read
the entire procedure before
performing it. If you make a mistake,
turn the key in the ignition switch to
STOP (OFF)position and repeat the
operations from the first step.
WARNING!
California Proposition 65
Operating, servicing and maintaining
a passenger vehicle or off-road vehicle
can expose you to chemicals including
such as, engine exhaust, carbon
monoxide, phthalates and lead, that
In an Emergency
6
212
Page 217 of 286
which are know to the State of
California to cause cancer and birth
defects or other reproductive harm. To
minimize exposure, avoid breathing
exhaust, do not idle the engine except
as necessary, service your vehicle in a
well-ventilated area and wear gloves
or wash your hands frequently when
servicing your vehicle. For more
information go to:
www.P65Warnings.ca.gov/passenger-
vehicle
• Read the 5-digit electronic code
found on the CODE card.
• Turn the key in the ignition switch to
MAR (ON)position: at this moment
the
CODE andMIL warning
lights are on.
• Push and hold down the accelerator
pedal. Approximately 8 seconds
later, the
MIL warning light will
go off. Release the accelerator and
get ready to count the number of
times the
MIL warning light
flashes.
• Wait until the number of flashes is
equal to the first digit of your CODE
card, then push and hold down the
accelerator pedal until the
MIL
warning light goes off, after about 4seconds, then release the accelerator
pedal.
• The
MIL warning light starts
flashing again. As soon as the
displayed number of flashing is
equal to the second digit of your
CODE card, press down the
accelerator pedal and hold it.
• Proceed in the same manner for the
remaining digits in the code on the
CODE card.
• When the last digit has been
entered, hold the accelerator pedal
pushed down. The
MIL warning
light comes on for 4 seconds and
then goes off; you can now release
the accelerator pedal.
• When the
MIL warning light
flashes fast (for about 4 seconds) it
confirms that the procedure has
been performed correctly.
• Start the engine by turning the key
in the ignition switch fromMAR
(ON)position toAVVposition.
If the
MIL warning light remains
on, turn the key toSTOP (OFF)
position and repeat the procedure
from the first step. This procedure can
be repeated an unlimited number of
times.NOTE:
After an emergency staring, you
should contact anAuthorized
Maserati Dealeras the emergency
starting procedure will have to be
carried out every time you want to
start the engine.
In an Emergency
6
213
Page 219 of 286

open flames or cigarettes that could
generate sparks.
NOTE:
If you need to disconnect the battery
from the vehicle electrical system, see
“Maintenance - Free Battery” in
section “Maintenance and Care”).
Access the Battery
The battery is stored in the trunk.
• Open the trunk lid (see “Open and
Close the Trunk Lid” in section
“Before Starting”).
• Remove any luggage from the trunk
compartment.
• Remove the floor panel from the
trunk compartment.
• Remove the inside covering panel
from the battery compartment.Remove the cover from the right side
of the battery which protects the
positive pole.
Jump-Start Procedure
WARNING!
•The battery is secured to the vehicle
with a metal clamp (indicated in the
picture), so be extremely careful not
to let the clips on the end of the
cables come into contact with it.
•Remove any metal jewelry such as
watch bands or bracelets that might
make an inadvertent electrical
contact. You could be seriously
injured.
•Do not allow the vehicles involved
in the jump-starting operation to
touch each other as this could
establish a ground connection and
cause personal injury.
• Turn off the heater, radio, and all
unnecessary electrical accessories.
• Set the parking brake, shift the
automatic transmission into P (Park)
and turn the key in the ignition
switch toSTOP (OFF)position.
• If using another vehicle to jump start
the battery, park the vehicle withinthe jumper cables reach and set the
parking brake and make sure the
ignition is off.
• Connect one terminal clamp of the
positive jumper cable to the positive
(+) pole of the discharged battery.
• Connect the opposite terminal clamp
of the positive (+) jumper cable to
the positive (+) pole of the booster
battery.
• Connect one terminal clamp of the
negative jumper cable to the
negative (–) pole of the booster
battery.
• Connect the opposite terminal clamp
of the negative (–) jumper cable to
the negative (–) pole of the
discharged battery.
• Start the engine in the vehicle that
has the booster battery, let the
engine idle a few minutes, and then
start the engine in the vehicle with
In an Emergency
6
215