2020 MASERATI GRANTURISMO CONVERTIBLE trunk release
[x] Cancel search: trunk releasePage 26 of 296

Keys
Two keys with radio control are
supplied with the vehicle.
The key is used for:
• starting the engine;
• activating the central door locking
system;
• opening the trunk lid electrically;
• activating/deactivating the alarm
system;
• locking/unlocking the glove
compartment on the dashboard.
WARNING!
California Proposition 65
Operating, servicing and maintaining
a passenger vehicle or off-road vehicle
can expose you to chemicals including
such as, engine exhaust, carbonmonoxide, phthalates and lead, that
which are know to the State of
California to cause cancer and birth
defects or other reproductive harm. To
minimize exposure, avoid breathing
exhaust, do not idle the engine except
as necessary, service your vehicle in a
well-ventilated area and wear gloves
or wash your hands frequently when
servicing your vehicle. For more
information go to:
www.P65Warnings.ca.gov/passenger-
vehicle
Ignition Switch
The key in the ignition switch can turn
in 4 positions:
STOP
(OFF)Engine off, engine immobilizer
and steering wheel lock
activated, connected devices
disabled, apart from those that
are not key-controlled (e.g.
centralized door lock, trunk
compartment opening, etc.).
The key is removable.
ACCSteering lock release and
position for cigarette lighter
and power outlet activation.
The key is removable.MAR
(ON)Driving position: all electrical
devices can operate. The key is
removable.
AVVEngine starting.
Upon exceeding a speeda3mph
(5 km/h), if one or more doors/lids are
open or not properly closed, a warning
buzzer will be activated.
WARNING!
•When you get out of the vehicle,
always remove the key to prevent
someone from accidentally
activating the controls.
•When leaving the vehicle, always
remove the key from the ignition
switch and lock your vehicle.
Before Starting
2
22
Page 35 of 296

In the event of an emergency (vehicle
dead battery or electric system failure)
to open the doors, with the locks
released, press the rear button inside
each handle. Otherwise, if the doors
are locked, you must release them by
turning the key in the lock to open
them, then press the rear button.
In this case, being a conventional
mechanism, hold the rear button
pressed down longer.On the door panels, in a position
which is visible from the outside, there
is a dual-color (green/red) LED E which
indicates the status of the locks
(locked/unlocked). The red LEDs
illuminate for 3 seconds after the locks
are engaged and the green LEDs for
the same amount of time when they
are unlocked.
NOTE:
The door LEDs remain illuminated for
approximately 3 seconds and
therefore, in normal conditions, they
are off.
When the security alarm system is
turned on and the doors are locked,
the LEDs on the doors flash.
The radio control device allows you to
operate the centralized opening of all
the doors or of the driver’s door only,
depending on the Maserati TouchControl Plus (MTC+) settings (see
"MTC+ Settings" in section
"Dashboard Instrument and
Controls").
If one or more doors are not properly
closed when locking the doors from
the outside, they will not be locked,
while if the trunk compartment is not
properly closed, the doors will in any
case be locked.
In both cases, the malfunction will be
indicated by the turn signals flashing
for a few seconds.
NOTE:
•The interior door locking/unlocking,
trunk compartment lid opening and
fuel tank door opening buttons are
disabled when the doors are locked
from the outside.
•In the event that the inertia switch
activates, the doors are electrically
unlocked and the vehicle can be
accessed by pressing the rear button
inside each handle.
Before Starting
2
31
Page 41 of 296
Trunk Safety
WARNING!
Do not allow children to have access
to the trunk. Always close the trunk
lid when your vehicle is unattended.
Once in the trunk, young children may
not be able to escape. If trapped in
the trunk, children can die from
suffocation or heat stroke.
Trunk Lid Emergency Release
from inside the Trunk
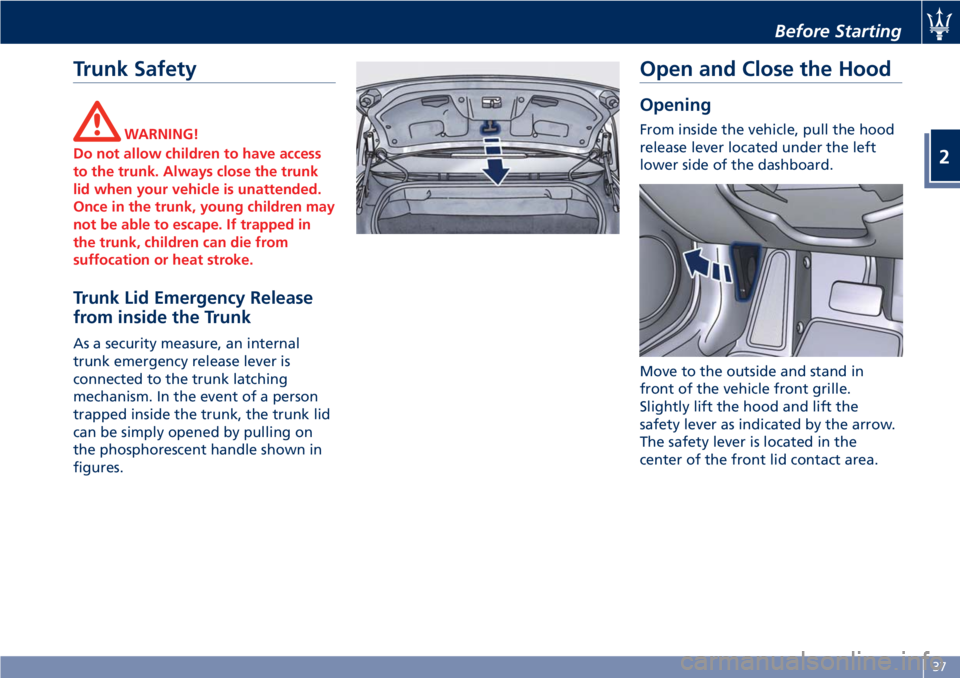
As a security measure, an internal
trunk emergency release lever is
connected to the trunk latching
mechanism. In the event of a person
trapped inside the trunk, the trunk lid
can be simply opened by pulling on
the phosphorescent handle shown in
figures.
Open and Close the Hood
Opening
From inside the vehicle, pull the hood
release lever located under the left
lower side of the dashboard.
Move to the outside and stand in
front of the vehicle front grille.
Slightly lift the hood and lift the
safety lever as indicated by the arrow.
The safety lever is located in the
center of the front lid contact area.
Before Starting
2
37
Page 100 of 296
Interruption/Inhibition of Soft
Top Movement
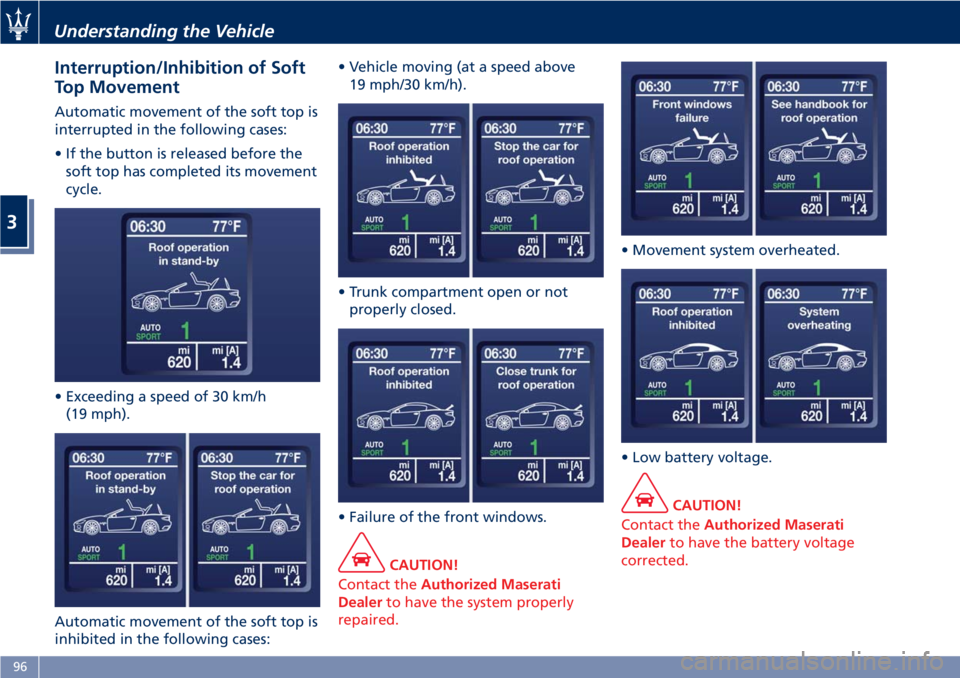
Automatic movement of the soft top is
interrupted in the following cases:
• If the button is released before the
soft top has completed its movement
cycle.
• Exceeding a speed of 30 km/h
(19 mph).
Automatic movement of the soft top is
inhibited in the following cases:• Vehicle moving (at a speed above
19 mph/30 km/h).
• Trunk compartment open or not
properly closed.
• Failure of the front windows.
CAUTION!
Contact theAuthorized Maserati
Dealerto have the system properly
repaired.
• Movement system overheated.
• Low battery voltage.
CAUTION!
Contact theAuthorized Maserati
Dealerto have the battery voltage
corrected.
Understanding the Vehicle
3
96
Page 166 of 296
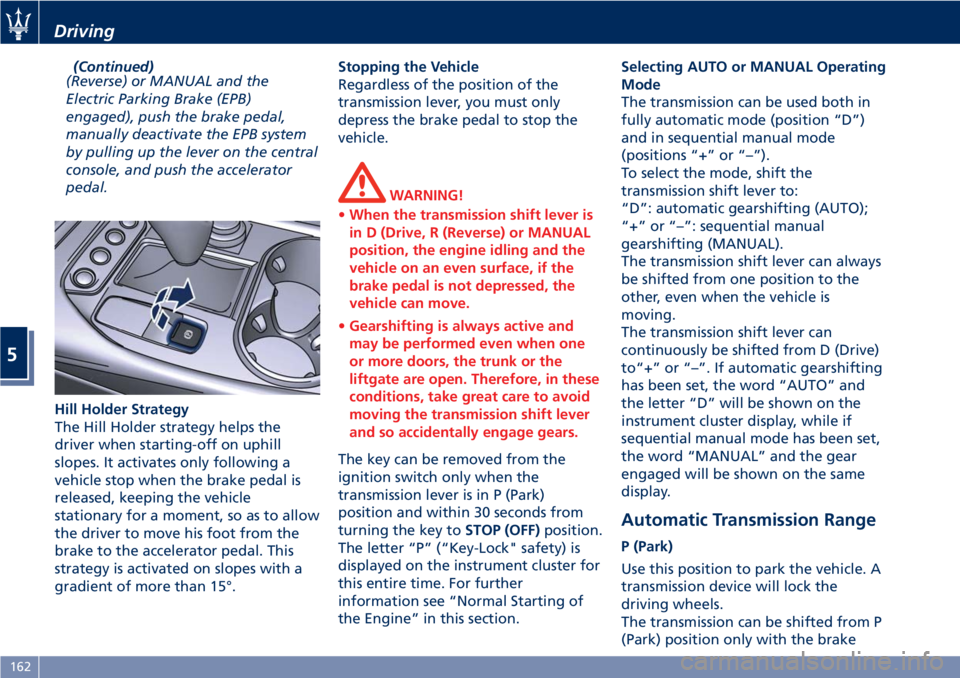
(Continued)
(Reverse) or MANUAL and the
Electric Parking Brake (EPB)
engaged), push the brake pedal,
manually deactivate the EPB system
by pulling up the lever on the central
console, and push the accelerator
pedal.
Hill Holder Strategy
The Hill Holder strategy helps the
driver when starting-off on uphill
slopes. It activates only following a
vehicle stop when the brake pedal is
released, keeping the vehicle
stationary for a moment, so as to allow
the driver to move his foot from the
brake to the accelerator pedal. This
strategy is activated on slopes with a
gradient of more than 15°.Stopping the Vehicle
Regardless of the position of the
transmission lever, you must only
depress the brake pedal to stop the
vehicle.
WARNING!
•When the transmission shift lever is
in D (Drive, R (Reverse) or MANUAL
position, the engine idling and the
vehicle on an even surface, if the
brake pedal is not depressed, the
vehicle can move.
•Gearshifting is always active and
may be performed even when one
or more doors, the trunk or the
liftgate are open. Therefore, in these
conditions, take great care to avoid
moving the transmission shift lever
and so accidentally engage gears.
The key can be removed from the
ignition switch only when the
transmission lever is in P (Park)
position and within 30 seconds from
turning the key toSTOP (OFF)position.
The letter “P” (“Key-Lock" safety) is
displayed on the instrument cluster for
this entire time. For further
information see “Normal Starting of
the Engine” in this section.Selecting AUTO or MANUAL Operating
Mode
The transmission can be used both in
fully automatic mode (position “D”)
and in sequential manual mode
(positions “+” or “–”).
To select the mode, shift the
transmission shift lever to:
“D”: automatic gearshifting (AUTO);
“+” or “–”: sequential manual
gearshifting (MANUAL).
The transmission shift lever can always
be shifted from one position to the
other, even when the vehicle is
moving.
The transmission shift lever can
continuously be shifted from D (Drive)
to“+” or “–”. If automatic gearshifting
has been set, the word “AUTO” and
the letter “D” will be shown on the
instrument cluster display, while if
sequential manual mode has been set,
the word “MANUAL” and the gear
engaged will be shown on the same
display.
Automatic Transmission Range
P (Park)
Use this position to park the vehicle. A
transmission device will lock the
driving wheels.
The transmission can be shifted from P
(Park) position only with the brake
Driving
5
162
Page 207 of 296
the amount of fuel allowed by the
system is very low, we recommend
therefore not to persist further.
• Wait approximately 10 seconds
before removing the fuel nozzle in
order to ensure completed supply of
residual fuel and restrict the risk of
fouling the fuel filler door area.
• Remove the fuel nozzle.
• Insert the cap on the fuel filler neck.
• Tighten the cap, turning it clockwise
until it stops.
• Close the fuel tank door.
CAUTION!
To avoid fuel spillage and overfilling,
do not “top off” the fuel tank after
filling.
Emergency Fuel Filler Door
Release
If you are unable to unlock the fuel
filler door using the dedicated button,
use the fuel filler door emergency
release located in the trunk.
• Open the trunk lid (see “Open and
Close the Trunk Lid” in section
“Before Starting”).
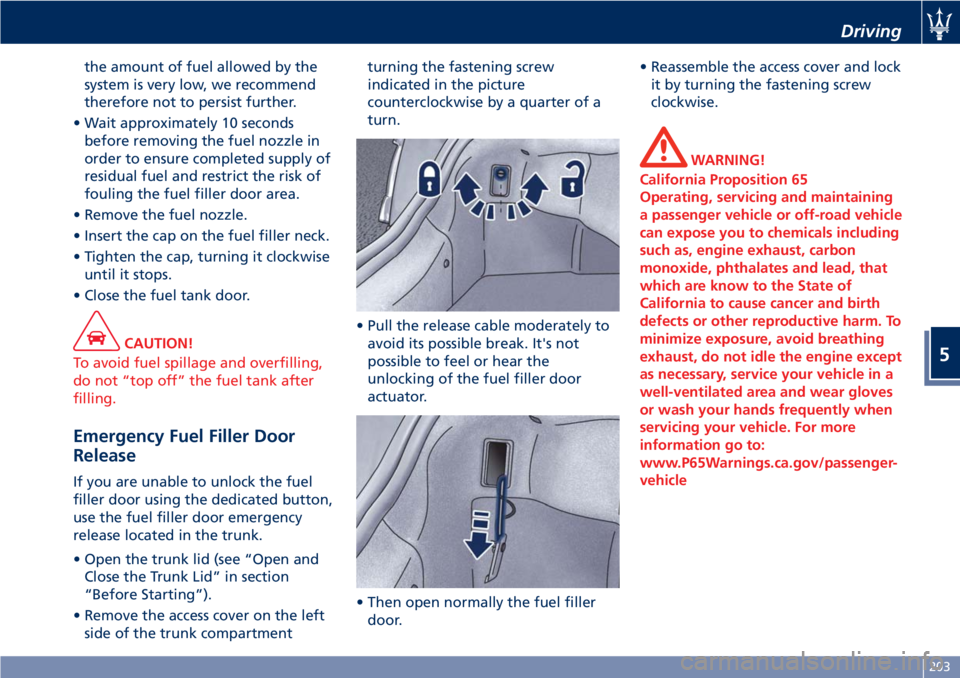
• Remove the access cover on the left
side of the trunk compartmentturning the fastening screw
indicated in the picture
counterclockwise by a quarter of a
turn.
• Pull the release cable moderately to
avoid its possible break. It's not
possible to feel or hear the
unlocking of the fuel filler door
actuator.
• Then open normally the fuel filler
door.• Reassemble the access cover and lock
it by turning the fastening screw
clockwise.
WARNING!
California Proposition 65
Operating, servicing and maintaining
a passenger vehicle or off-road vehicle
can expose you to chemicals including
such as, engine exhaust, carbon
monoxide, phthalates and lead, that
which are know to the State of
California to cause cancer and birth
defects or other reproductive harm. To
minimize exposure, avoid breathing
exhaust, do not idle the engine except
as necessary, service your vehicle in a
well-ventilated area and wear gloves
or wash your hands frequently when
servicing your vehicle. For more
information go to:
www.P65Warnings.ca.gov/passenger-
vehicle
Driving
5
203
Page 216 of 296
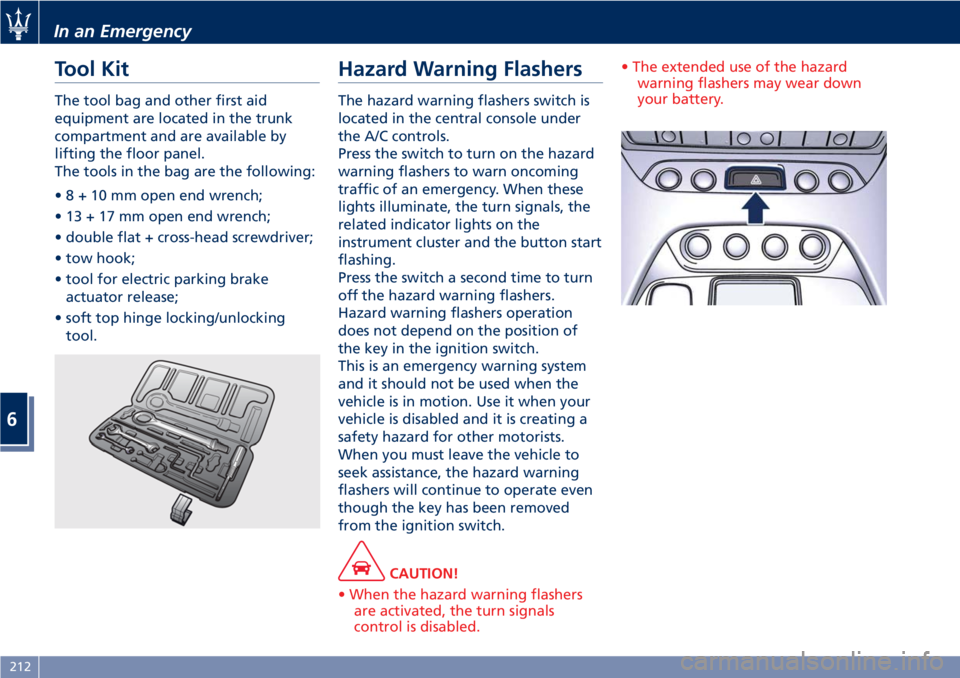
Tool Kit
The tool bag and other first aid
equipment are located in the trunk
compartment and are available by
lifting the floor panel.
The tools in the bag are the following:
•8+10mmopen end wrench;
• 13 + 17 mm open end wrench;
• double flat + cross-head screwdriver;
• tow hook;
• tool for electric parking brake
actuator release;
• soft top hinge locking/unlocking
tool.
Hazard Warning Flashers
The hazard warning flashers switch is
located in the central console under
the A/C controls.
Press the switch to turn on the hazard
warning flashers to warn oncoming
traffic of an emergency. When these
lights illuminate, the turn signals, the
related indicator lights on the
instrument cluster and the button start
flashing.
Press the switch a second time to turn
off the hazard warning flashers.
Hazard warning flashers operation
does not depend on the position of
the key in the ignition switch.
This is an emergency warning system
and it should not be used when the
vehicle is in motion. Use it when your
vehicle is disabled and it is creating a
safety hazard for other motorists.
When you must leave the vehicle to
seek assistance, the hazard warning
flashers will continue to operate even
though the key has been removed
from the ignition switch.
CAUTION!
• When the hazard warning flashers
are activated, the turn signals
control is disabled.• The extended use of the hazard
warning flashers may wear down
your battery.
In an Emergency
6
212
Page 220 of 296
• If necessary, turn the hazard warning
flashers on and place the warning
triangle at the required distance.
WARNING!
•The jack should be used on level firm
ground wherever possible.
•It is recommended that the wheels
of the vehicle be chocked, and that
no person should remain in a vehicle
that is being jacked.
•If the vehicle has been stopped on a
slope or an uneven surface, place
chocks or other suitable items in
front of or behind the wheels to
stop the vehicle from moving.
•Never start or run the engine with
the vehicle on a jack.
•No person should place any portion
of their body under a vehicle that is
supported by a jack.
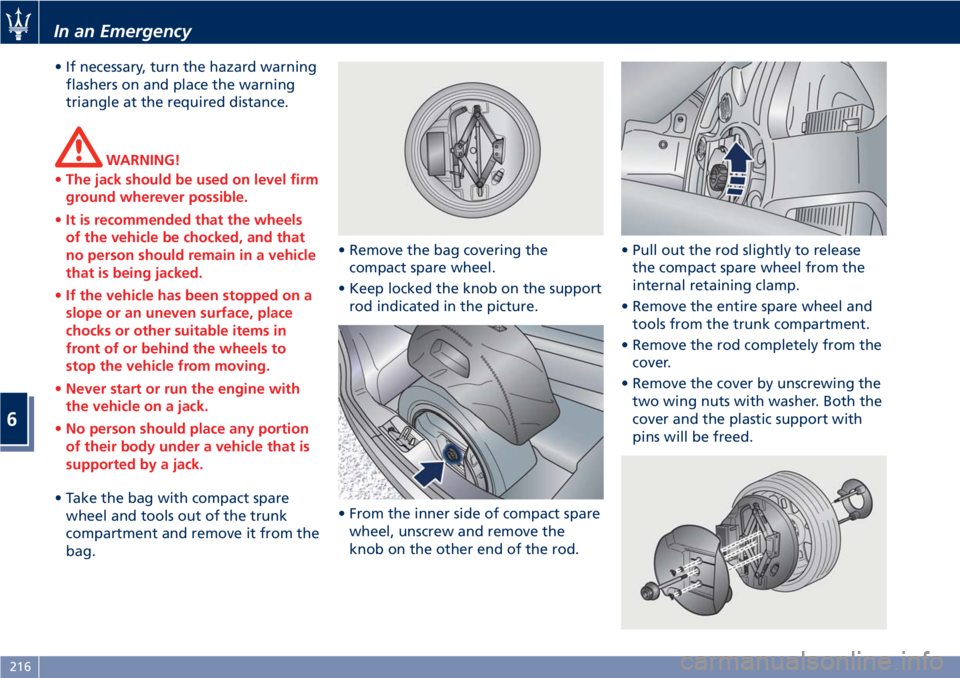
• Take the bag with compact spare
wheel and tools out of the trunk
compartment and remove it from the
bag.• Remove the bag covering the
compact spare wheel.
• Keep locked the knob on the support
rod indicated in the picture.
• From the inner side of compact spare
wheel, unscrew and remove the
knob on the other end of the rod.• Pull out the rod slightly to release
the compact spare wheel from the
internal retaining clamp.
• Remove the entire spare wheel and
tools from the trunk compartment.
• Remove the rod completely from the
cover.
• Remove the cover by unscrewing the
two wing nuts with washer. Both the
cover and the plastic support with
pins will be freed.
In an Emergency
6
216