2020 LINCOLN CORSAIR tow
[x] Cancel search: towPage 60 of 591
The system consists of the following:
•
Safety Canopy curtain airbags above the
trim panels over the front and rear side
windows identified by a label or wording
on the headliner or roof-pillar trim.
• A flexible headliner which opens above
the side doors to allow air curtain
deployment · Crash sensors and monitoring
system with a readiness indicator.
See Crash Sensors and Airbag
Indicator (page 57).
Properly restrain children 12 years old and
under in the rear seats. The Safety Canopy
will not interfere with children restrained
using a properly installed child or booster
seat because it is designed to inflate
downward from the headliner above the
doors along the side window opening. The design and development of the Safety
Canopy included recommended testing
procedures that were developed by a group
of automotive safety experts known as the
Side Airbag Technical Working Group. These
recommended testing procedures help
reduce the risk of injuries related to the
deployment of side airbags (including the
Safety Canopy).
CRASH SENSORS AND AIRBAG
INDICATOR
WARNING:
Modifying or adding
equipment to the front end of your vehicle
(including hood, bumper system, frame,
front end body structure, tow hooks and
hood pins) may affect the performance of
the airbag system, increasing the risk of
injury. Do not modify or add equipment to
the front end of your vehicle. Your vehicle has a collection of crash and
occupant sensors which provide information
to the restraints control module. The
restraints control module deploys (activates)
the seatbelt pretensioners, driver airbag,
passenger airbag, knee airbag(s), seat
mounted side airbags and the Safety
Canopy. Based on the type of crash, the
restraints control module deploys the
appropriate safety devices.
The restraints control module also monitors
the readiness of the above safety devices
plus the crash and occupant sensors. The
readiness of the safety system is indicated
by a warning indicator light in the instrument
cluster or by a backup tone if the warning
light is not working. Routine maintenance of
the airbag is not required.
A difficulty with the system is indicated by
one or more of the following:
57
Corsair (CTF) Canada/United States of America, enUSA, Edition date: 201906, Second-Printing Supplementary Restraints SystemE67017
Page 64 of 591

GENERAL INFORMATION ON
RADIO FREQUENCIES
This device complies with Part 15 of the FCC
Rules and with Industry Canada
license-exempt RSS standard(s). Operation
is subject to the following two conditions: (1)
This device may not cause harmful
interference, and (2) This device must accept
any interference received, including
interference that may cause undesired
operation.
WARNING: Changes or modifications
not expressively approved by the party
responsible for compliance could void the
user's authority to operate the equipment.
The term "IC:" before the radio certification
number only signifies that Industry Canada
technical specifications were met.
The typical operating range for your
transmitter is approximately 33 ft (10 m).
Vehicles with the remote start feature will
have a greater range. One of the following could cause a decrease
in operating range:
•
Weather conditions.
• Nearby radio towers.
• Structures around the vehicle.
• Other vehicles parked next to your
vehicle.
The radio frequency used by your remote
control can also be used by other radio
transmitters, for example amateur radios,
medical equipment, wireless headphones,
wireless remote controls, cell phones, battery
chargers and alarm systems. If the
frequencies are jammed, you will not be able
to use your remote control. You can lock and
unlock the doors with the key.
Note: Make sure to lock your vehicle before
leaving it unattended.
Note: If you are in range, the remote control
will operate if you press any button
unintentionally.
Note: The remote control contains sensitive
electrical components. Exposure to moisture
or impact may cause permanent damage. Intelligent Access
(If Equipped)
The system uses a radio frequency signal to
communicate with your vehicle and authorize
your vehicle to unlock when one of the
following conditions are met:
• You activate the front exterior door
handle switch.
• You press the luggage compartment
button.
• You press a button on the transmitter.
If excessive radio frequency interference is
present in the area or if the transmitter
battery is low, you may need to mechanically
unlock your door. You can use the
mechanical key blade in your intelligent
access key to open the driver door in this
situation.
See Remote Control (page 61).
REMOTE CONTROL
Intelligent Access Key
Note: You may not be able to shift out of
park (P) unless the intelligent access key is
inside your vehicle.
61
Corsair (CTF) Canada/United States of America, enUSA, Edition date: 201906, Second-Printing Keys and Remote Controls
Page 79 of 591
Press the button again within three seconds
to confirm that all the doors are closed. The
doors lock again, a tone sounds and the
direction indicators flash if all the doors and
the luggage compartment are closed.
Mislock
If any door or the luggage compartment is
open, or if the hood is open on vehicles with
an anti-theft alarm or remote start, a tone
sounds and the direction indicators will not
flash. You can switch this feature on or off
from the touchscreen. See Settings (page
478).
Audible and Visual Locking Confirmation
If audible and visual locking confirmation is
configurable, you can turn it on or off from
the touchscreen.
See Settings (page 478).
Mechanical Key
The intelligent access key also contains a
removable key blade that you can use to lock
and unlock your vehicle.
See Remote
Control (page 61). Turn the top of the key toward the front of
your vehicle once to lock all doors.
Turn the top of the key toward the rear of
your vehicle once to unlock the driver door
only.
Locking and Unlocking the Doors with the
Key Blade
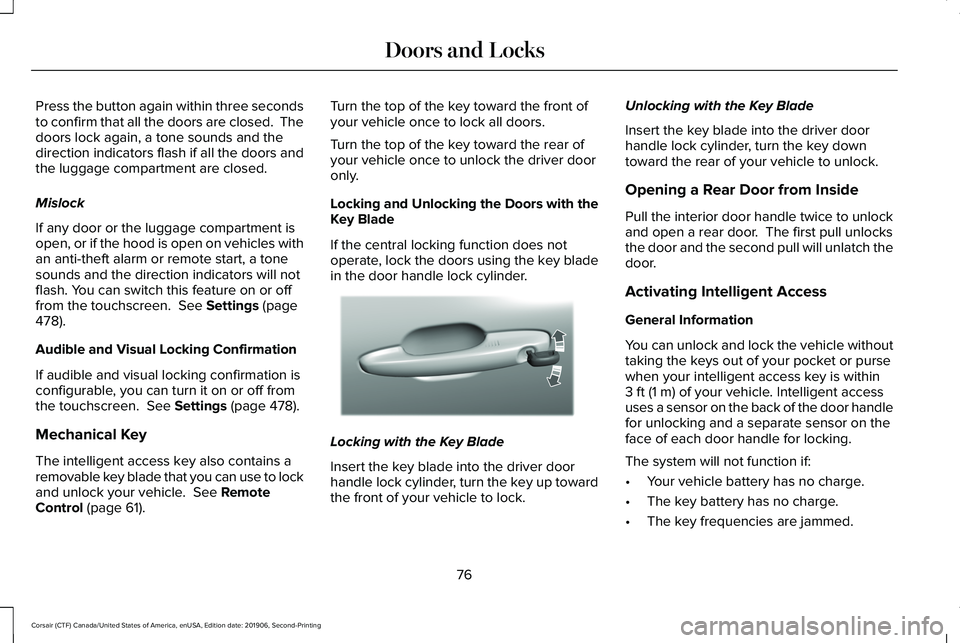
If the central locking function does not
operate, lock the doors using the key blade
in the door handle lock cylinder.
Locking with the Key Blade
Insert the key blade into the driver door
handle lock cylinder, turn the key up toward
the front of your vehicle to lock.Unlocking with the Key Blade
Insert the key blade into the driver door
handle lock cylinder, turn the key down
toward the rear of your vehicle to unlock.
Opening a Rear Door from Inside
Pull the interior door handle twice to unlock
and open a rear door. The first pull unlocks
the door and the second pull will unlatch the
door.
Activating Intelligent Access
General Information
You can unlock and lock the vehicle without
taking the keys out of your pocket or purse
when your intelligent access key is within
3 ft (1 m)
of your vehicle. Intelligent access
uses a sensor on the back of the door handle
for unlocking and a separate sensor on the
face of each door handle for locking.
The system will not function if:
• Your vehicle battery has no charge.
• The key battery has no charge.
• The key frequencies are jammed.
76
Corsair (CTF) Canada/United States of America, enUSA, Edition date: 201906, Second-Printing Doors and LocksE310901
Page 90 of 591
PASSIVE ANTI-THEFT SYSTEM
Note:
The system is not compatible with
non-Lincoln aftermarket remote start
systems. Use of these systems may result in
engine starting problems and a loss of
security protection.
Note: Metallic objects, electronic devices or
a second coded key on the same key chain
may result in vehicle starting problems,
especially if they are too close to the key
when starting your vehicle. Prevent these
objects from touching the coded key when
starting your vehicle. Switch the ignition off,
move all objects on the key chain away from
the coded key and restart your vehicle if a
problem occurs
Note: Do not leave a duplicate coded key
in your vehicle. Always take your keys and
lock all doors when leaving your vehicle. SecuriLock®
The system helps prevent the engine from
starting unless you use a coded key
programmed to your vehicle. Using the
wrong key may prevent your vehicle from
starting. A message may appear in the
information display.
If you are unable to start your vehicle with a
coded key, it is not operating correctly. A
message may appear in the information
display.
Automatic Arming
The system arms when you switch the
ignition off.
Automatic Disarming
The system disarms when you switch the
ignition on with a coded key.
Replacement Keys
Note:
Your vehicle comes with two keys. The intelligent access key functions as a
programmed key that operates the driver
door lock and turns on the intelligent access
with push button start system, as well as a
remote control.
If your programmed transmitters are lost or
stolen and you do not have an extra coded
key, you will need to have your vehicle
towed to an authorized dealer to program
new coded keys.
Store a spare intelligent access key away
from your vehicle in a safe place. You can
purchase replacement keys or remote
controls from an authorized dealer.
Programming a Spare Key
Note:
You can program a maximum of four
keys to your vehicle.
You must have two previously programmed
intelligent access keys inside your vehicle
and the new unprogrammed intelligent
access keys readily accessible. Contact an
authorized dealer to have the spare key
programmed if two previously programmed
keys are not available.
87
Corsair (CTF) Canada/United States of America, enUSA, Edition date: 201906, Second-Printing Security
Page 99 of 591
AUTOWIPERS (IF EQUIPPED)
Wet or winter driving conditions with ice,
snow or salty road mist can cause
inconsistent and unexpected wiping or
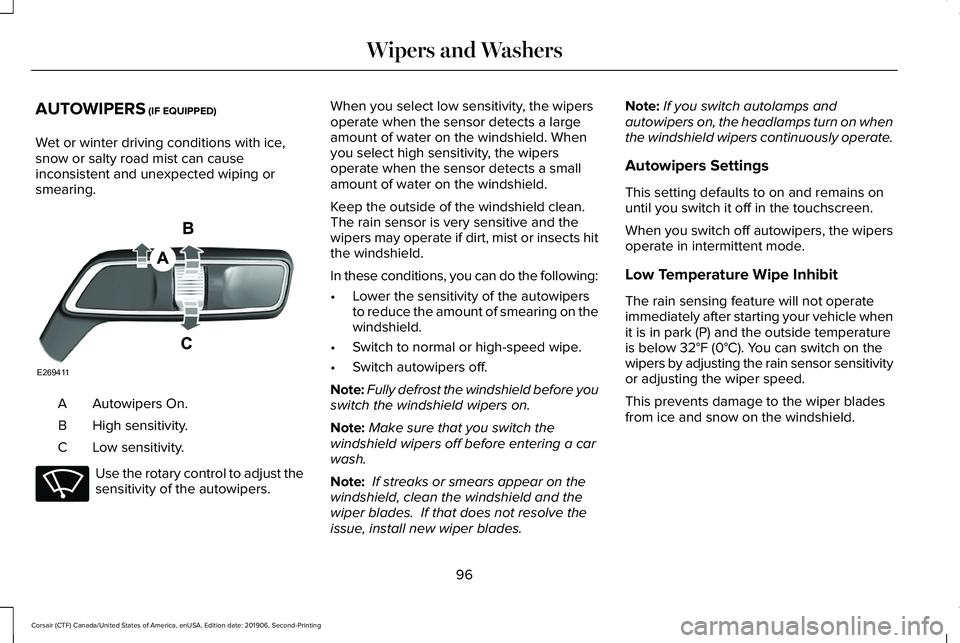
smearing. Autowipers On.
A
High sensitivity.
B
Low sensitivity.
C Use the rotary control to adjust the
sensitivity of the autowipers. When you select low sensitivity, the wipers
operate when the sensor detects a large
amount of water on the windshield. When
you select high sensitivity, the wipers
operate when the sensor detects a small
amount of water on the windshield.
Keep the outside of the windshield clean.
The rain sensor is very sensitive and the
wipers may operate if dirt, mist or insects hit
the windshield.
In these conditions, you can do the following:
•
Lower the sensitivity of the autowipers
to reduce the amount of smearing on the
windshield.
• Switch to normal or high-speed wipe.
• Switch autowipers off.
Note: Fully defrost the windshield before you
switch the windshield wipers on.
Note: Make sure that you switch the
windshield wipers off before entering a car
wash.
Note: If streaks or smears appear on the
windshield, clean the windshield and the
wiper blades. If that does not resolve the
issue, install new wiper blades. Note:
If you switch autolamps and
autowipers on, the headlamps turn on when
the windshield wipers continuously operate.
Autowipers Settings
This setting defaults to on and remains on
until you switch it off in the touchscreen.
When you switch off autowipers, the wipers
operate in intermittent mode.
Low Temperature Wipe Inhibit
The rain sensing feature will not operate
immediately after starting your vehicle when
it is in park (P) and the outside temperature
is below
32°F (0°C). You can switch on the
wipers by adjusting the rain sensor sensitivity
or adjusting the wiper speed.
This prevents damage to the wiper blades
from ice and snow on the windshield.
96
Corsair (CTF) Canada/United States of America, enUSA, Edition date: 201906, Second-Printing Wipers and WashersE269411 E270969
Page 100 of 591

WINDSHIELD WASHERS
Pull the lever toward you to
operate the windshield washers.
When you release the lever, the wipers
operate for a short time. When activated, a
courtesy wipe occurs a short time after the
wipers stop to clear any remaining washer
fluid.
Note: You can switch courtesy wipe on or
off in the touchscreen.
Note: Do not operate the washers when the
washer reservoir is empty. This could cause
the washer pump to overheat. Front Camera Washer (If Equipped)
Operating the windshield washer also turns
on the front camera washer.
REAR WINDOW WIPER AND
WASHERS
Rear Window Wiper Intermittent wipe.
A
Continuous wipe.
B
Rear window wiper off.
C Depending on your vehicle, when you switch
on the front wipers and move the gearshift
lever to reverse (R), the rear intermittent wipe
may turn on.
Note:
Make sure you switch the rear window
wiper off before entering a car wash.
Rear Window Washer Push the lever away from you to operate the
rear window washer. When you release the
lever, the wipers operate for a short time.
Do not operate the washers when the
washer reservoir is empty. This could cause
the washer pump to overheat.
97
Corsair (CTF) Canada/United States of America, enUSA, Edition date: 201906, Second-Printing Wipers and WashersE269412 E270967 E242324
C E269727
Page 102 of 591
Push the lever away from you to
switch the high beam on.
Push the lever forward again or pull the lever
toward you to switch the high beams off.
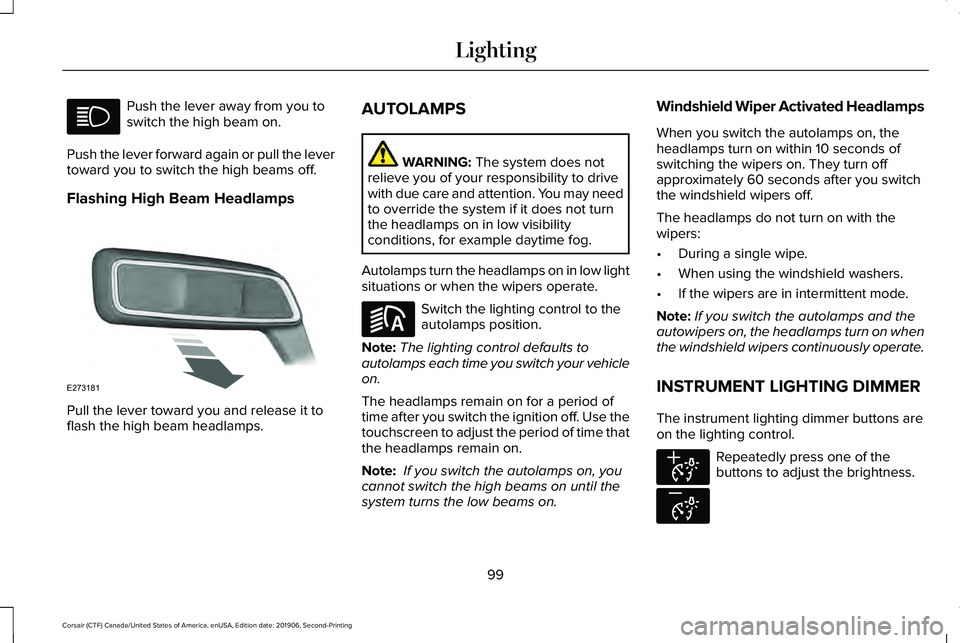
Flashing High Beam Headlamps Pull the lever toward you and release it to
flash the high beam headlamps. AUTOLAMPS WARNING: The system does not
relieve you of your responsibility to drive
with due care and attention. You may need
to override the system if it does not turn
the headlamps on in low visibility
conditions, for example daytime fog.
Autolamps turn the headlamps on in low light
situations or when the wipers operate. Switch the lighting control to the
autolamps position.
Note: The lighting control defaults to
autolamps each time you switch your vehicle
on.
The headlamps remain on for a period of
time after you switch the ignition off. Use the
touchscreen to adjust the period of time that
the headlamps remain on.
Note: If you switch the autolamps on, you
cannot switch the high beams on until the
system turns the low beams on. Windshield Wiper Activated Headlamps
When you switch the autolamps on, the
headlamps turn on within 10 seconds of
switching the wipers on. They turn off
approximately 60 seconds after you switch
the windshield wipers off.
The headlamps do not turn on with the
wipers:
•
During a single wipe.
• When using the windshield washers.
• If the wipers are in intermittent mode.
Note: If you switch the autolamps and the
autowipers on, the headlamps turn on when
the windshield wipers continuously operate.
INSTRUMENT LIGHTING DIMMER
The instrument lighting dimmer buttons are
on the lighting control. Repeatedly press one of the
buttons to adjust the brightness.
99
Corsair (CTF) Canada/United States of America, enUSA, Edition date: 201906, Second-Printing Lighting E273181 E281240 E291299 E296433
Page 103 of 591
HEADLAMP EXIT DELAY (IF EQUIPPED)
After you switch the ignition off, you can
switch the headlamps on by pulling the
direction indicator lever toward you. You will
hear a short tone. The headlamps will switch
off automatically after three minutes with any
door open or 30 seconds after the last door
has been closed. You can cancel this feature
by pulling the direction indicator toward you
again or switching the ignition on.
DAYTIME RUNNING LAMPS -
VEHICLES WITH: CONFIGURABLE
DAYTIME RUNNING LAMPS WARNING:
The daytime running
lamps system does not activate the rear
lamps and may not provide adequate
lighting during low visibility driving
conditions. Make sure you switch the
headlamps on, as appropriate, during all
low visibility conditions. Failure to do so
may result in a crash. Switch the daytime running lamps on or off
using the touchscreen:
1.
Select Settings. See Settings (page
478).
2. Select
Vehicle.
3. Select
Lighting.
The daytime running lamps turn on when:
1. The lamps are on in the information display.
2. You switch the ignition on.
3. The transmission is not in park (P) for vehicles with automatic transmissions or
you release the parking brake for
vehicles with manual transmissions.
4. The lighting control is in the autolamps position.
5. The headlamps are off.
The other lighting control switch positions
do not turn on the daytime running lamps.
If the daytime running lamps are off in the
information display, the lamps stay off in all
switch positions. DAYTIME RUNNING LAMPS -
VEHICLES WITH: DAYTIME
RUNNING LAMPS (DRL) WARNING:
The daytime running
lamps system does not activate the rear
lamps and may not provide adequate
lighting during low visibility driving
conditions. Make sure you switch the
headlamps on, as appropriate, during all
low visibility conditions. Failure to do so
may result in a crash.
The system turns the lamps on in daylight
conditions.
To switch the system on, switch the lighting
control to any position except headlamps.
FRONT FOG LAMPS
(IF EQUIPPED)
Switching the Front Fog Lamps On or
Off
Only switch the front fog lamps on during
reduced visibility.
100
Corsair (CTF) Canada/United States of America, enUSA, Edition date: 201906, Second-Printing Lighting