2020 LINCOLN CONTINENTAL interior lights
[x] Cancel search: interior lightsPage 80 of 609

When you open one of the front doors and
lock your vehicle using the power door lock
control, all doors lock then unlock if:
•
The ignition is on.
• The ignition is off and the transmission
is not in park (P).
Autolock
Autolock locks all the doors when:
• All doors have closed.
• The ignition is on.
• You shift into any gear putting your
vehicle in motion.
• Your vehicle reaches a speed greater
than 12 mph (20 km/h).
Autolock repeats when:
• You open then close any door while the
ignition is on and your vehicle speed is
9 mph (15 km/h)
or lower.
• Your vehicle reaches a speed greater
than
12 mph (20 km/h). Autounlock
Autounlock unlocks all the doors when:
•
The ignition is on, all the doors have
closed, and your vehicle has been
moving at a speed greater than
12 mph
(20 km/h).
• Your vehicle comes to a stop and you
switch the ignition off or to the accessory
position.
• You open the driver door within 10
minutes of switching the ignition off or to
the accessory position.
Note: The doors do not autounlock if you
electronically lock your vehicle after you
switch the ignition off and before you open
the driver door.
Enabling or Disabling Autounlock
You can enable or disable the autounlock
feature using the information display controls
or an authorized dealer can do it for you.
See
General Information (page 117). Illuminated Entry
The interior lamps and some exterior lamps
illuminate when you unlock the doors with
the remote control.
The illuminated entry system turns off the
lights if:
•
The ignition is on.
• You press the remote control lock button.
• After 25 seconds of illumination.
The lights do not turn off if:
• You turn them on with the lamp control.
• Any door is open.
Illuminated Exit
The interior lamps and some exterior lamps
illuminate when all the doors have closed
and you switch the ignition off.
The lamps turn off if all the doors remain
closed and:
• 25 seconds have elapsed.
• You press the push button ignition
switch.
77
Continental (CPL) Canada/United States of America, enUSA, Edition date: 201907, Second-Printing Doors and Locks
Page 104 of 609

Push the lever up or down to use
the direction indicators.
Indicating a Lane Change
Tap the lever up or down to make the
direction indicators flash three times to
indicate a lane change.
WELCOME LIGHTING
The Lincoln welcome mat projection lights
are on the bottom of the exterior mirror
housings. They project an image onto the
ground a short distance from your vehicle
when welcome lighting or lighted entry turns
on.
For auto-fold mirrors, the Lincoln welcome
mat turns on when welcome lighting or
lighted entry turns on and the mirrors fold in
upon locking or using the switch on the door.
You can switch this feature on or off in the
information display. Note:
Moisture, frost and ice build-up or
other types of contamination on the surface
of the light lens can cause non-permanent
distortion or reduced brightness of the
image. Do not use abrasive materials to
clean the lens.
Note: If you enable auto-fold and then you
fold the mirrors in to the door window glass,
the welcome mats do not turn on.
INTERIOR LAMPS
The lamps turn on under the following
conditions:
• You open any door.
• You press a remote control button.
• You press the all lamps on button on the
overhead console. Front Interior Lamp
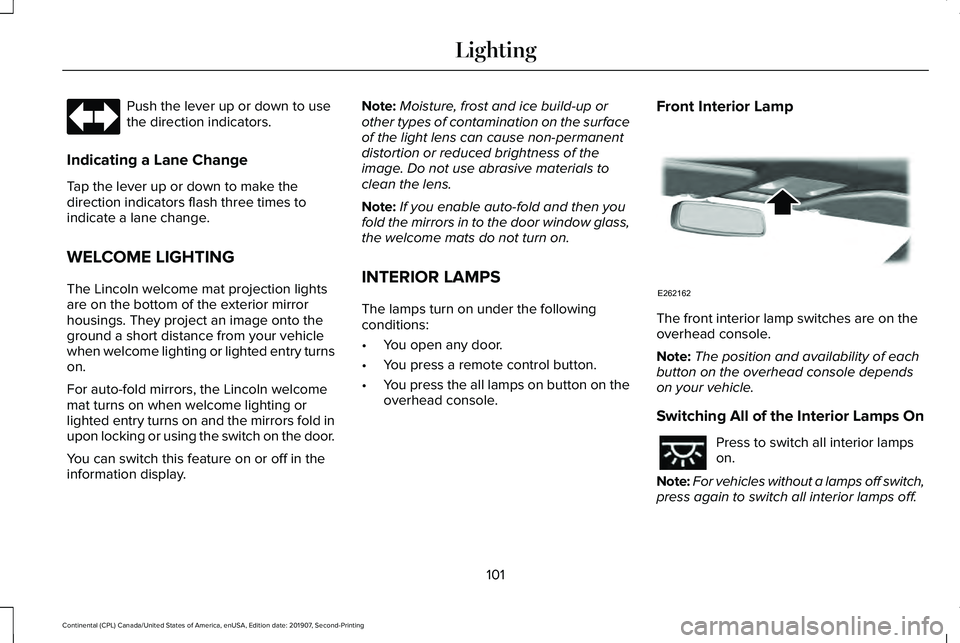
The front interior lamp switches are on the
overhead console.
Note:
The position and availability of each
button on the overhead console depends
on your vehicle.
Switching All of the Interior Lamps On Press to switch all interior lamps
on.
Note: For vehicles without a lamps off switch,
press again to switch all interior lamps off.
101
Continental (CPL) Canada/United States of America, enUSA, Edition date: 201907, Second-Printing Lighting E262162
Page 105 of 609

Switching All of the Interior Lamps Off
(If Equipped)
Press to switch all interior lamps
off.
Switching the Individual Map Lamps
On and Off Press to switch the left-hand
individual dome lamp on and off.
Press to switch the right-hand
individual dome lamp on and off.
Interior Lamp Function Press to switch the interior lamp
function on and off.
When the interior lamp function is off and
you open a door, the courtesy and door
lamps stay off.
When the interior lamp function is on and
you open a door, the courtesy and door
lamps turn on. Note:
The indicator lamp lights amber when
the door function is off.
Rear Interior Lamps
The rear interior lamps may be above the
rear seat or above the rear windows. Press to switch the lamps on or off.
Note: If the rear lamps are switched on
through the overhead console, you cannot
turn them off with the rear lamp switch.
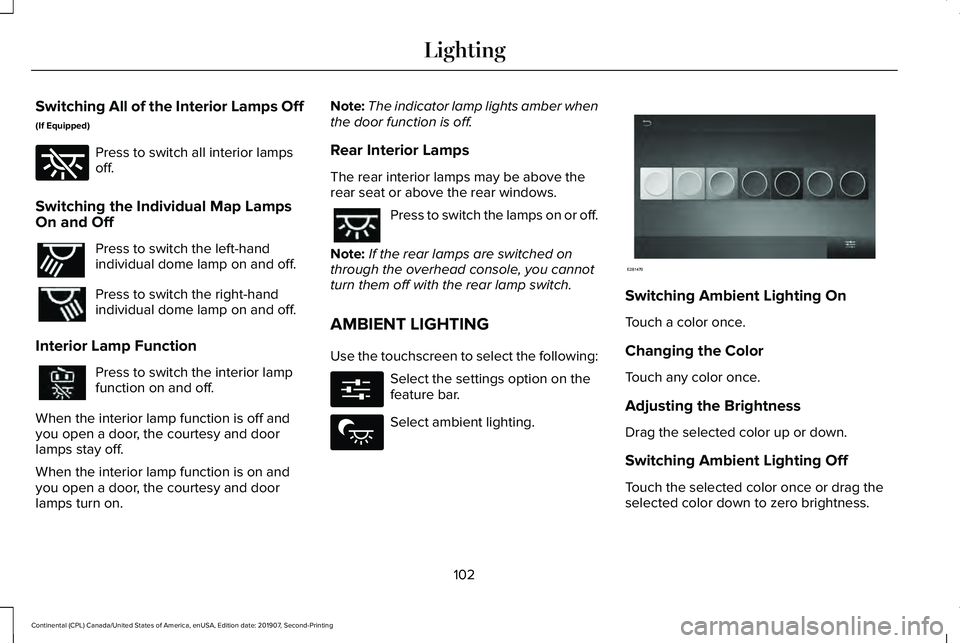
AMBIENT LIGHTING
Use the touchscreen to select the following: Select the settings option on the
feature bar.
Select ambient lighting. Switching Ambient Lighting On
Touch a color once.
Changing the Color
Touch any color once.
Adjusting the Brightness
Drag the selected color up or down.
Switching Ambient Lighting Off
Touch the selected color once or drag the
selected color down to zero brightness.
102
Continental (CPL) Canada/United States of America, enUSA, Edition date: 201907, Second-Printing LightingE262185 E262193 E280315 E279027 E281470
Page 111 of 609

Loose Mirror
If you manually fold the power-folding
mirrors, they may not work properly even
after you re-position them. You need to reset
them if:
•
The mirrors vibrate when you drive.
• The mirrors feel loose.
• The mirrors do not stay in the folded or
unfolded position.
• One of the mirrors is not in its normal
driving position.
To reset the power-fold feature, use the
power-folding mirror control to fold and
unfold the mirrors. You may hear a loud noise
as you reset the power-folding mirrors. This
sound is normal. Repeat this process as
needed each time you manually fold the
mirrors.
Heated Exterior Mirrors
See Heated Exterior Mirrors (page 153). Memory Mirrors
You can save and recall the mirror positions
through the memory function. See Memory
Function
(page 165).
Auto-Dimming Feature
The driver exterior mirror dims when the
interior auto-dimming mirror turns on.
Signal Indicator Mirrors
The outer portion of the appropriate mirror
housing blinks when you activate the
direction indicator.
Lincoln Welcome Mat
Projection lights, on the bottom of the mirror
housings, project an image onto the ground
a short distance from the vehicle.
360-Degree Camera
(If Equipped)
See
360 Degree Camera (page 238). Blind Spot Monitor
See
Blind Spot Information System (page
257).
INTERIOR MIRROR WARNING:
Do not adjust the mirror
when your vehicle is moving.
Note: Do not clean the housing or glass of
any mirror with harsh abrasives, fuel or other
petroleum or ammonia-based cleaning
products.
You can adjust the interior mirror to your
preference. Some mirrors also have a second
pivot point. This lets you move the mirror
head up or down and from side to side.
Auto-Dimming Mirror
Note: Do not block the sensors on the front
and back of the mirror. Mirror performance
may be affected. A rear center passenger
or raised rear center head restraint may also
block light from reaching the sensor.
108
Continental (CPL) Canada/United States of America, enUSA, Edition date: 201907, Second-Printing Windows and Mirrors
Page 241 of 609

The system uses red, yellow and green
highlights that appear on top of the video
image when any of the sensing systems
detect an object.
Manual Zoom
WARNING: When manual zoom is
on, the full area behind your vehicle may
not show. Be aware of your surroundings
when using the manual zoom feature.
Note: Manual zoom is only available when
the transmission is in reverse (R).
Note: When you enable manual zoom, only
the centerline is shown.
Selectable settings for this feature are zoom
in (+) and zoom out (-). Press the symbol in
the camera screen to change the view. The
default setting is zoom off.
This allows you to get a closer view of an
object behind your vehicle. The zoomed
image keeps the bumper in the image to
provide a reference. The zoom is only active
while the transmission is in reverse (R). Rear Camera Delay
Selectable settings for this feature are on
and off.
The default setting for the rear camera delay
is off.
When shifting the transmission out of reverse
(R) and into any gear other than park (P), the
camera image remains in the display until:
•
Your vehicle speed sufficiently increases.
• You shift your vehicle into park (P).
360 DEGREE CAMERA
(IF EQUIPPED) WARNING:
The 360 degree camera
system still requires the driver to use it in
conjunction with looking out of the
windows, and checking the interior and
exterior mirrors for maximum coverage. WARNING:
You may not see objects
that are close to either corner of the
bumper or under the bumper due to the
limited coverage of the camera system. WARNING:
Use caution when
turning camera features on or off when the
transmission is not in park (P). Make sure
your vehicle is not moving. WARNING:
At all times, you are
responsible for controlling your vehicle,
supervising the system and intervening, if
required. Failure to take care may result in
the loss of control of your vehicle, serious
personal injury or death.
Note: Use caution using the 360 view when
any of the doors are ajar. If a door is ajar,
the camera will be out of position and the
video image may be incorrect.
The 360 degree camera system consists of
front, side and rear cameras. The system:
• Allows you to see what is directly in front
or behind your vehicle.
• Provides cross traffic view in front and
behind your vehicle.
238
Continental (CPL) Canada/United States of America, enUSA, Edition date: 201907, Second-Printing Parking Aids
Page 429 of 609

Trade Number
Function
LED.
High-mount brake lamp. 1
LED.
Interior lamps. 1
1 To replace these lamps, see an authorized dealer.
Note: To replace instrument panel lights, see an authorized dealer.
426
Continental (CPL) Canada/United States of America, enUSA, Edition date: 201907, Second-Printing Capacities and Specifications
Page 515 of 609

Make sure to change your vehicle
’s oils and
fluids at the specified intervals or in
conjunction with a repair. Flushing is a viable
way to change fluid for many vehicle
sub-systems during scheduled maintenance. It is critical that systems are flushed only with
new fluid that is the same as that required
to fill and operate the system or using a
Ford-approved flushing chemical.
Owner Checks and Services
Make sure you perform the following basic
maintenance checks and inspections every
month or at six-month intervals. Check Every Month
Engine oil level.
Function of all interior and exterior lights.
Tires (including spare) for wear and proper pressure. Windshield washer fluid level.
Fuel and water separator. Drain if necessary (or if indicated by the information display). Holes and slots in the tail pipe to make sure they are functional and clear of debris. Check Every Six Months
Battery connections. Clean if necessary.
Body and door drain holes for obstructions. Clean if necessary. Cooling system fluid level and coolant strength.
Door weatherstrips for wear. Lubricate if necessary.
512
Continental (CPL) Canada/United States of America, enUSA, Edition date: 201907, Second-Printing Scheduled Maintenance